If there is one traditional food I don’t care much about it’s the Epiphany kings’ galette, the “galette des rois”. Whether the brioche or the frangipane, I don’t care much about them. Not that I dislike them but I don’t like them either. They are not part of my must-eat food. And since I am bad at making puff pastry, that’s even easier to forget about it… but this year IG was covered with galettes and though I was insensitive to them A. wasn’t… and he asked me why we never have galette though he loves it so much!
What???? Why on earth would you wait more than 20 years to tell me???
How could I have not imagined he would love galette. He who doesn’t like almonds but loves calisson and financiers, he who doesn’t love butter but loves croissants and brioches… of course he loves galette… of course I ignored that…
Well then… I took all the courage it takes to make an attempt at puff pastry when I have failed so often.
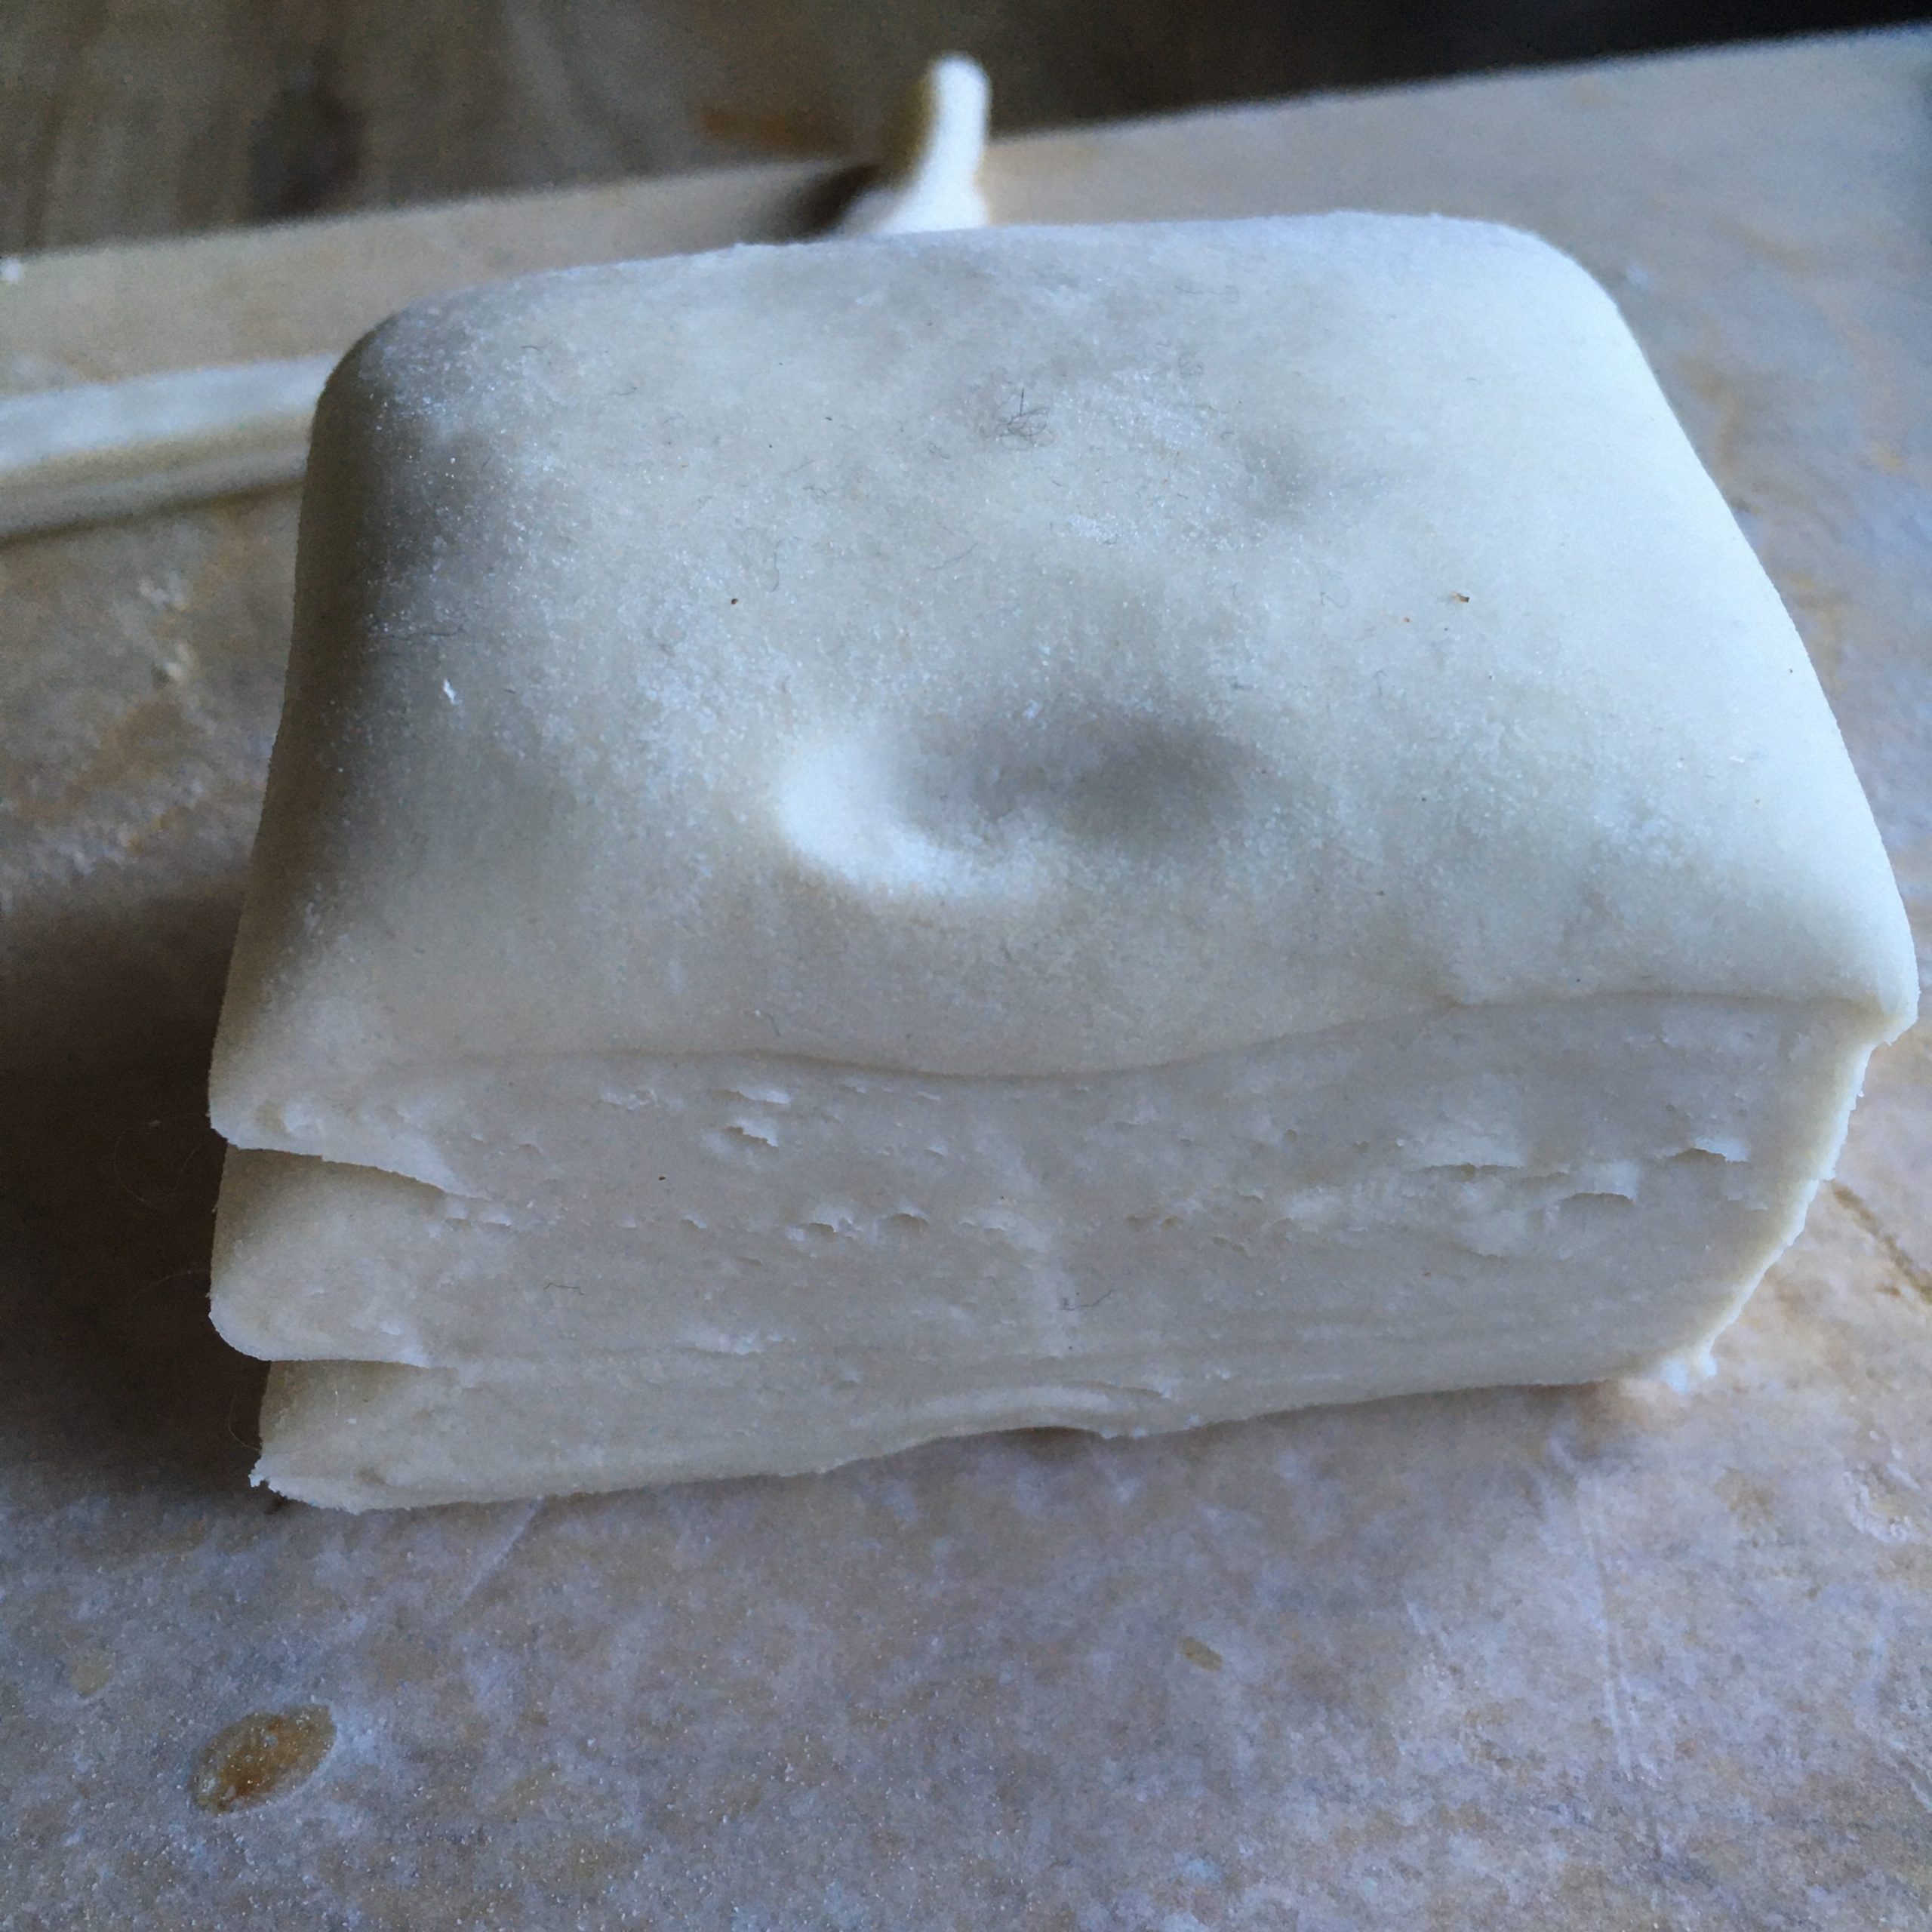
So here I am folding and rolling and turning every hour my puff pastry by the book, hoping it will become something… probably because of the cold temperature inside it is not as tedious as I remembered, and no butter spill.
For the frangipane I used a standard recipe: almond powder plenty, 1 egg, a bit of sugar and a tiny bit of butter, stirred into a dense pomade.
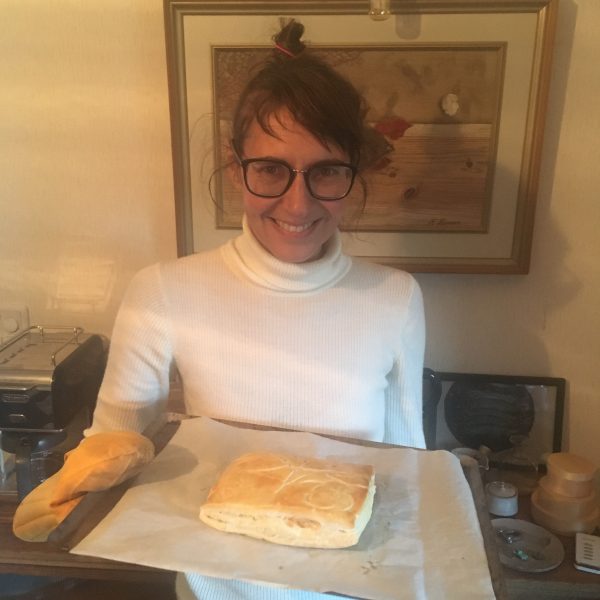
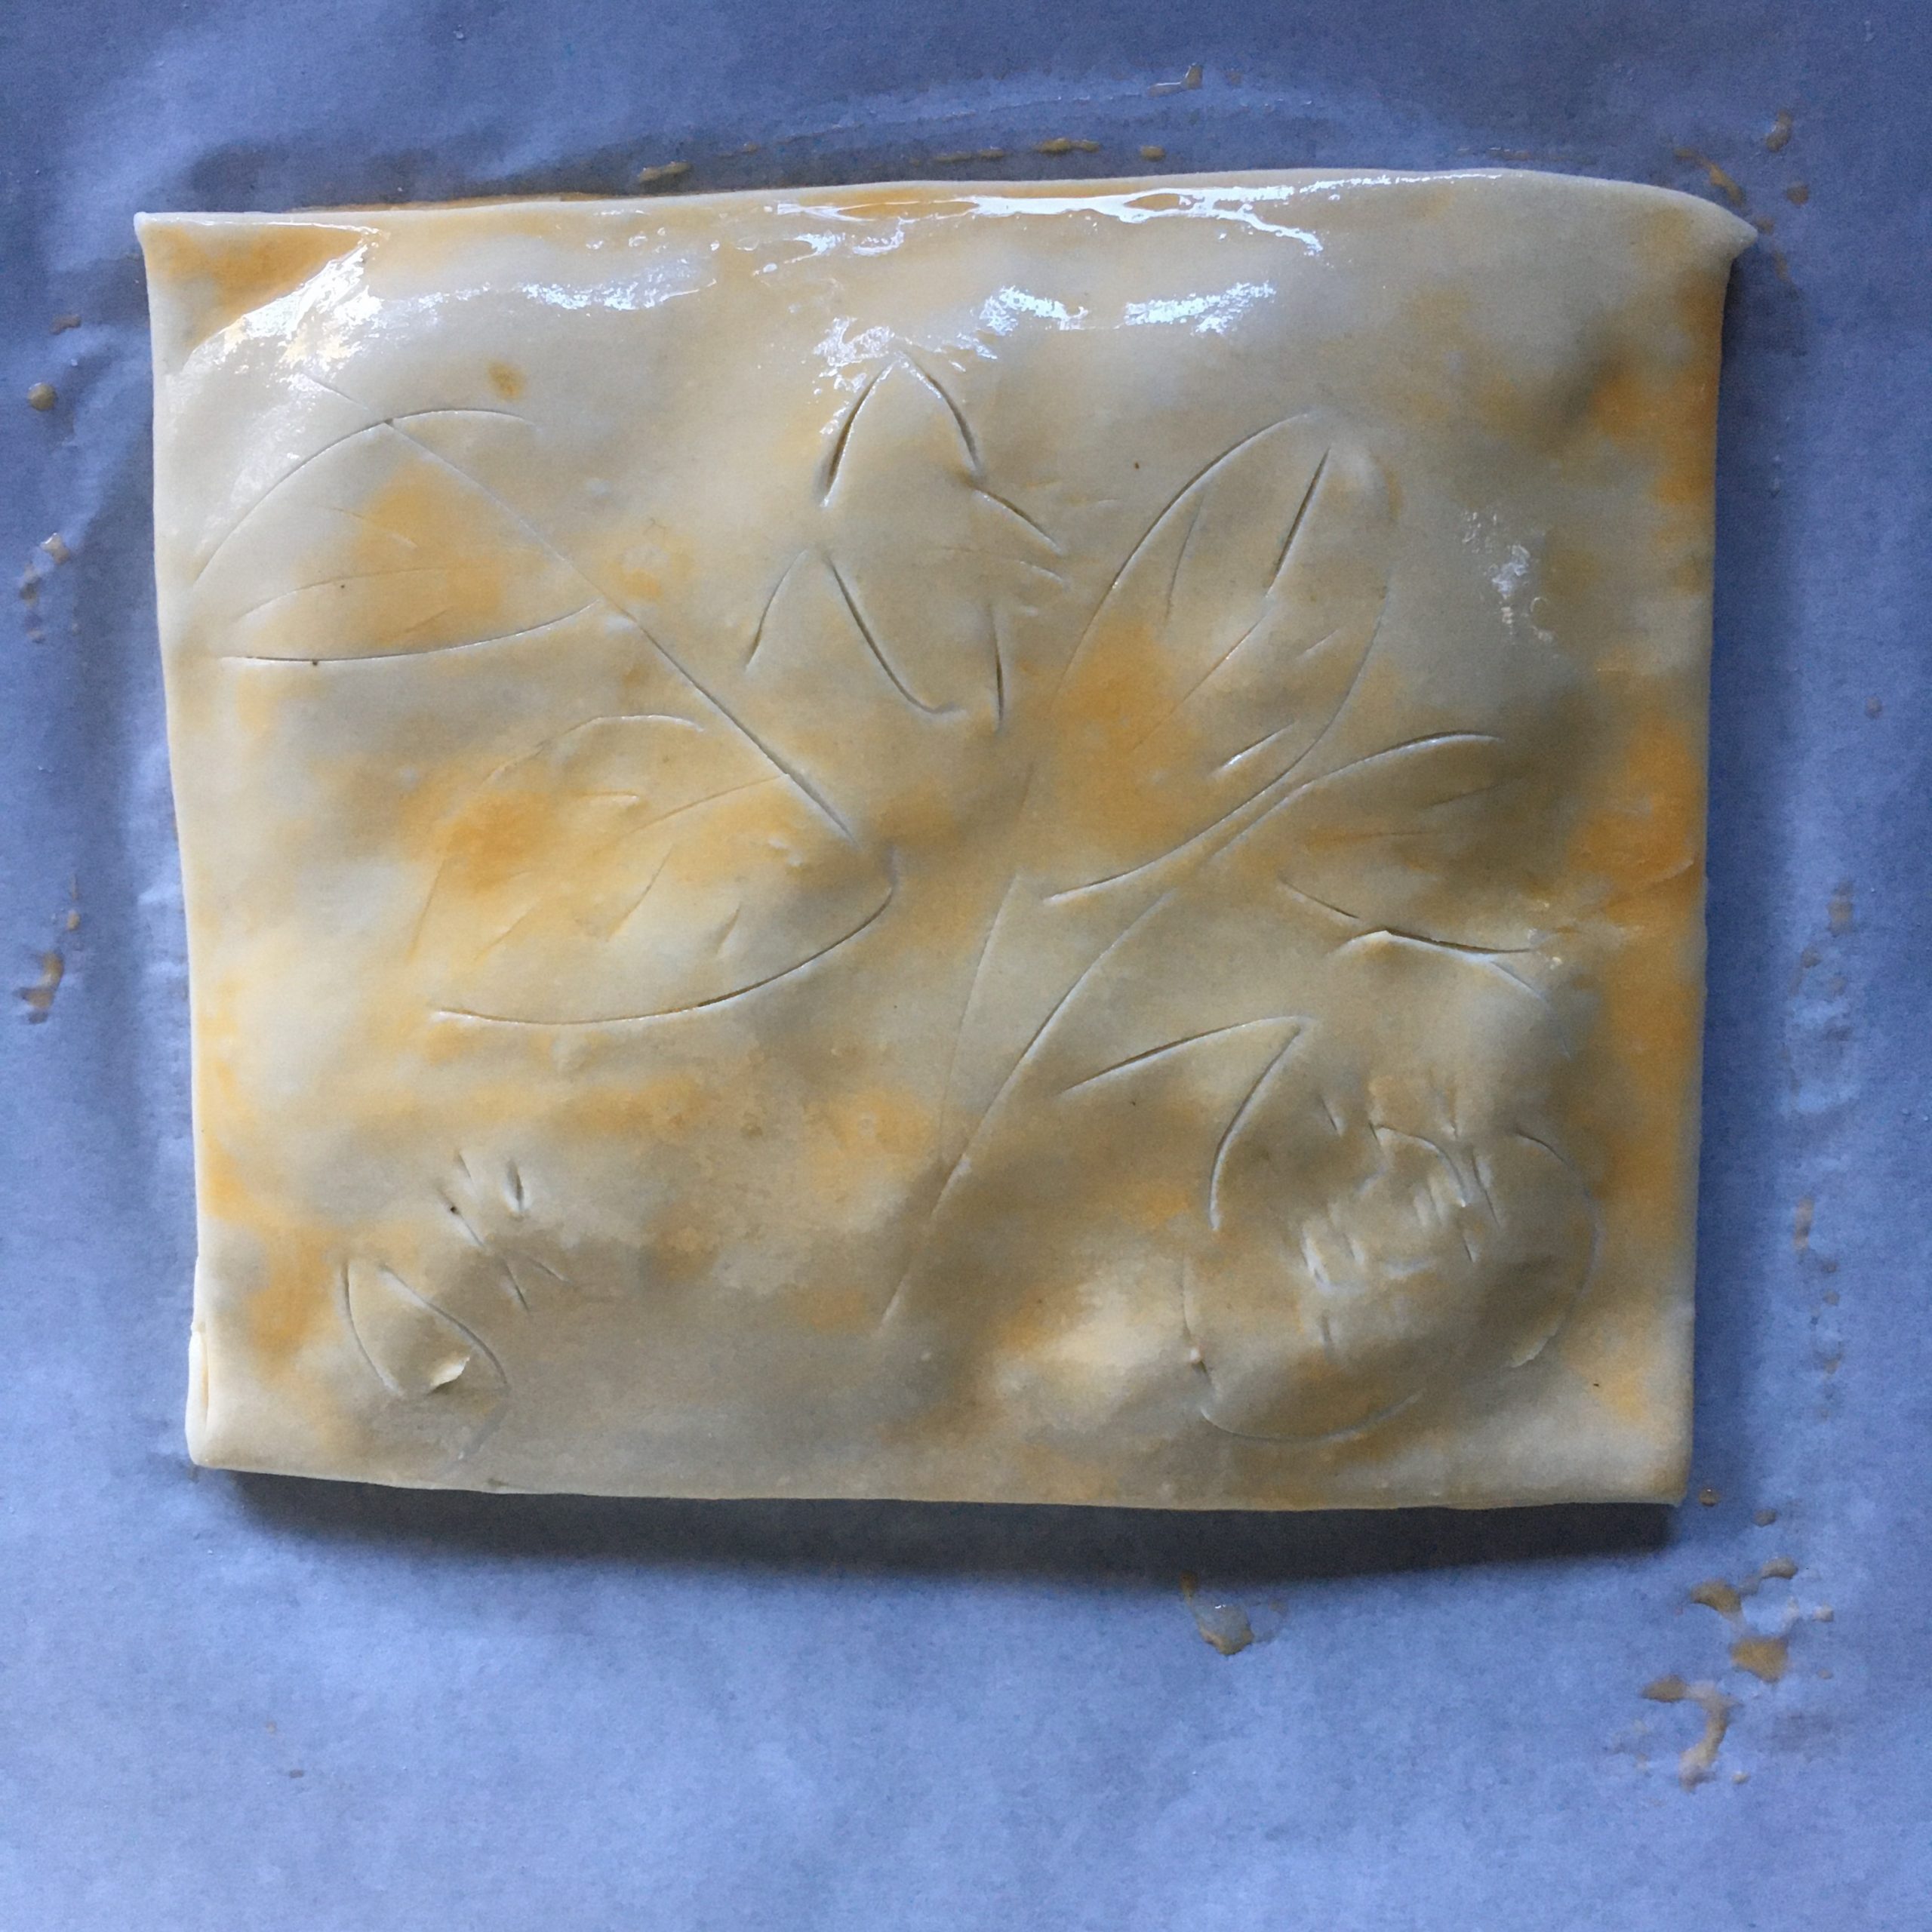
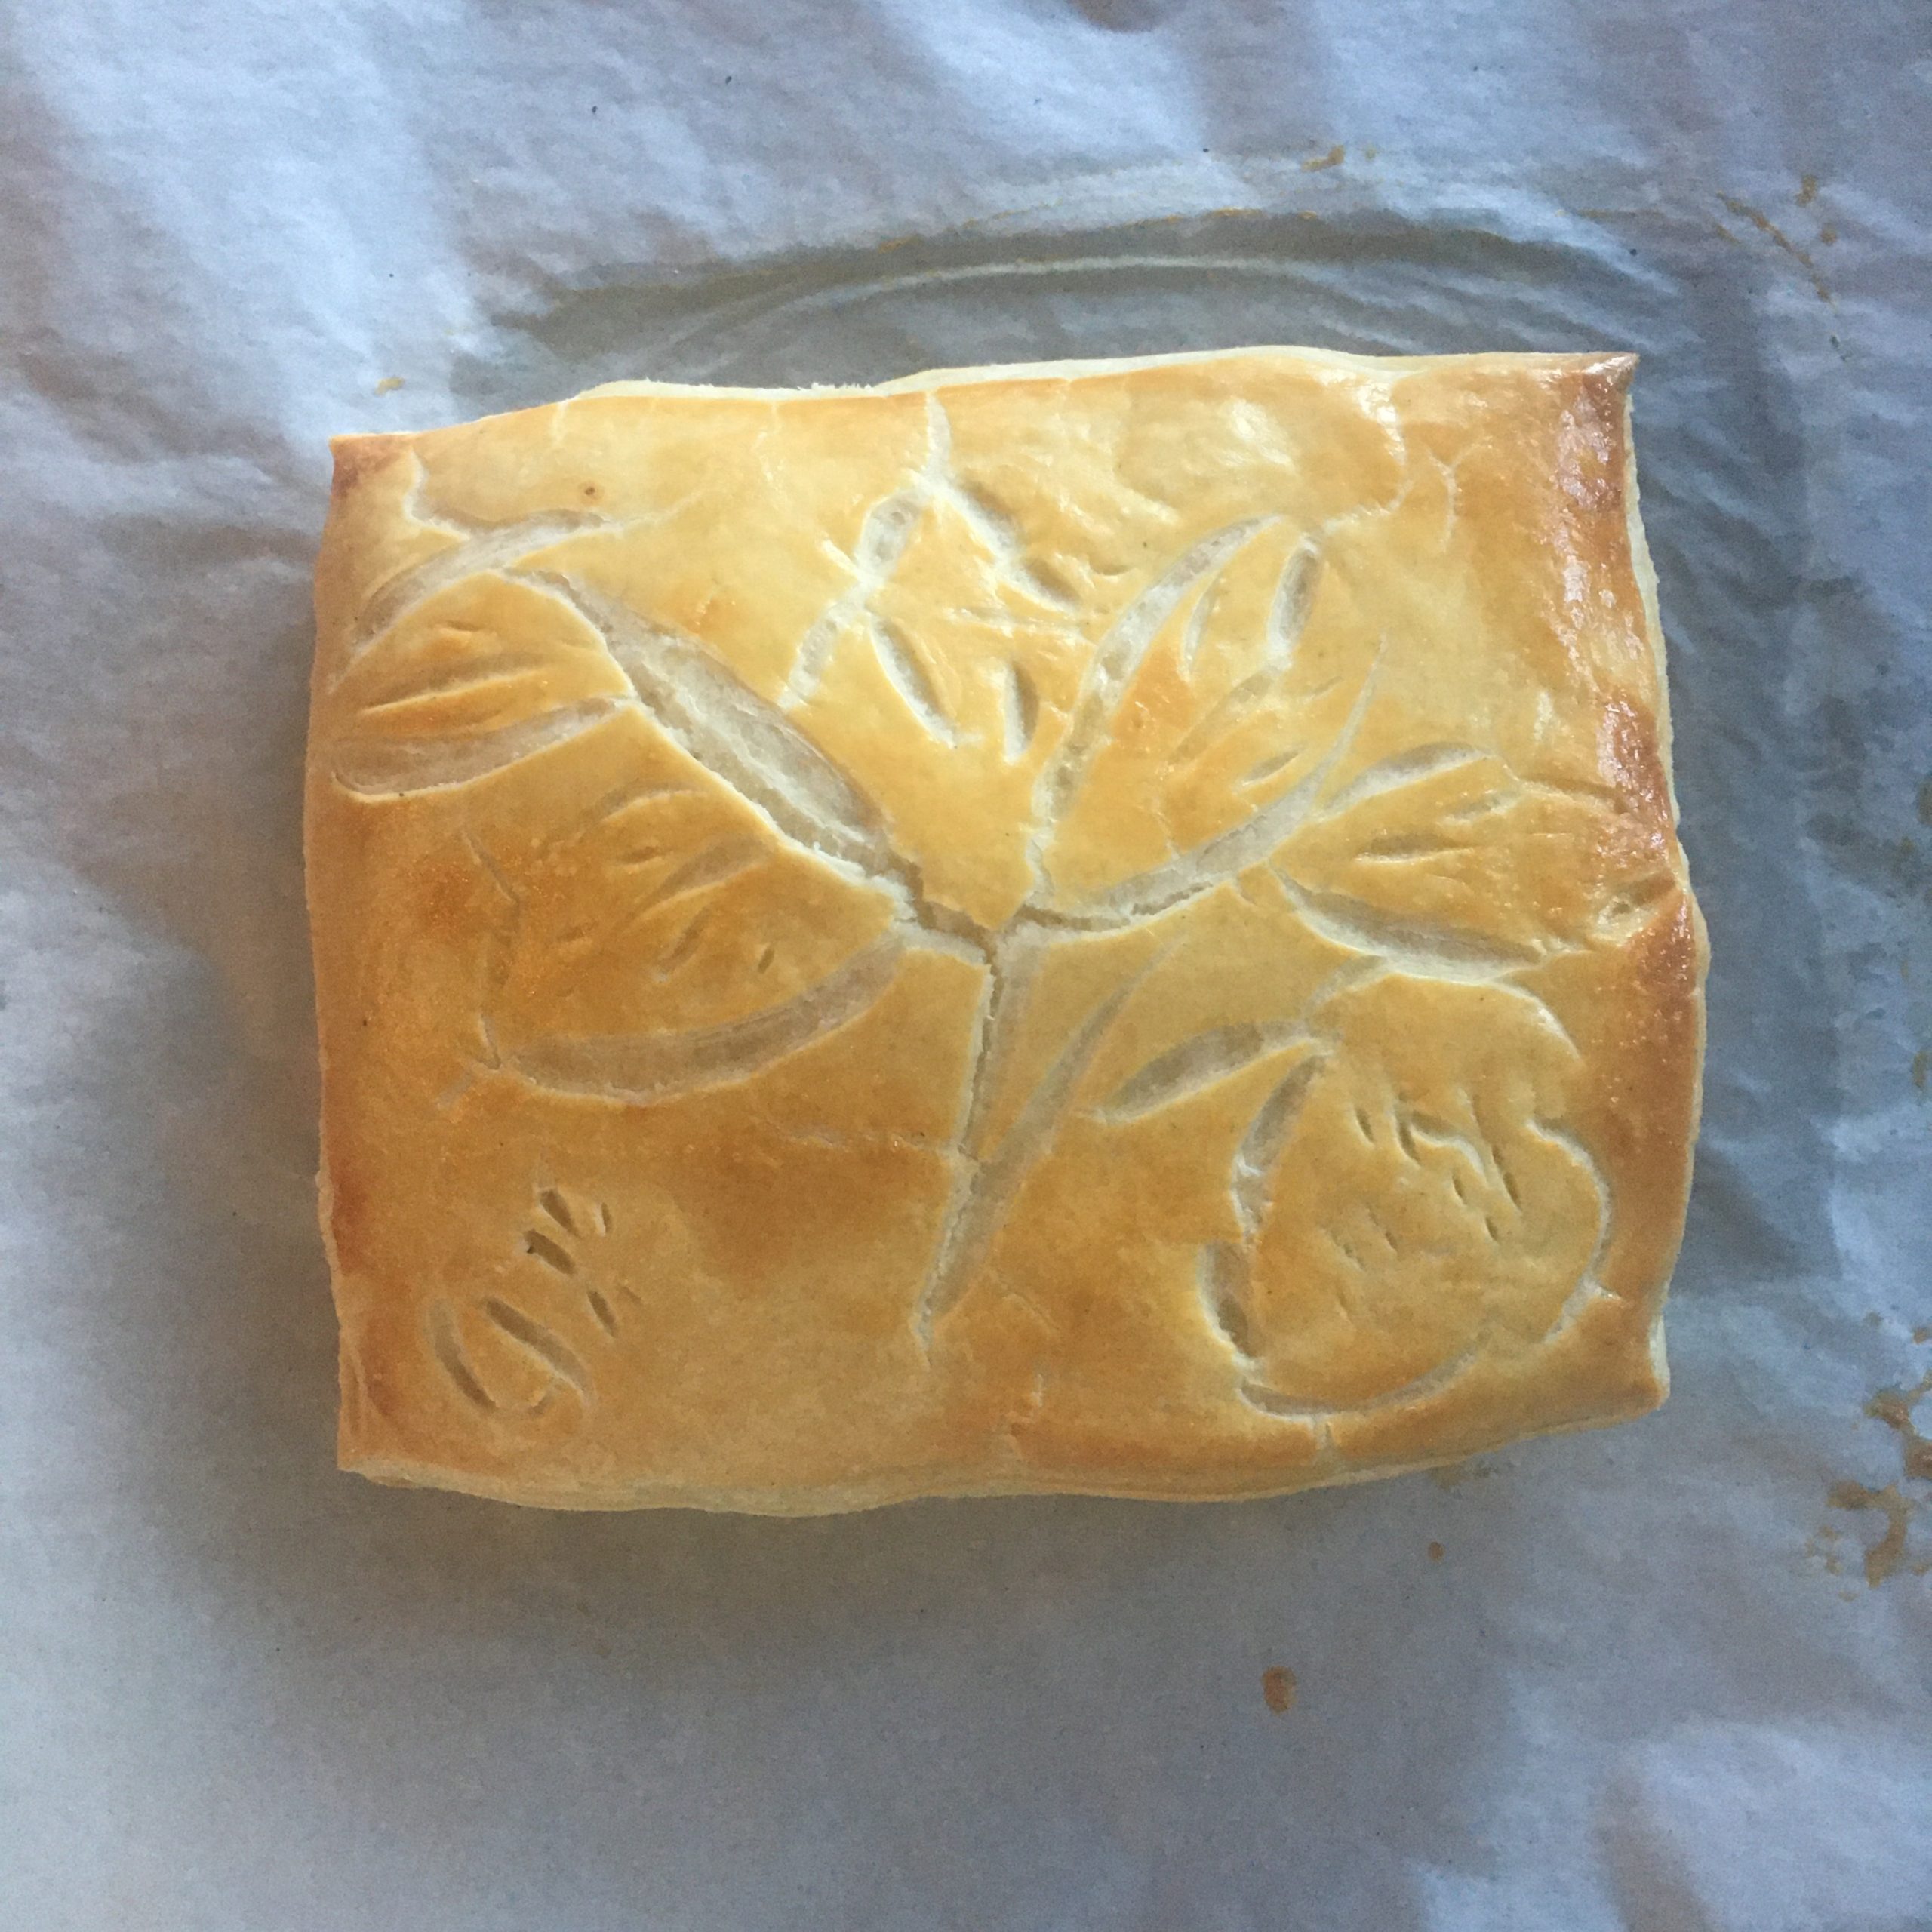
The rest is just simple. I decided for a square galette, rolled one layer of dough, topped with frangipane, leaving enough room to close it. Rolled another layer of dough to put on top, sealed the borders well. Paint an egg batter. Made a little seasonal drawing: blooming camellia japonica as we have so many in the garden, and 30min at 200deg. Until just golden. A. couldn’t wait any longer!!!
The result was surprisingly delicious. It didn’t have the sticky sugary top it too often has in shops, it was not too sweet, actually very nice, and the puff pastry worked well! Beginner’s luck!!!
I am not good at welcoming new years… Probably because it is too close to my birthday, and I just myself turned one more year and still try to understand what it means… also we celebrate more personal events than any other: birthdays, anniversaries… For many it is a time to look back at achievements and look forward to goals. I have no regrets , and as long as I can remember I never made a good resolutions list. I have no bucket list, nor list of things I want to fix in my life, bad habits I need to get rid of, diets I need to start, addictions I need to quit or things I could do better. Not that I am perfect of course not, but I don’t make lists. Usually when I need to do something I just do it and organize myself to stick to it! January 1st wouldn’t be the time I would particularly change and set goals for myself. So the welcoming of the new year is not so important for me. And for the past 17 years we’ve spent a lot of the new year eves either in a plane or with a big jet lag in the countryside, when it is cold and we usually go early to bed and wake up early too. Though I like the Japanese celebration of new year at a nearby temple or shrine for the festive simplicity of hatsumode 初詣, the first visit of the year to a shrine or temple, and have nice memories of so many spent with friends or family in so many different places in Japan they are also often memories of hours in the cold, waiting in crowded lines for the time to arrive, with bonfire to warm us once in a while. So we now often skip the midnight visit and go later in the day, when it’s less crowded.
Even though we don’t celebrate much, I prepare a nice dinner (as I do every day ;)) and we spend a quiet evening together, as we always do. Nothing fancy… and I like it that way very much.
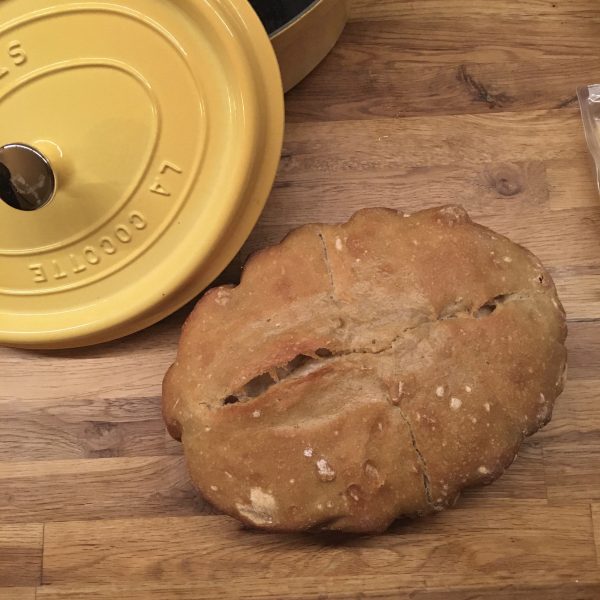
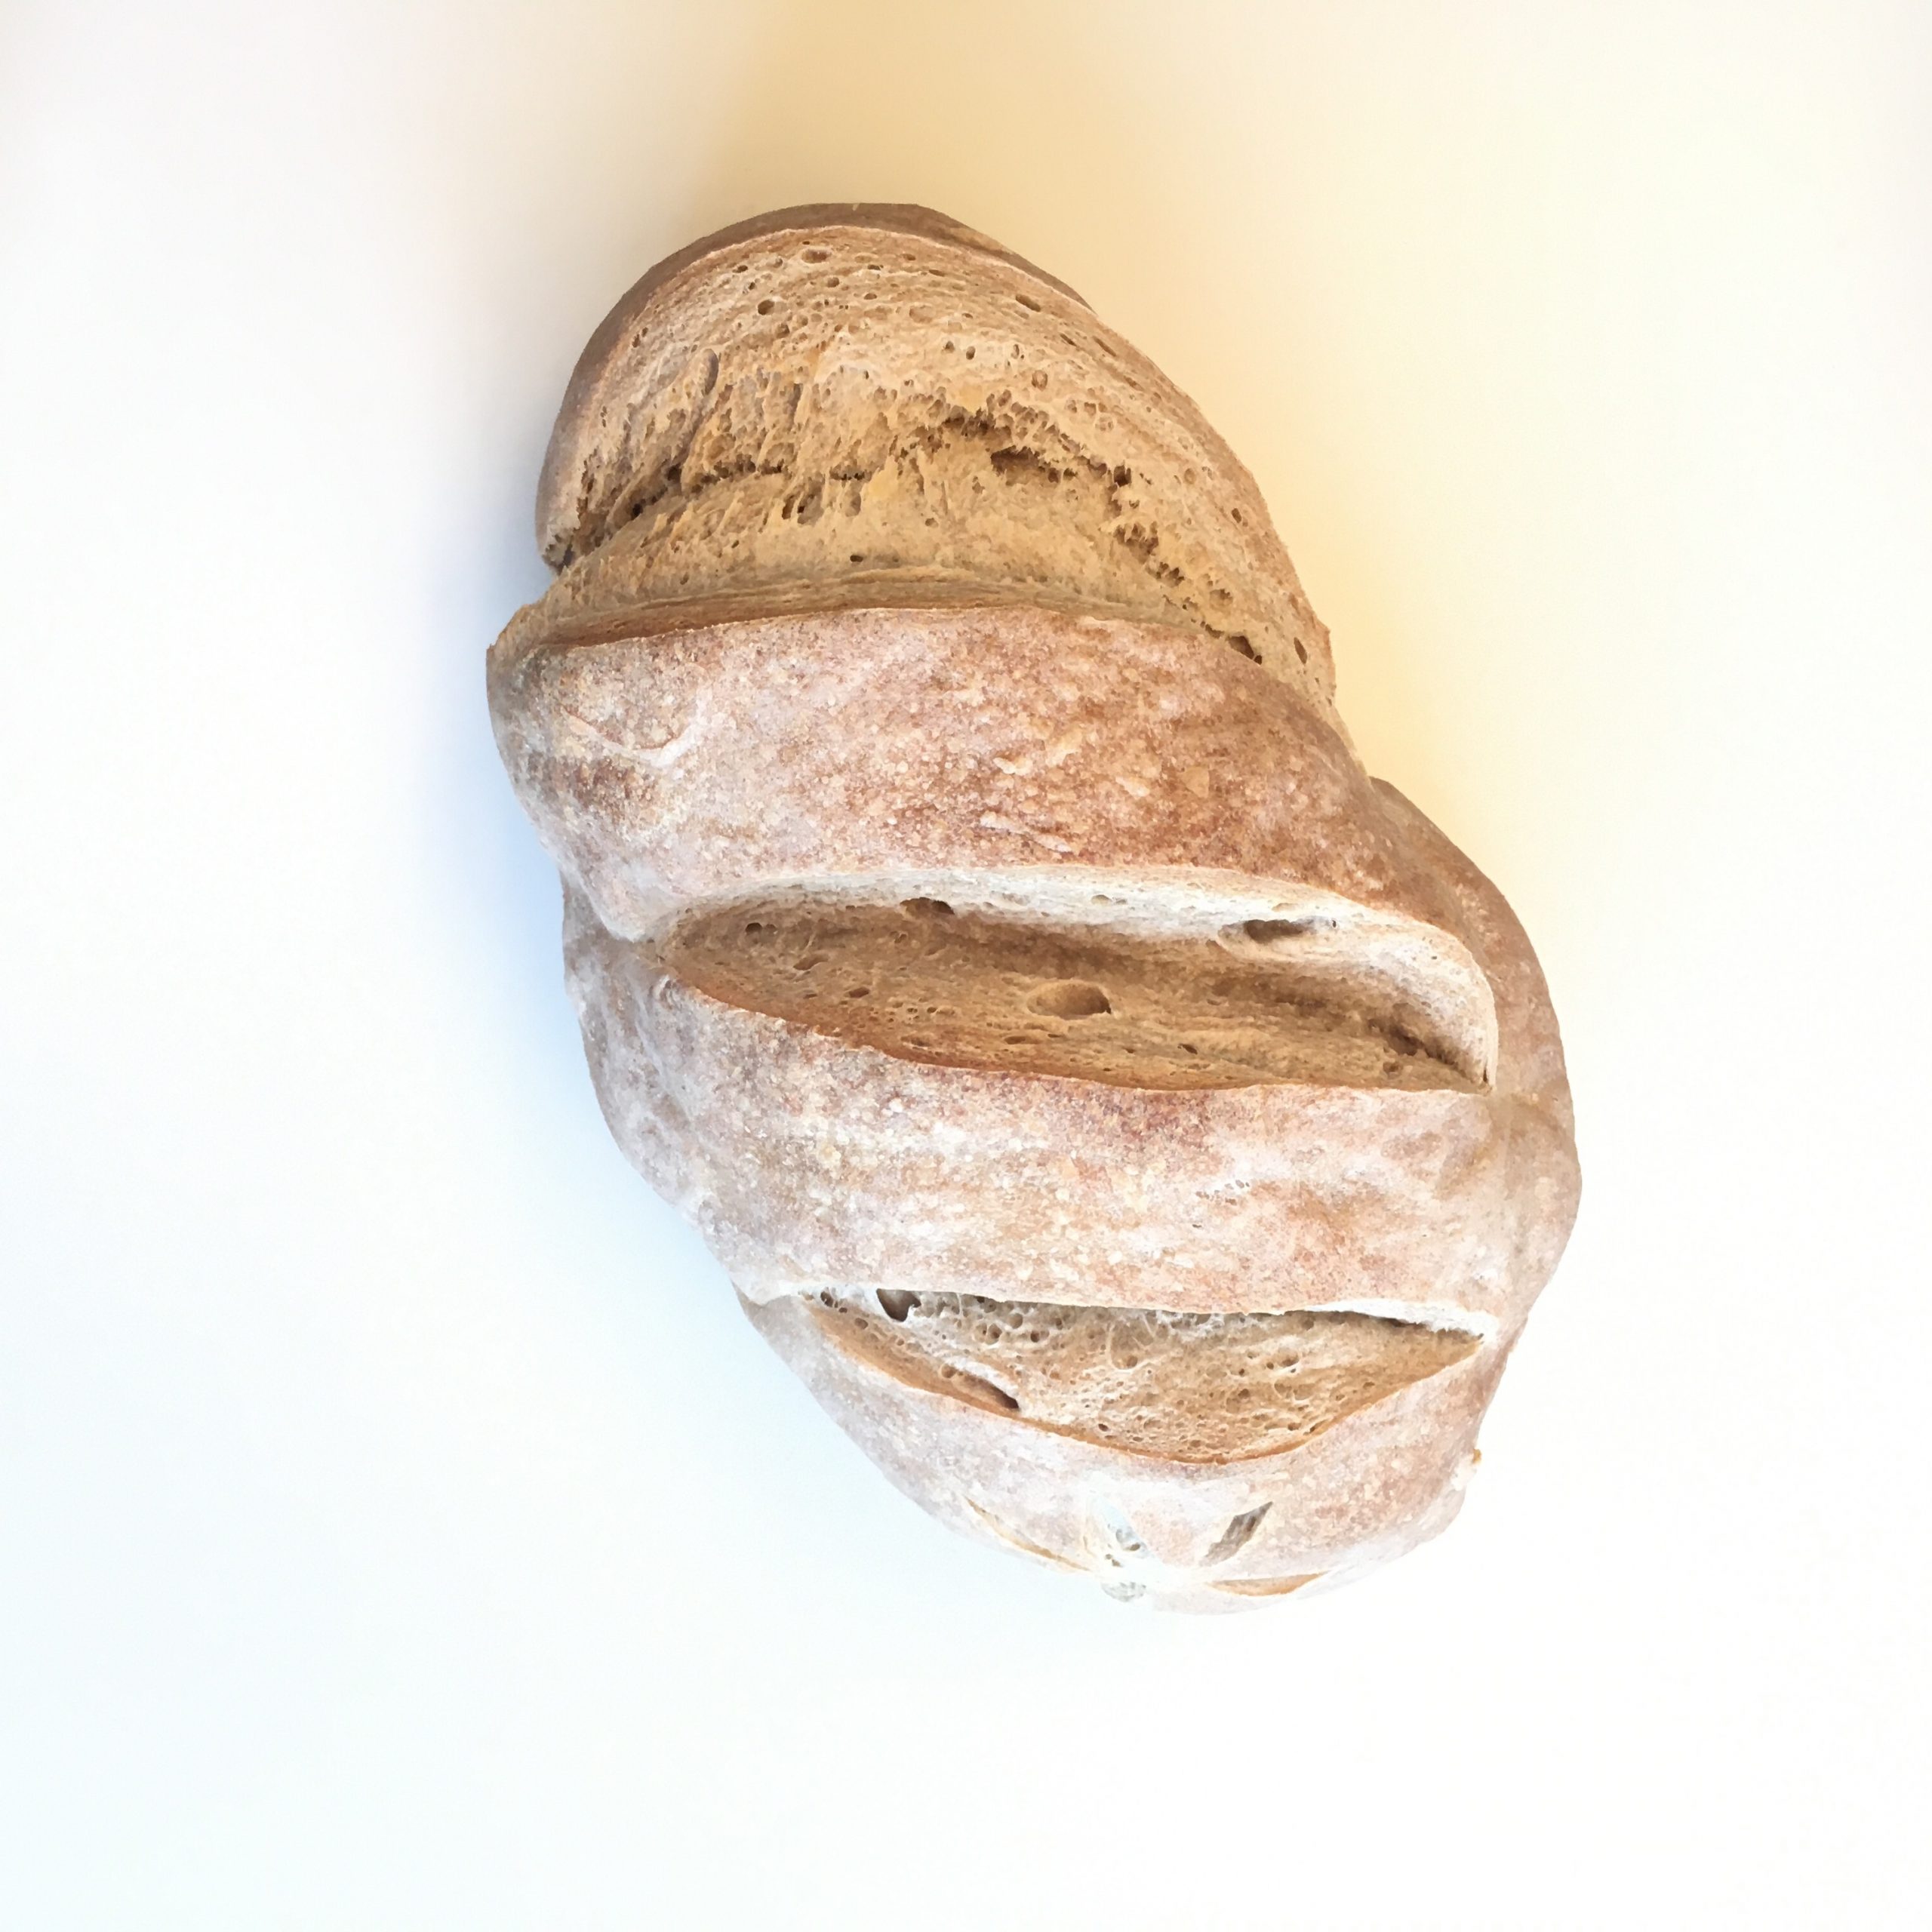
This year is just the same. At the time I write, everything is quiet outside, though the shrine is all lit up to welcome a few visitors during the night. A. is fast asleep, I am struggling to keep an eye open. We will wake up when the day breaks tomorrow. It will be cold and sunny. I have already baked the bread for our breakfast as I tested a new (to me) baking method using a cast iron pot, which has helped me understand why my breads are often too pale. I have an issue with moisture when I bake them. The cast iron pot just solved the problem and I finally could bake a golden bread, with a crust crunchy outside and well balanced crumbs.
So now I can sleep tight, wish you a good end of the year and see you in 2022!
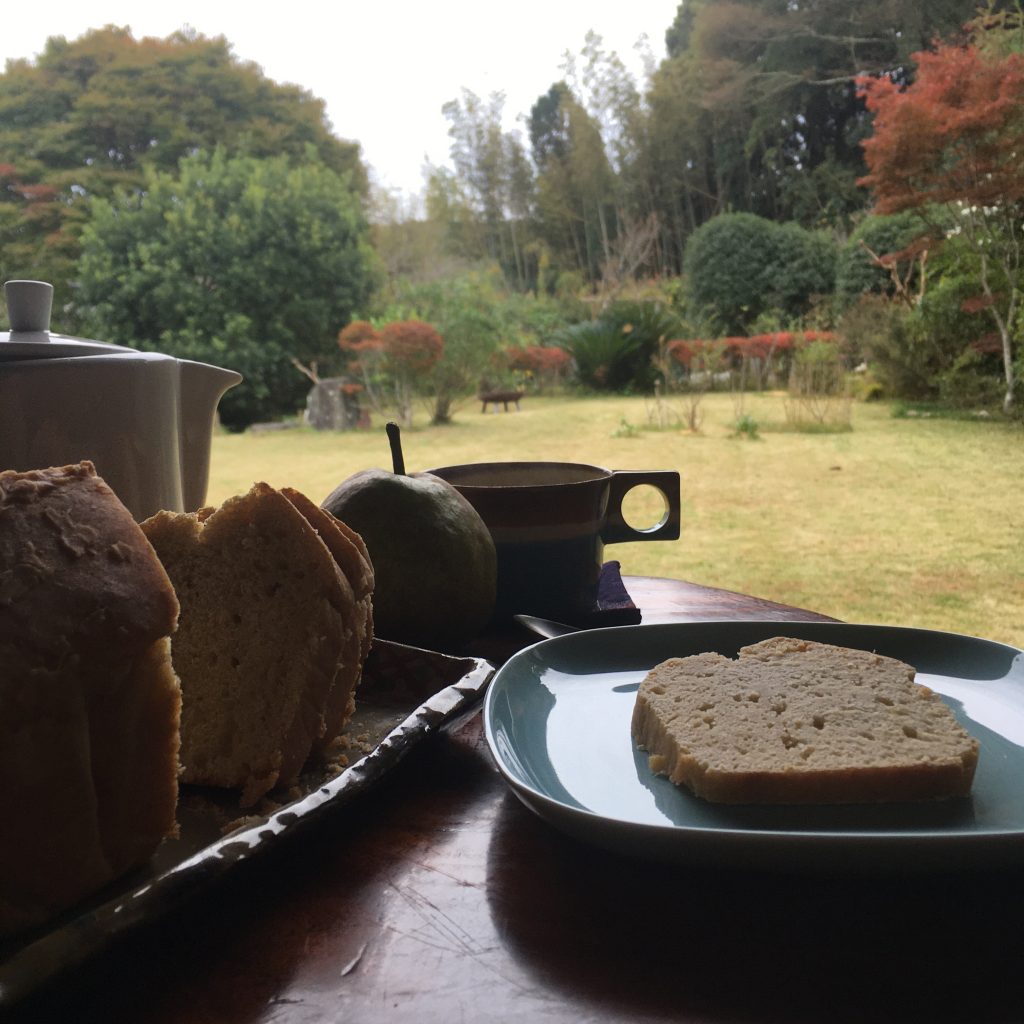
A few weeks ago I started to think about how much I love the French gingerbread called pain d’épices, that I don’t recall seeing any in Japan and that I never made some… It is heavy in the hand, yet light when eaten, with a beautiful golden color and flavors and aromas that sparkle in the mouth, and the texture is a very melting one. One of my favorite pain d’ épices of all time is that of my horse ridding teacher. She has a gift not only for gardening but also for cooking sweets. In summer during intensive training camps, she would bake while we would play around with the horses, and make fruits charlottes with the fruits from the orchard. In the fall or winter she would make pain d’épices. I was so found of it that I remember asking her the recipe, and she told me she just mixes 1kg of flour with 1kg of honey. I was probably 12 when I asked but I still remember this recipe because it didn’t make sense for me at the time, honey and flour, that’s it, really??? and I never tried, too scared of wasting 1kg of honey!
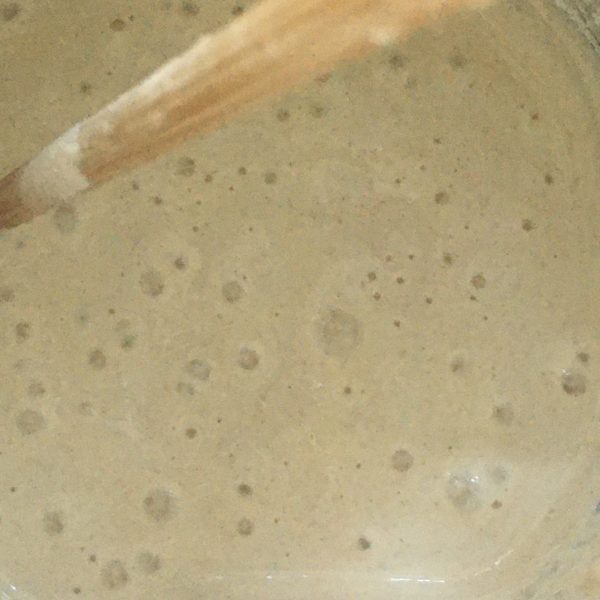
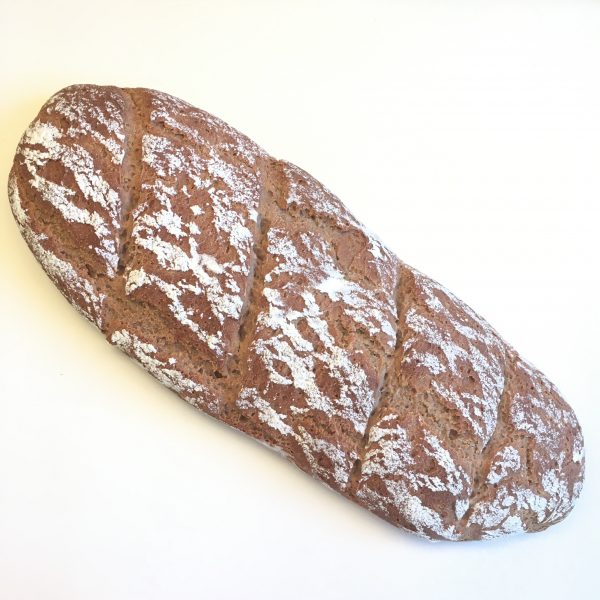
But when I started to look at how to make pain d’épices how surprised was I to see that, this is indeed the recipe for classic pain d’épices from Reims. What I didn’t know then was that the mix, with spices added, should be kept days or weeks to start the fermentation that will guarantee the fluffiness. Last year I would probably have been very skeptical trying such an attempt, as I was not very sure how all this fermentation worked, but since I made my sourdough Lois I feel a lot more confident to do flour base fermentation. Finally, last week I decided to start the experiment and prepared a mix of 600g of flour and 600g of honey together, some said that adding the spices at that stage would increase the development of aromas, so I added them too. I left the preparation in a container under a lid the whole week at home (with the winter temperatures settling in, the house temperature is about 5 to 9 now, so no big risk of seeing things rotting, or mold developing!!!!) And today I just found my mixture, it hasn’t changed much but it is not looking bad at all so I prepared it and baked it. The result???
A perfect pain d’épices! The look, the color, the texture, the smell… Exactly as you would find on in France, a happy A. and a happy me, eaten it with a cup of Christmas tea at tea-time or for breakfast. We even used it for toasts with cheese for me and some pork paté for A. and we were very satisfied. The recipe is very simple and except for the one week wait it is very simple to make. Definitely a must do again one. This recipe is will become a new classic like my pompe a l’huile.
Pain d’ épices (1 big loaf or 2 smaller)
600g of flour
600g of pure honey (liquid is easier but creamy can work too)
1tsp of ground cardamom
1tsp of ground cloves
2tsp of cinnamon
1 ping pong size piece of fresh ginger, pealed, grated or chopped thinly (I use fresh ginger because it is easy to find and I just chopped it roughly but you may use ground ginger, then 1/2tsp should be good enough)
water
additional 1/2tsp of baking soda (if your rise time is short)
About 5days to two weeks before you want to bake your pain d’epices prepare the dough. For that, in a container with a lid mix the honey the flour and the spice. If your honey is really to creamy and hard too work you can melt it in a pan at very low heat to liquify it. Stir to incorporate all ingredients. I used a spatula to do that as the mix is way to sticky to put hands in. One everything is well incorporated put the lid on the container, and let rest for as long as you want, but at least a few days.
After a few days, the spices may have start to color the dough a bit but it may not have changed much otherwise. When you want to bake your pain d’epices, pre-heat your oven to 150deg, just add a little of tepid water to the mix to soften it and knead. The dough is sticky but not terribly sticky. If you think your rise time is rather short (just a few days), you may want to add a little of baking soda now, to ensure perfect fluffiness. Knead and add water to obtain a compact yet smooth dough. Using parchment paper set in a cake dish or split in two and make two, or more. And bake for about 2h if you make a big one (check with a knife or stick if the dough is well cooked inside), for 2 smaller, about 1h should be enough.
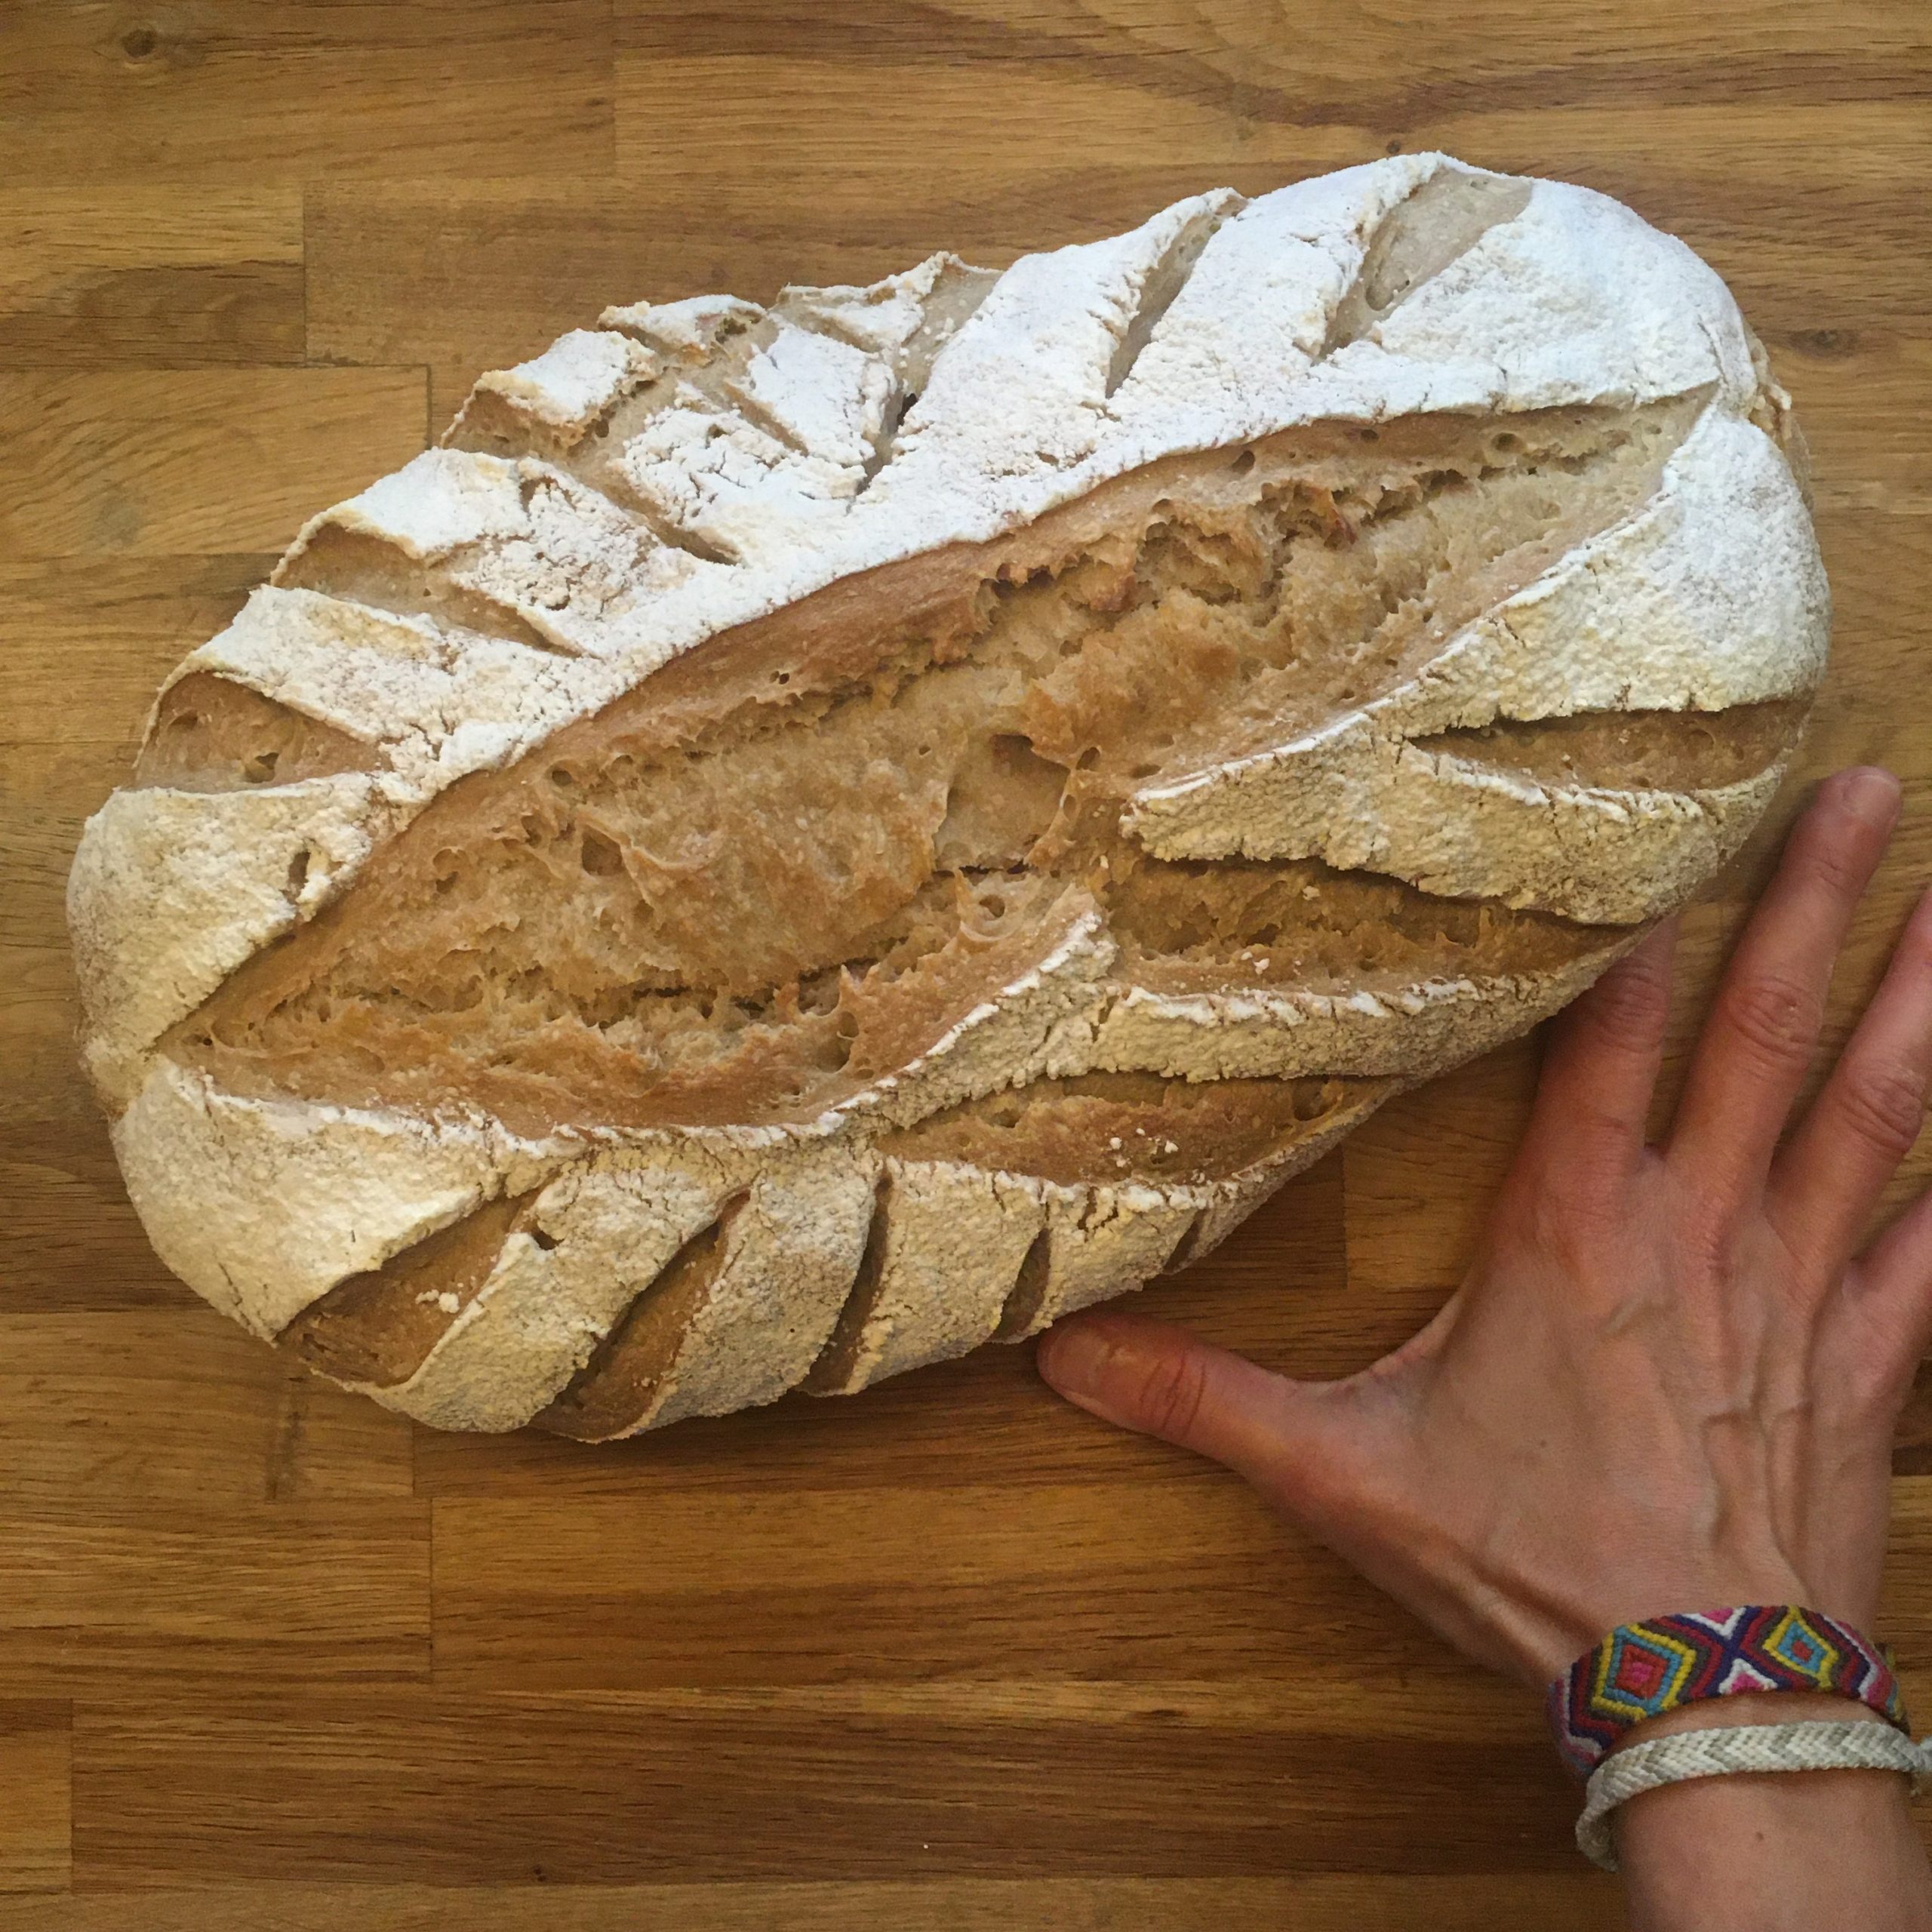
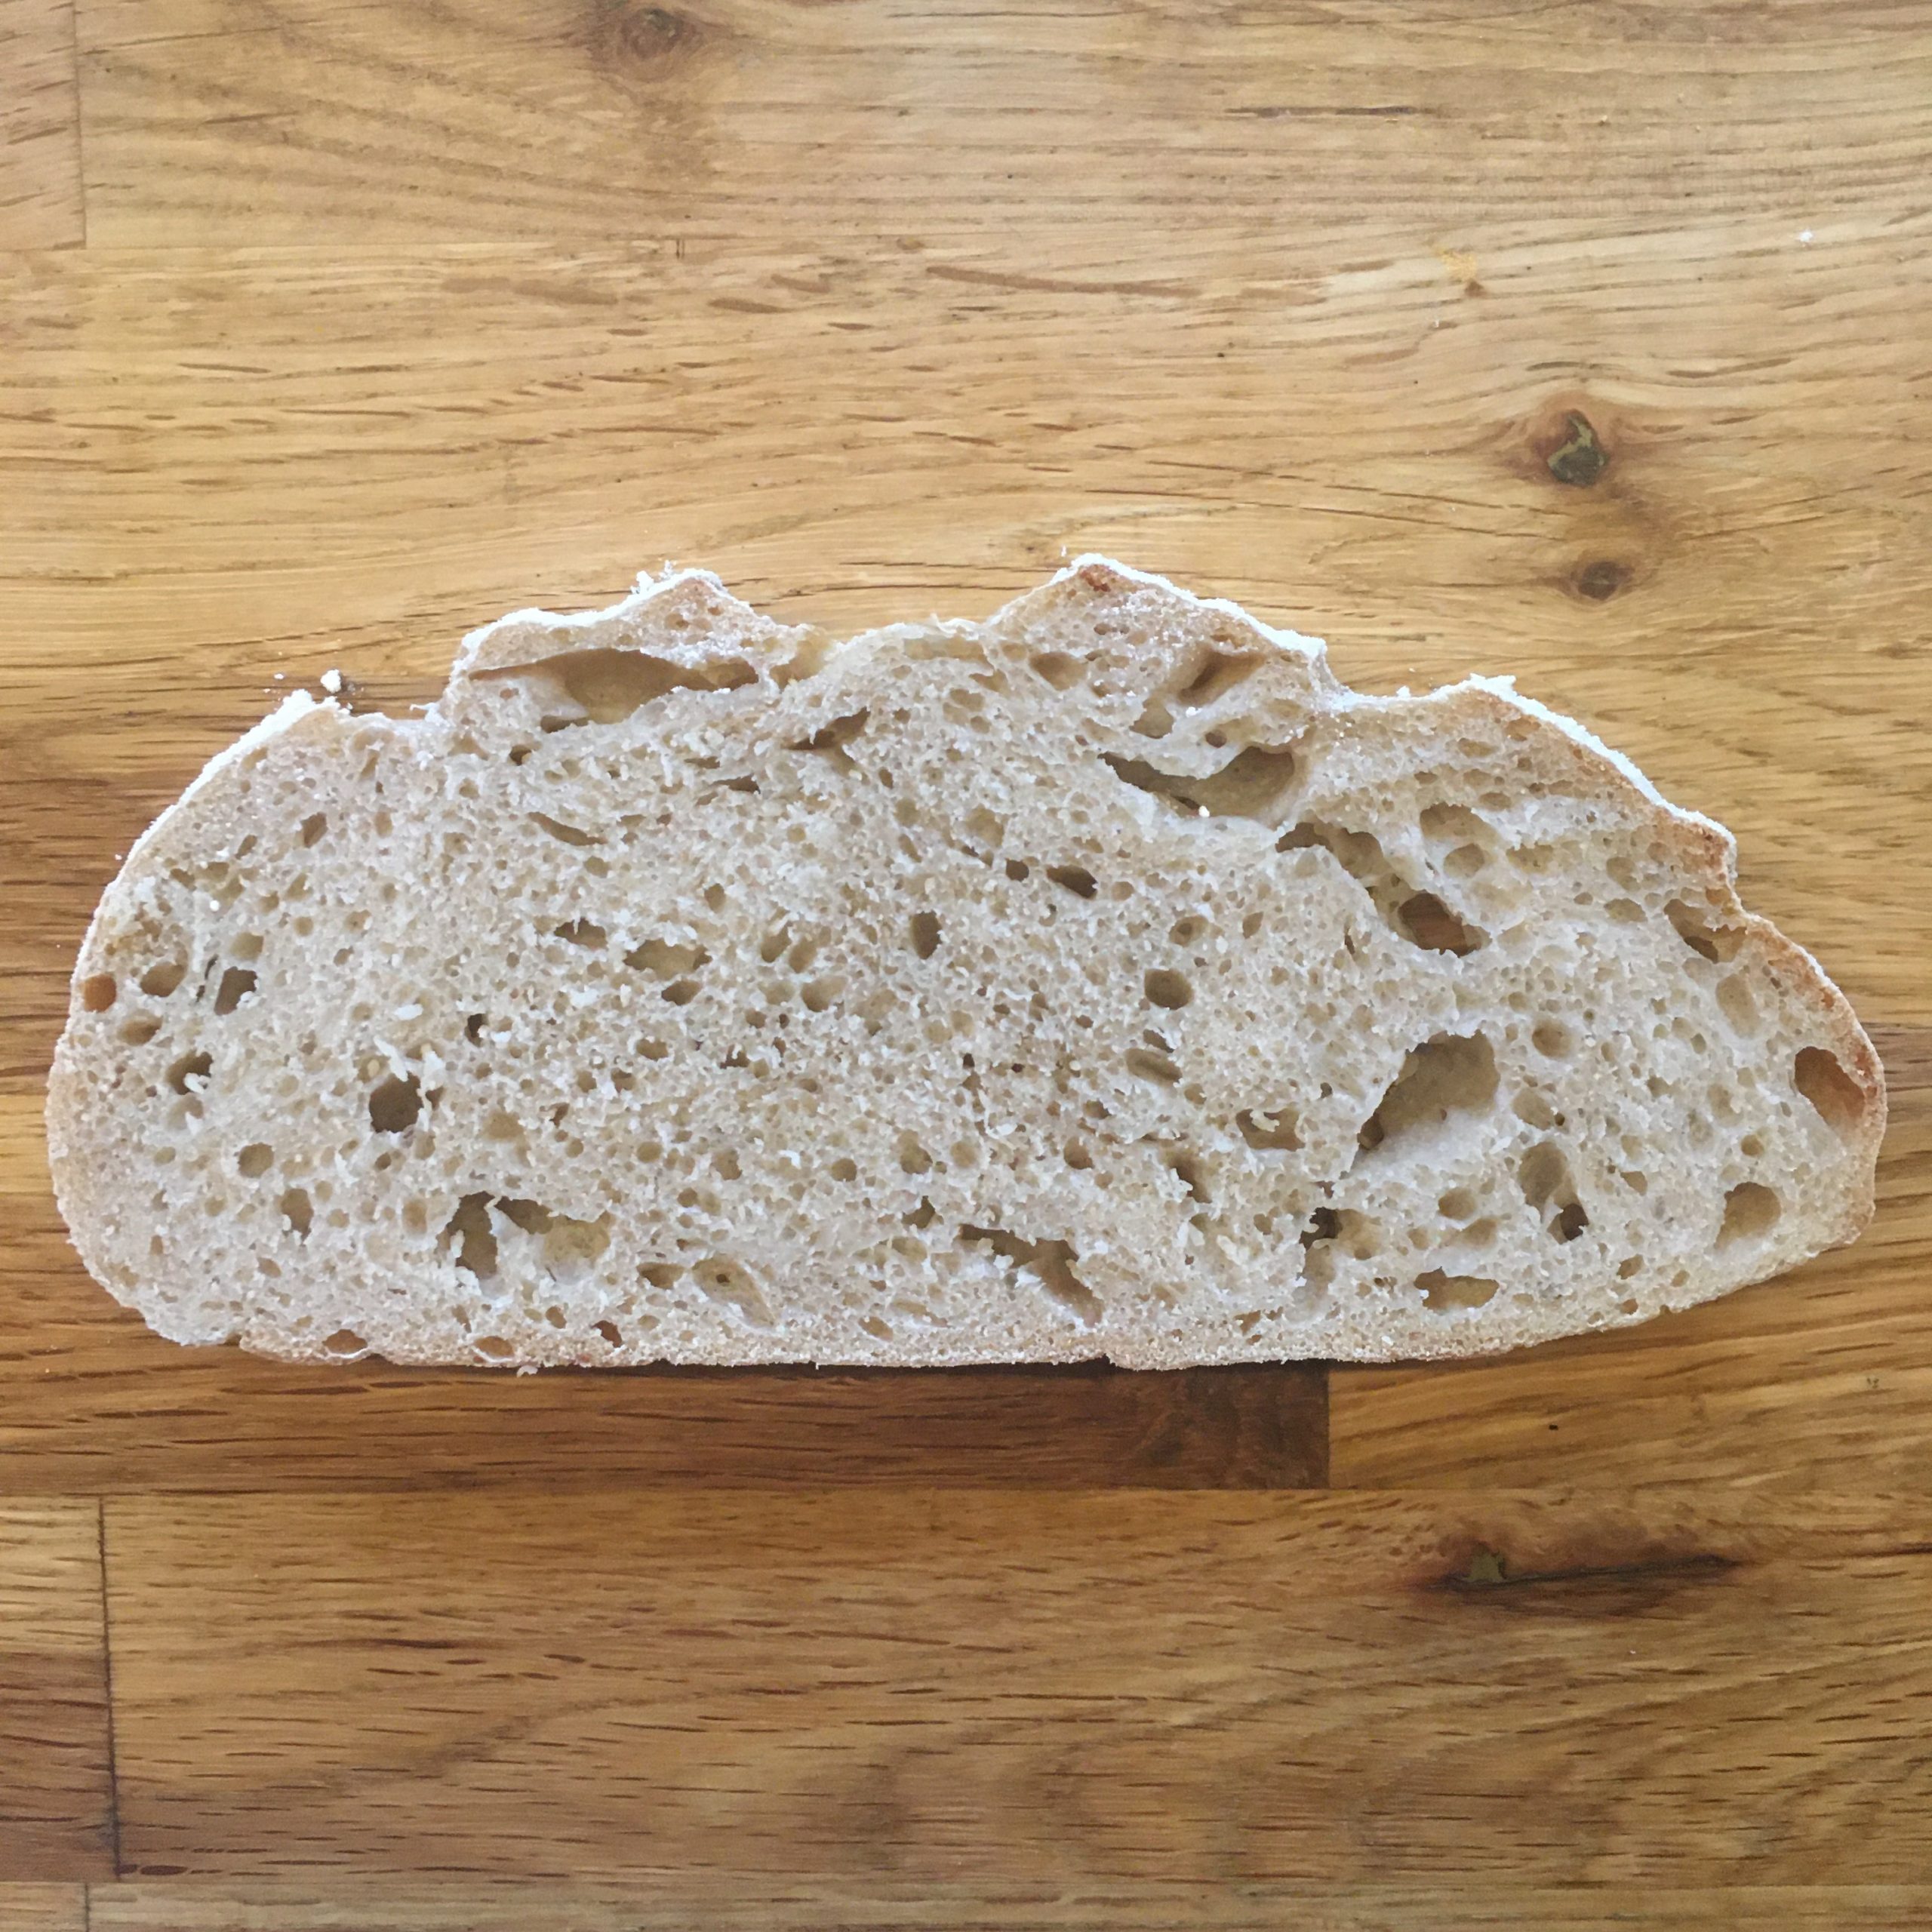
I made a very large one and baked about 2h at 150deg, but wasn’t sure it was perfectly baked so I finished with 10 min at 180deg just to be sure. Let cool down before cutting and eating.
Pain d’epices normally keeps well, this is tone he purpose of the original recipe. But in our house, we didn’t had time to see how long it can keep!!! We’ve eaten it in a snap!!!
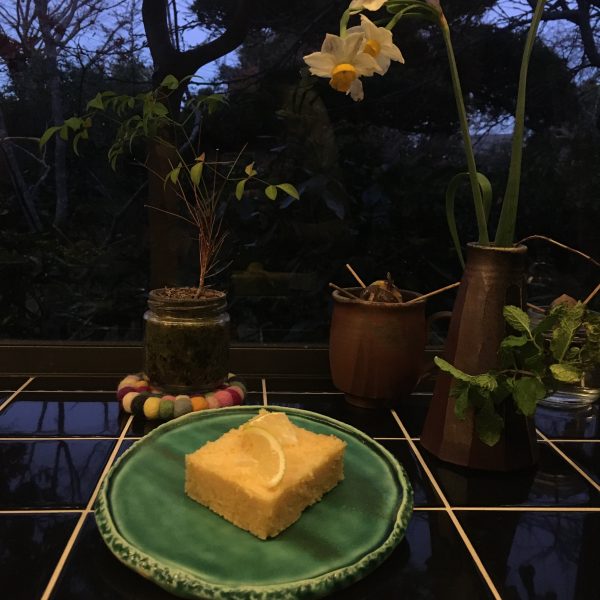
Look at this beautiful color and perfectly dense but bubbly texture!!!
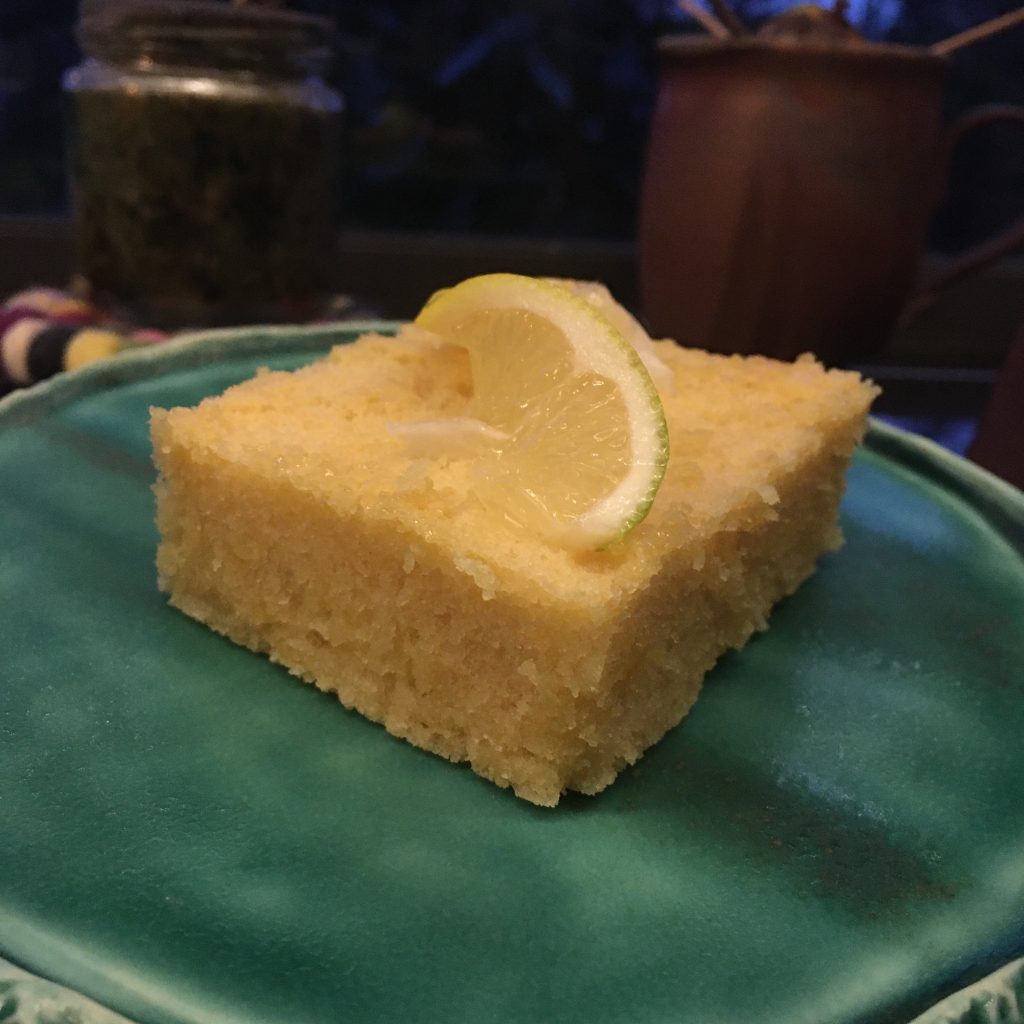
As much as I do!!! I’ve always loved lemons, and lemon juice. In France and in Italy when every one goes to the cafe to have an expresso, I would either have a freshly squeezed lemon, when it’s cold in winter, with some hot water in it. That’s really something I love about cafes, and that, with freshly squeezed orange, is probably the only fresh thing you can have.
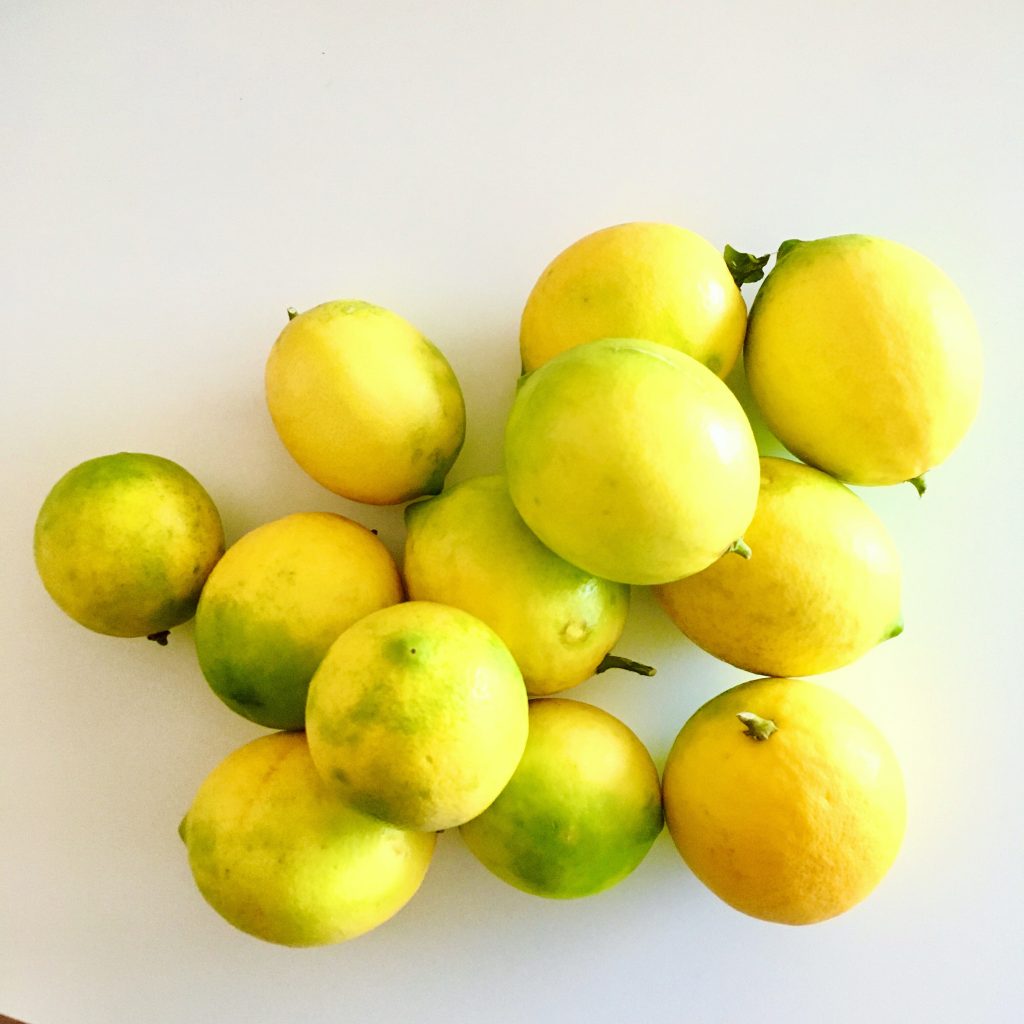
Our lemon tree this year had a lot of flowers but none went to maturity so we’ll have no fruits. So when my secretary sent me a giant box filled with giant lemons from her garden, I can only be thankful, and super happy. Who doesn’t love no chemical at all grown vegetables or fruits???
It took me a bit of time to think about what to cook… I love lemon tarts, lemon cakes, lemon squares… but I wanted to try something else… so while sipping hot lemon, I browsed the net for some recipes and found a lemon brownie recipe. Buttery and sweet, that would be a hit with A. No doubt!
Except that the recipe I found was a little odd: they didn’t say when to put the sugar, the proportion of butter was just too much and all sounded a bit awkward, so while using a classic chocolate recipe I came up with my own lemon brownie recipe, and it was great (lucky I cut the butter by a fourth, it is already very buttery!!!)
Enjoy! It is really super easy!!!
Lemon brownie (makes a large pie dish for at least 6 pieces)
180g of flour
150g of sugar
150g of butter
4 eggs
The zest of one large lemon or two small
The juice of one large juicy lemon or two smaller or less juicy
A pinch of sal
A pinch of baking soda
Melt the butter. In a large bowl mix the flour, the salt, the baking soda and the lemon zest, add the butter and stir.
In another bowl, whisk the eggs, the sugar and the lemon juice. Add to the previous bowl and stir. Set in a buttered and floured pie dish to have about 1.5cm thickness.
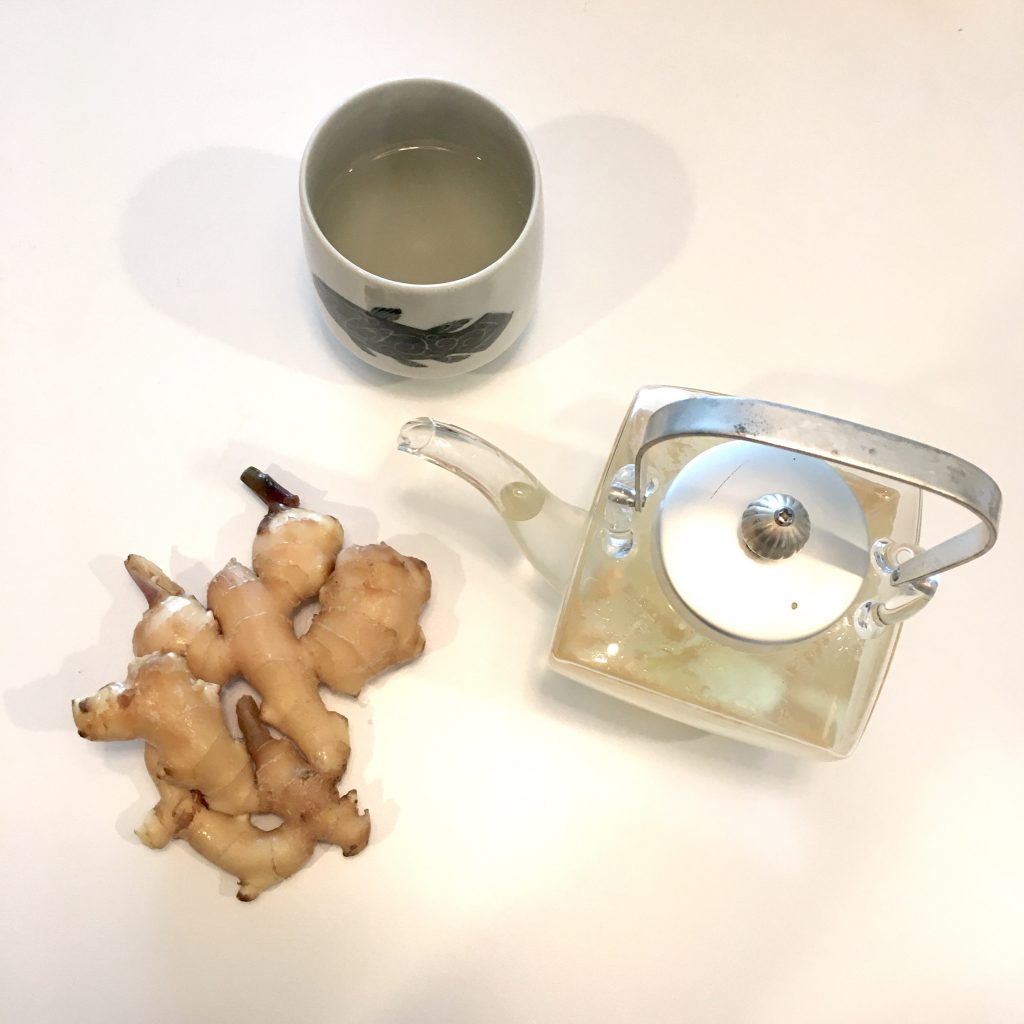
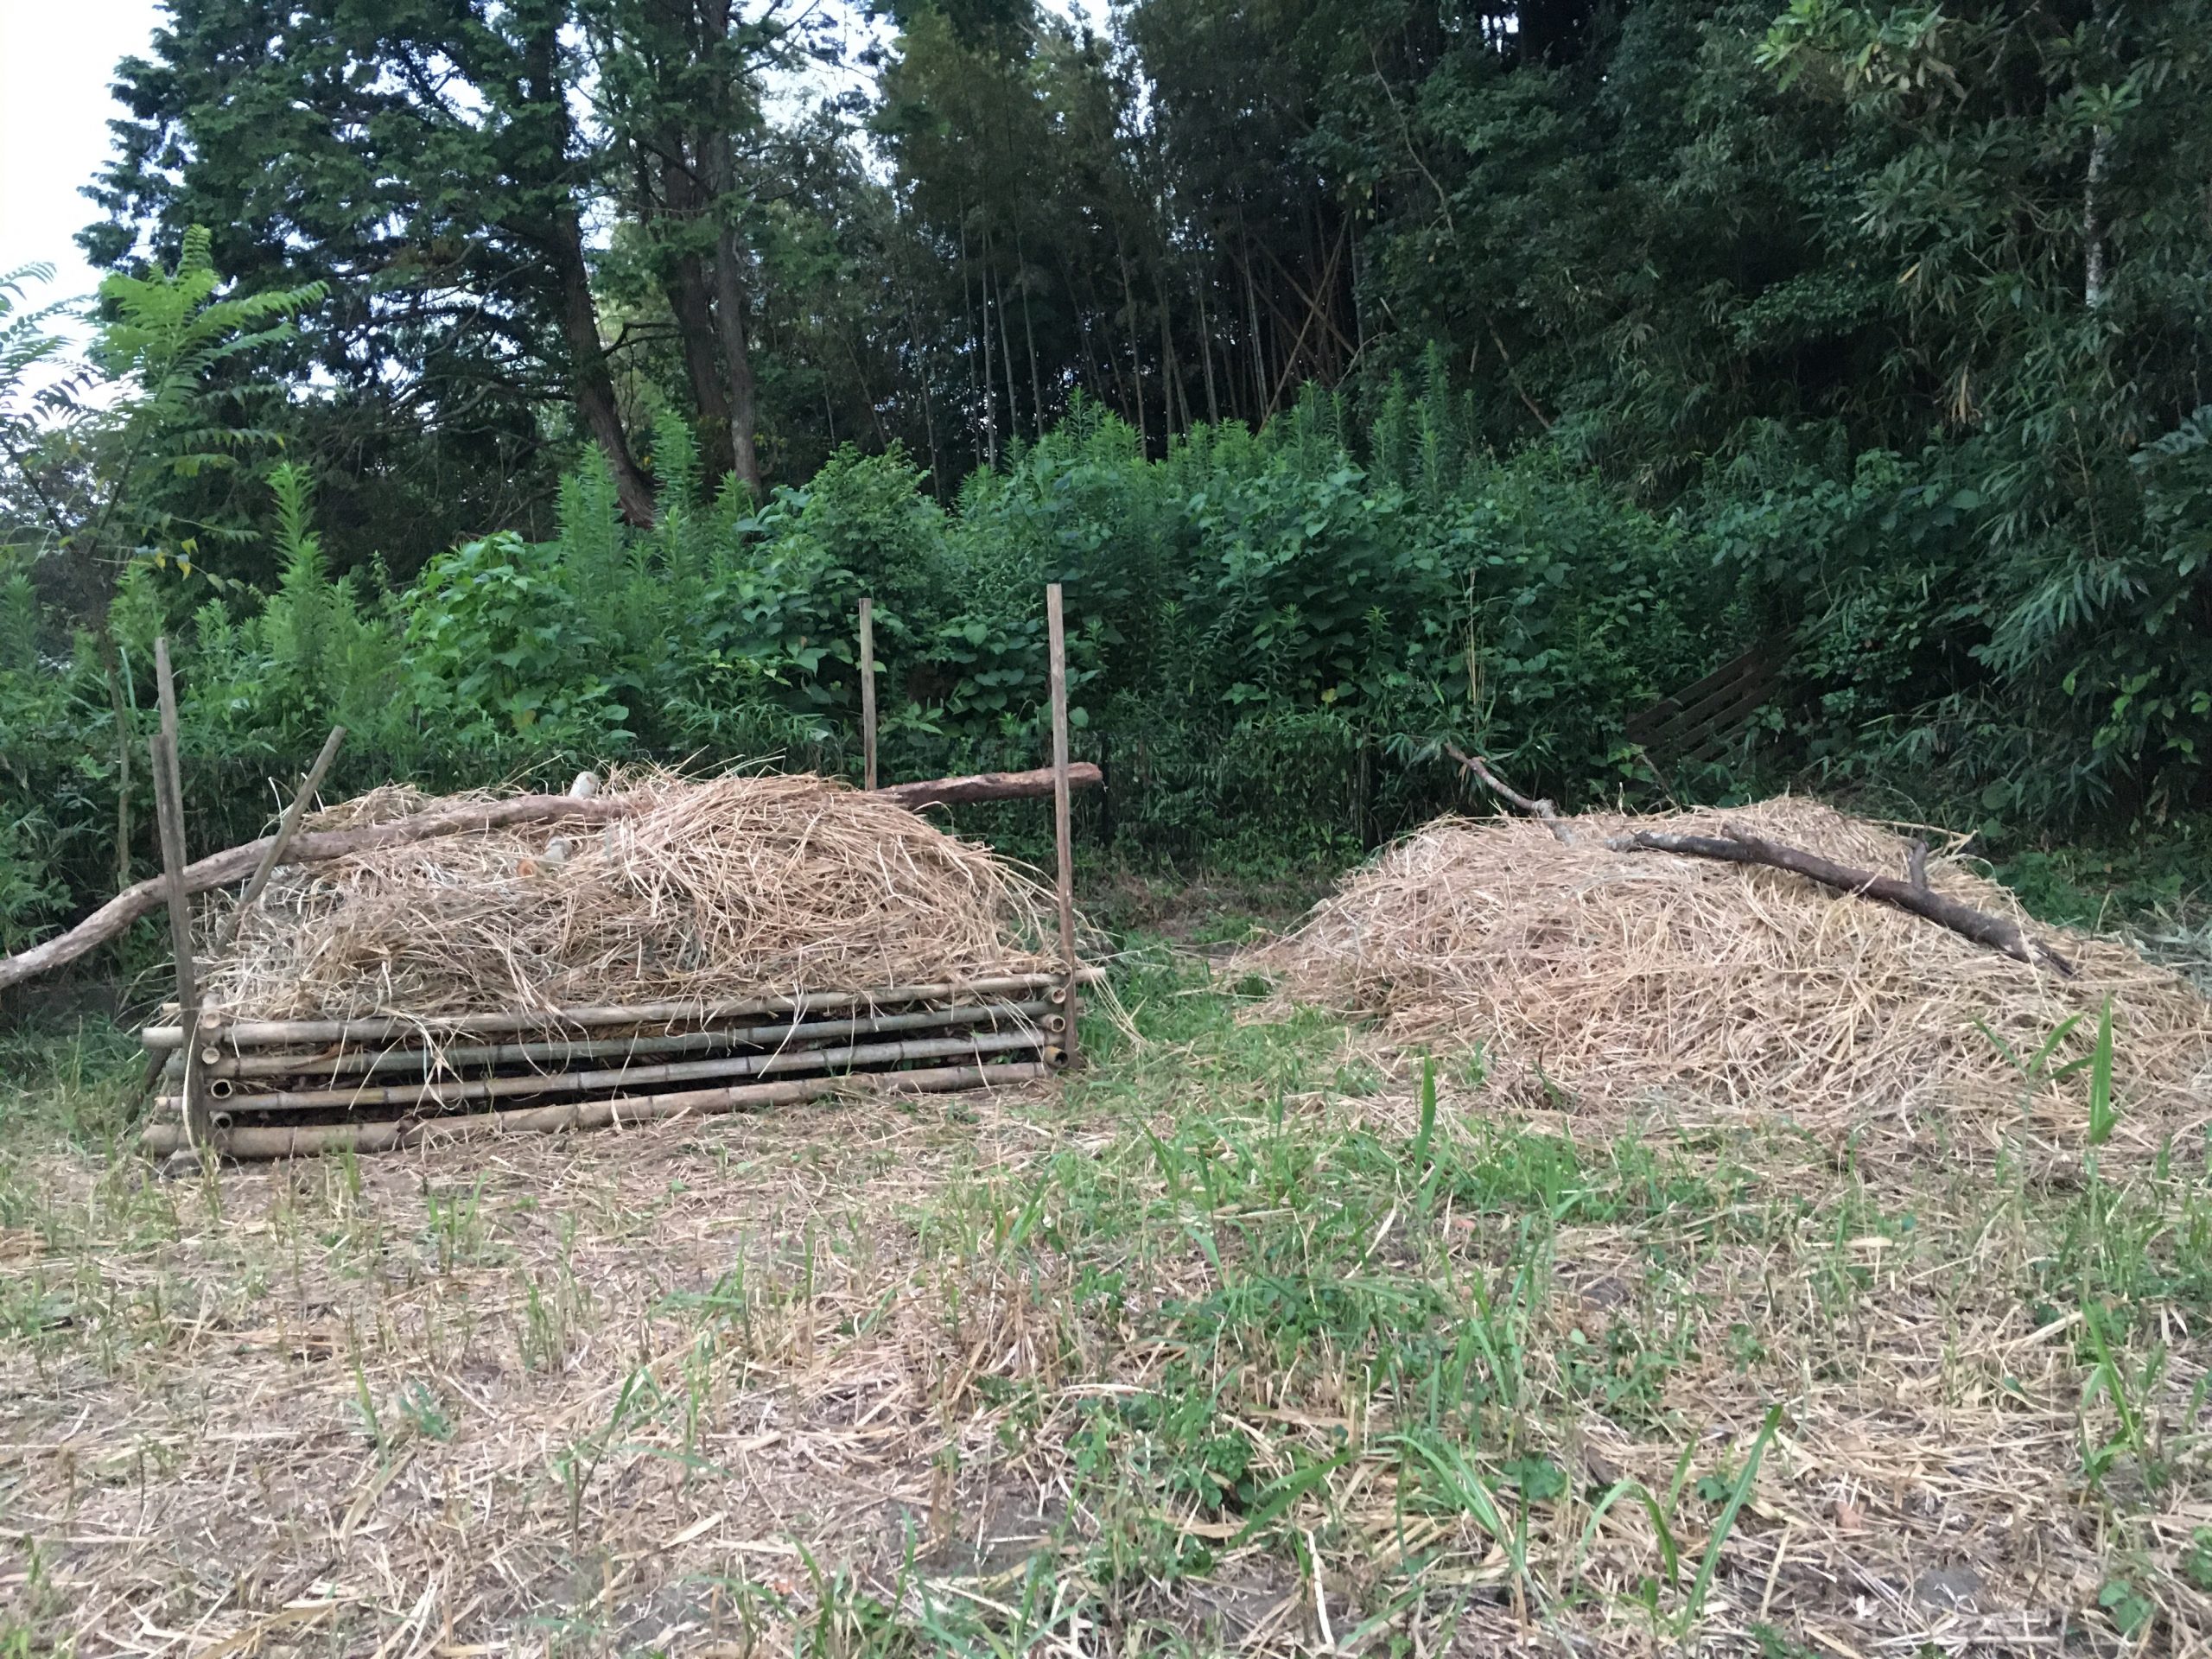
Just after myoga, fresh ginger season is starting. Both plants may look very similar, but in ginger we eat the root mainly. Unfortunately we don’t have ginger growing in our garden yet, so I usually buy fresh ginger at the farmers market. I’m big fan of candied ginger, and prepared some sometimes, but so far I didn’t get time. Work has been really busy, and everyday is full from morning to evening, if not with work, with surfing, gardening and trying to get familiar with Pistache. Progresses in any of the above are really slow: I’m getting better at spinning but it’s not quite yet very nice… the new garden soil is slowly shaping up, very slowly… and the cat… hum she’s around a lot but it is still too early to get anywhere close…
Pistache
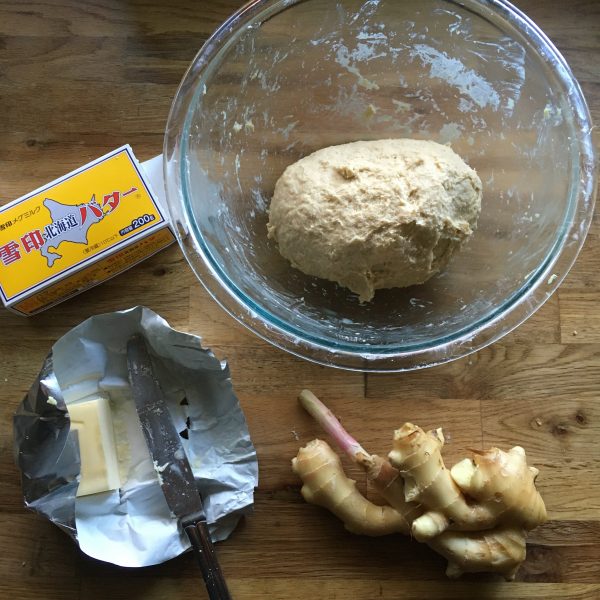
All that to say that I didn’t make candied ginger, but instead used the fragrant roots for honey drinks, and for a delicious brioche. The drinks are easy, I just peel and slice thinly the root. Add a tablespoon of honey and top with hot water. For the brioche, the recipe is below.
Hot ginger
Ginger and lemon brioche
400g of flour
3 eggs
100g of butter
50g of brown sugar
100g of fresh sourdough
1 root of fresh ginger grated with its juice too or ginger powder
The zest and juice of one lemon or lemon extract
Mix all ingredients in a bowl and knead until smooth and soft. Leave for as much as it needs to grow. That will depends on the room temperature. Once the sourdough has clearly worked, flatten the dough, wait 15min and shape (I used a cake dish). Leave for another 1h or 2 before baking at 200deg for 40min or until golden.
A year ago after many years of hesitation, I finally decided to prepare my first sourdough: Lois. Since then we’ve been living and working together to make breads, pizze, brioches, buns and the like, for the best and a few times the worst, but I must say that I am very happy with it.
Lois is a sourdough that behaves well. Seeing so many pictures on IG and www of sourdough overflowing really got me worried, as I hate the kitchen to be a mess, to throw away food, and waste time and energy cleaning a catastrophe that could have been avoided. Kept in a large enough bin has always prevented it from happening and that’s good news! I think also Lois may not be a very very active sourdough, even in a large bin only a few times I could see it grow quite dramatically, otherwise, it looks much more like some kind of pale mousse.
But when it comes to working, it is a steady and stable worker, regardless of the temperatures and the seasons, and I can’t stand the taste of yeast now. The richness of the sourdough flavor is really unique and it evolves with time, making the kitchen smell good as soon as the bread is out of the oven!
So you understand now, I will continue to cherish Lois.
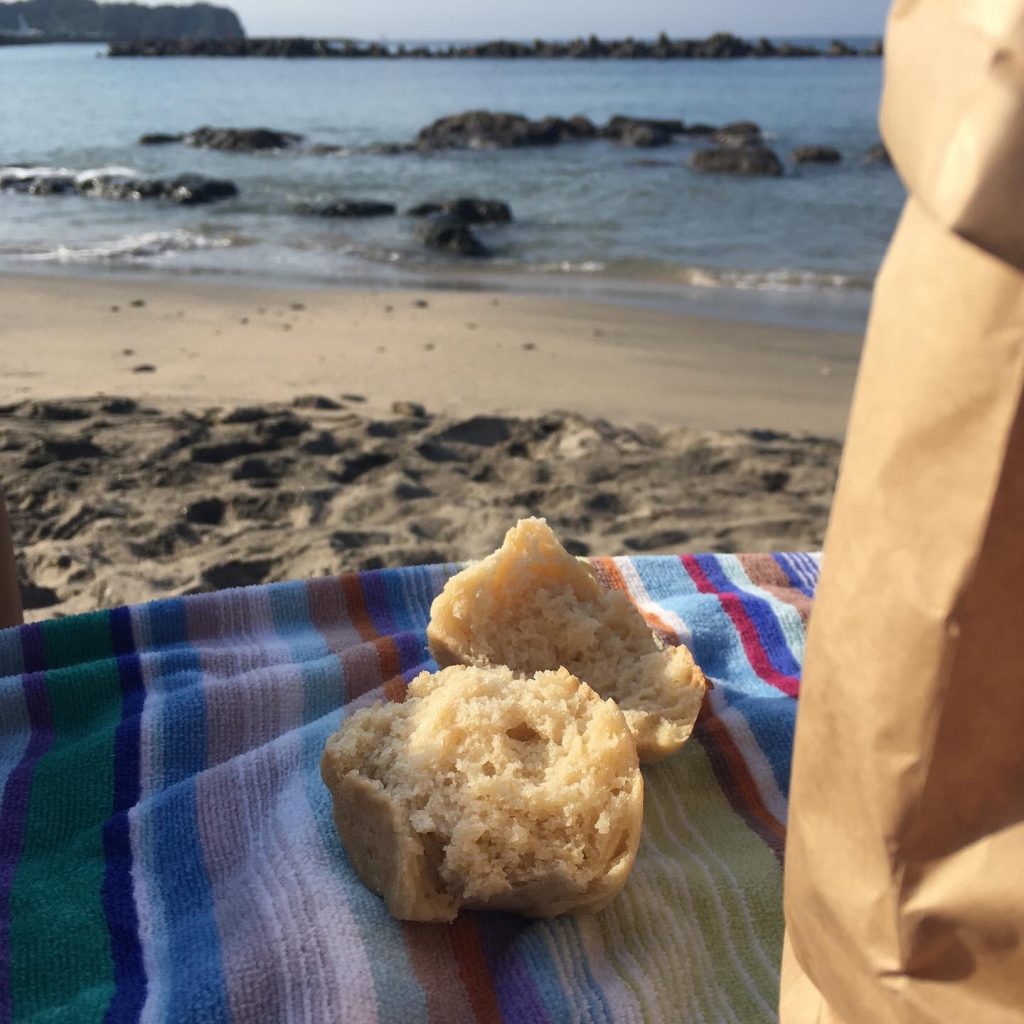
Damn I love summer, the heat, the cicadas, the trips to the beach and all the summer foods!!!
Another year without travel has taken us to our usual refuge for the holidays, where we’ve been spending more and more time thanks to telework. Escaping for one full week Tokyo’s heat, the Olympics fuss, and the again increasing rate of contaminations is just perfect.
Holidays are usually spent between morning and afternoon surf sessions, playing tennis, when the weather allows, gardening (we’re expanding our garden so there is quite a bit of work to prepare the new plot soil, as we plan to use it as an orchard and kitchen garden partly), talking, reading and sleeping a lot, and cooking less than I always originally want…
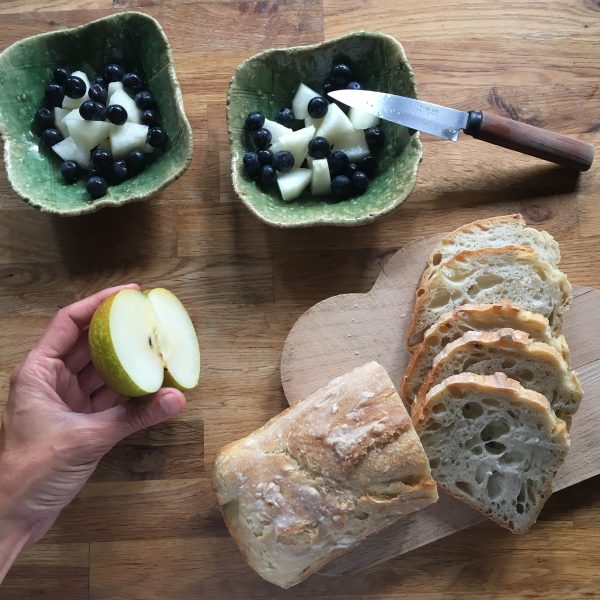
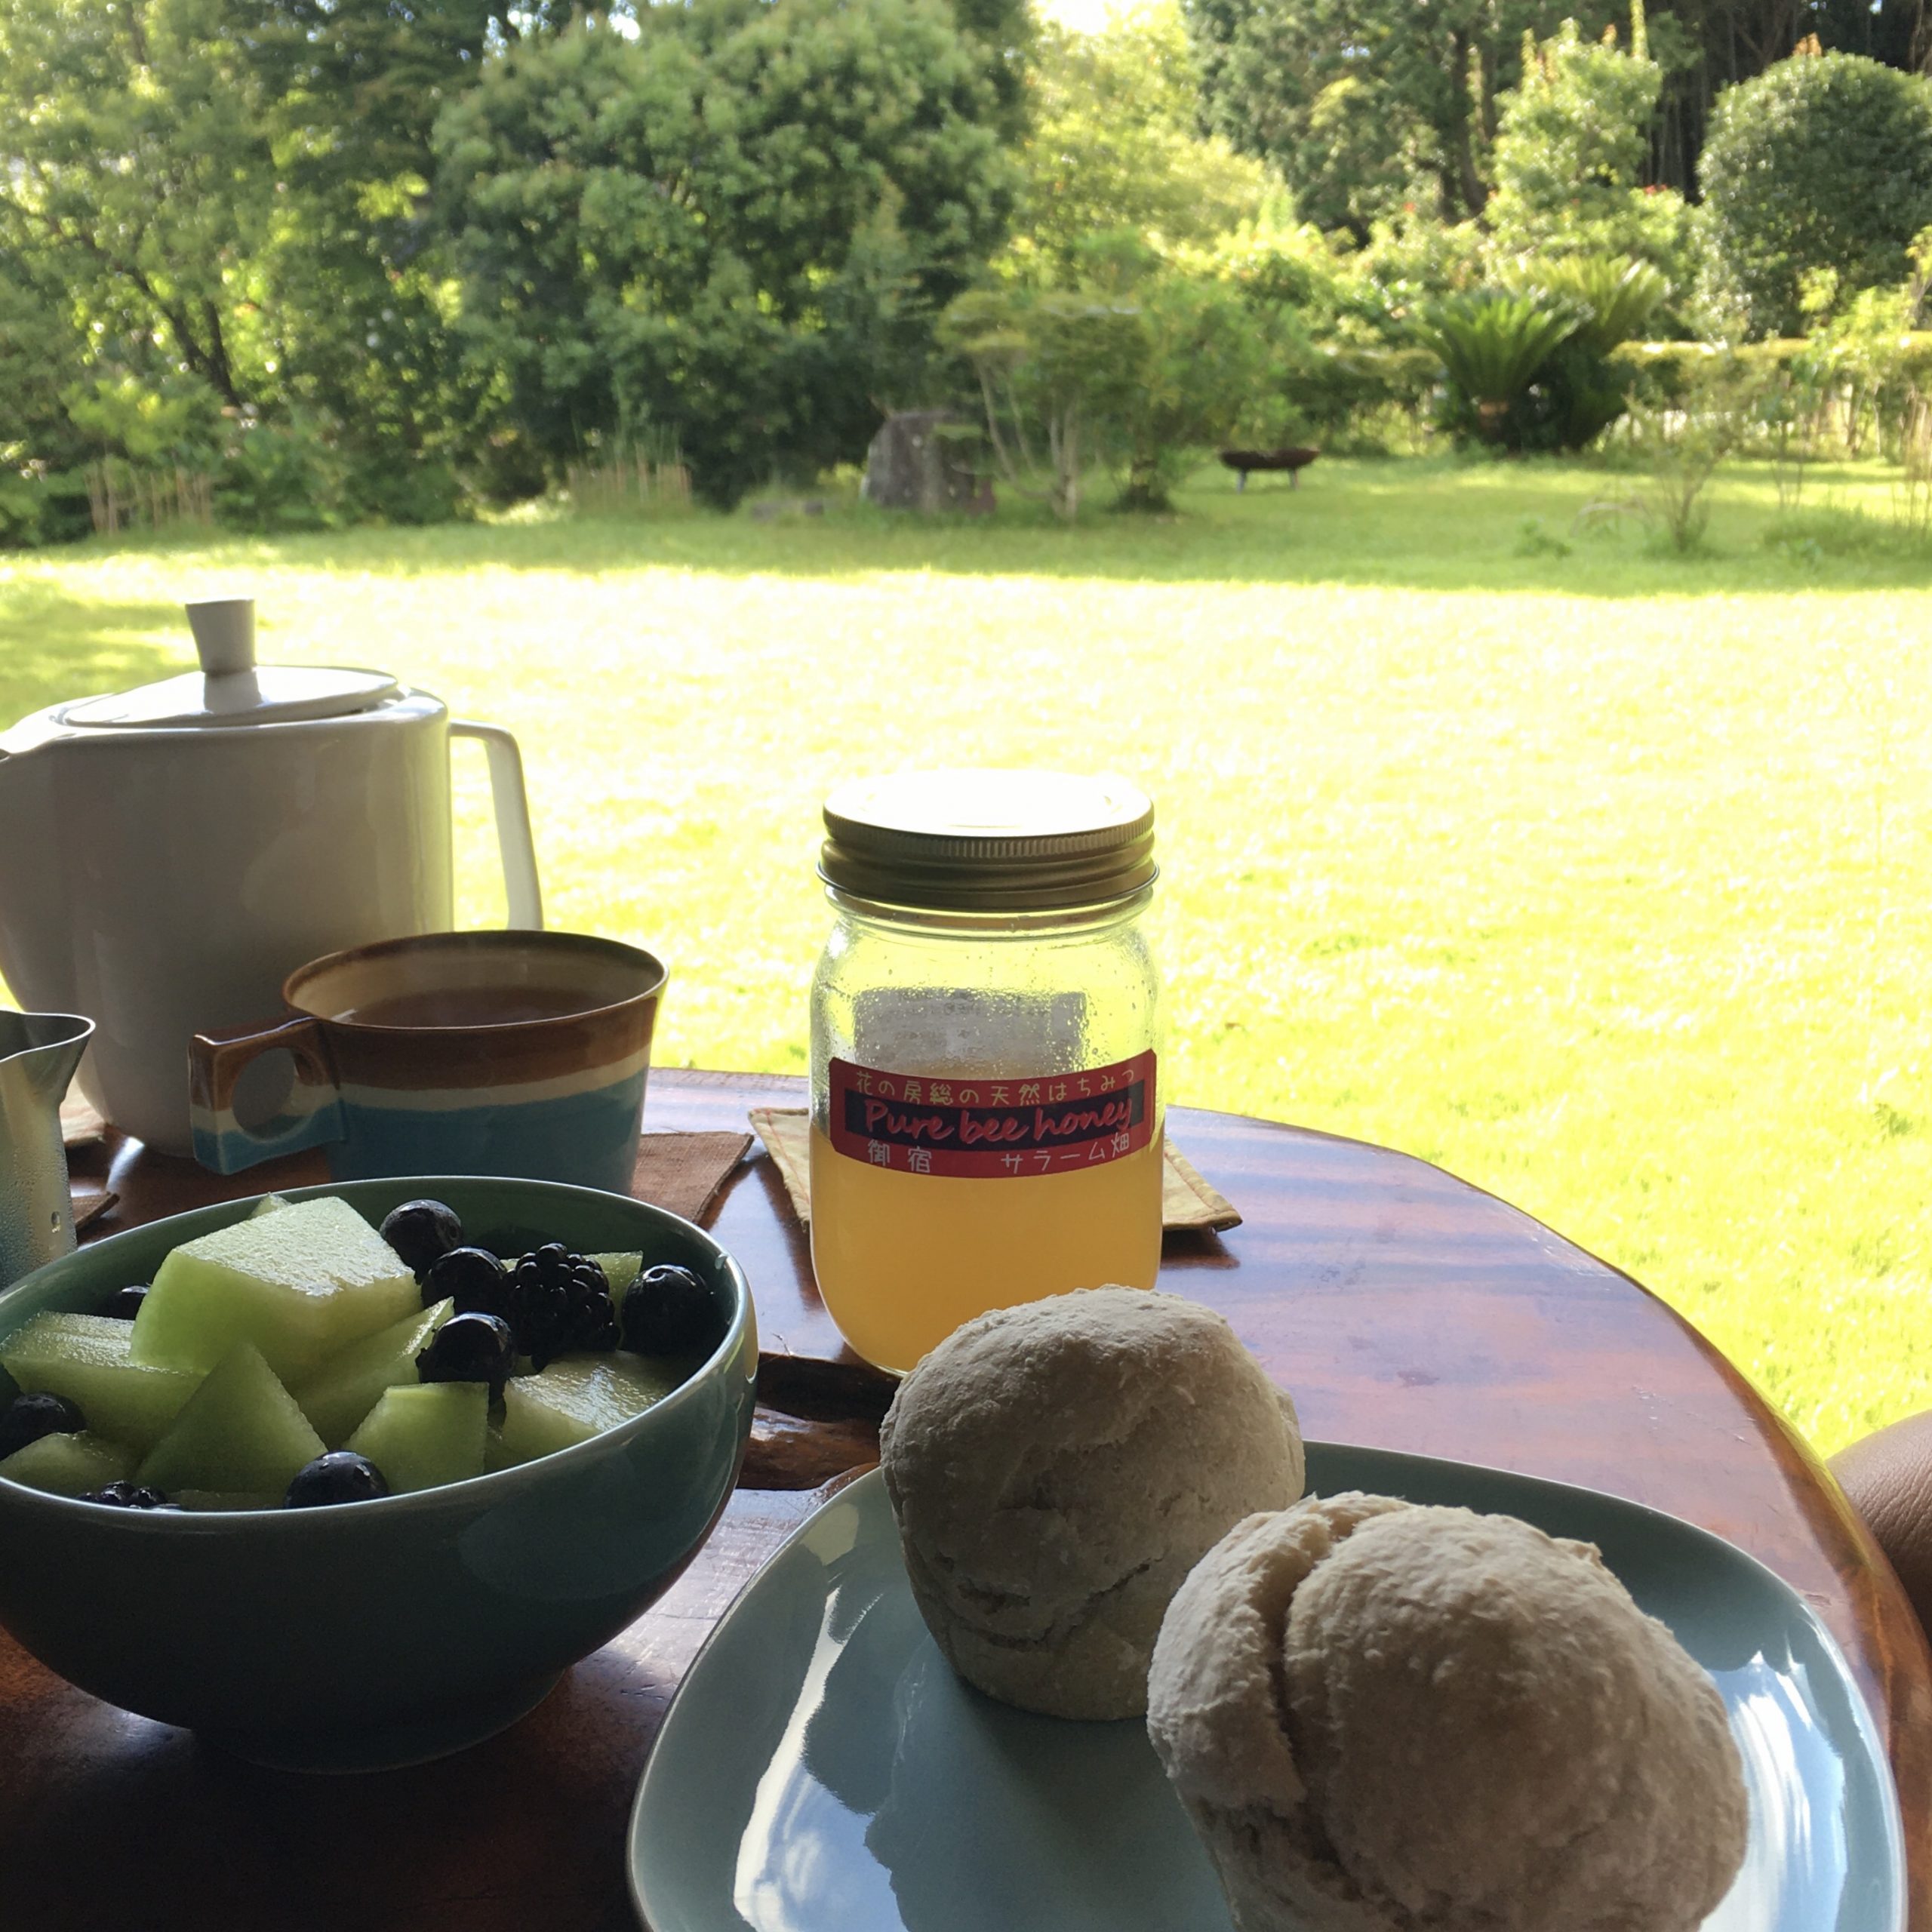
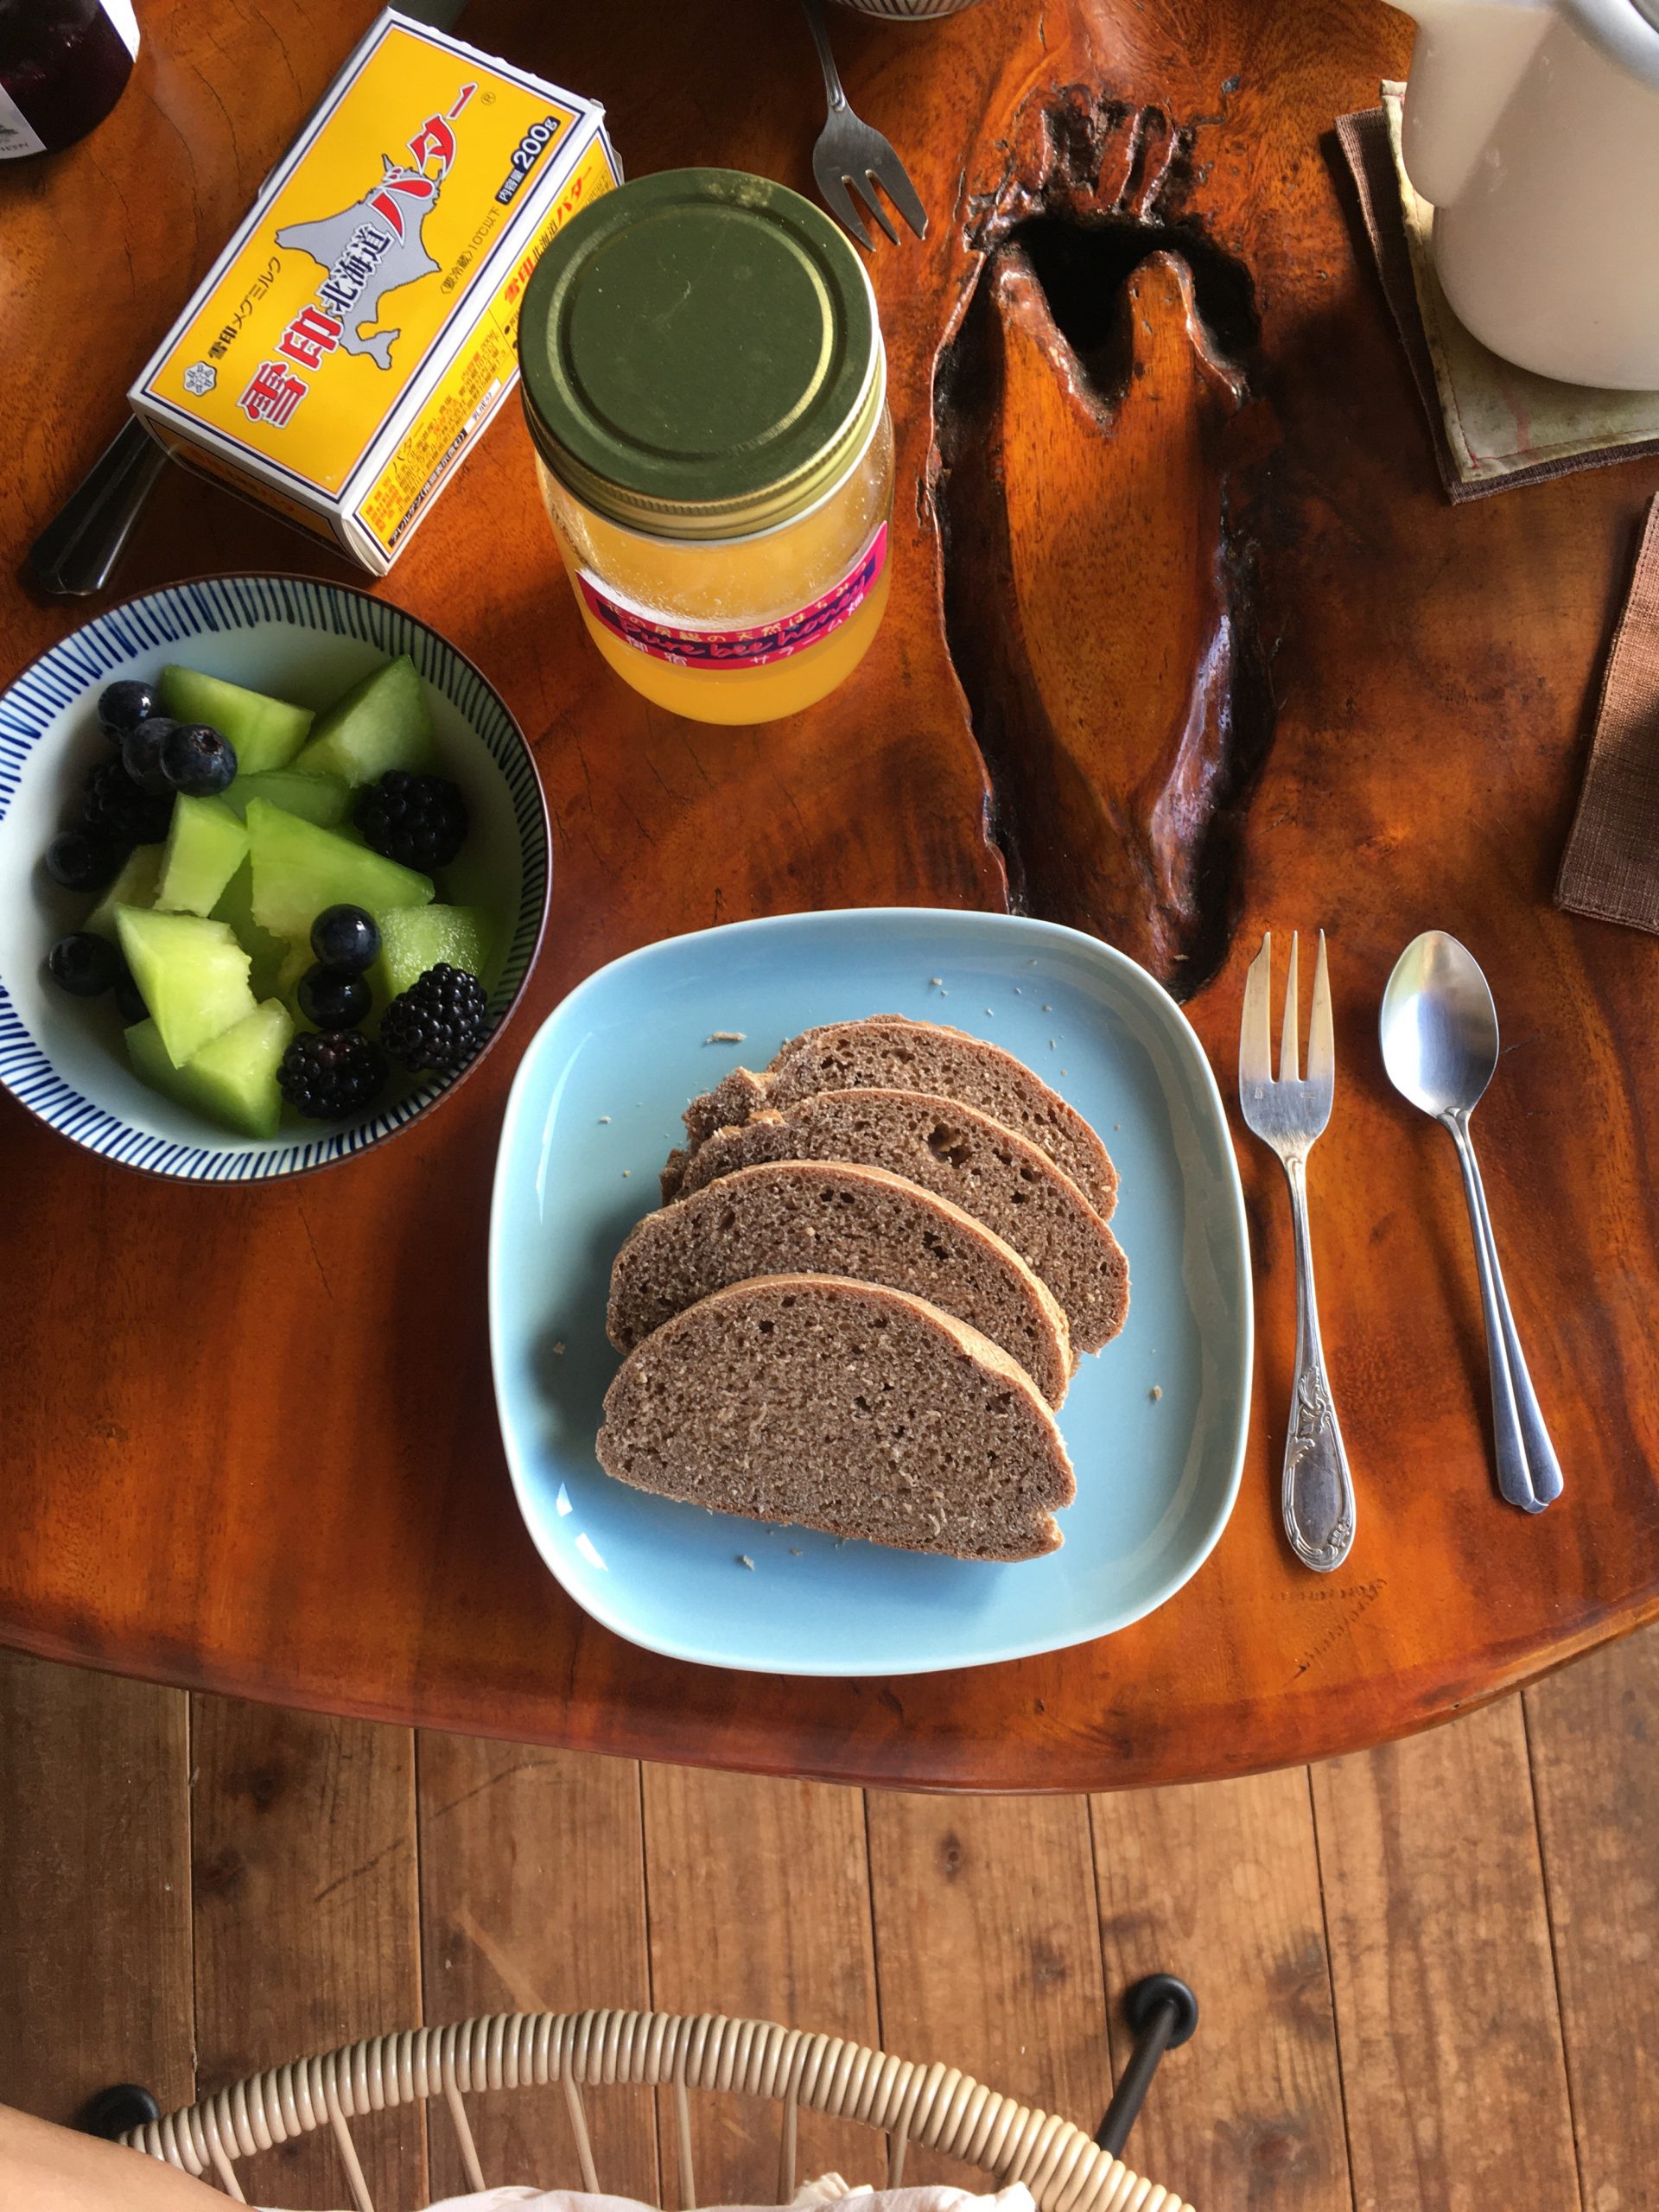
I must say that the fresh fruits and vegetables are so delicious eaten just the way they are that it doesn’t invite to be creative!!! Simple melons, blueberries, blackberries, and now the nashi season has also started… though in the past I tried some nashi tart and baking them, I love them just the way they are… simply peeled and eaten just out of the fridge, that’s when their cold and sweetly perfumed juice is so refreshing! (Top picture)
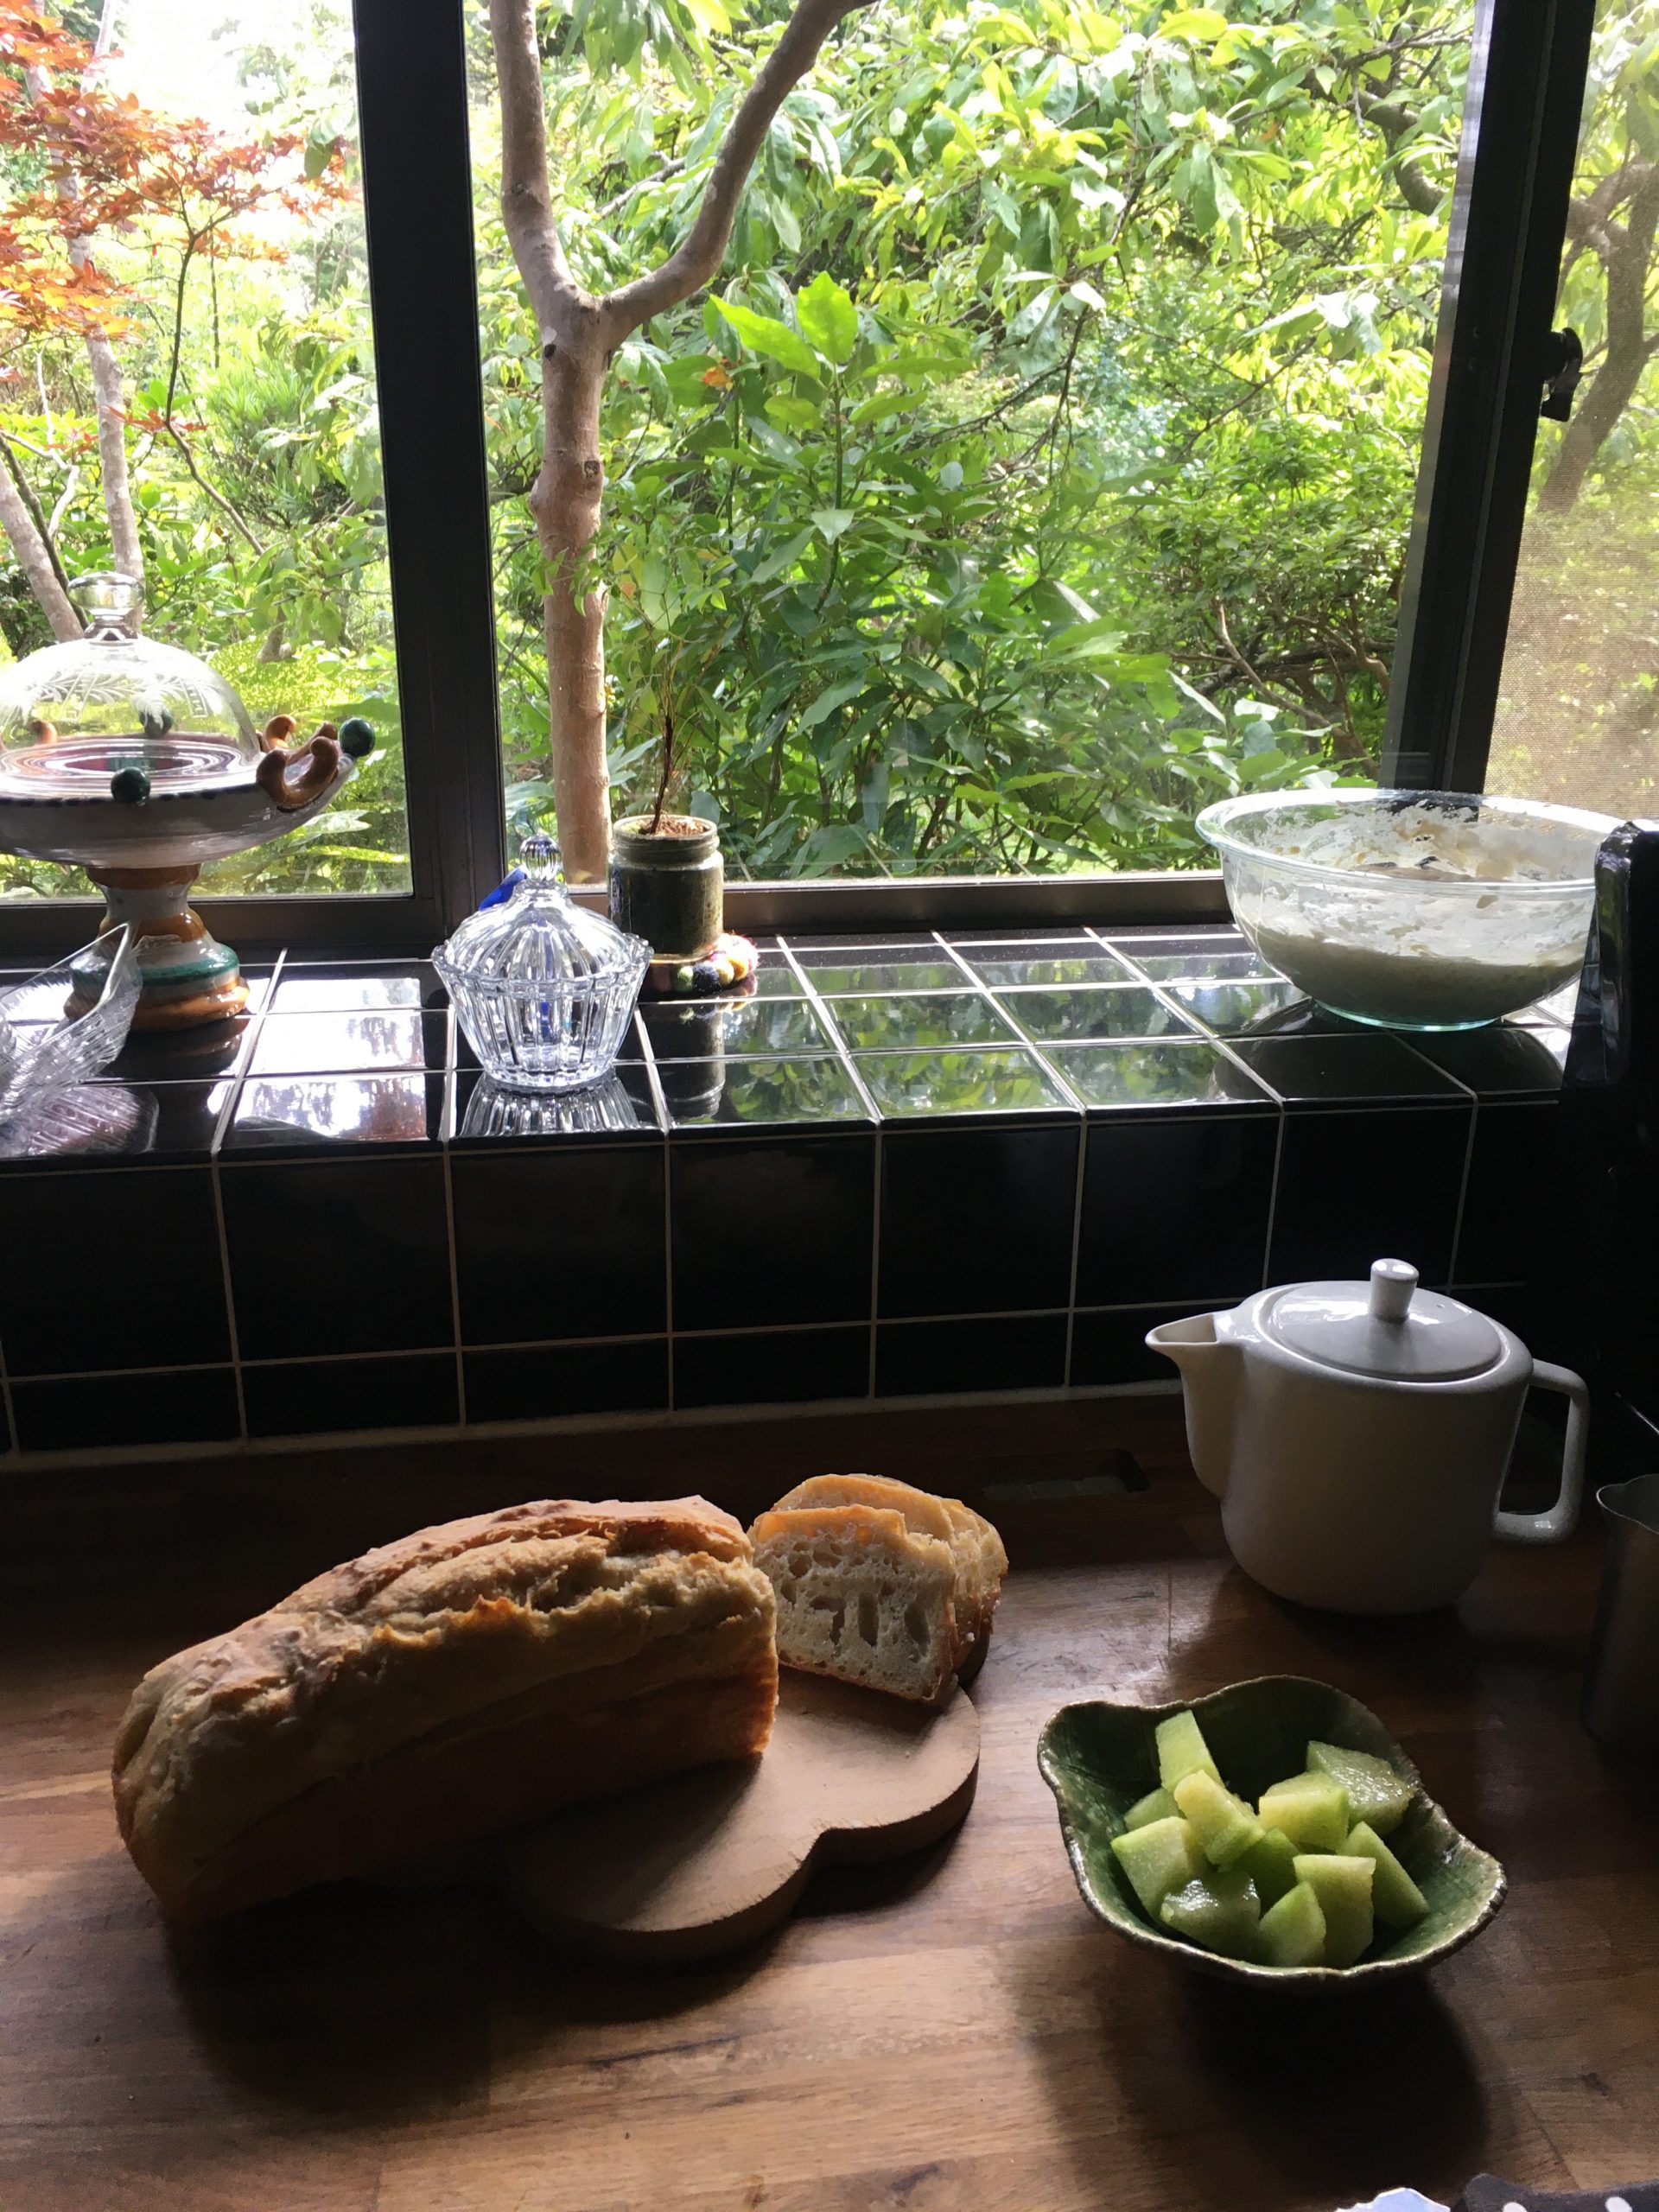
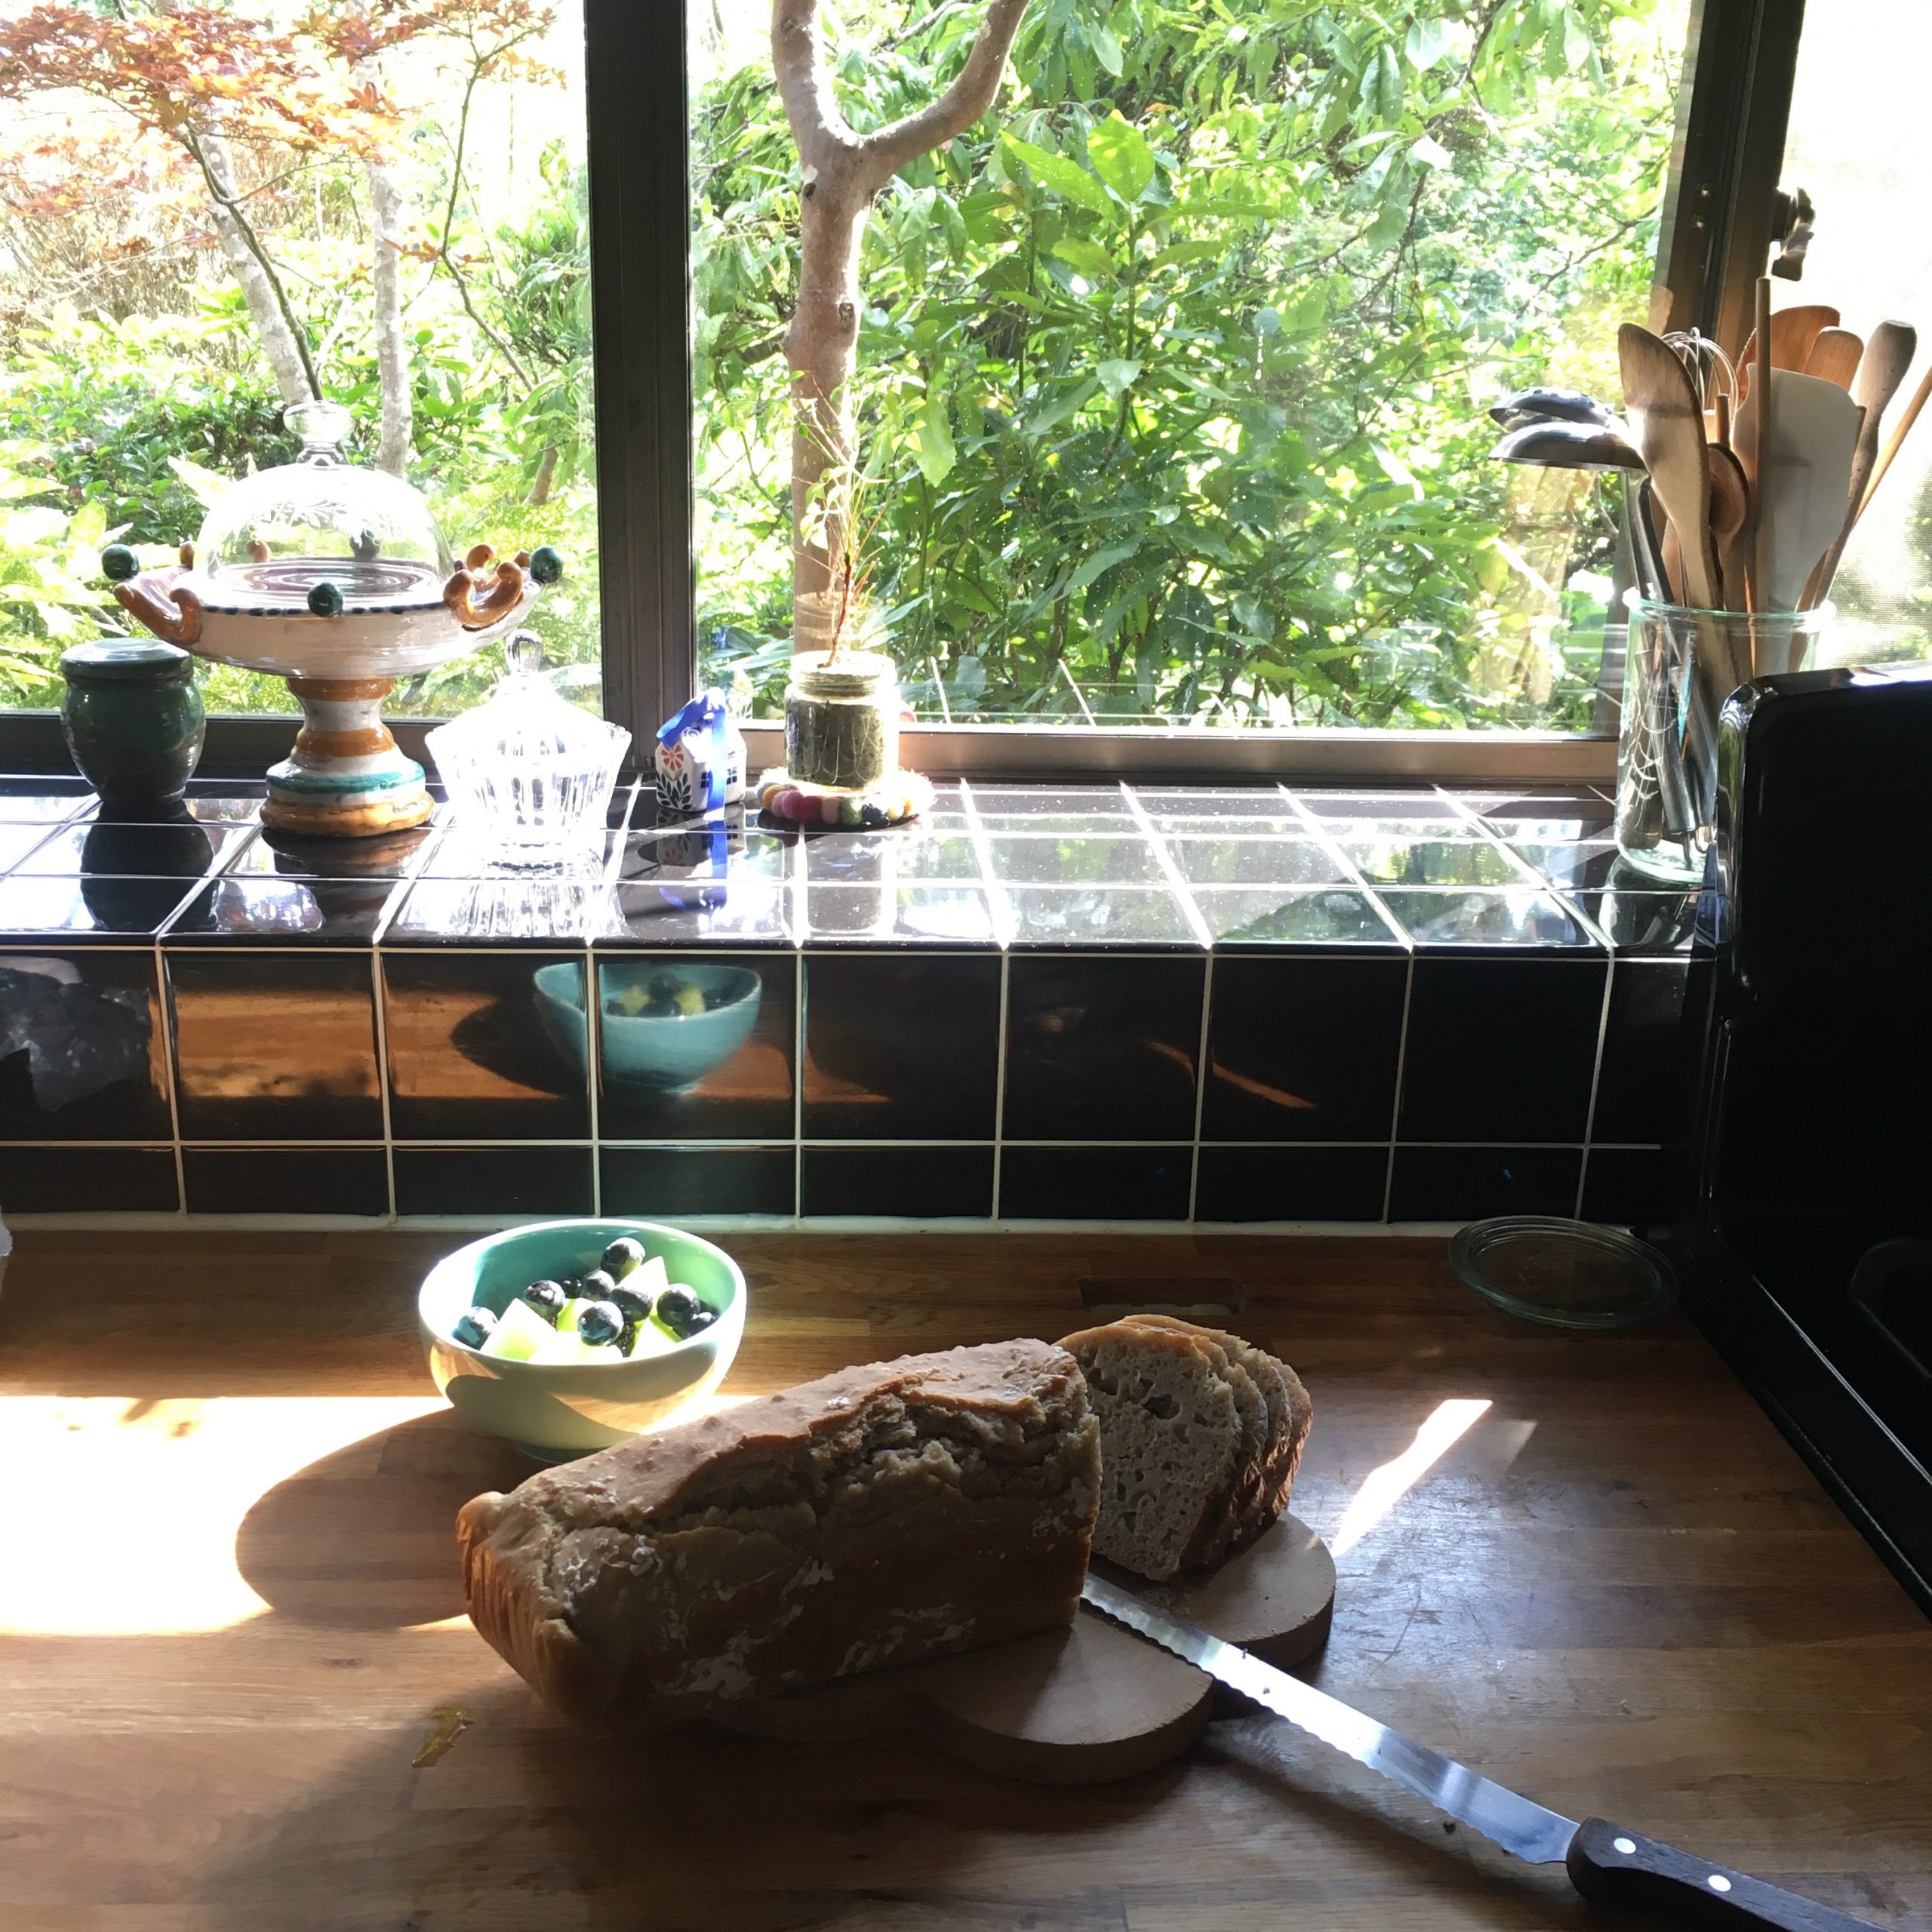
Breakfasts = fresh fruits and sourdough breads
The one thing I steadily do is baking breads and tarts and quiches. Whole wheat, buckwheat, plain, seeds, focaccia, pizza… everything is good for my sourdough! And blueberries tart are also a favorite at home!
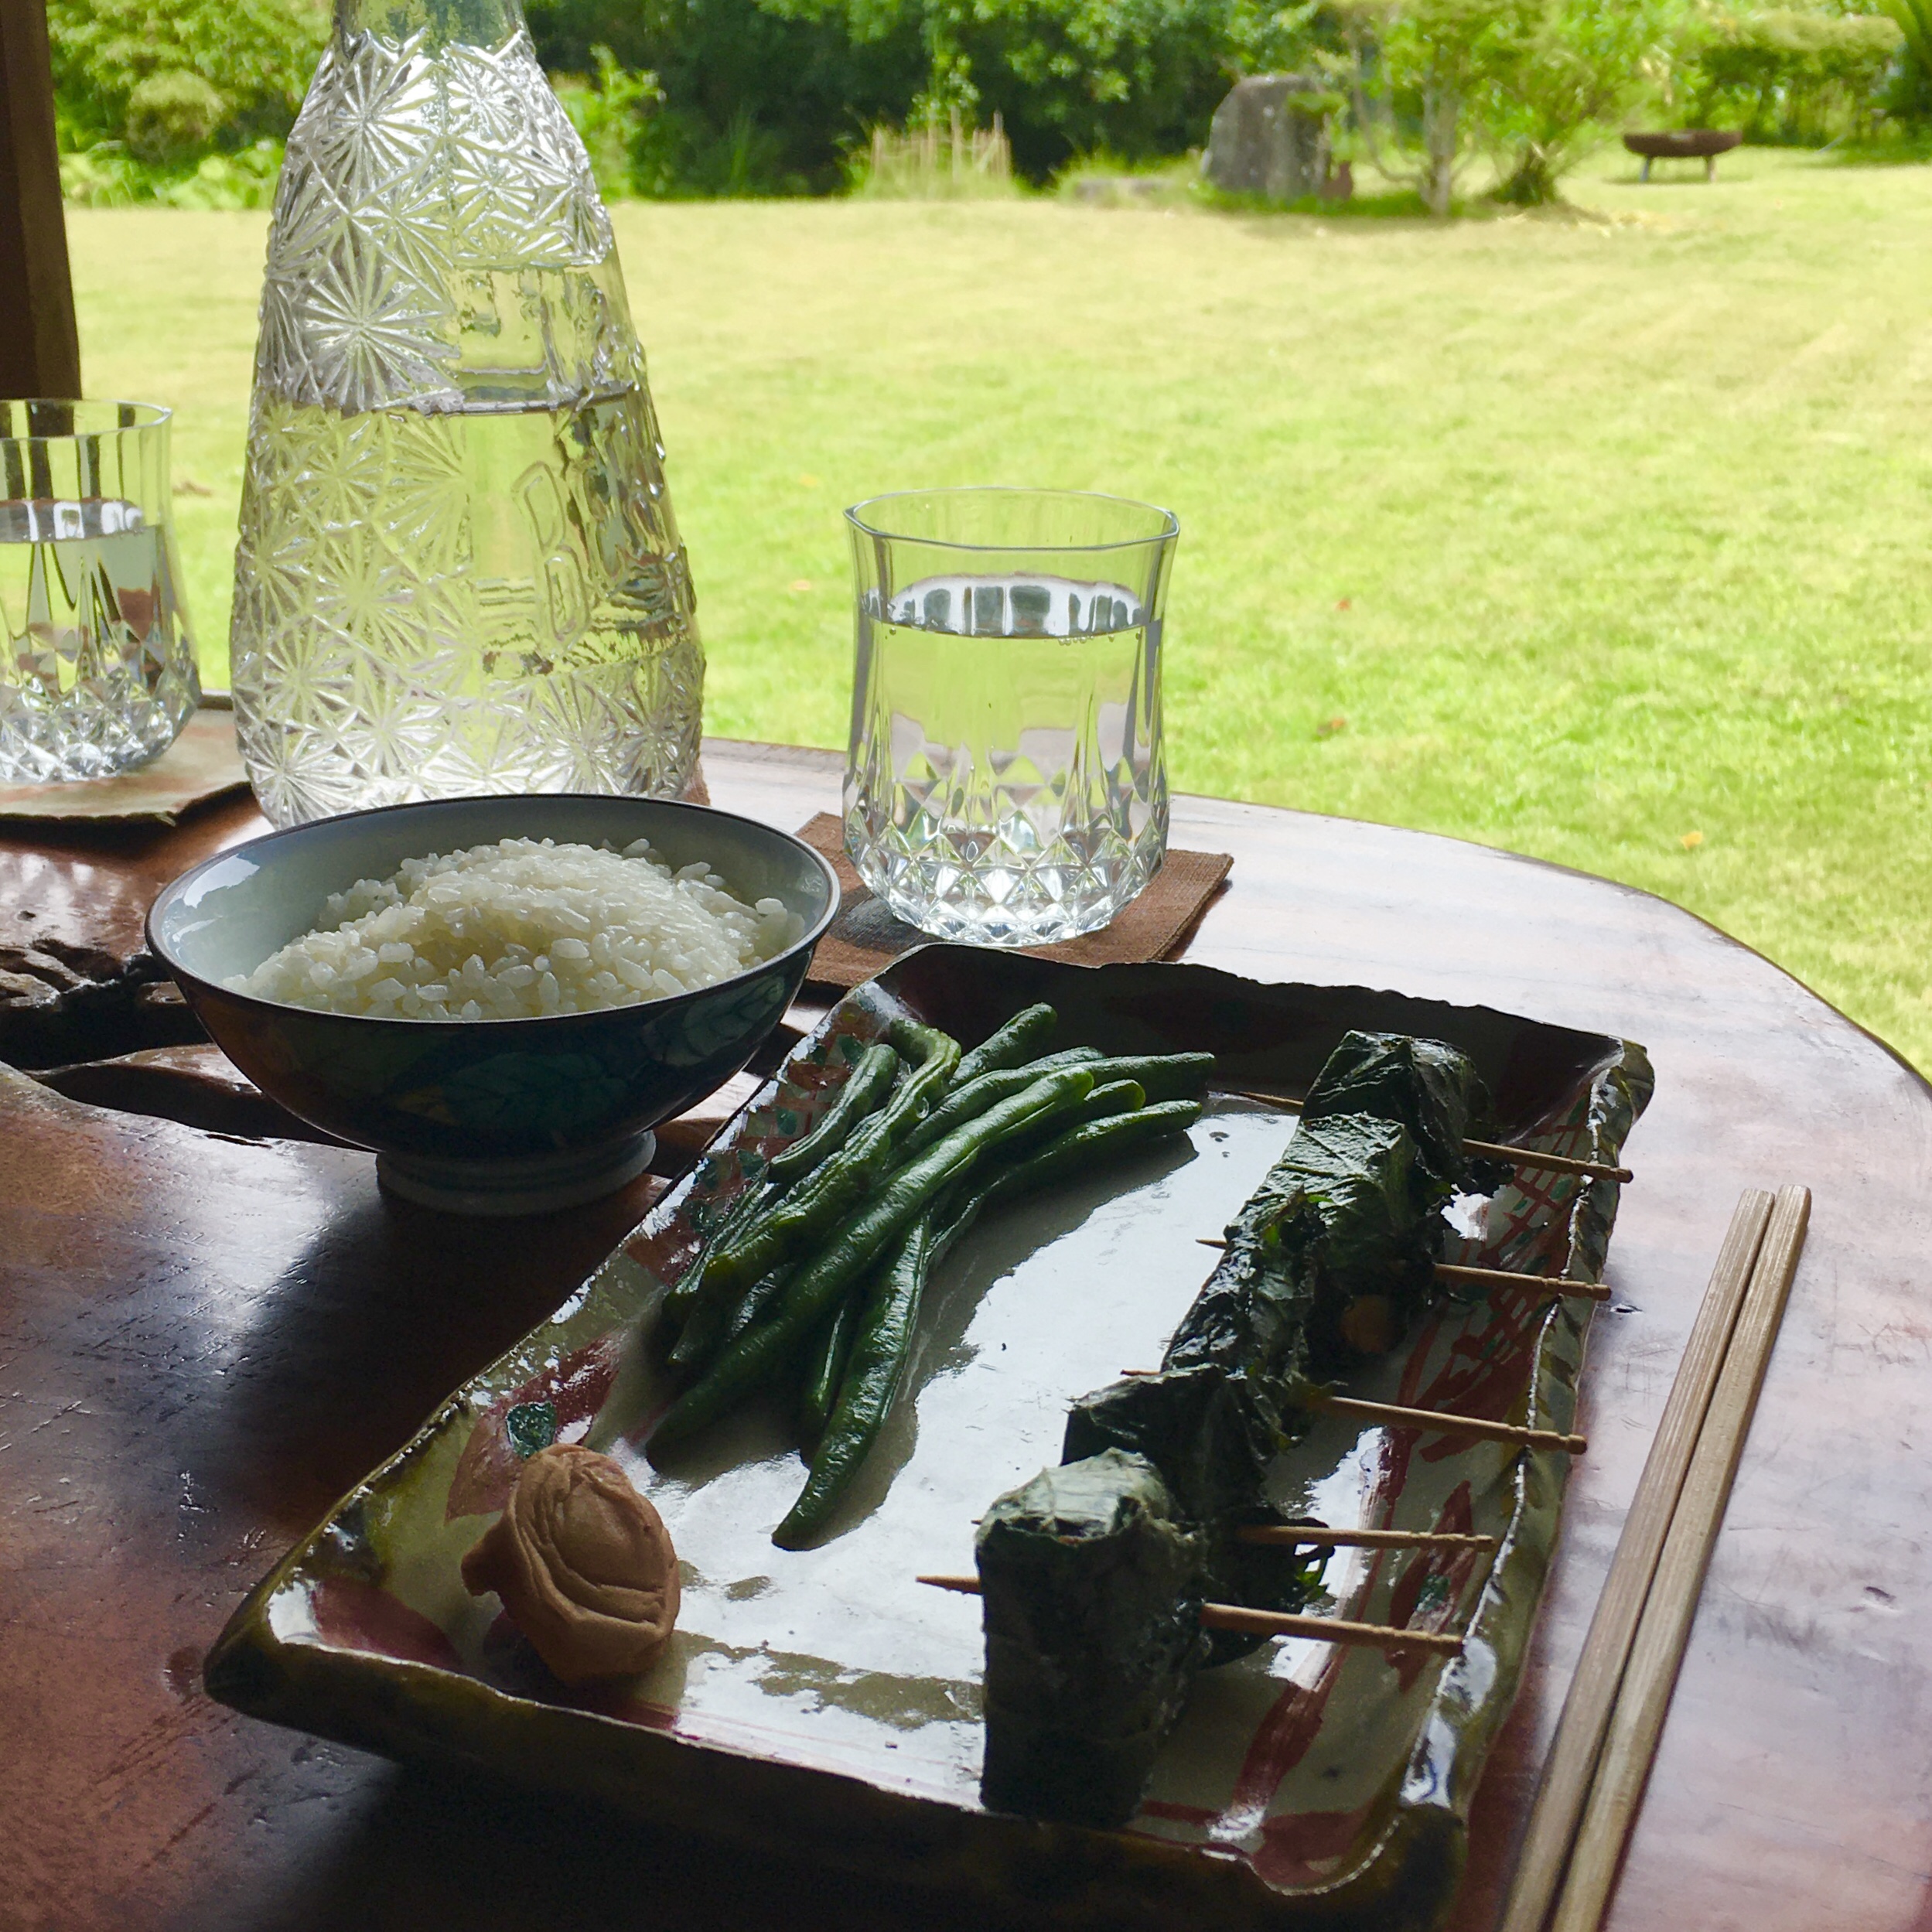
I’ve been also making quite a bit of skewers. Simple but easy to serve and grill in a pan… fish, chicken breast, pork filet… everything is good! My favorite is to roll the fish or the meat in green shiso leaves, that for sure feels like summer. Shiso everywhere! Topping a salad, in white rice…
For our new plot, I hope we could try to turn this desert land into a permaculture forest garden… my experience and skills in growing a kitchen garden are rather close to zero but I really would love to have one of these beautiful forest gardens that populate Instagram… one day maybe… but planning is fun anyway.
When I started making bread I was so unsure of the results that I was making bread for a single breakfast, basically with 160-180g of flour. After I became more confident I increased slightly and went to double, but baking with yeast, the bread had a hard time keeping fresh in the Japanese weather: too dry in winter and too humid almost all the rest of the time. So my basic flour amount stayed around 300g for a loaf most of the time, unless we had guests and the bread would go in no time. But I felt it was such a waste of time and energy. Kneading 300g or 500g of flour is not much different, and heating the oven once is so much more energy efficient.
Since I’ve baked with my sourdough Lois, as I was experimenting I went down to smaller loafs again for a bit, and increasing their size little by little, I also got rid of the scale. I do everything using my feeling, learning to understand how the dough is rather than trusting the scale always. Indeed, I feed my sourdough also without a scale, more than often I keep rather hard but when I want to wash its home I then liquify it to move it before making it hard again when moving in again. And with the weather changing really quickly, the scale was no good to tell me how much hydrated should be the dough, but my hands are rather good. It also helps when working with different kind of flours, like I do.
What I am targeting is a large loaf that can make 3 breakfasts and eventually a few extra slices for tea-time, for this I use the equivalent of 500g or slightly more of flour, which happens to be perfect to use a large part of my sourdough before it becomes too voluminous!!!
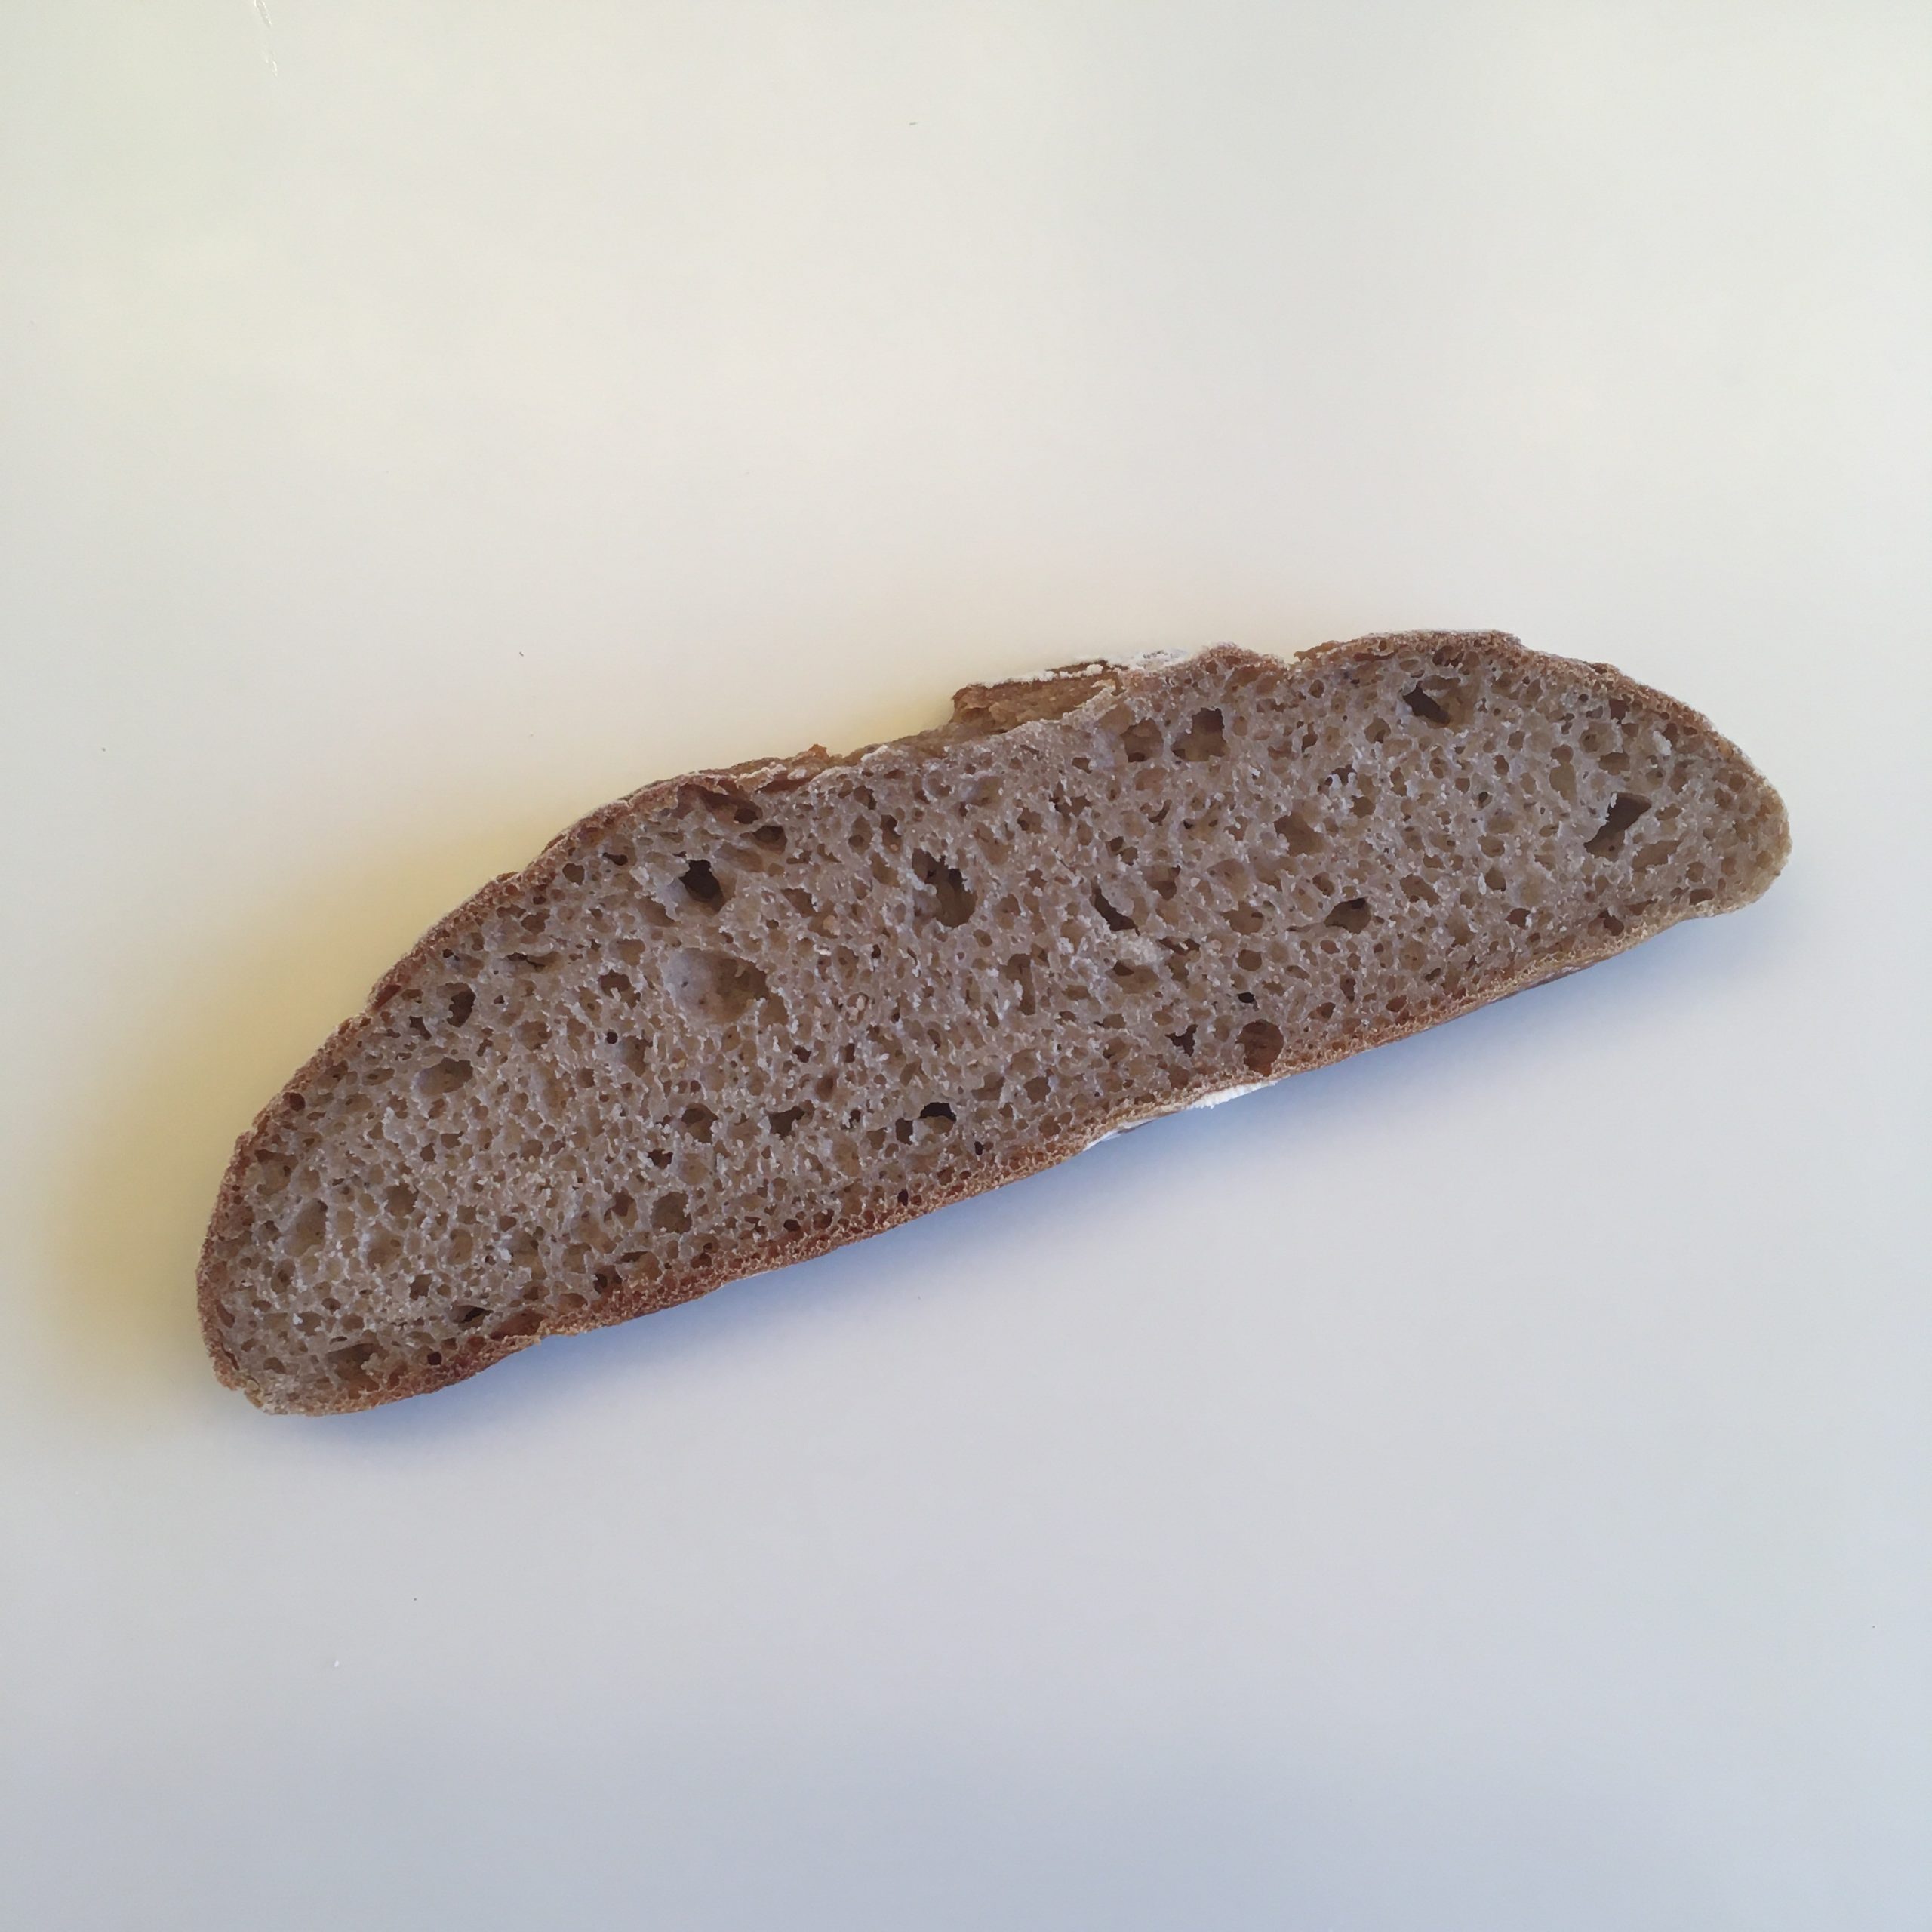
My all-time favorite is definitely campagne bread using about 20% of whole wheat flour or of buckwheat flour. The others that I love baking are the boxed whole wheat bread with nuts, seeds and dry fruits, I love the shape of its slices and the patterns the fruits etc… create in it. or the naturally very sweet whole wheat and chestnut flour bread. While chestnut flour contains no gluten you obtain a denser crumb but all the same delicious.
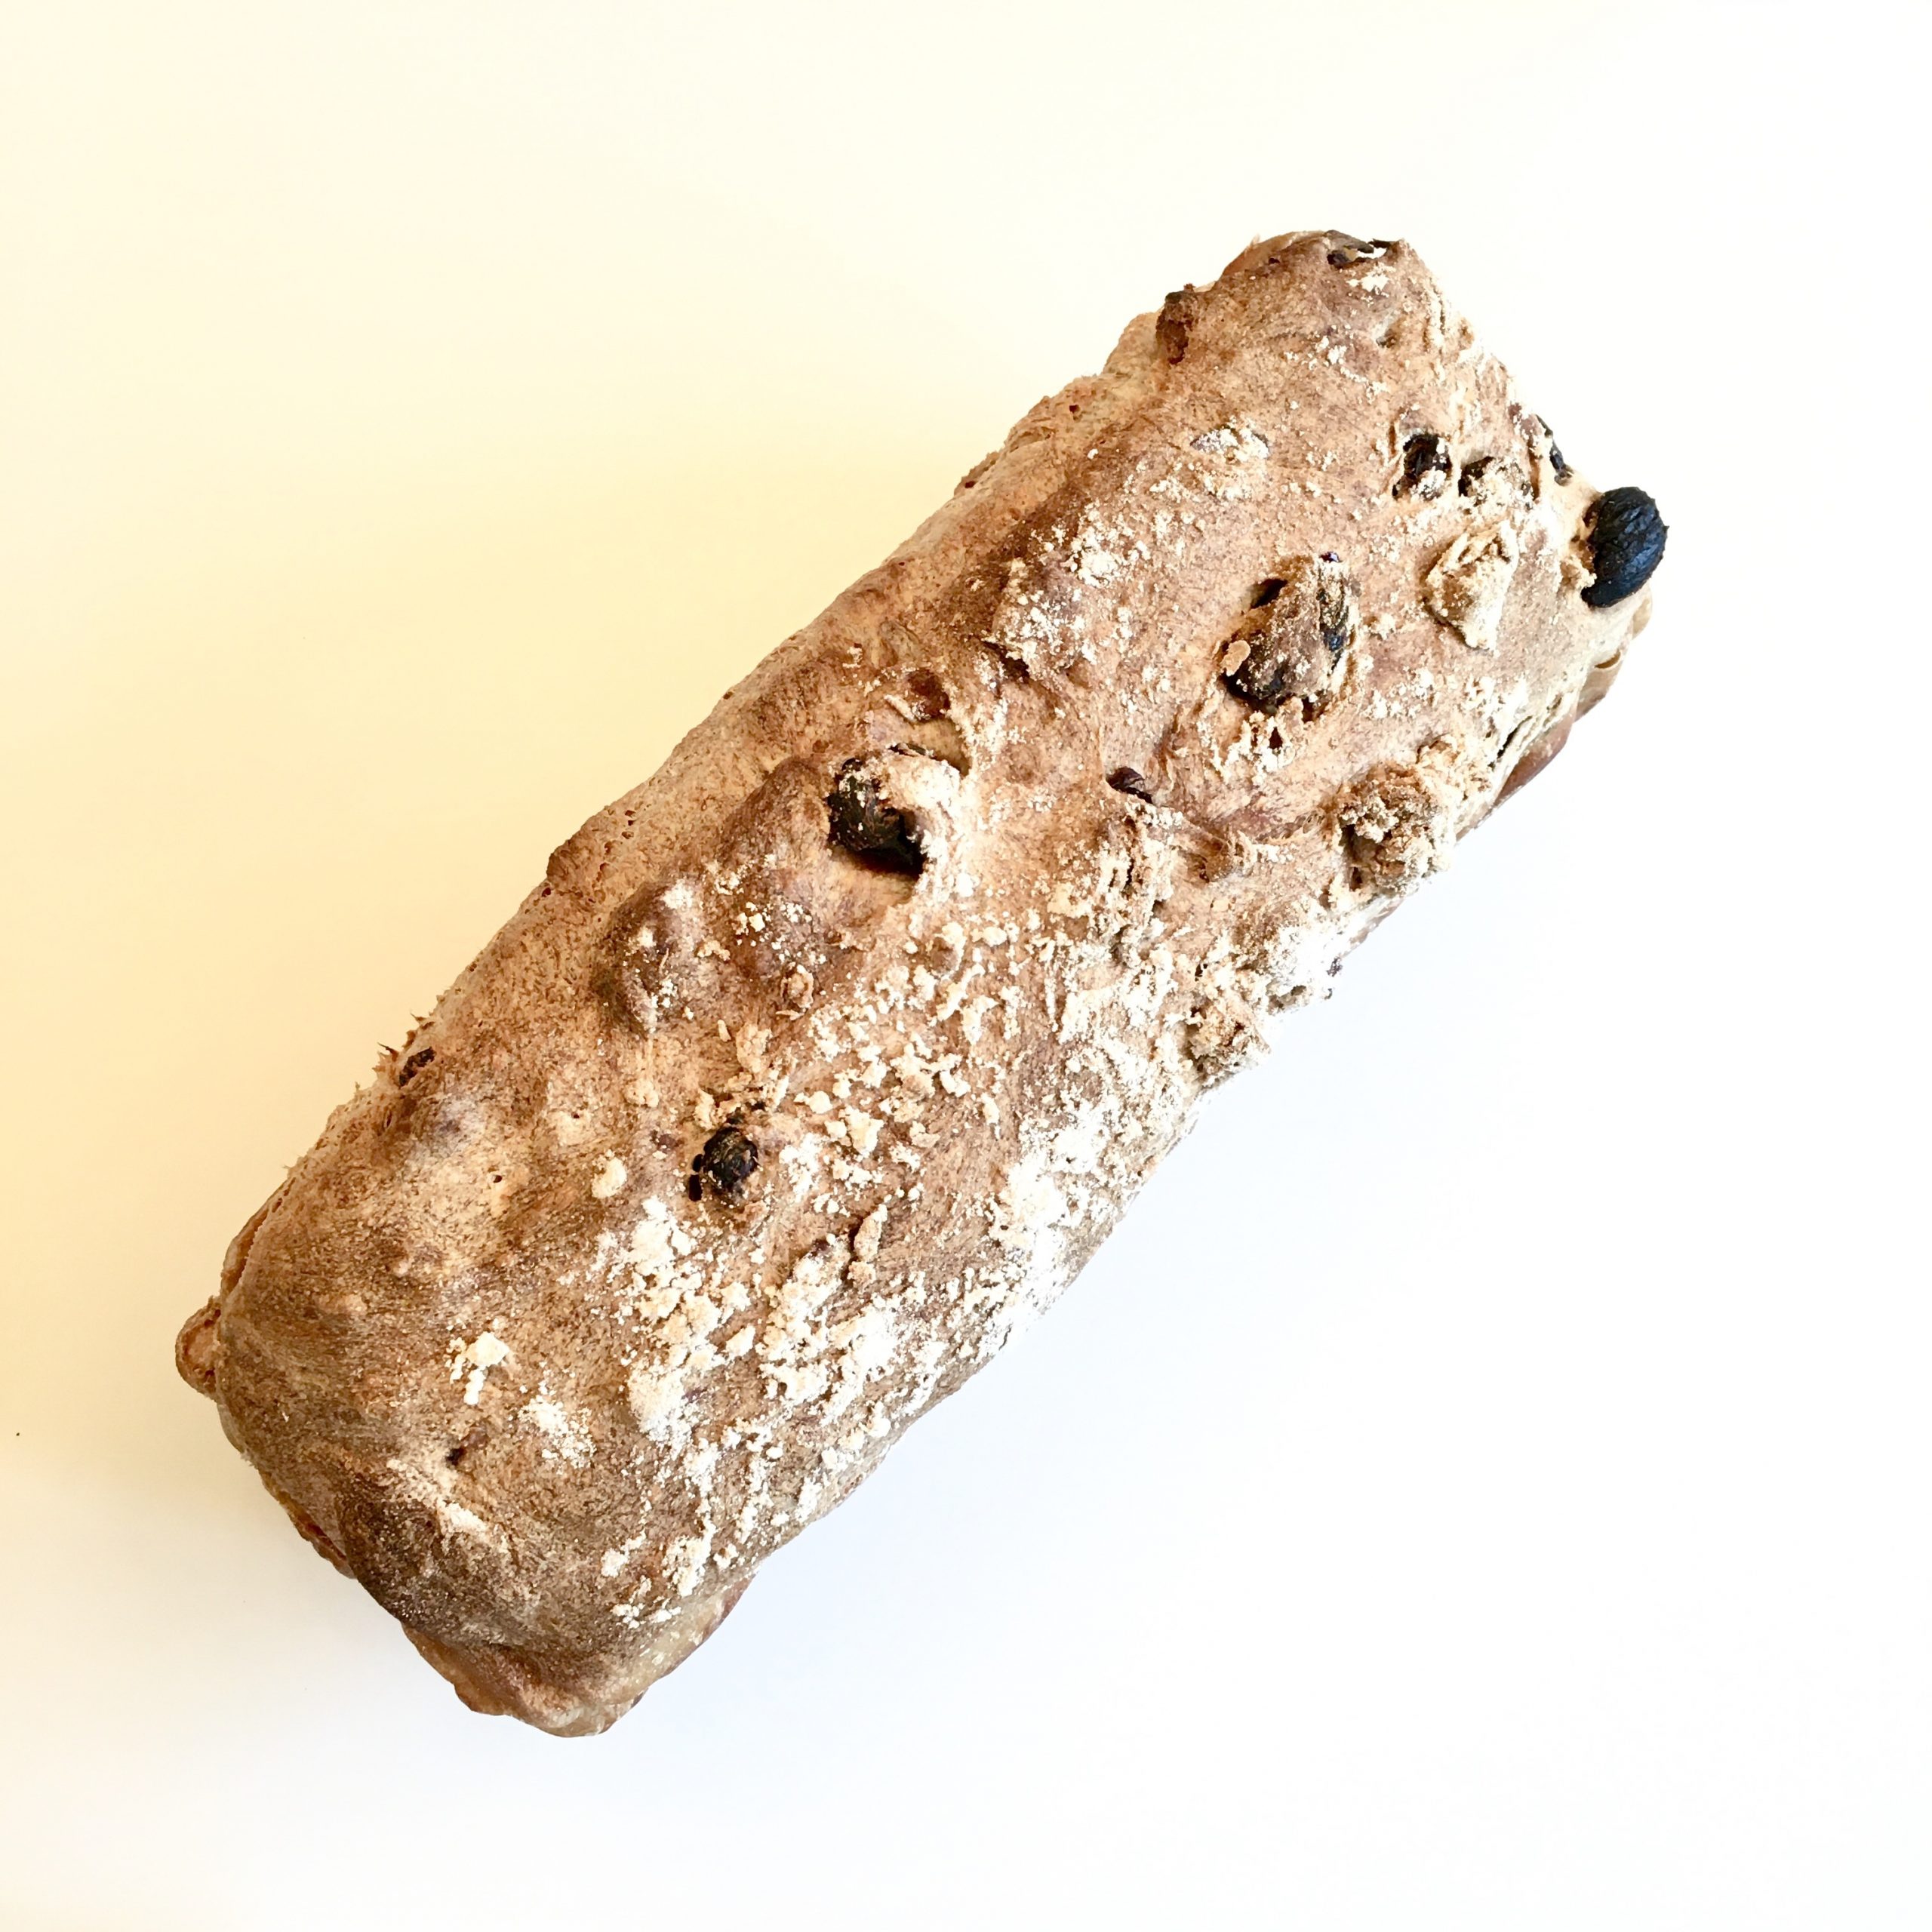
Having a nice loaf of bread waiting for you for breakfast is one of the many reasons I started making bread. Controlling what is inside and where ingredients come from is also as much important. I have had a hard time finding nice flour, I started with using flour I would bring back from France and shifted to Japanese flour, but honestly finding organic or chemical free local flour has been quite a challenge. And when I finally found it (アオヤギ製粉), discussing with the owner to see if they provide me with whole wheat flour, he told me there will be no harvest for the next 3 years because they need to replace some of their equipment… huge deception… so I order pretty much all their stock to support them (hoping it would enable them to fix their equipment faster) and be sure I would have enough for a year (that’s how long I think I can keep it in the Japanese weather). But I am pretty sure I won’t, now that I realized I use about 5kg of flour per month!!!! So I have turned back to the more commercial organic flour I’ve been finding at the supermarket, made in Japan but sold in tiny 500g bags (and this is the big size, the normal being 300g!!!). But at least there is some whole wheat flour which makes me happy. Indeed one of my favorite bread is pumpernickel and the other is a rich whole wheat bread with nuts, seeds, raisins etc… very dense, energetic and delicious! It reminds me some of the breads we often had at home, toasted with butter. So let me share my recipe.
Some of my flour stock… 20kg of flour is basically 4 months of bread making and pasta, quiche, scones, crepes…
Energy packed bread
500g of whole wheat flour
10g of salt
150g of sourdough
30g of brown sugar
70g of sultanas
70g of whole hazelnut
30g of pumpkin seeds
You can add more but I like it that way….
Water
In a large bowl mix together the flour, the sourdough, the salt and sugar. Add water as needed when kneading to obtain a soft slightly wet dough. Then add the nuts, seeds, sultanas. Knead to obtain an homogeneous mixture. Leave to rest for 6 to 24h depending on temperatures. After it has grown, shape it and leave again for another 2-3h. Bake 30 min at 230deg.