Oh no! The pantry is empty!!!

Welcome September!!! Honestly, I don’t remember there was a month of August this year… and September starts in quite a gloomy mood… bye bye summer vegetables and welcome autumn!!! With the first butternut squash in and no more korinki… rain and chilly wind.

But while when I open my fridge it is, somehow, always easy to think about something to cook… my pantry recently has been rather empty. I was so much waiting for the new rice to arrive, and for my favorite flour too, that I completely forgot that we were running out of everything: no more pasta, no more regular flour, very little olive oil… 🤭

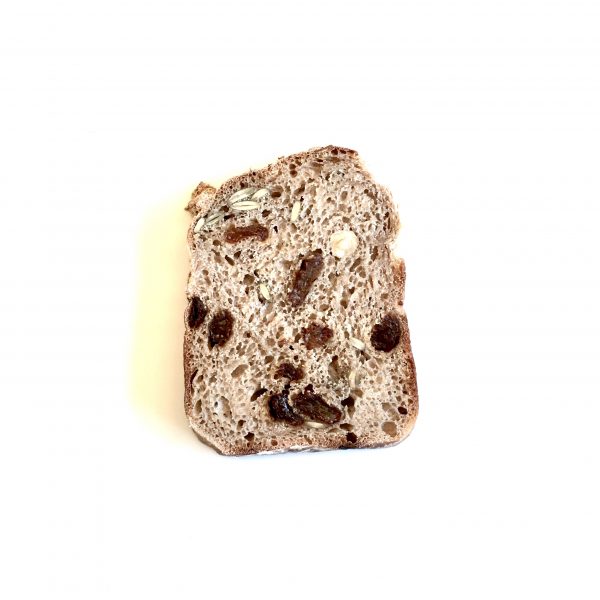
Our bread are now whole wheat bread as this is the only flour I have left. And so our our pancakes and crepes! Not that I dislike it, but A. sometimes prefers a mix of flours.

And last night when it was time to cook dinner, after another long day of work, you know, when you are starving and you want something quickly ready so that you can sit back and have a nice break… the very last thing I had was a pack of dried soba… I was dreaming of pasta, but soba would be a good alternative, well the only alternative! Because there is no meal if there is no carb in our house!

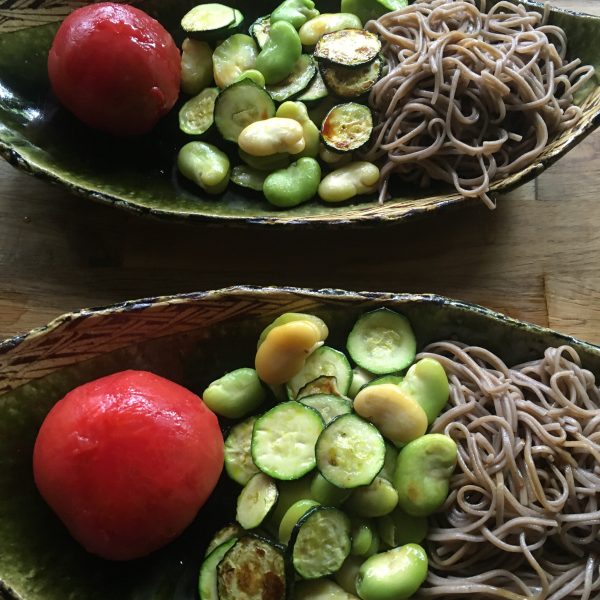
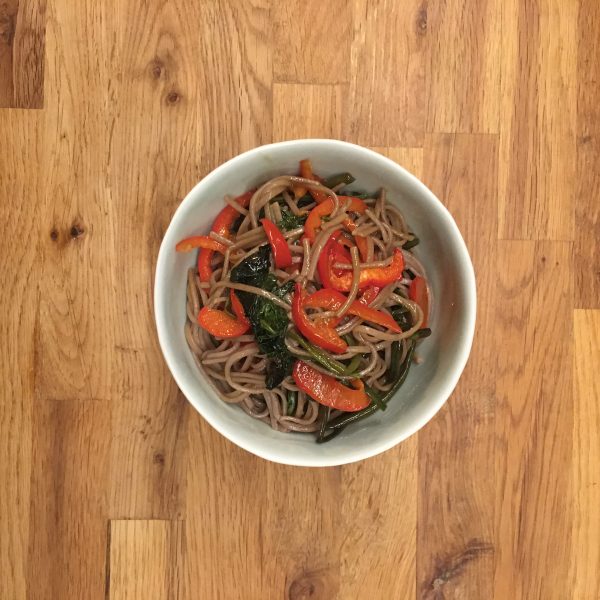
The plating was made in a rush and the picture taking in a rush too, but the recipe ended up being perfectly balanced and taking advantage of the end of summer vegetables that are bell peppers and the nalta jute. So let me share my recipe with you, in case you are in a rush and have soba noodles nearby.

End of summer sautéed soba (2 servings)

  • 2 portions of soba noodles (dry, fresh, semi dry…)
  • 1 bell pepper (color of your choice)
  • 2 big handful of nalta jute
  • 1tsp of olive oil
  • 2tbs of soya sauce

Boil the soba as indicated. Rinse well after they are cooked and keep in water.

While the soba are boiling, wash and chop very thinly the bell pepper. In a large heated pan, add the oil, the bell pepper and cook at medium heat until it soften. Wash the nalta jute and add to the pan. Continue cooking at medium heat until soft too. Drain the soba and add to the pan. Stir well. Add the soya sauce and stop heating. stir again well and serve immediately.

If you manage well you should have your meal ready in 15min!

Better love eggplants!!!

While the summer plays hide and seek, the summer vegetables are still around and should be for a few more weeks.

The great star of the summer in my kitchen this year is eggplant 🍆. We always eat a lot of eggplants in the summer, but this year it looks really like we are eating even more. Last week recipe was a great example but there is much more to do. And today I share with you another Japanese eggplant recipe, vegan this time, as simple as the previous one but with a different set of flavors.

Sautéed eggplants Japanese style

  • 2 Japanese eggplants
  • 1 aburage pad (thin fried tofu sheets)
  • 1 tsp of sesame seeds
  • 1tsp of soya sauce
  • 1tsp of cooking oil, I usually use olive oil no matter what but sunflower or rice oil are OK too

Wash the eggplants and dice them. In a pan set the cooking oil snd heat. When hot add the eggplant and cook at high heat while stirring often. Slice thinly the aburage. Add to the eggplants. Cook and stir until the eggplants are creamy. Add the sesame and soya sauce, stir and serve.

While the base is the same as the perfect eggplant recipe, the flavors are very different. I actually recommend to cook both and compare. It’s perfect to understand umami.

Malaysian inspirations – fragrant rice

In search for new inspirations and continuing with these inspirations from our travels around the world, after Italy (which I must say was an easy one!!!) I decided we would travel back to Malaysia.

A long long time ago we traveled to Malaysia for a few days in Kuala Lumpur and then north to Langkawi. In Kuala Lumpur we were super lucky to spend time with some local acquaintances that were total food fans and introduced us to all the possible food that exist there, discovering the Malay, Indian, Chinese… influences of this very original cuisine. I came back from our trip with a cookbook in our suitcase. A book in the end I enjoyed looking at but barely made any recipe from because I’m always missing an ingredient…

This time I decided I wouldn’t care and would just do with what I had, assuming that what I don’t have in my pantry is something I don’t like much. Hopefully, recently I bough some jasmine long rice as a change from round Japanese rice, because this is probably what would make the most difference. So I did a super simple rice recipe. Of course I didn’t have all the ingredients and adapted it to our taste. I served it with some vegetables simply cooked in a bit of coconut cream.

The recipe was mentioning that it is traditionally served for weddings. But I am simplifying it so much that I don’t even want to use the original name of the dish to call the recipe I have prepared. Yet the degree of satisfaction for that recipe was really high so I invite trying it!

Fragrant rice Malasia-style (4 servings)

  • 300g of basmati or jasmine long rice
  • 350g of water
  • 20g of butter
  • 2tsp of ground cardamom
  • 1tsp of coriander seeds
  • 1 stick of cinammon
  • 2 star anises
  • 2tsp of soya sauce
  • a pinch of salt

The first thing to do is to prepare fragrant water. In a small pan, heat the coriander seeds, the cinnamon stick, the star anise and the coriander for a few minutes. add 50g of water and bring to a boil, add the butter and keep heating until half of the liquid is gone. drain to keep the water and remove the spices. Keep the spices for decorating.

In a pan set the rice, top with 300g of water, add the fragrant water you just made, the salt, and the soya sauce. cook undercover at low heat until all the water is gone. Stop the heating and keep everything in the pan, under the cover for another 5minutes before serving. use the spice for decorating if you want to.

The garden presents…

On a rainy Sunday like today we met with what would be our little hideaway and resting place. (More about how we ended up here here)

Hydrangeas in our garden

The few things that I found charming as soon as we arrived was the hydrangeas, in full bloom under the rain, with their vibrant gradation of blues and purples. The abundant plum trees covered with fruits, and the lush green of the Japanese maple trees, the gingko, the pine and the azaleas. Everything that makes a Japanese garden, Japanese. I obviously didn’t see many thing that were also there: the loquat tree, the strawberry tree… After 8 years I now know pretty much all, even if I am uncertain about the 3 or 4 different types of plums we have, and every year I harvest more fruits than we can process! In particular the plums and the strawberry tree fruits. So I give away a lot. This year 15kg of plums went to my secretaries at the university!!! And used 5kg for syrup and 3kg for umeboshi. The rest is for the birds, the worms and the ants ;).

After years of struggle making umeboshi and failing, I realized umeboshi are not so difficult to make if you have the proper instruments. I use to make them with whatever I had, before investing in a proper pickle box, that is wide enough and has a lid with a spring where you can apply sufficient pressure and get rid of the heavy stone, the overflowing ume juice and the failure… largely due also to the fact that I cannot check them every day. So if you plan to make umeboshi I highly recommend you invest in the proper recipient. I use a pickle box called Picre.

Umeboshi

  • 2kg of Japanese plums (yellowish rather than greenish)
  • 360g of salt

If your plums are really hard or toi greenish, dip them in water a few hours before starting.

Wash them and pat them dry carefully. Remove the stems.

Sterilize your recipient. It should be 3-4 times the volume of your plums to avoid overflowing accidents. Set half of the salt in and create an even layer. Organize the plums on the layer in order to remove space between the fruits as much as possible. Sprinkle a bit of salt. Create a new layer on top remove space as much as possible between all fruits. Sprinkle salt and repeat until all plums are well organized in a compact manner. Sprinkle the remaining salt on top.

Sterilize the lid and set on top to gently squeeze the plums. Set a heavy weight or pressure on top. After a few days the liquid from the plum will start to be released and a brine will be created. This is umezu. A precious liquid to use for pickling, energy drinks etc… after a week, the liquid should be about the height of the plums. It will continue rising and can be 2-3 times the height of your original plums height hence why choosing a recipient big enough.

Leave that way until the end of July. And see you then for the next step!!!

Rakkyō

If you have ever eaten curry-rice in a restaurant you surely have eaten the little white pickle served with it and then you have eaten pickled rakkyō 薤. A little vegetable that looks like a shallot a bit and is often called Chinese onion. I love the crisp and fresh taste it has and it’s hard to stop eating! A little like French cornichon, but less sour and salty!!!

The season for fresh rakkyō harvest is right now and it is fairly easy to find in coop and farmers markets. Pickling them is rather simple though washing and pealing is a bit tedious and you have recipe several options.

The easiest one is to use a prepared ready to use “rakkyō su” which is a mix of vinegar, sugar, dashi that is chiefly used for pickling rakkyō but can also be used for other preparations such as curry onion pickles. Though I am not necessarily a fan of ready to use products, they are a good way to start when you are unsure of the result and what you do and want to maximize success.

Other methods are to prepare your own brine for pickling the rakkyō. One recipe I have in an old Japanese cookbook is quite lengthy and probably the most genuine one, yet I couldn’t find a similar one anywhere, so I tempted to share it with you. My rakkyō are still in their first week of picking so I don’t yet the result… we’ll see!!!

So first the recipe for a quick sure outcome, and then the lengthy one. Choose the one you prefer!

Easy-peasy pickled rakkyō

  • 1kg of fresh rakkyō
  • 1 bottle of rakkyō su らっきょ酢

Start by washing the rakkyō and removing the first layer of skin to obtain a smooth and shiny surface. Remove the hard base and top too. Bring a large pan filled with water to a boil and throw the rakkyō in for one minute. Drain and pat dry the rakkyō.

In a sterilized bin put the dry rakkyō and cover with the rakkyō su. Close the bin with a lid. Leave to rest for 14 days. Shake the bin 2 times per day on the first 3 days. After 14 days enjoy!

Classic recipe of pickled rakkyō

Brine for pickling (used 14 days later)

  • 2 cups of rice vinegar or other white mild vinegar
  • 300g of sugar
  • 1 cup of white umezu (brine of the umeboshi unflavored with shiso), can be replaced by 1 cup of vinegar + 1tsp of salt
  • 1/2 cup of mirin or konbu dashi
  • 5 dried red pepper (optional)

Pickling step 1

  • 1kg of fresh rakkyō
  • 30g of salt
  • 4tbs of vinegar
  • 1l of water

Start by washing the rakkyō and removing the first layer of skin to obtain a smooth and shiny surface. Remove the base and top too.

In a pan, set the water, salt and vinegar and the prepared rakkyō. Bring to a boil and stop right away. Drain and pat dry and put in a bin or a pickle-pot. Cover with the brine you made or of commercial brine. If you can set a heavy lid, otherwise everyday shake the bin. Wait for two weeks.

Pickling step 2

After two weeks drain the rakkyō and set them in salted water for 3-4h. Renew 2-3 time the water. Then set to dry in the air for half a day. Ideally in the sun, but any well ventilated place will do.

Finally prepare the brine by mixing all the brine ingredients together (but the red pepper) and bring to a boil. In a sterilized bin put the rakkyō and cover with the brine. Add the red pepper if you plan to use some.

Now it’s ready. Rakkyō in brine should keep a year or so., so enjoy!

Fireflies season

The end of May in Ohara is a beautiful season. The greens on the hills change from fresh greens to rich ones and the paddies from the typical yellow green if very young rice plants to a beautiful shamrock green. It is also the beginning of the rainy season, of hydrangeas blooming and warmer days. At bight it is possible for a few weeks to see fireflies.

Japanese have something for fireflies 蛍 hotaru. I didn’t recall seeing fireflies often as a child, a rare few times in Lozere, but not much. And since we moved to Japan and went to see fireflies at Chizanso in Tokyo with our friend I. who always had the best info about things to do, I kind of understand the sweet magic and the kind of nostalgia they bring. Seeing fireflies at Chizanso was great, but it is an orchestrated event when they release fireflies in the garden. While the magic is there, the artificiality of it is hard to neglect. It’s like seeing lions in a zoo…

In Ohara we are blessed with rather clean streams of water and great nature (I can’t say it is everywhere when I see the palettes of glyphosate at the garden center…) and we can see fireflies in their ecosystem. We first saw some in our garden one Sunday night, and since then every year we go for a walk when the season comes. And for sure with a bit of patience and the habituation to darkness you can spot a little green light blinking. If we want to be lazy, we walk to the nearest stream in the paddies, and there we can see plenty.

A firefly in our garden

The fireflies season is the perfect transition between the end of spring and the beginning of the summer. It brings many greens in the plate broad beans and zucchini. Tomatoes from the green house that are ripe, sweet and juicy. It inspired me for the recipe of the simple plate on the top picture: soba, fava beans and zucchini in soya sauce and a peeled tomato, also with soya sauce. I love when the juice of the tomato mix in the soya sauce, eaten together with the cold soba it is divine.

Whole wheat bread

Having a nice loaf of bread waiting for you for breakfast is one of the many reasons I started making bread. Controlling what is inside and where ingredients come from is also as much important. I have had a hard time finding nice flour, I started with using flour I would bring back from France and shifted to Japanese flour, but honestly finding organic or chemical free local flour has been quite a challenge. And when I finally found it (アオヤギ製粉), discussing with the owner to see if they provide me with whole wheat flour, he told me there will be no harvest for the next 3 years because they need to replace some of their equipment… huge deception… so I order pretty much all their stock to support them (hoping it would enable them to fix their equipment faster) and be sure I would have enough for a year (that’s how long I think I can keep it in the Japanese weather). But I am pretty sure I won’t, now that I realized I use about 5kg of flour per month!!!! So I have turned back to the more commercial organic flour I’ve been finding at the supermarket, made in Japan but sold in tiny 500g bags (and this is the big size, the normal being 300g!!!). But at least there is some whole wheat flour which makes me happy. Indeed one of my favorite bread is pumpernickel and the other is a rich whole wheat bread with nuts, seeds, raisins etc… very dense, energetic and delicious! It reminds me some of the breads we often had at home, toasted with butter. So let me share my recipe.

Some of my flour stock… 20kg of flour is basically 4 months of bread making and pasta, quiche, scones, crepes…

Energy packed bread

  • 500g of whole wheat flour
  • 10g of salt
  • 150g of sourdough
  • 30g of brown sugar
  • 70g of sultanas
  • 70g of whole hazelnut
  • 30g of pumpkin seeds
  • You can add more but I like it that way….
  • Water

In a large bowl mix together the flour, the sourdough, the salt and sugar. Add water as needed when kneading to obtain a soft slightly wet dough. Then add the nuts, seeds, sultanas. Knead to obtain an homogeneous mixture. Leave to rest for 6 to 24h depending on temperatures. After it has grown, shape it and leave again for another 2-3h. Bake 30 min at 230deg.

Going blank…

Times like this one happen more then often… when we are so busy with “other things” that cooking comes last… it also synchronizes with lack in novel ingredients and a total blank in terms of inspiration. So I am back in autopilot mode. Cooking simple, ultra simple things that we love and that don’t take much time. I think also the technical issues I am facing with WordPress recurrently are not helping, as most of the pleasure of sharing a recipe or an experience here is destroyed by the “error uploading” message that pops again and again.

My morning and afternoon tools…

So, food has been nourishing so that a morning in the ocean can be followed by an afternoon in the garden. Spring brings a lot of work in the garden. Everything suddenly grows so quickly. And this year plums may be 2 to 3 weeks earlier than usual, so better be ready…

A simple chick peas and tomatoes spicy raggu with a generous slice of sourdough bread

But probably my most “creative” recipe of the past 10 days is a revised version of the cocoa cream for a vegan coconut all white dessert. This recipe of the cocoa cream really got me into making desserts, and it is so easy to make variations of it (I have a few others in mind). So while I’m trying to find new ideas, or rediscover old ones (which the original reason for which I started this blog), let me share this super easy one.

Coconut cream (4 servings)

  • 200ml of coconut cream
  • 20g of corn starch
  • 30g of sugar
  • 50ml of water

In a pan, warm the coconut cream, add the all the ingredients and stir until it starts thickening. Serve ib bowl, let cool down before eating.

See? That s’ simple isn’t it ?

Double tap ashitaba gnocchi

For those who know me, it is no secret we love ashitaba 明日葉 since we visited Hachijojima a long time ago. Actually ashitaba is a native plant of Japan and more particularly Izu islands (Hachijojima…), Miura peninsula and Boso peninsula (where ouf country house is). So imagine how happy I am every year when the season comes!!! One of my all-time favorite is my recipe of ashitaba is ashitaba gnocchi, that in my opinion I don’t make often enough. And this time I decided to go for a double ashitaba gnocchi+ashitaba pesto.

Its taking the flavor to an extra level of green and refreshment. The recipe is simple as always and not very different than the previous ones. But just in case you would need one…

Ashitaba gnocchi & pesto (2 servings)

  • 2 potatoes
  • A bouquet of ashitaba
  • Salt and pepper
  • Olive oil
  • Flour

Boil the whole potatoes until tender. Peel and mash. Blanch the ashitaba. Blend without water until smooth. Filter half of the blended mixture through a tea net, jeep both the juice and the leaf puree.

Mix the leaf puree with the potatoes. Add flour to obtain a slightly sticky dough. Shape the gnocchi. Add a but more flour if needed while shaping them.

Pour back the juice in the blender, add olive oil, salt and pepper. Then move all to a pan and heat at medium heat while stirring once in a while.

Boil a large amount of water, and poach the gnocchi. When they float move them to the pan and roll them in the sauce to coat them. Serve and enjoy right away.

Proudly powered by WordPress | Theme: Baskerville 2 by Anders Noren.

Up ↑

Verified by MonsterInsights