Potato salad

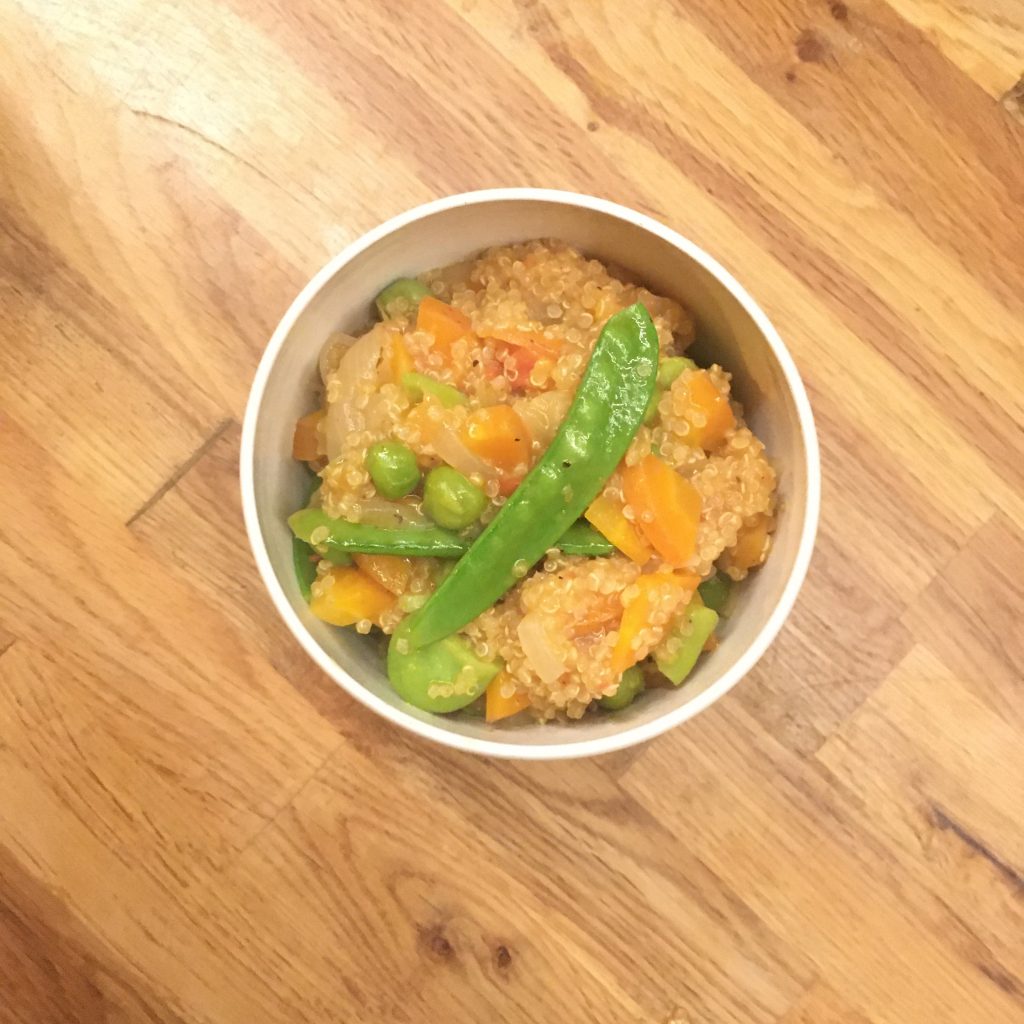
For those that have been to Japan they know that potato salad ポテトサラダ is a quite important dish in Japanese cuisine. It is probably one of this japanized version of western food that is so popular it looks like genuine Japanese food!! You can find potato salad on the table at every party and it is so common that it can be found in combini as well. While the idea of a potatoes base salad with vegetables all creamy and mushy is very nice, just like the kabocha salad. But the problem with most potato salad is the abundance of mayonnaise that just makes it fatty and taste like mayonnaise, nothing else. I do like fresh homemade mayonnaise once in a while but I am not such a fan to bother making some in particular if I have no plan for the egg white. But I love homemade potato salad, so I just replace the mayonnaise with a simple soft boiled egg with olive oil. That’s it! It’s faster, more digest and none the less tasty! Because fast is an important condition for preparing lunch when we are back from the ocean.

So here is my potato salad recipe with all ingredients from Isumi except the olive oil from Tuscany and the salt and pepper.

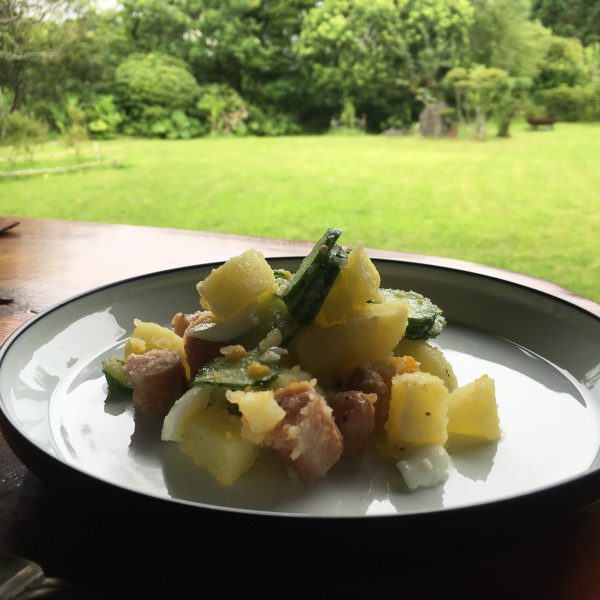
Potato salad (2 servings)

  • 3 mid size potatoes that becomes mushy when boiled
  • 1 Japanese cucumber
  • 5 Japanese sausages
  • 1 egg
  • 1tbs of olive oil
  • Salt and pepper

In a pan boil some water. In the meantime peel and cut the potatoes. Add to the boiling water, add the sausages, and later the egg. Boil until the potatoes are soft. The egg shouldn’t be boiled longer than 5min to keep the yolk creamy. Cut the cucumber in thin slices. Drain the potatoes and the sausages. In a bowl, set the cucumber, the potatoes. Cut the sausages in 1cm long pieces, add to the bowl, stir. The potatoes should start mushing and mix well with all the other ingredients. Add the olive oil, salt and pepper. Finally, add the egg cut roughly. Stir well again. Eat right away or later!

Have a good day!

Edamame ravioli

Every week, I am hoping for a more quieter week and every week day is getting busier and I end up with very very little time to cook… for example today my lunch was some raw carrots, a piece of Comte cheese and some nuts… as I rushed between meetings and things to do. It is also often a bowl of rice topped with something rapidly cooked (more coming about that soon). So when I manage to have just a little more time to cook I jump on the occasion and I cook some more fancy things. “Fancy” being almost exaggerated!!
The season for edamame is starting now and I got some from the farmers market, which I was thinking I would just boil for a quick use in salad or with rice but then I had this little window of time for cooking and I was all set for making edamame gyoza, but then thought that as delicious it seems, it would be almost too conventional in traditional Japanese flavors, so I decided to opt for the Italian version: ravioli!!!

While making ravioli takes a little bit more time, it is so rewarding and we love them so much that it is always worth eating a bit late!!! For this edamame ravioli, I mixed in the filling the edamame and some pork meat and I dressed them simply with olive oil, salt and pepper. Here is my recipe.

Edamame ravioli

  • 100g of flour (I used whole wheat here)
  • 1 egg
  • a bit of water
  • 100g of ground pork meat
  • 200g of edamame
  • Salt, pepper olive oil

Prepare the pasta by mixing, as usual, the flour, the egg and a bit of water. Knead well and keep for 30min.

Boil the edamame. Once cooled down, shell them and remove the skin as much as possible. In a mortar puree them roughly (as on the above picture). In a frypan cook the pork meat then mix with the edamame. Add salt and pepper. Keep the frypan as it is.

Roll the pasta. Fill the ravioli and close them. Boil a large pan of water and boil the ravioli. When they float move them to the frypan with half a ladle of cooking water. Add olive oil a bit and cook 2min before serving and enjoying immediately.

Variations around flat breads

I am always amazed by all you can do with just flour and water… and recently I’m getting addicted to flat breads… Remember when I first tried here? Well… the same person that makes the dried chickpeas that triggered my wish for flat bread to eat with falafels, well, also makes chickpeas flour… I use a lot chickpeas flour for socca, but I wanted a change so I decided to explore possibilities with flat breads.

First, I made a trial by replacing 3/4 of the flour by chickpeas flour and that worked perfectly… served with zucchini and basil.

Then, another possibility I thought of was to replace half of the flour by whole wheat flour… and that’s all the same delicious.

Finally, I decided to add seeds to the dough. Caraway or cumin seeds are perfect.

As for cooking I tried two options. One is in the dry thick frypan. To obtain a soft bread, flexible and light. The other way, I added vegetal oil in the pan and fried them. It gives a crispy golden bread. Both were equally delicious but I have a preference for the dry soft ones, in particular when used to eat vegetables such as eggplants or zucchinis…

One thing is sure is that making flat breads is super simple, fast and requires no complex ingredients. They are delicious and fit super well summer vegetables or curry. They will be on our table often!!

Chickpeas flour flat breads

Japanese flavors meet mum’s classic recipe

In the late spring and early summer, back then when we lived in France, my mother would often cook a potatoes salad with green beans or broad beans and new onion. Or she would prepare broad beans with tomatoes. Broad beans, or Morocco ingen モロッコインゲン, are very easy to find in Japan. In Isumi they seems to be growing quite easily, it’s on the farmers market stall from early June. (Oh! By the way, it seems that the name “ingen” comes from the name of a monk that imported green beans to Japan a few centuries ago!!)

Like my mother, I like to prepare broad beans, and a potato salad is always handy because it can be prepared ahead of time and doesn’t need to be refrigerated. Perfect lunch for a busy day. Though I live the dressing my mother prepare for this salad – her classic recipe is here – I wanted to test the new katsuo flakes from Katsuura I bought recently and I am also trying to finish the last umeboshi from last uear to make space for the new ones that will be arriving in a few weeks. The dressing for my potatoes and broad beans salad was all set. The mixture of flavors, familiar yet newly combined made this recipe really super easy and delicious. So here it is.

Japanese flavors potatoes and broad beans salad (serves 2)

  • 150g of new potatoes
  • 200g of broad beans
  • 1 large umeboshi
  • A handful of katsuo flakes
  • 1tbs of soya sauce
  • 1tbs of olive oil

Boil the potatoes and broad beans. Do not over cook the broad beans. Drain. In a bowl add the vegetables, extract the flesh of the plum, scatter it on the vegetables. Add the olive oil, the soya sauce, top with the katsuobushi. Serve at room temperature or cold.

Fava beans

Now is the season and it’s always a feast for me!!! Well… it wasn’t always like that, it took me time to enjoy fava beans but now I love them and I was thinking of doing a fava beans week like I did in the past for many of my favorite ingredients: 5-7 days, 5-7 recipes, but by the time I got to actually seat and write a post I realize I published so many pictures of recipes with fava beans on IG that in the end it wasn’t making sense anymore. So once again the fava bean week has been postponed… I decided to go with a summary of my favorite recipes, may in one or two posts.

One thing that took me some time to understand was how delicious fava beans or sora-mame in Japanese そら豆 are when simply blanched and pealed. I use to eat them whole (don’t get me wrong not whole whole right! Just the beans inside the pod!!!)… but after preparing some Shojin cuisine recipes some years ago, I understood the difference between pealed and not pealed fava beans, and I would never not peal anymore.

One of my favorite fava beans combination is with tomatoes. For some reason Isumi produces beautiful and delicious tomatoes. Very large and ripe ones, I love to cook them slowly with olive oil and reduced into a thick tomato sauce. They are sweet and tasty. Add a new onion to the preparation, soften by the long and slow cooking at low heat, and this is perfection!! If you have made tomato sauce last summer, my preparation is probably close to that, even thicker, so if you still cannot find proper tomatoes just use tomato sauce. I just then add blanched and pealed fava beans and use it for accommodating Japanese rice white and brown, or pasta, long and short or just a slice of made bread.

Tomato and fava beans topping brown rice

One other recipe is to use the fava beans as a base for pasta sauce. Instead of just blanching the fava beans I cook them a little longer so that they become creamy when pealed. Then mash them with olive oil, salt and pepper and add to pasta. Here I added a bit of smoked snapper.

Fava beans pasta sauce with smoked snapper

Finally, one of my favorite way of eating quinoa is to start as a soup, but let the liquid evaporate almost entirely and add plenty of vegetables from the start. I usually do this recipe in winter but spring is also good with all the spring vegetables, here a large tomato for the sweetness, a new carrot, and pealed fava beans and green peas. That’s it!

Have a good day!!!

Bamboo shoot again!

We are moving in our new apartment tomorrow, but getting everything ready and working doesn’t mean not cooking, we have to eat 😉 Luckily we are only moving vertically so it’s quite easy to go and meet with the workers in between two online meetings, and anyway we decided not to do a lot of renovations first rather wait to see how we live in that new place. Our main idea was that since we spend most of our week days at work and most of our weekends in the countryside, our Tokyo apartment was oversized, so we wanted a downsizing. Few people want to move to a smaller place but we did. So we found a smaller version without a guest room we decided to move… well that was before Corona and simultaneous telework, so maybe not the most judicious timing… but one has to take opportunities when they come!

What does moving has to do with bamboo shoots??? Nothing… it’s spring, the soft pink of the sakura season is over and made way to the bright pink and fuchsia azaleas, and bamboos are growing growing growing. I even saw some in Kitanomaru park during one of my daily walks. But as I said before, the season is very short, so it’s better to enjoy them without delay.

I presented in the past some bamboo shoot recipes but this week I came with a few more ideas and wanted to share them with you. Both recipe today are mixing Mediterranean and Japanese cuisine, and the key is a fragrant olive oil. The first one is a chickpeas and tomatoes ragu, the second is more of a leftover type of recipe. Indeed, because we’re moving I decided to empty the fridge and the pantry as much as I could. And because we’re moving also and our view won’t be as dramatic as the actual one I shoot a few more times my lunch plate with a view…

Chickpeas and bamboo shoots ragu

– 1/2 bamboo shoot

– 2 cups of boiled chickpeas

– 1 large ripe tomato

– a few capers

– fragrant olive oil

– salt and pepper

Prepare the bamboo shoot as usual by boiling it in rice water fir as long as it needs to be soft (a tooth pick should easily enter.

Boil the chickpeas.

Wash the tomato. In a large pan generously oiled with a good olive oil add the tomato roughly cut. Cook until you obtain a smooth tomato sauce. Add salt and pepper and the capers, the chickpeas, and the sliced bamboo shoots. Stir and add a bit if olive oil, serve and eat warm or cold. That’s it!!!

Leftover bamboo salad

– 1/4 of bamboo shoot boiled

– a handful of boiled chickpeas

– 2 large boiled potatoes

– 1/2 new onion blanched

– a handful of boiled green beans

– fragrant olive oil

– 1tbs of soya sauce

Cut the bamboo, the potatoes, the onion and the green beans, dress in a bowl. Add the chickpeas, the soya sauce, sone olive oil, stir gently and eat!!!

Isn’t that super easy???

Gynura bicolor – 金時草

Riding our bicycles has given us a new perspective on the neighborhood. Circling a 15km radius from home we have discovered a few new things and stopped at new places that we may have driven through many times bit didn’t really stopped by. When you cycle it’s easy to take a small street or a narrow passageway, to stop, turn back and get a bit lost… every detour is a discovery, and a surprise.

The new beach walk & ride path between Ohara beach and Misakichoizumi park

Riding we discovered a nice swamp, a reclining Buddha in a tiny temple, a new ride along the beach, a busy surfing spot, an old house with a beautiful park enclosed by walls… we also stopped for shopping in a few places: cheeses and fromage blanc at fromagerie Haru, fish at Onjuku, and vegetables at local organic place. That’s where I found these beautiful purple and dark green leaves I didn’t know about. And as usual a locally grown green I don’t know must go in my basket! So here I am with this gynusa bicolor (which name I didn’t know until a few minutes ago). Of course I always ask the local people what they do with a vegetable I don’t know and try it that way first. She said with soya sauce and okaka… which I understood as blanched and then seasoned with soya sauce and katsuobushi. And so that’s what I tried. And that was really very very delicious. So I bought some again today and I will test it again ;)!!!

Have a good weekend!

Croissants!!!

I use to hunt down the best croissants in Tokyo, I found some, but best shops making the best croissants change over time… Recently we went nearby our place at the factory, and they have probably close to the best pain au chocolat but definitely not the best croissants… and a space that maybe perfect for a gloomy morning but not for a bright sunny day, I preferred the park nearby.

Pain au chocolat from factory

Knowing that finding delicious croissants in Tokyo, you can imagine that in Isumi it is a bit of challenge. Grain makes delicious croissants and pains au chocolat but they open too late to have freshly baked croissants in the morning. The only option was that I tried making some again. Indeed after three or four miserable attempts in the past years, I decided that an ugly weekend would be the perfect timing for another attempt. And that’s just what we got: pouring rain for almost 2 days and strong winds, notwithstanding a drop in temperature back to a modest 5.

Instead of testing again a recipe I had in my books and didn’t work for me, I chose to go online and pick a video tutorial. After watching a few I picked the video by Domi patiss, because it was neither too short, nor too long, because her croissants look really fluffy and delicious, and she had a few hints that made sense to me. I followed her recipe almost to the letter except for quantities and I must say that for the first time I managed to make croissants that both have the taste and appearance of croissants from a boulanger… They were delicious!!!

So here is what I did… there is a lot of waiting/resting time, so it took 24h to make the croissants, but the actual “action” time is always very short. The video by Domi patiss is in French but quite visual to understand the folding and rolling tips she gives.

Croissants (make 6-8 pieces)

– 250g of flour

– 70g of water

– 60g of milk

– 6g of fresh yeast

– 7g of salt

– 20g of brown sugar

– 10g + 110g of butter

In a large bowl I mix the flour, the sugar, the salt, add the water, the milk, the yeast and 10g of butter. I knead until smooth, roll into a 25 by 15cm rectangle, wrap not too tight and set in the fridge for 12h at least. The dough should raise during that time.

http://gentianeetantoine.com/igk/wp-content/uploads/2020/03/video-1.mov

Then I roll it onto a rectangle of about 25cm by 50cm. Cut the 110g of butter (cold) in thin slices and cover half of the dough. Flip the other half on top and roll again to obtain the same size again. Fold in four, wrap and refrigerate for 1h.

Roll again to the same size or larger and fold in three this time. Refrigerate for another hour.

Finally roll again to the same size. Cut the edges to make apparent the feuilletage. Cut 6-8 triangles, roll them into croissant, set for another hour to rest at room temperature.

Apply an egg batter on the croissants and bake at 210deg for 15min or until perfectly golden. Enjoy!!!

Pan fried ravioli

In an attempt to practice my gyoza dough making and rolling I decided to make some pan fried ravioli using a vegan dough recipe which is only water and flour, and therefore the recipe of gyoza skin, and filled with Japanese salted salmon, spinach and ricotta. So I found it hard to know how to call them… these are not strictly speaking ravioli, nor gyoza either… but a kind of mixture of both. Well what is important is that they were really delicious and it doesn’t take much time to make them and it was a good rehearsal for making gyoza soon. Indeed, ravioli are made from a flat sheet of pasta, but for gyoza they are rolled one by one, so I needed a bit of practice to remind myself how much dough is needed to roll one skin. All you need is just a nice top well dusted to roll them quickly. So here is my recipe…

Pan fried ravioli (for 16-20 pieces)

For the dough:

– 100g of flour

– water

– a pinch of salt

– more flour for dusting

In a bowl mix the flour and salt, add water bit by bit while kneading. Stop when the dough is soft and smooth. Leave to rest for an hour if you have time.

Filling:

Choose what pleases you, I used Japanese salted salmon, spinach and ricotta. I boiled and drained very well the spinach. Add the salmon, and a bit of ricotta. As the salmon is already quite salty, I used nothing but a bit of black pepper.

Ok, then! Now the fun can start!!!

You need a clean top or a wide wooden cutting board. Dust it generously. Pick a 1cm diameter ball of dough and roll it with a rolling pin to the thinness and diameter you like. I like thin, but not too thin as filling is then a pain. So I rolled to about 8cm diameter. Then filled and closed the ravioli. When I made enough pieces to fill a frypan I heated it, and greased it with olive oil. Then throw the ravioli. I cooked at medium heat until golden, flipping them regularly. That’s it!

Proudly powered by WordPress | Theme: Baskerville 2 by Anders Noren.

Up ↑

Verified by MonsterInsights