First spring of my sourdough Lois!

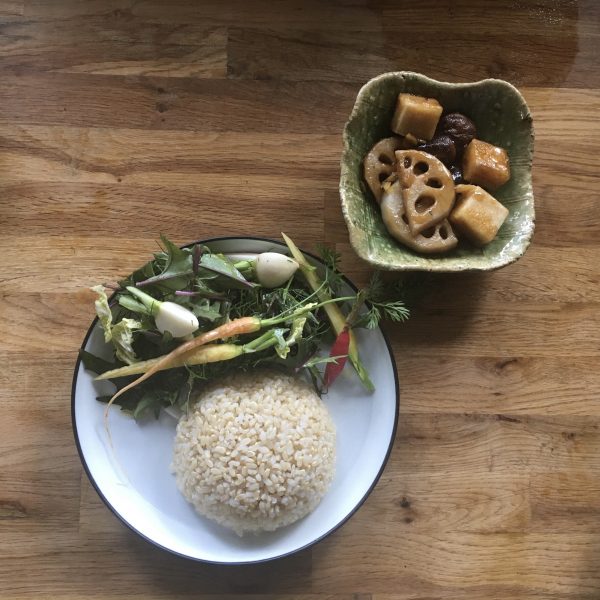
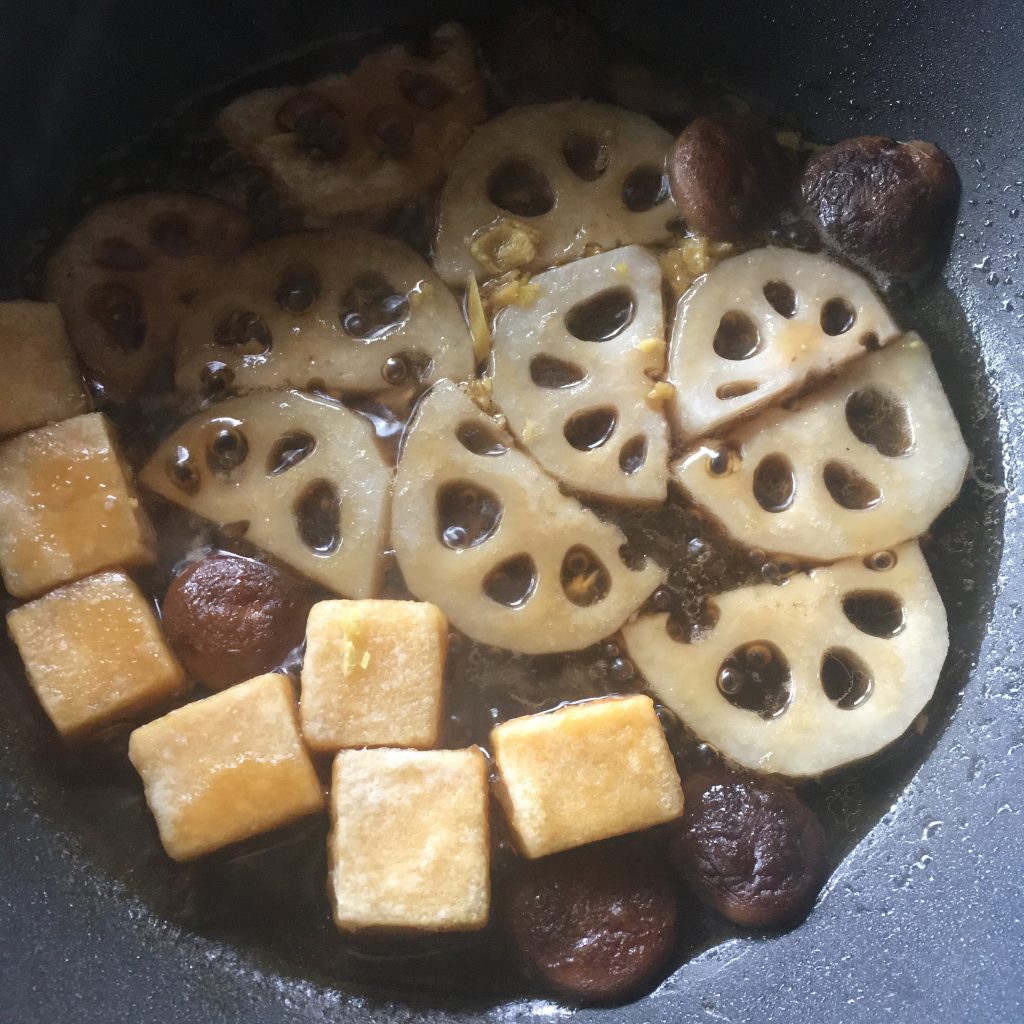
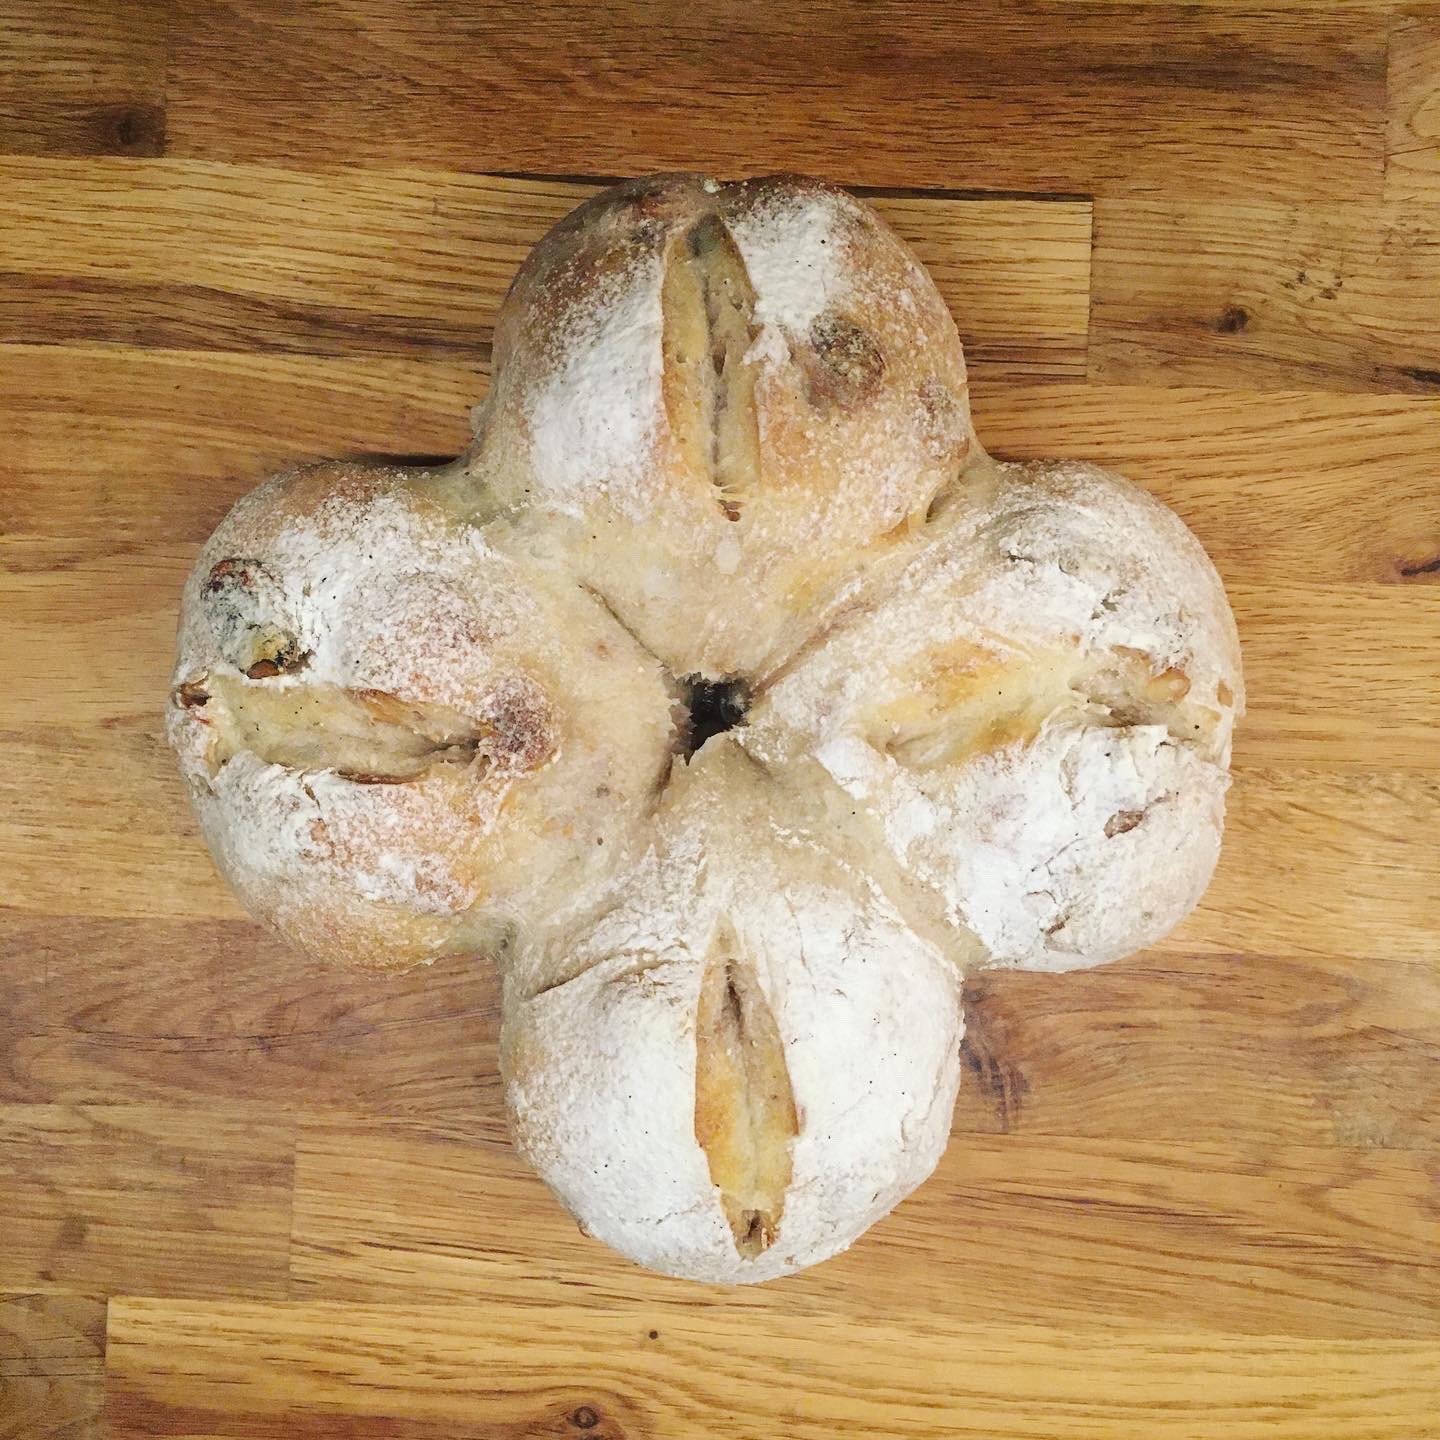
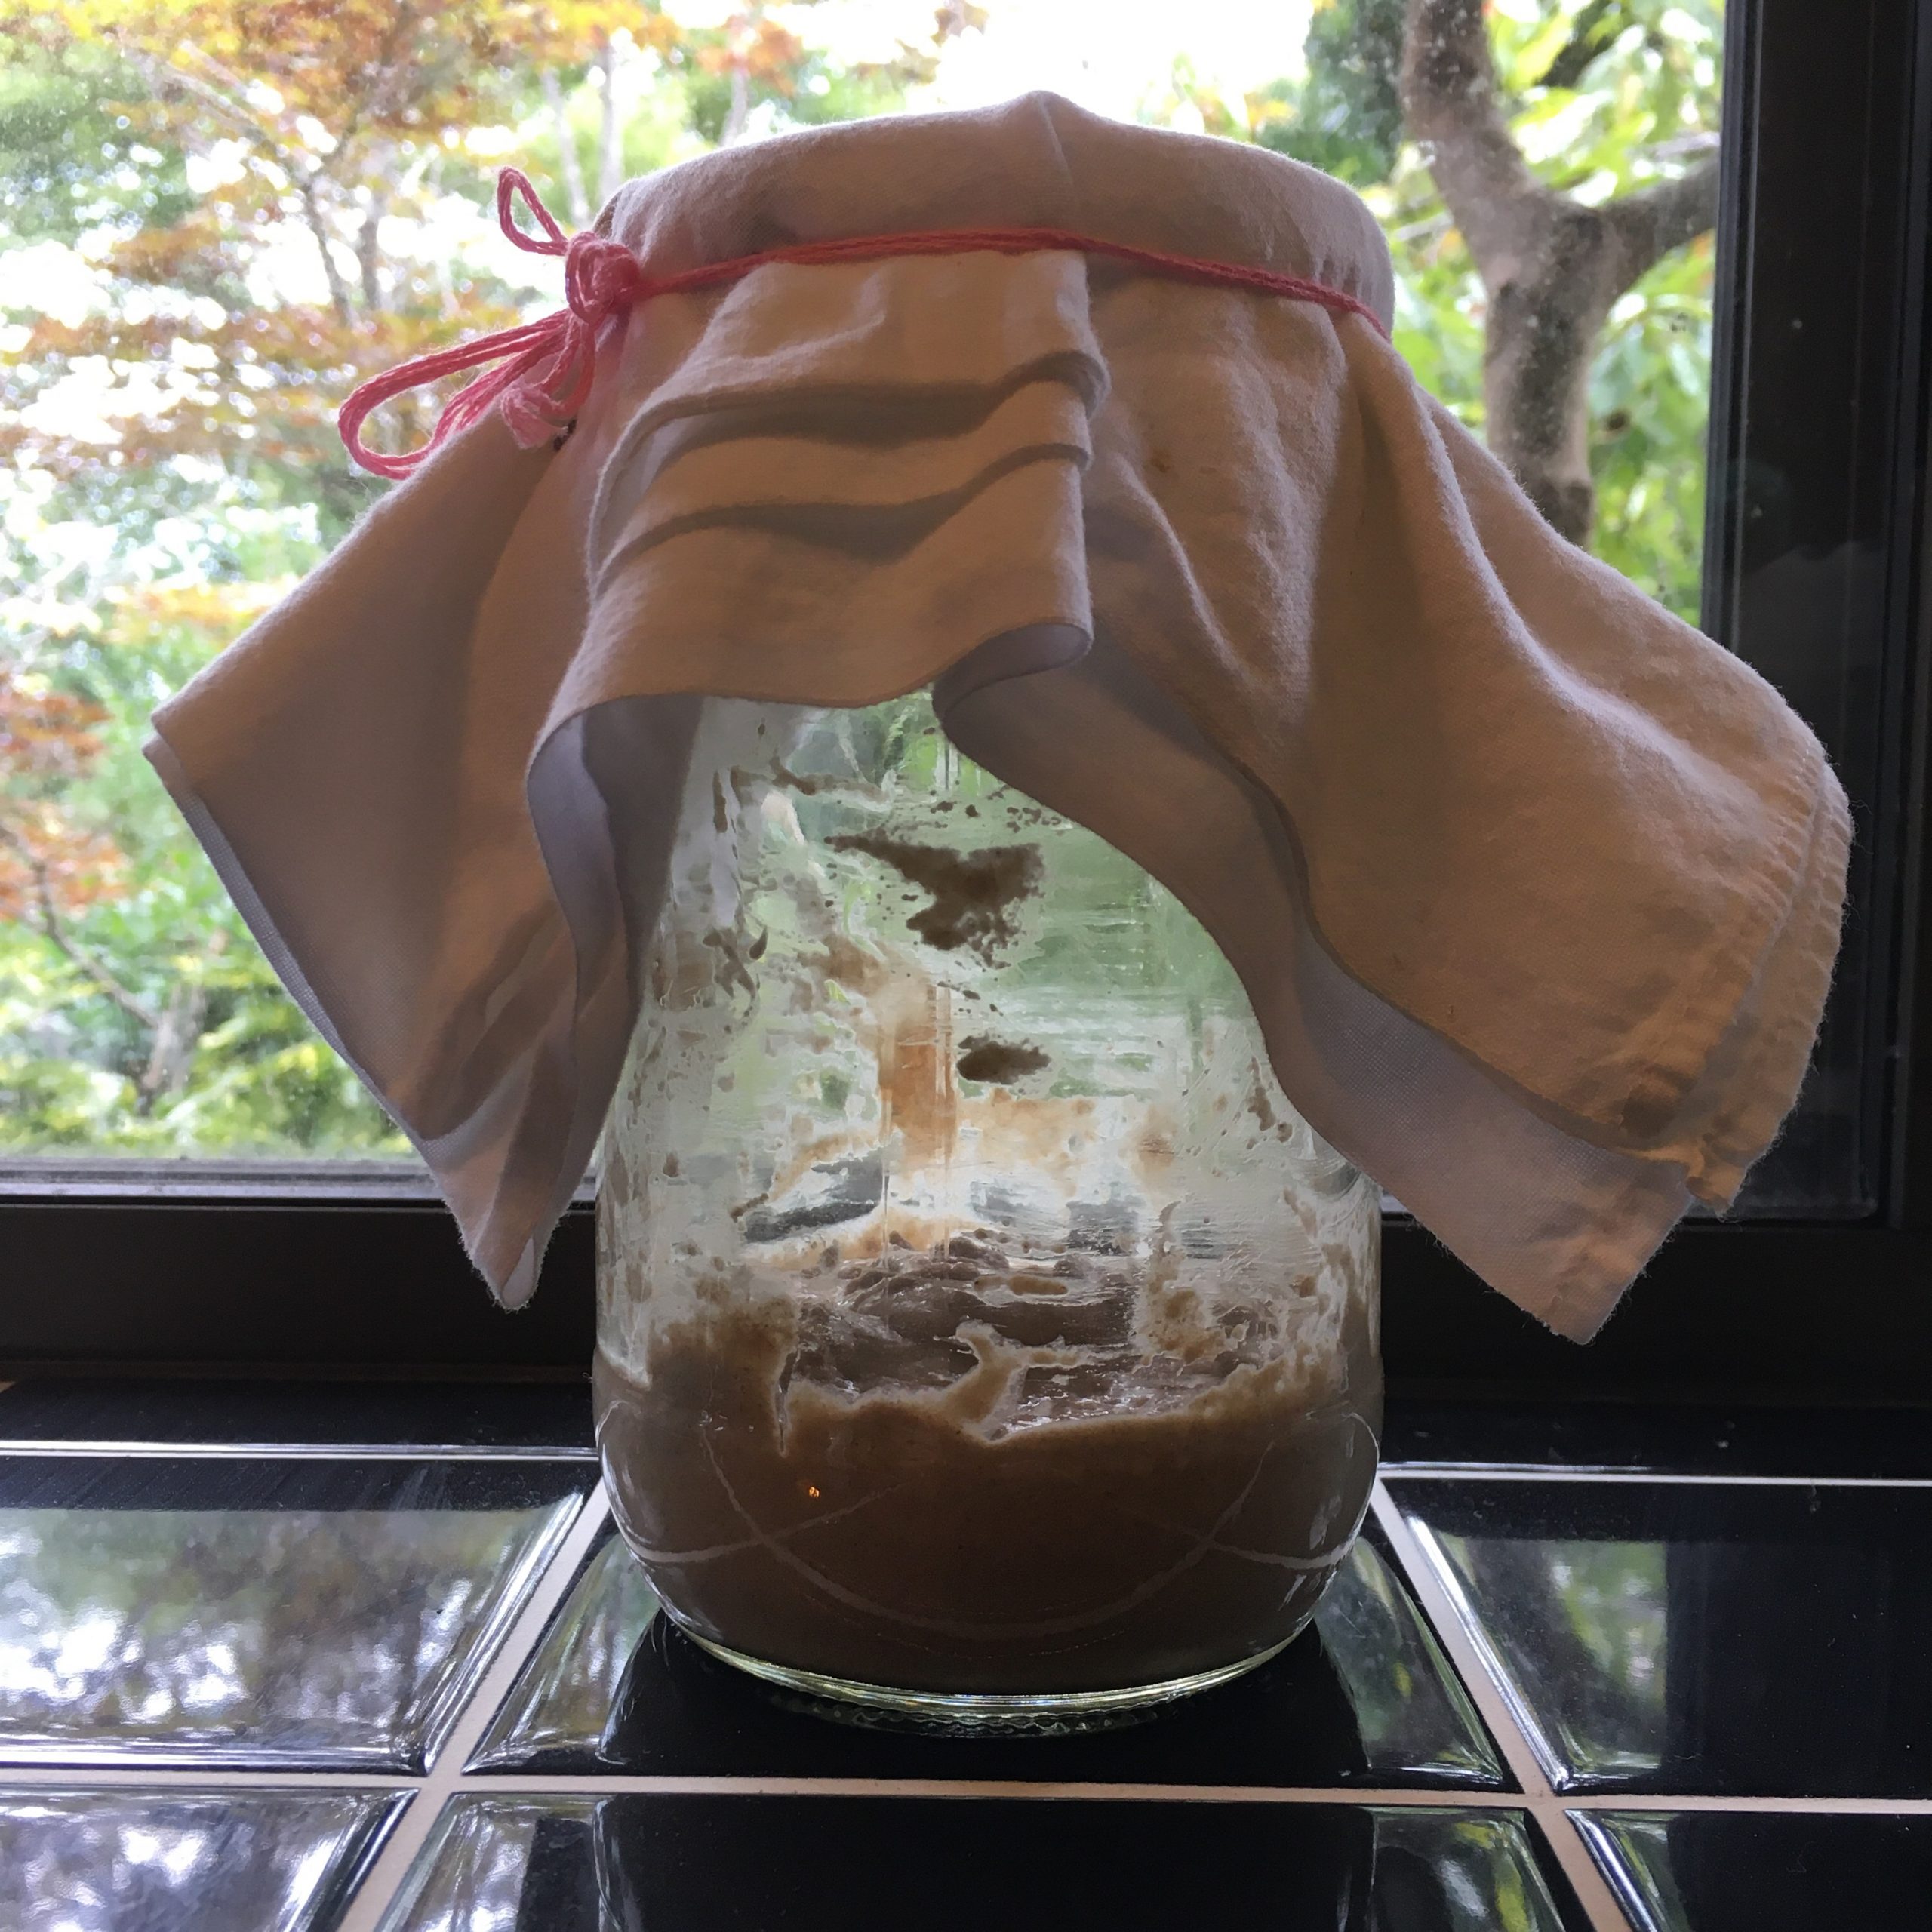
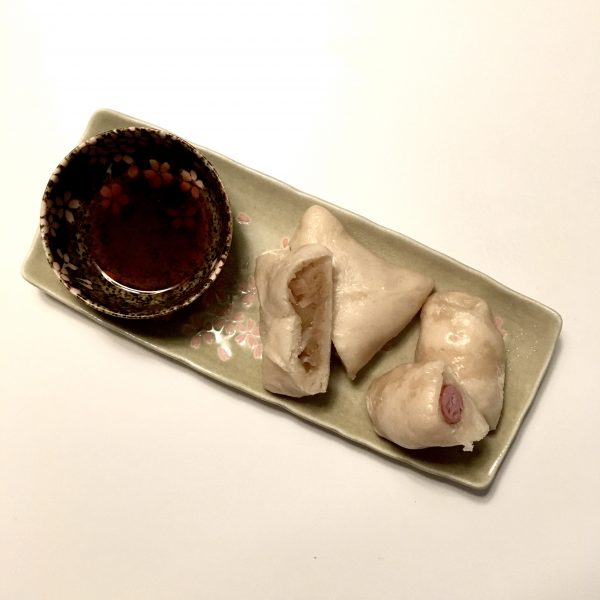
I’m still new to the sourdough owner community and a novice still learning many things with my 6months old Lois. We have had a difficult start, very… but I must say that I am impressed by its behavior for the past few weeks. I am keeping exactly the same regimen and treatments, keeping it in the fridge during the week and outside during the weekend to bake that I have always had. But now Lois is responding in a beautiful way… is it that spring is in the air? I can’t yet explain it and wish it will last… It doesn’t starve in the fridge after 2 days (Lois is/was a glutton), rather the contrary. And anytime I use it to bake it has a much better taste and smell and a faster process. It’s making baking easy and very very enjoyable. So pleased that I decided to use it to make bao again. I filled them with what I had in the fridge: onions and smoked sausages. Chiba prefecture has quite a few pork farms and some make rather delicious sausages, that A. likes very very much so I always have some in the fridge, just in case. So here is the recipe of the bao.

Bao (makes 8 pieces)

For the buns

  • 200g of flour
  • 50g of sourdough
  • A pinch of salt
  • Water

For the filling

  • 1 onion
  • 4 little (smoked) sausages
  • A large pinch of cinnamon

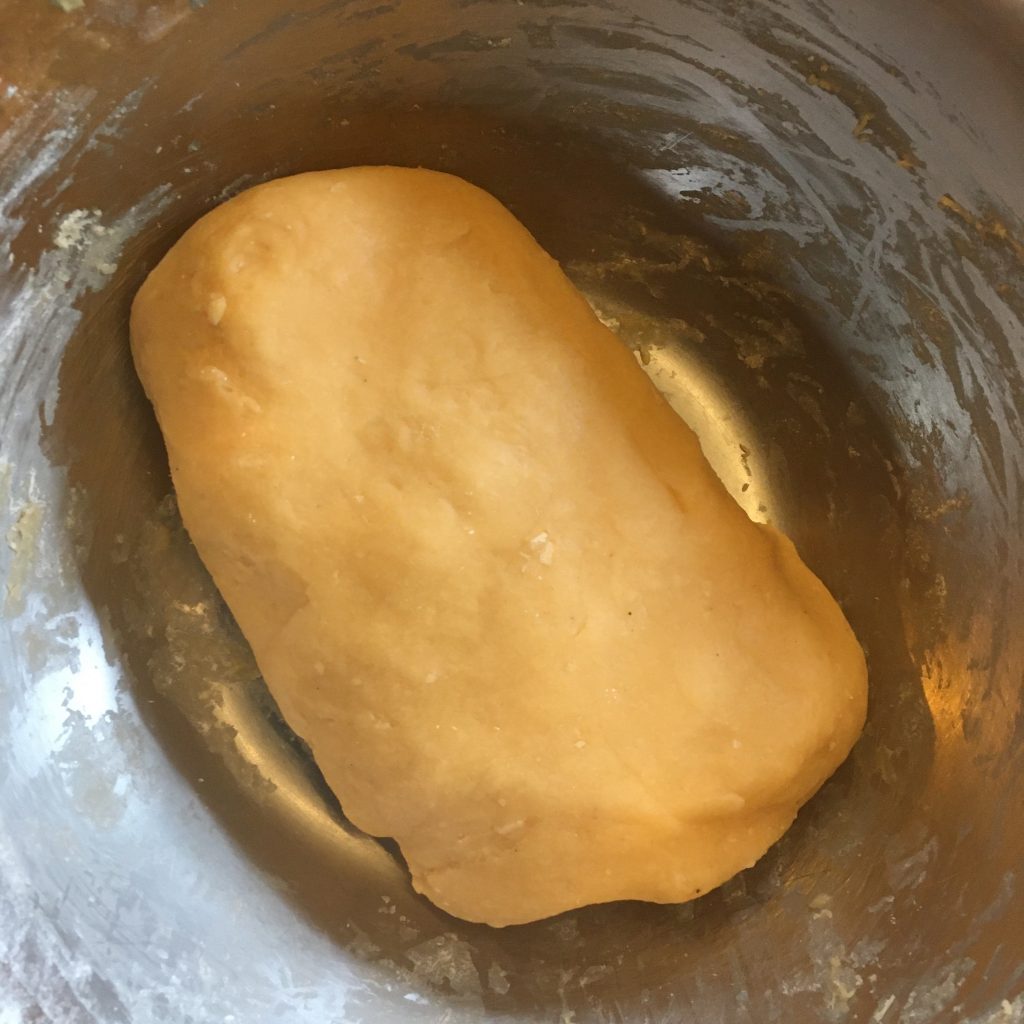
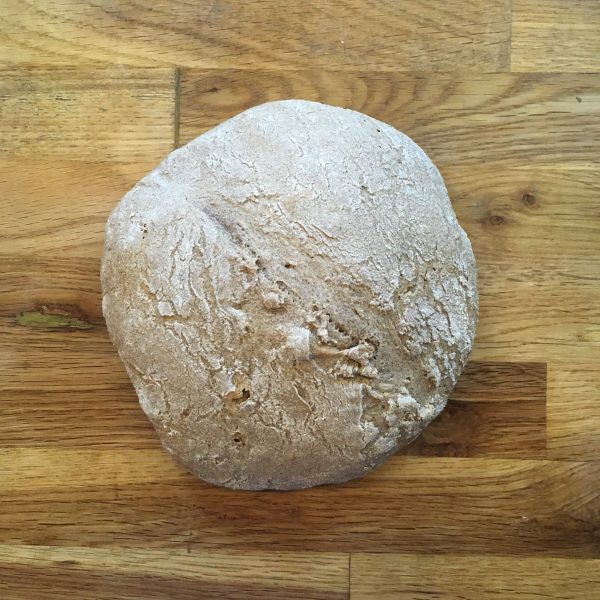
First prepare the bun dough as it needs a few hours to raise. In a bowl mix the flower, the sourdough and the salt. Add water little by little while kneading to obtain a slightly wet dough. Soft and smooth. Leave to raise for some time (a few hours depending on your sourdough, room temperature…). It should raise and at least become elastic with an homogeneous texture. While it’s raising, peel and chop the onion rather thinly. In a pan cook the onions at low heat, with a bit of water. They shouldn’t change color much. Add a bit of salt and the cinnamon. Continue cooking under cover until very soft and tender. Add a bit of water if needed to avoid roasting them. Once cooked, let cool down.

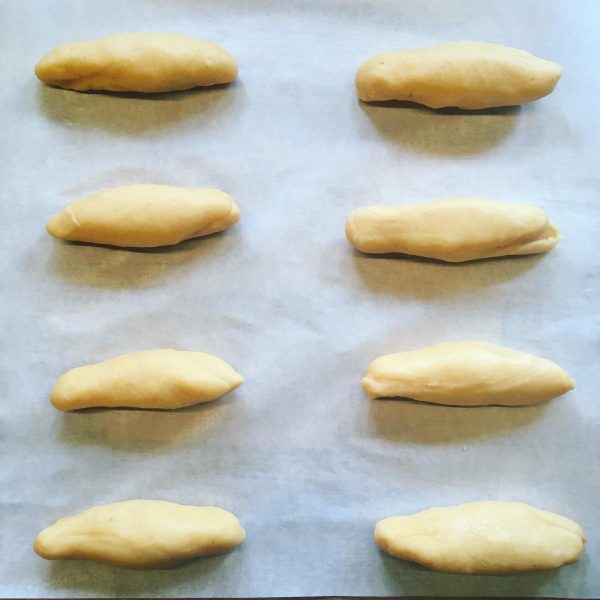
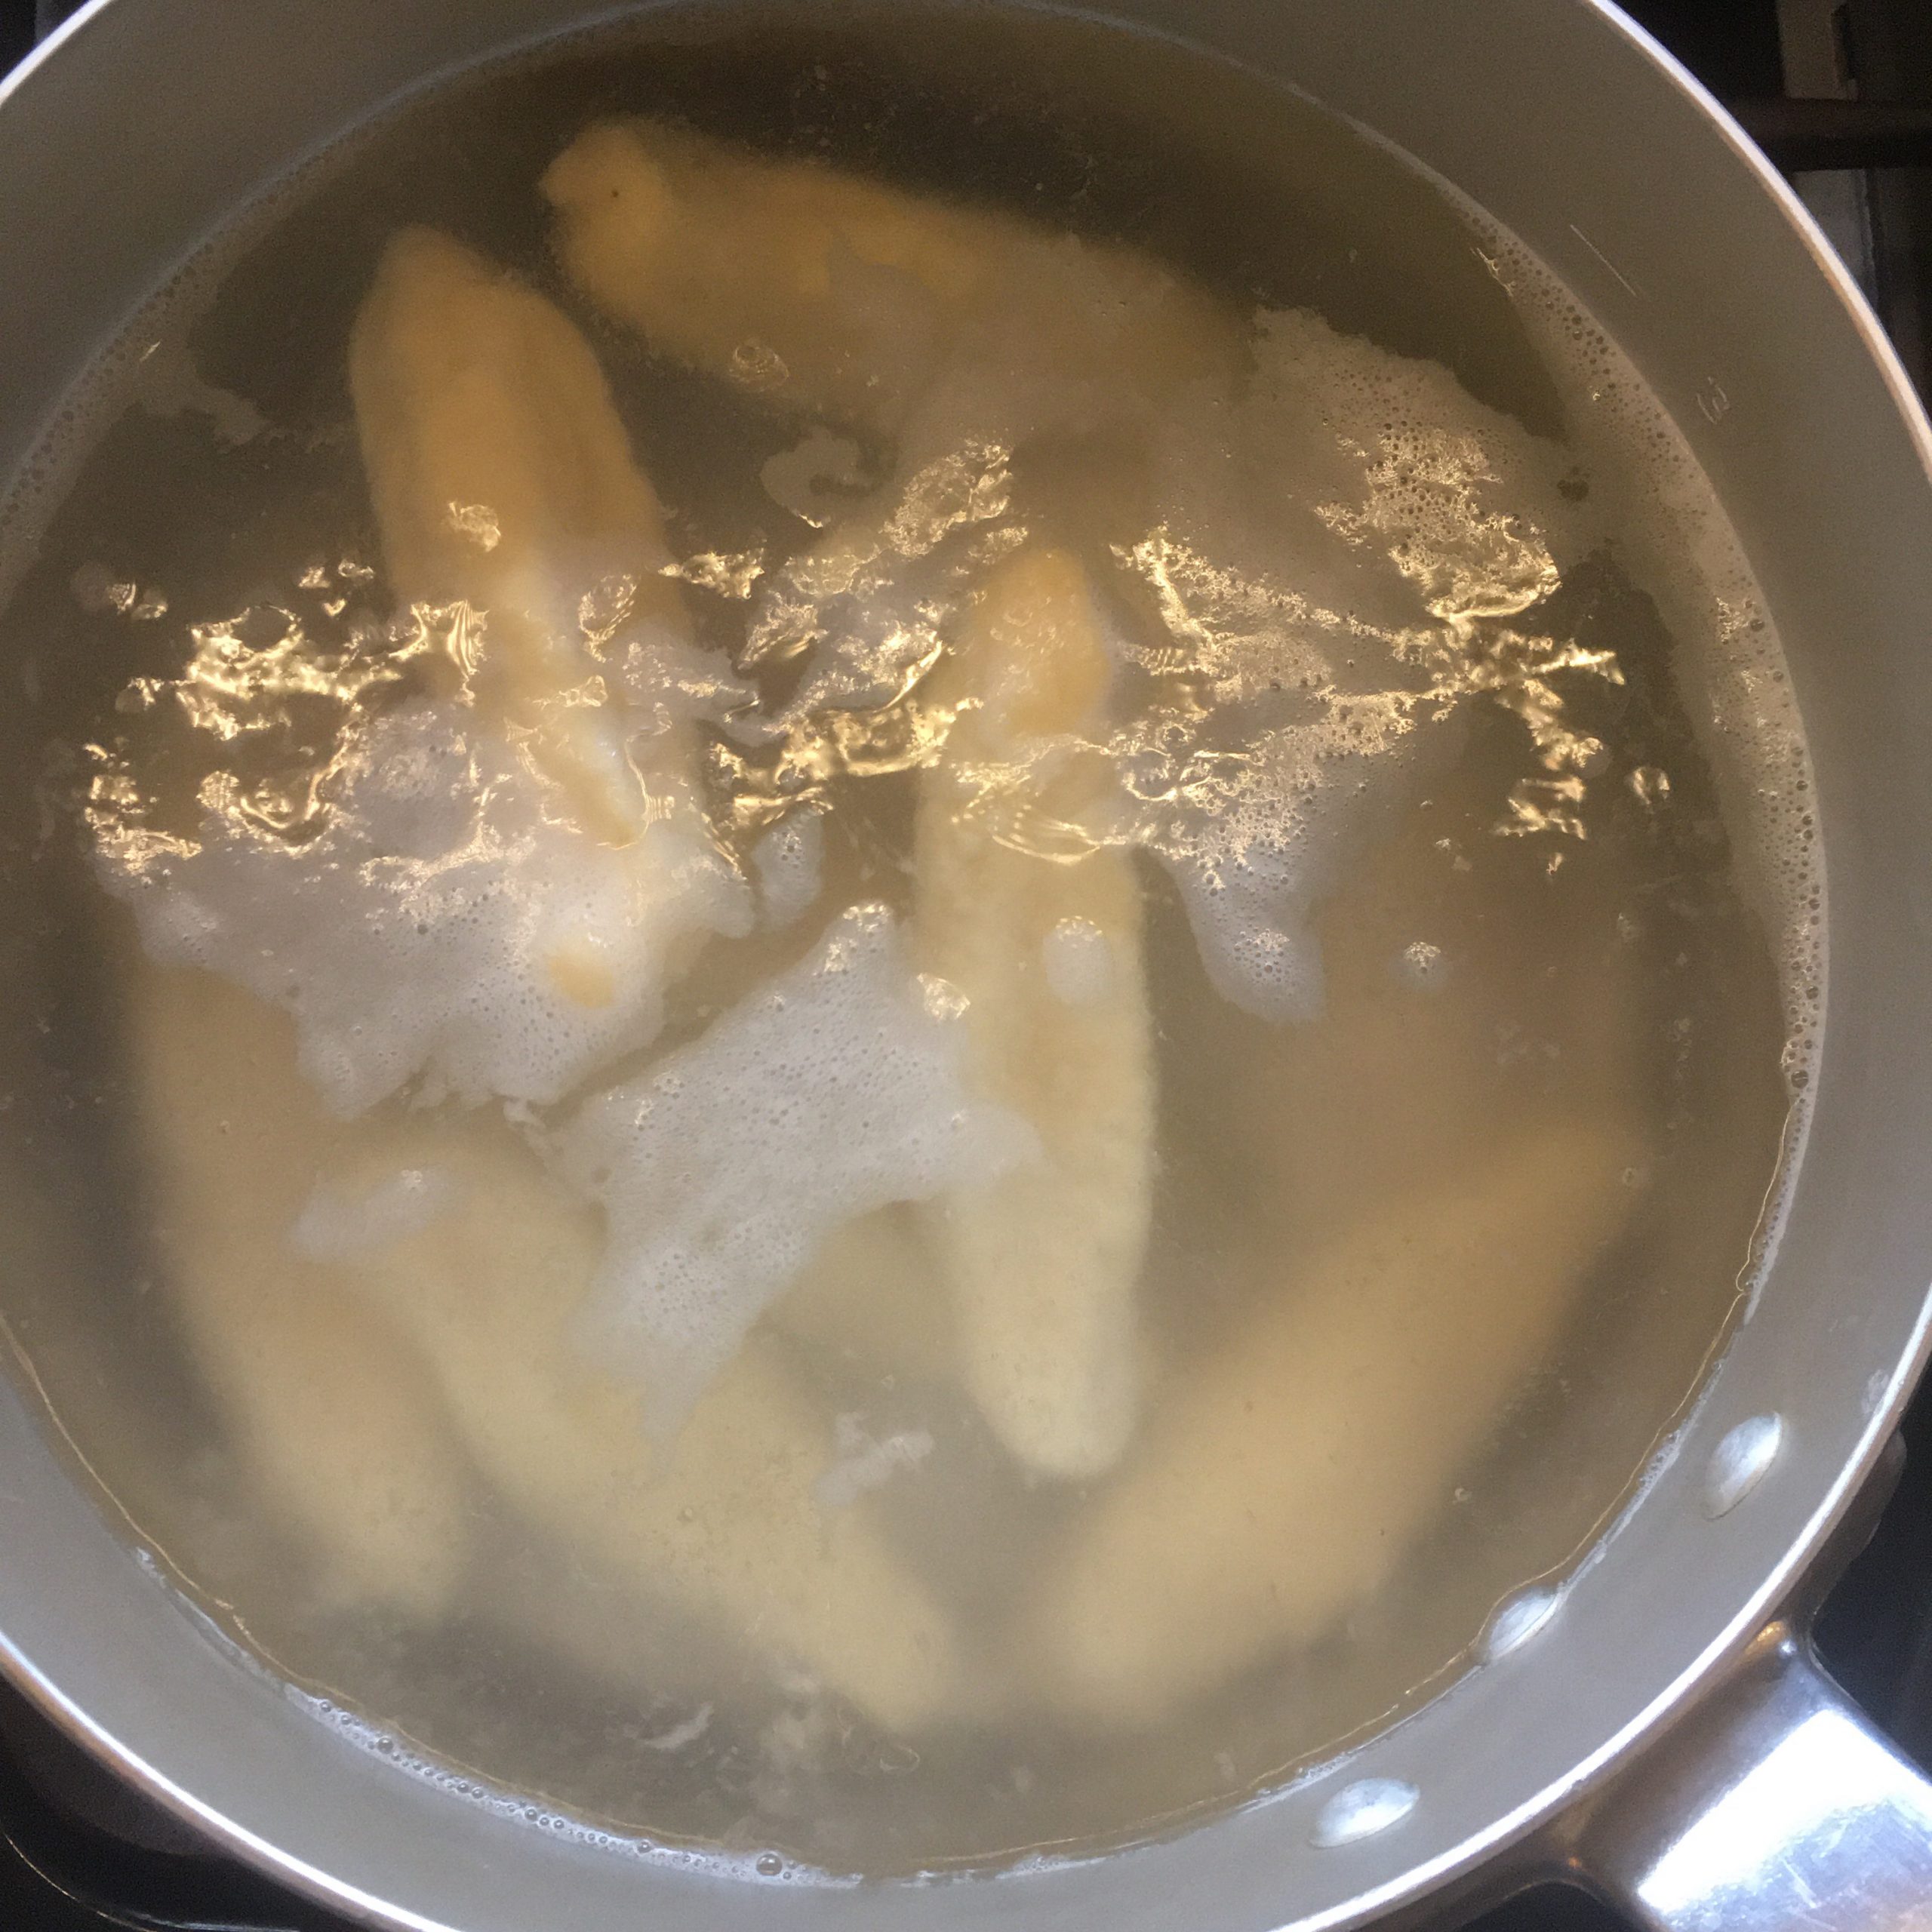
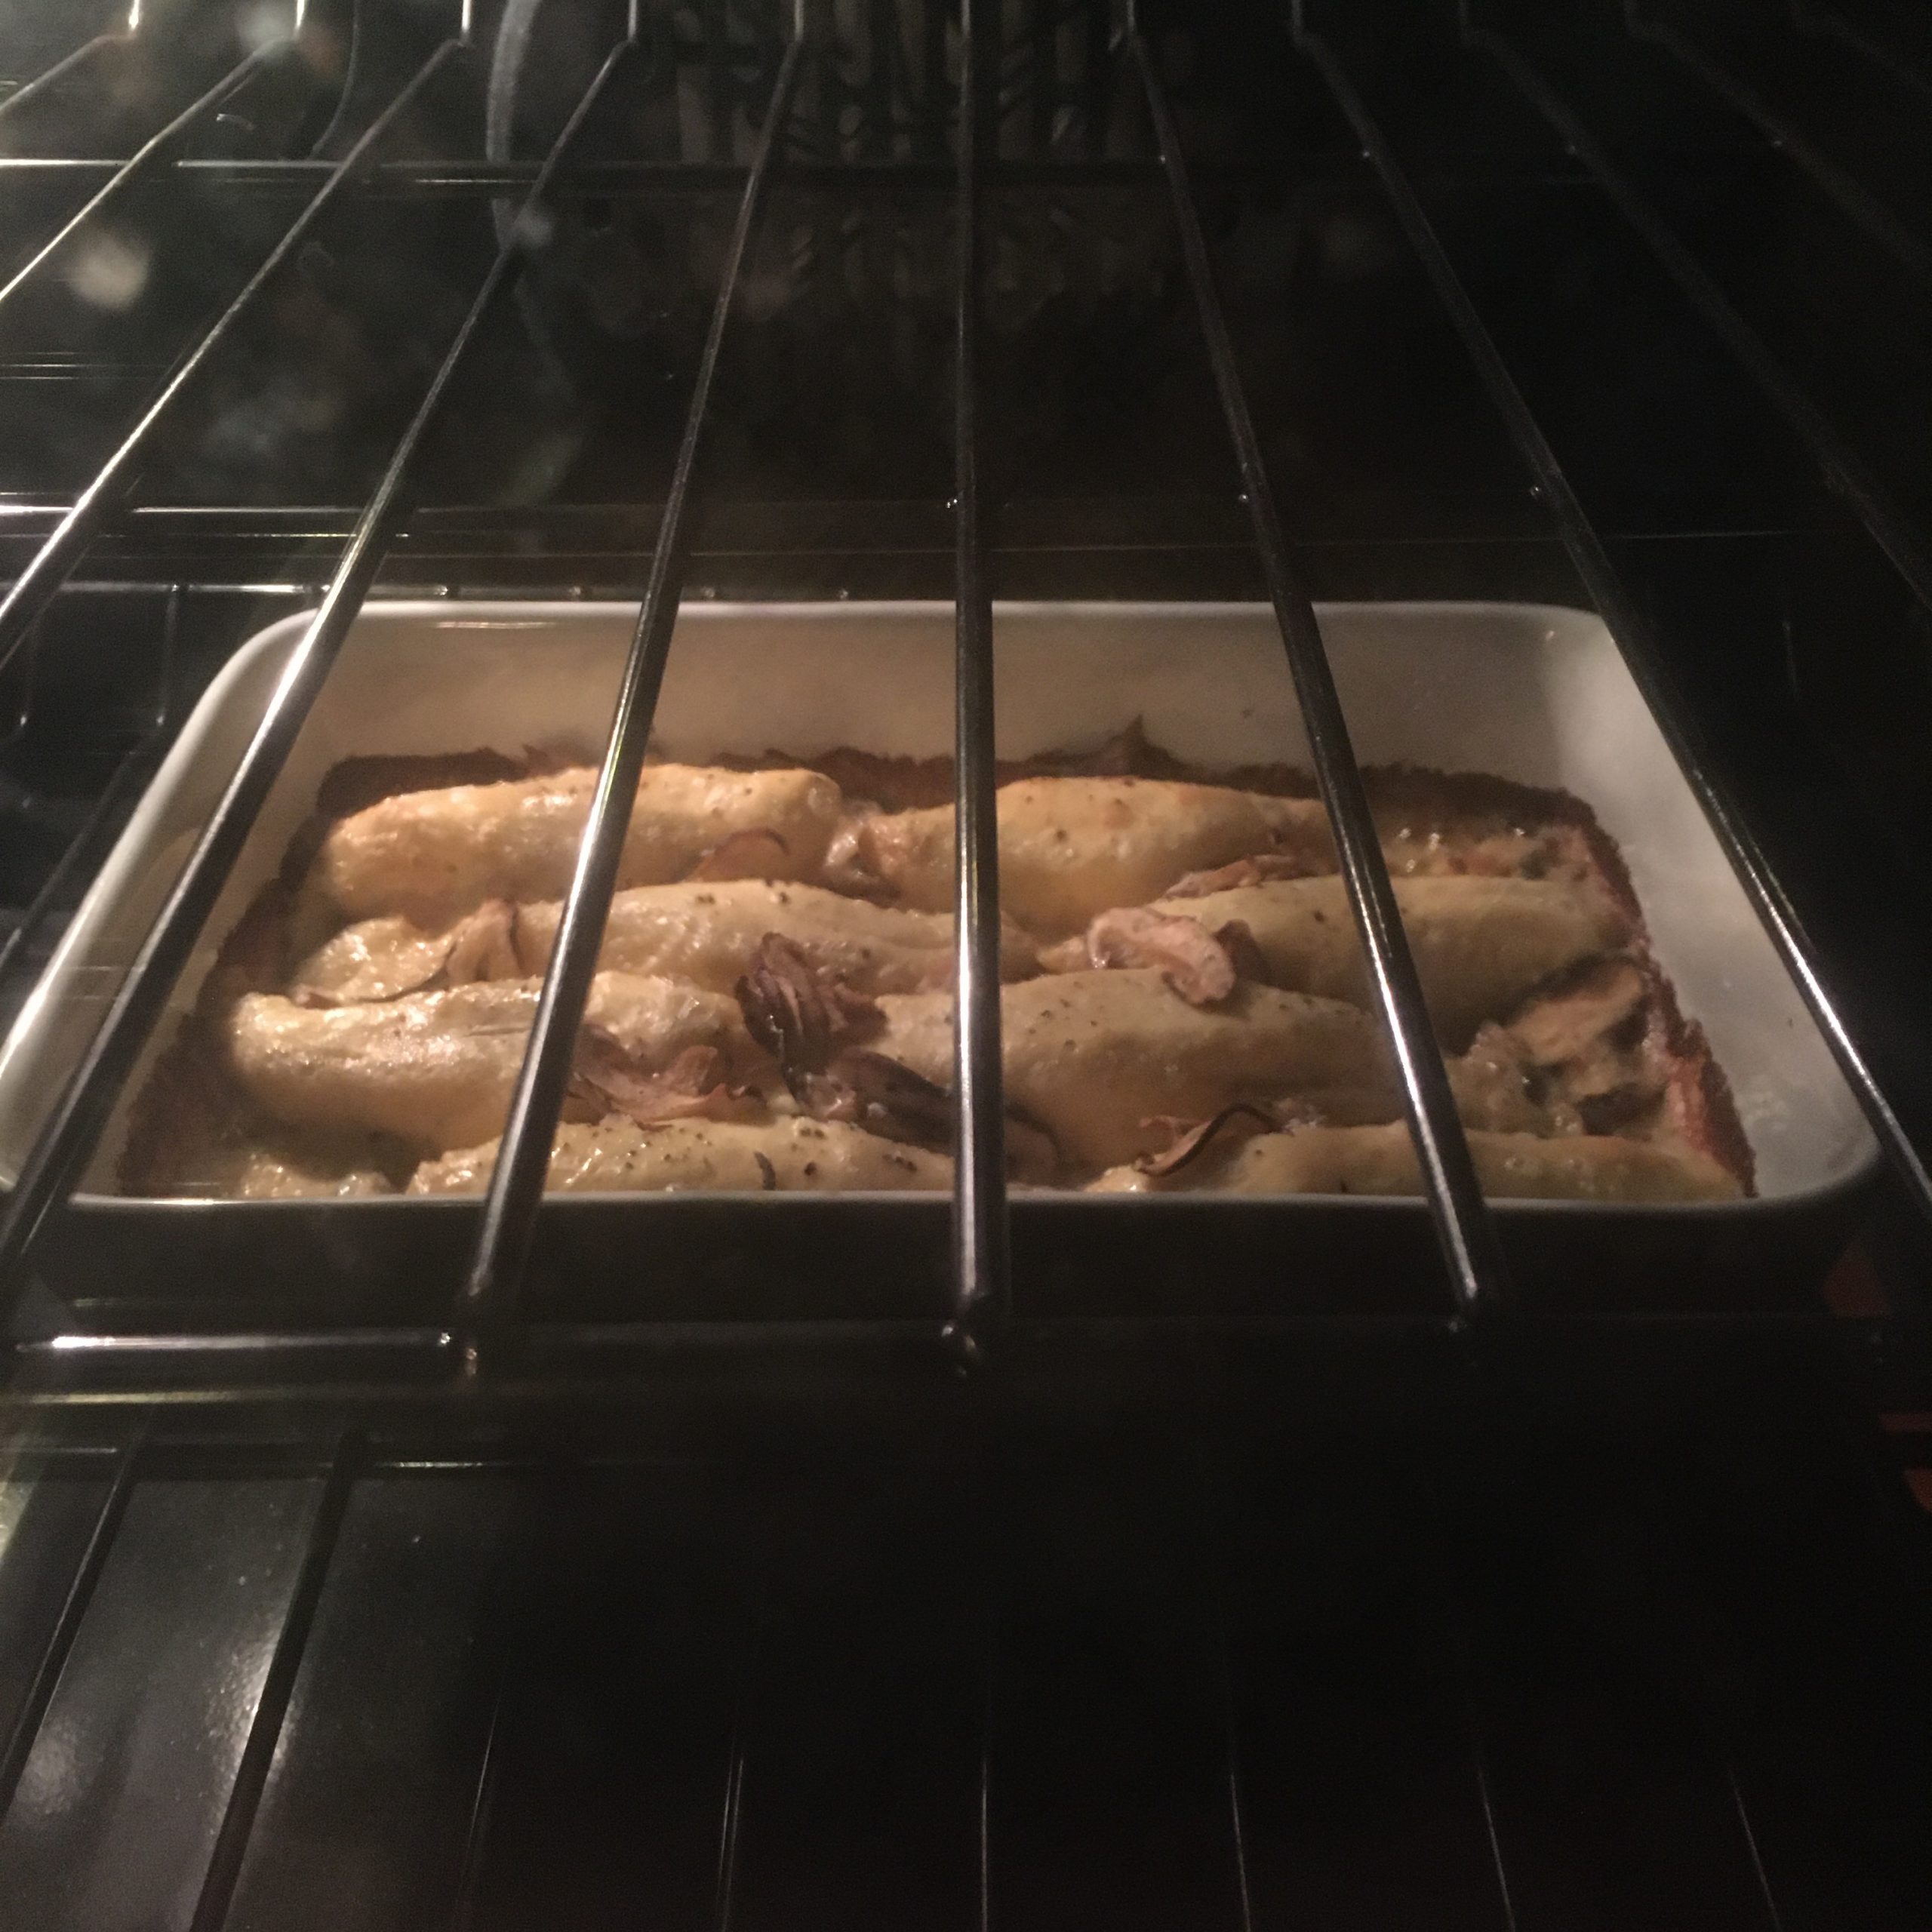
Now your dough should have raised enough. Cut it in 8 equal pieces, and make 8 balls. Roll each of them a floured top into 15cm rounds. Split the onion in 4, and fill 4 of the dough rounds. Roll the 4 sausages each in a dough round and roll them. Let them rest for an hour our two.

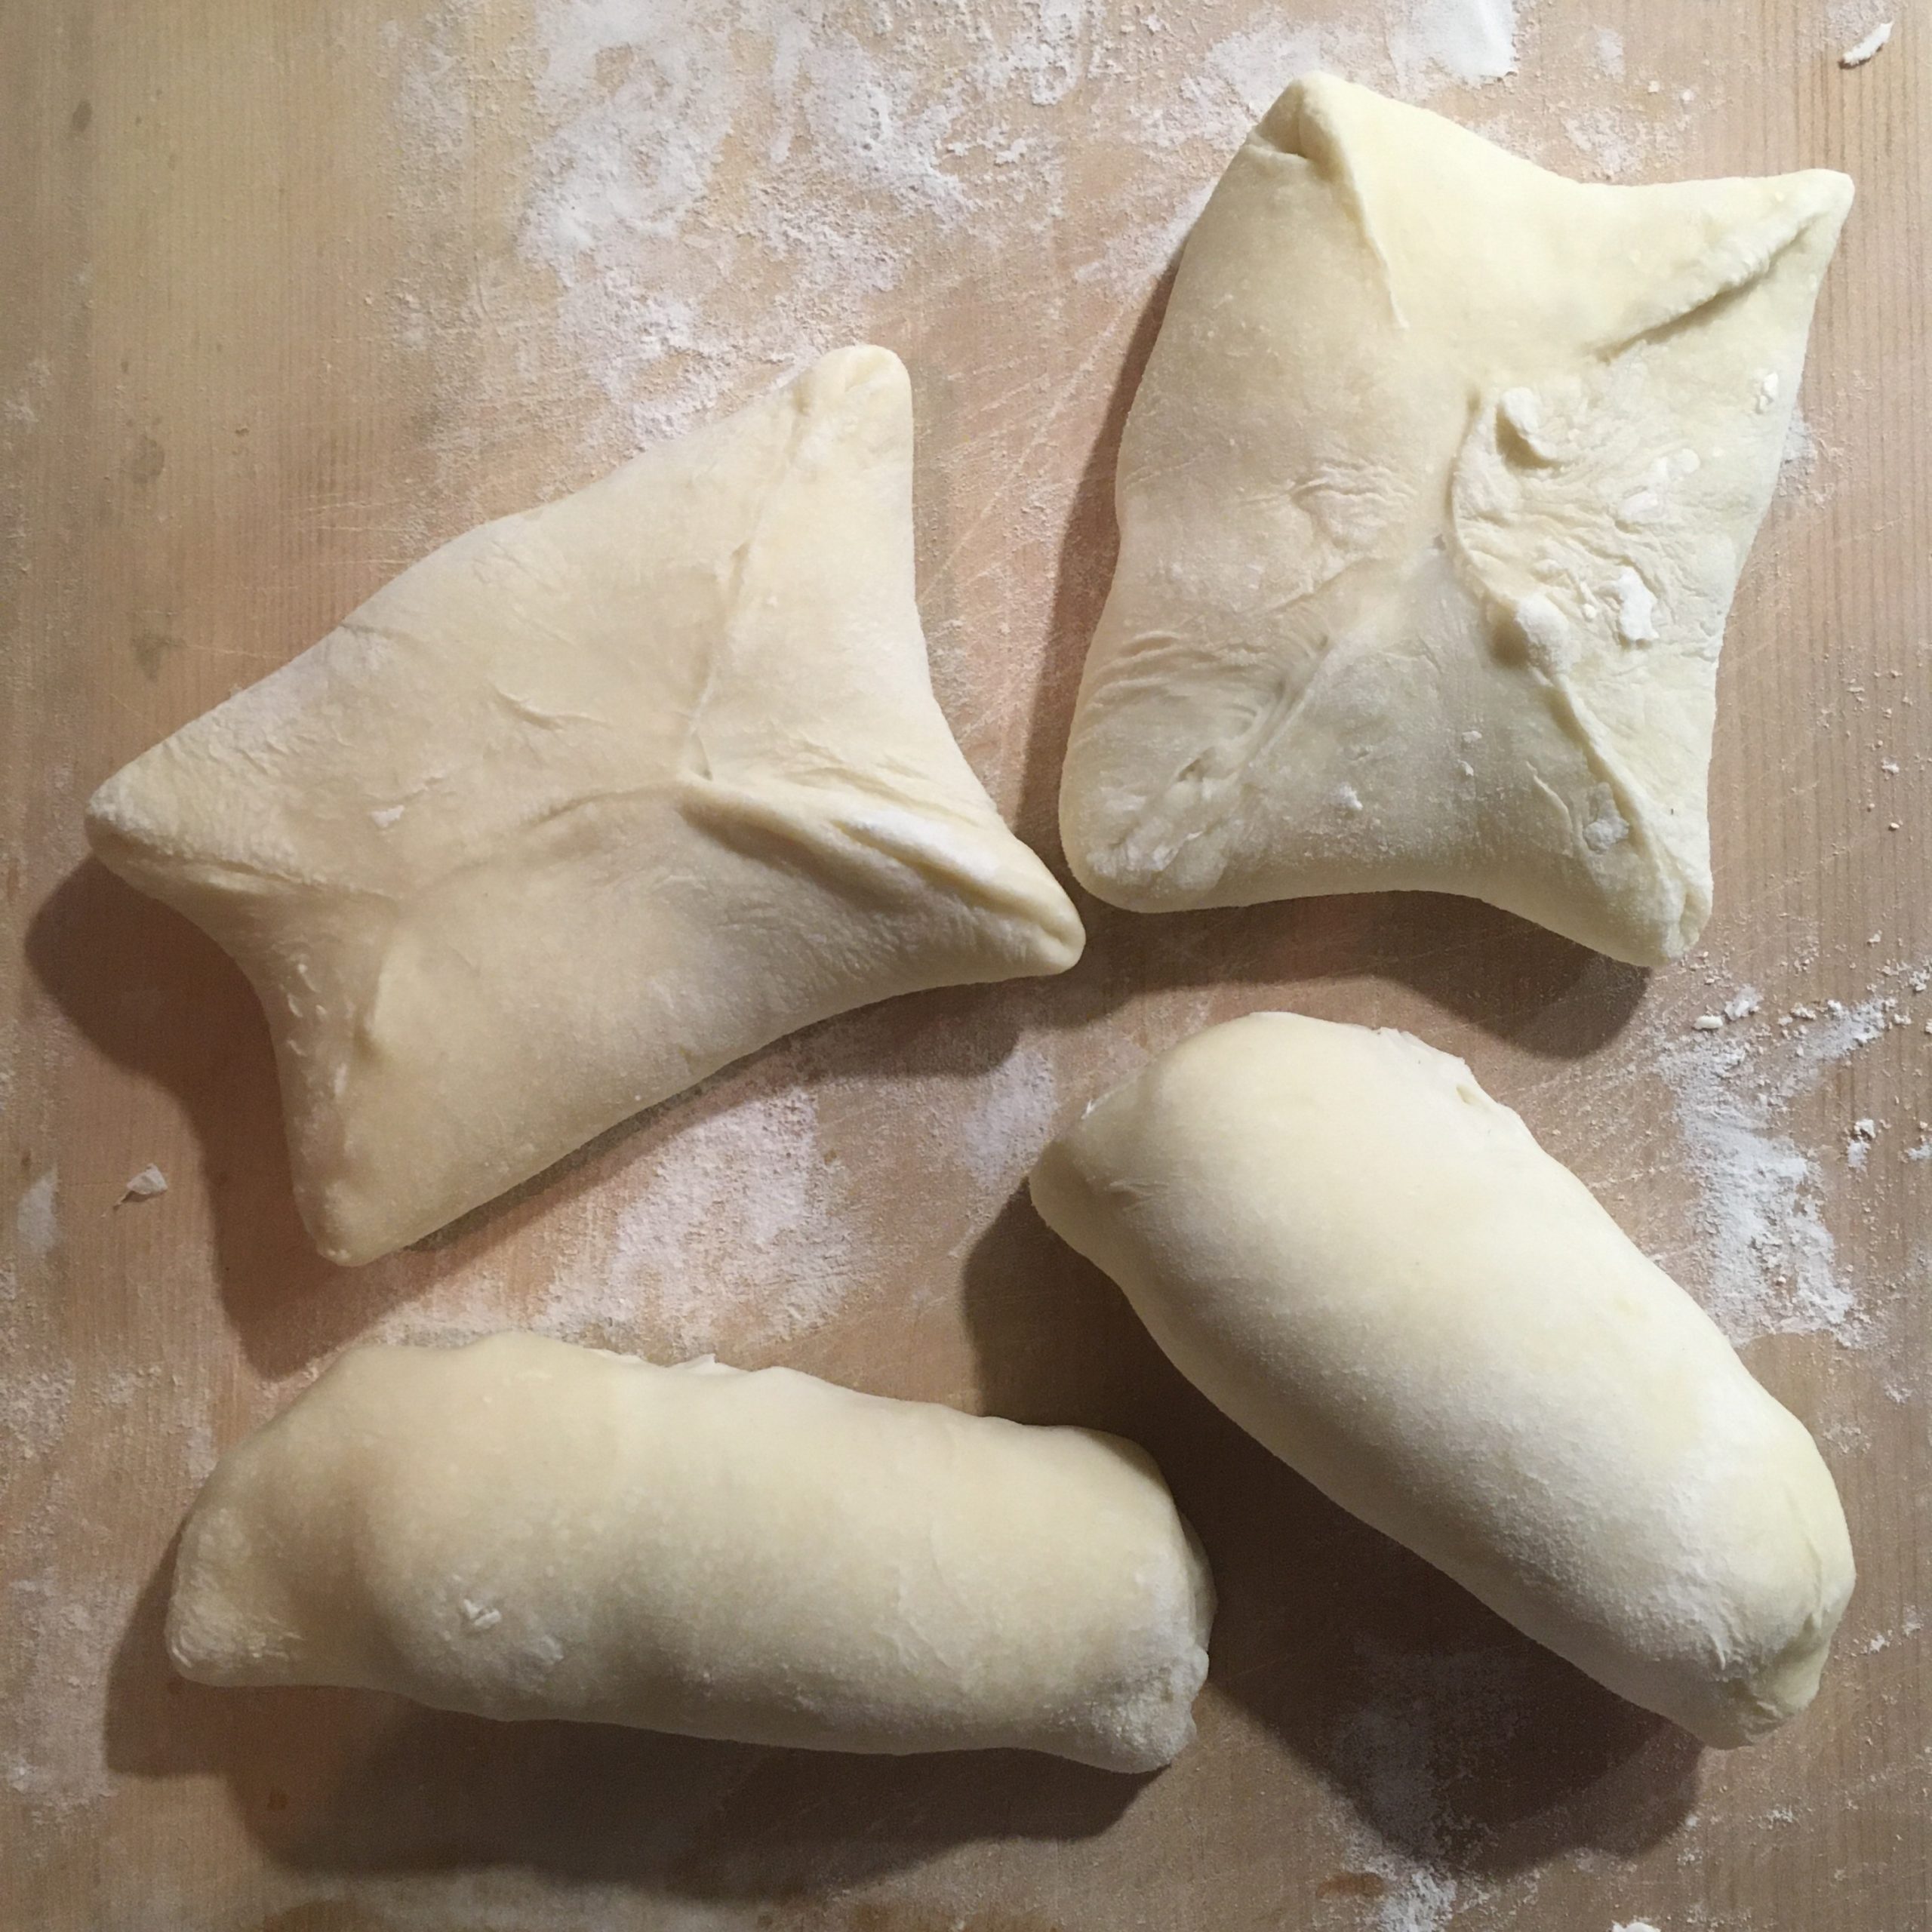
Prepare a steamer and steam them for 15min. I put them on a square of cooking paper to avoid them to stick, and put a lot of space between as they will inflate quite a bit.

Finally I served with soya sauce. The sausage bao could be nice with a bit of karashi (Japan kind of mustard), but I didn’t have any…

Koyadofu simmered with winter vegetables

You may remember that in October I introduced a very Japanese ingredient: Koyadofu-高野豆腐 in a post with a very simple recipe of curry. This was just one of the many examples of using koyadofu. Some may definitely claim that it is spongious and tasteless, I wouldn’t argue much, but I could also say that it is packed with proteins and it adds a very interesting texture to many preparations. The recipe I want to present today is a very simple recipe of Koyadofu first slightly fried and then simmered. It is basically a preparation that could be done with hard tofu as well. The vegetables I chose for the recipe are those I had around but you can also change slightly and add greens or vegetables of your choice. I must admit that lotus root and shiitake are really perfect for this preparation: the fresh shiitake are soft and a bit chewy, the renkon is crunchy, and the koyadofu just perfectly spongy, but the prior frying avoids it from sucking all the juice.

So without further delay, let me share this recipe, that is really simple but holds all the best Japanese flavours.

Simmered Koyadofu (serve 2 people as a side of rice)

  • 5cm of lotus root, a bit big
  • 10 cubes of 1~2cm of koyadofu. If you use large blocks of koyadofu 2 should enough
  • 10 little shiitake, or 5 large
  • a 1cm piece of fresh ginger
  • 3tbs of soya sauce
  • 3tbs of cooking sake
  • 1/2 of water
  • some katakuriko 片栗粉 or potato starch
  • a bit of oil for frying

First of all return the koyadofu to a soft texture by bathing it into water for a few minutes. Drain well by squeezing it like a sponge. If you use large blocks cut them in 1~2 cm cubes. Roll them in the katakuriko. In a oiled and heated frypan fry the cubes until white golden.
Peel the lotus root and cut in 5~10mm slices, cut in 2 if the root is really large. Add to the pan and cook in the remaining oil. Wash the shiitake, remove the stem, cut them in 2 or 4 if large. Add to the pan. Grate the ginger, add to the pan, add the soya sauce, the sake and the water and simmer for 10min or until the liquid is almost gone. Serve with a bowl of rice for example.

Chickpeas and orrecchiete, an heresy?

There are culinary rules I grew up with that are long lived… Such that we don’t eat bread with pasta, potatoes or rice, or we don’t potatoes with pasta or rice, or rice with pasta… basically one and only one source of carbs is enough for one meal. A. would confirm that pasta and rice are definitely not a good mix, despite the famous dish called Turk(o) rice from Nagasaki, that to be honest seems more like a terrible mix… Indeed, a long long time ago, I was working on the weekend and really busy and I didn’t have much time to prepare A. a lunch. At that time, probably the last time after the incident, I was using a bit the freezer to freeze some leftovers to use in cases of emergency, and I was sure I had a bit of pork ground meat there, so I told him to boil himself some pasta, add the meat and enjoy! But the meat wasn’t meat, it was brown rice, and apparently spaghetti with brown rice was a terrible mix (more so when you’re a meat eater and you think you will have pork…!!!)

Sorry mum, but there are rules that I discovered can be broken and lead to delicious preparations such as having potatoes in curry rice, or sweet potato rice, or potato ravioli. And that’s how mixing chickpeas and pasta came to my mind… But not all pasta would work the same and I found that Orecchiette would be great for their little cup shape would be the perfect size for that of chickpeas. I knew they would made a great pair and they did. Perfect for a nutritious lunch after 2 hours in the ocean surfing and body boarding and before another 2-3 hours in the garden trimming trees. Yes, weekend in the country are very active and warm and comforting food is much necessary to face the elements.

For the recipe I used a Mediterranean variation of flavors, I used some greens (I used turnip tops, but it can be anything green and leafy: spinach, chard…), a fragrant Italian olive oil and a few chopped Maltese dried tomatoes, ample pepper. So here is the detailed recipe, I hope you’ll enjoy it.

Orecchiette and chickpeas (for 2 servings)

  • 125g of dried orecchiette, boiled
  • 70-90g of boiled chickpeas (a small cup)
  • a nice bundle of green of your choice and in season: spinach, radish tops, turnip tops, chard or whatever you like
  • 2-4 dried tomatoes depending on the size. Mine are giant sun dried tomatoes I brought back from Malta
  • deliciously fragrant olive oil as much as you like
  • black pepper freshly ground

Prepare you chickpeas the day before if they are dry. and boil them until tender. If your pasta aren’t boiled yet boil them.

Wash and chop roughly the green. In a large pan or wok, put a bit of olive oil, and at low to medium heat soften the greens in the oil. when soft enough and brightly colored, add the pasta and the peas and stir well. to obtain a well balance mix of all the ingredients. Chop the dry tomatoes, and stir again, still cooking at medium heat. Add a last splash of olive oil, ground black pepper and serve. That’s it! Simple isn’t it?

Completely in love with my sourdough 🤍🤍🤍

After the slightly difficult beginnings with my sourdough starter Lois, it’s been almost 2months and we have reached a nice cruising speed, I use it all the time now. I’m still a bit surprised that my starter hasn’t done any crazy bubbling so far, on the contrary, it’s been behaving very very well, doing regular foaming but to a reasonable volume, and when in need for food it smells a nice apple flavour.

Cooking bread with my sourdough starter at first was quite tedious, with the impression of starting from the scratch, in particular, I had to relearn how the proving and rising worked, cooking at higher temperatures, with many of my first breads that just imploded when baking, ending up with big cracks on the bottom rather than on the top, or being too dense. I also needed a bit of adjustment with the flour I was using. I am still searching for a steady supply of organic local flour (and I will make a post as soon as I find something that is worth mentioning). The ones I have used during the summer are now out of stock and it seems unsure when they will have stock again. Together with searching for supply, I steadily continued and learned from my mistakes, and now they are all fixed or so, and I have started to obtain a regular shape and beautiful crusts with fluffy crumble on a regular basis. I started playing again with whole wheat, wheat bran,nuts etc… In the end, it seems that lower room temperature and longer times work very well for my sourdough starter. That to say that the sourdough adventure is a beautiful one and the flavour of the breads are uncomparable with those made with yeast (dry or fresh), so even if it took me so long to make up my mind, that it is a hassle to travel with my sourdough back and force between Tokyo and Ohara, it is just a new habit. And if while in Tokyo I use little of the sourdough for baking (until I get my kitchen redone with an oven…), but the one thing that I find really amazing is to use the extra sourdough I have for flat breads and for pancakes. It brings the flavour to a new level, something quite addictive.

So if you have a sourdough starter that you don’t use much for bread baking like me, I highly recommend you continue feeding it every day and use it for anything that needs flour and water. If you have other tricks to use your sourdough please let me know I am curious about other uses. Indeed Lois is quite gluttonous and in 4 days it gets quite voluminous!
Actually I have already starting giving parts of it away to friends so if you are interested in a stable sourdough starter, please let me know!

Quenelles…

That’s something I haven’t cooked for 4 years!!! Can you believe that??? The last time I made some was for that post back in 2016!!! And then… nothing… strange enough because (1) I like quenelle very much, (2) it’s not difficult to make, (3) it requires only simple ingredients I always have in the pantry… So with the weather getting chillier it was a good time for turning the oven on more than usual.

I used the recipe from my previous post and slightly adjusted it, it is for regular quenelles, they don’t become very fluffy… I still don’t know how to make them fluffier, I need to work on it. But even not fluffy it tastes great. This time also I used fresh cream, but I realized once again (I rarely use cream so I have a tendency to forget) that Japanese fresh cream sold in supermarkets is not very good for oven cooking, it dries out and only the fat remains, which looks buttery and not creamy anymore… Milk to cook the quenelles first and adding the cream later is probably a better solution…

Still here is the recipe adjusted.

Quenelles (2-3 servings)

For the quenelles

  • 150 flour
  • 2 eggs
  • 50g of butter
  • a pinch of salt and nutmeg

For the sauce

  • 6 large shiitake or the equivalent of other simple mushrooms
  • 4tsp of fresh cream (if you like it) or olive oil can work…
  • 1 cup of milk
  • salt and pepper

In a pan the butter. Heat until the butter has melted. Add the flour, and cook at low heat for 8min. If you have a hard time mixing in all the flour add a few drops of water.

The final dough after cooking and smoothing

Cool down a bit and add the eggs, the salt, the nutmeg, and stir well. You should obtain a smooth dought that doesn’t stick. If it sticks add a little more flour, if too dry add a bit of water. Cut the dough in 8 pieces and form the quenelles as shown in the picture below. Boil a large amount of water and poach the quenelles until they float.

Set in an oven dish, add the milk. Wash and slice the mushrooms, add to the whole. If you use fresh cream (not Japanese) add it now. Add salt and generously add pepper. Pre heat the oven at 200 degrees. And bake for 30min. At 20min add the cream (if you use Japanese cream). They get golden brownish on the top when ready. Serve and eat immediately.

Autumn warmth and color

As the summer fades away, autumn days are slowly settling in. Autumn in Japan does not mean yet fallen leaves, cold mornings etc… we’ll have to wait at least another month for that! October is usually a fair month with warm days and just chilly enough evening and mornings to enjoy a walk or a bicycle ride. The food stalls start changing in colors and products too. The new rice harvested in August, the pumpkins and kabocha, the lotus roots… of course some of the summer food will still be around for a while: the super ripe tomatoes, the last crunchy cucumbers…

Combined together late summer and early fool ingredients are perfect such as in this pasta recipe below: tomatoes, butternut, lotus root… simple but delicious.

With the more chilly evenings, it is nice to curl under a little blanket and eat a warming dish, warming by its color and flavors. So I prepared a slightly spicy soup with fresh vegetables and chicken meat-balls, in a bouillon of spices and fresh lemongrass. Here is my recipe, it’s super simple!! Hope you’ll like it!

Spicy soup (2 servings)

  • 1 carrot
  • 1 2cm slice of butternut squash
  • A handful of green beans
  • 100-150g of chicken breast grounded
  • 1 tsp of potato starch
  • 1 pinch of turmeric
  • 1 pinch of chilly pepper
  • 1 pinch of coriander
  • 1 pinch of salt and pepper
  • 1 leave of fresh lemongrass
  • 100g of vermicelli or thin noodles (optional)

Actually you can adjust the vegetables to what you have around… I sliced the carrot with the peeler to obtain very thin slices, but you can also do a julienne or small stick… it’s up to you…

So in in a large pan I heat 1L if water, add the vegetables and the spices. Then in a bowl I mix the meat and the starch. Make small balls (1.5-2cm diameter) and toss them in the boiling bouillon. After 10min all is ready. 5min before eating I add the noodles. They cook very quickly and you don’t want them to become thick and too soft. Serve immediately. Yes… that’s it!!!

Have a good day!

I knew it…

Well… while this week has been crazy busy with work, I also was very excited with my sourdough experiment… and things turned out almost as I expected they would… with utter fun when Lois grew and foamed and in utter disappointment when it stopped, finishing in a nauseous mess that stunk like I couldn’t imagine it would. Sourdough is not for me, I knew it…

Lois on the 2nd day, gently bubbling

I read books, blogs, websites about sourdough before starting (it took me 5 years to get ready for the commitment!!!!) and while I was observing it growing. I wanted to do right, not to waste precious time and resources. Then I was almost desperate when it started to stink, read even more about all the possible tricks, tested them all: sugar, malt, fridge, not fridge, more food, more mixing, rest, splitting it and starting afresh… nothing seemed to have worked truly. Almost 1kg of mixture went down the drain in a terrible smell. The rest is sitting in the kitchen in a desperate hope I can still save it. The smell is gone but no foaming and bubbling as I thought it would… part of the passive mixture was used for pancakes this morning…

But before things went south I had on the third day just enough to make a tiny bread to test it when it was still good! And damned! Even if I rushed it a bit ( temperature went down with the rain so the rising was too slow for the impatient me!) the crust was perfectly crusty, the crumbs were moist and soft, and the taste of whole wheat and sourdough was amazing. Enough to keep me trying to save what is left of Lois… so now I am in this terrible situation where I want to stop hoping I can grew a stable relationship with my sourdough, but I can’t take the final decision to trash it all, as the taste of sourdough bread was so perfect…

An old recipe

Making a quiche requires quite many ingredients. First flour and butter for the dough, then eggs and milk or cream fir the egg base and finally something to put in: vegetables, bacon, fish, cheese… then it takes 30-40min to bake it to perfection. It’s not something you prepare and serve 20min after you’ve started cooking.

But one day, when I was rather young and staying at my best friend’s house, her mother made a quiche, or rather what in French we call a savory tart with minimum ingredients and cooking time: the mustard tart. Back in France many people buy ready-to-use rolled pie crust so this makes it even simpler, but here what is stunning is the baking time. Because there is no egg base, it is really short.

Unfortunately the original recipe is all about cheese, and this doesn’t work for A. so I barely cook mustard tarts, until the other day when I decided to replace his share of cheese by thinly sliced local sausages. He had his meat, I had my cheese and everyone was happy to have lunch ready in no time!!!

So if you want to try, here is the original recipe and my recipe:

Mustard tart (classic)

  • flour, butter, water for one pie crust
  • 2 large and ripe tomatoes
  • 2tbs of mustard
  • 1-2 handful of grated emmental or gruyere cheese

Prepare the dough and roll for a 30cm low pie dish. Spread the mustard. Wash and thinly slice the tomatoes, sprinkle the cheese. Bake at 200deg until the cheese os melted and slightly golden. That’s it!!!

Mustard tart (meaty version half/half)

  • flour, butter, water for one pie crust
  • 2 large and ripe tomatoes
  • 2tbs of whole grain mustard (makes the whole milder)
  • 1 handful of grated emmental or gruyere cheese
  • 2-4 little sausages

Proceed exactly as above but just slice the sausages, sprinkle them on one half, and the cheese on the other. It is really that simple!!!

Edamame and eggplant

Whether on weekdays, when we have little time to have lunch or on the weekends when we are busy with surfing/bodyboarding, playing tennis or gardening, having a good lunch easily ready is important. Moreover, if that can be prepared in advance it is even better! Fresh pasta have been quite a good candidate as they can be accommodated easily, be eaten warm or cold… and since it it is the end of the summer we want to continue enjoying the summer vegetables a little longer, in particular, enjoy the last edamame of the season. I know that we will have eggplants and tomatoes for quite a few weeks or even months but they add a real summer touch to a dish. So I came up with a recipe of edamame pasta with eggplant that is all creamy and divine and I couldn’t wait sharing that recipe with you, as if you want to try you’ll have to hurry!

Edamame, fava beans, and similar are a good match with eggplants and are traditionally used together in Japanese cuisine. I revisited this classic combination in a more western style.

Edamame and eggplant creamy pasta (2 servings)

  • a handful of edamame
  • 2 eggplants
  • fresh pasta
  • olive oil
  • salt and pepper
  • grated Parmigiano (optional)

Boil the edamame, grill the eggplants to be able to peel them. Once the edamame have cooled down peel them completely and in a mortar puree them. Add a bit of olive oil, salt and pepper. Peel the eggplant and add to the mix and pure roughly. Boil the fresh pasta, once drained add the mix, stir well ad serve. Add grated Parmigiano if you like.

Yes! that’s it! Isn’t that simple? And you’ll see it is truly delicious!

Proudly powered by WordPress | Theme: Baskerville 2 by Anders Noren.

Up ↑

Verified by MonsterInsights