Milk bread

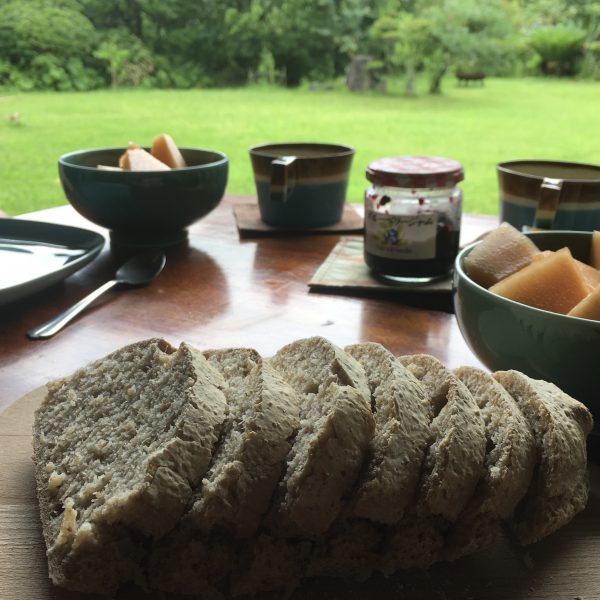
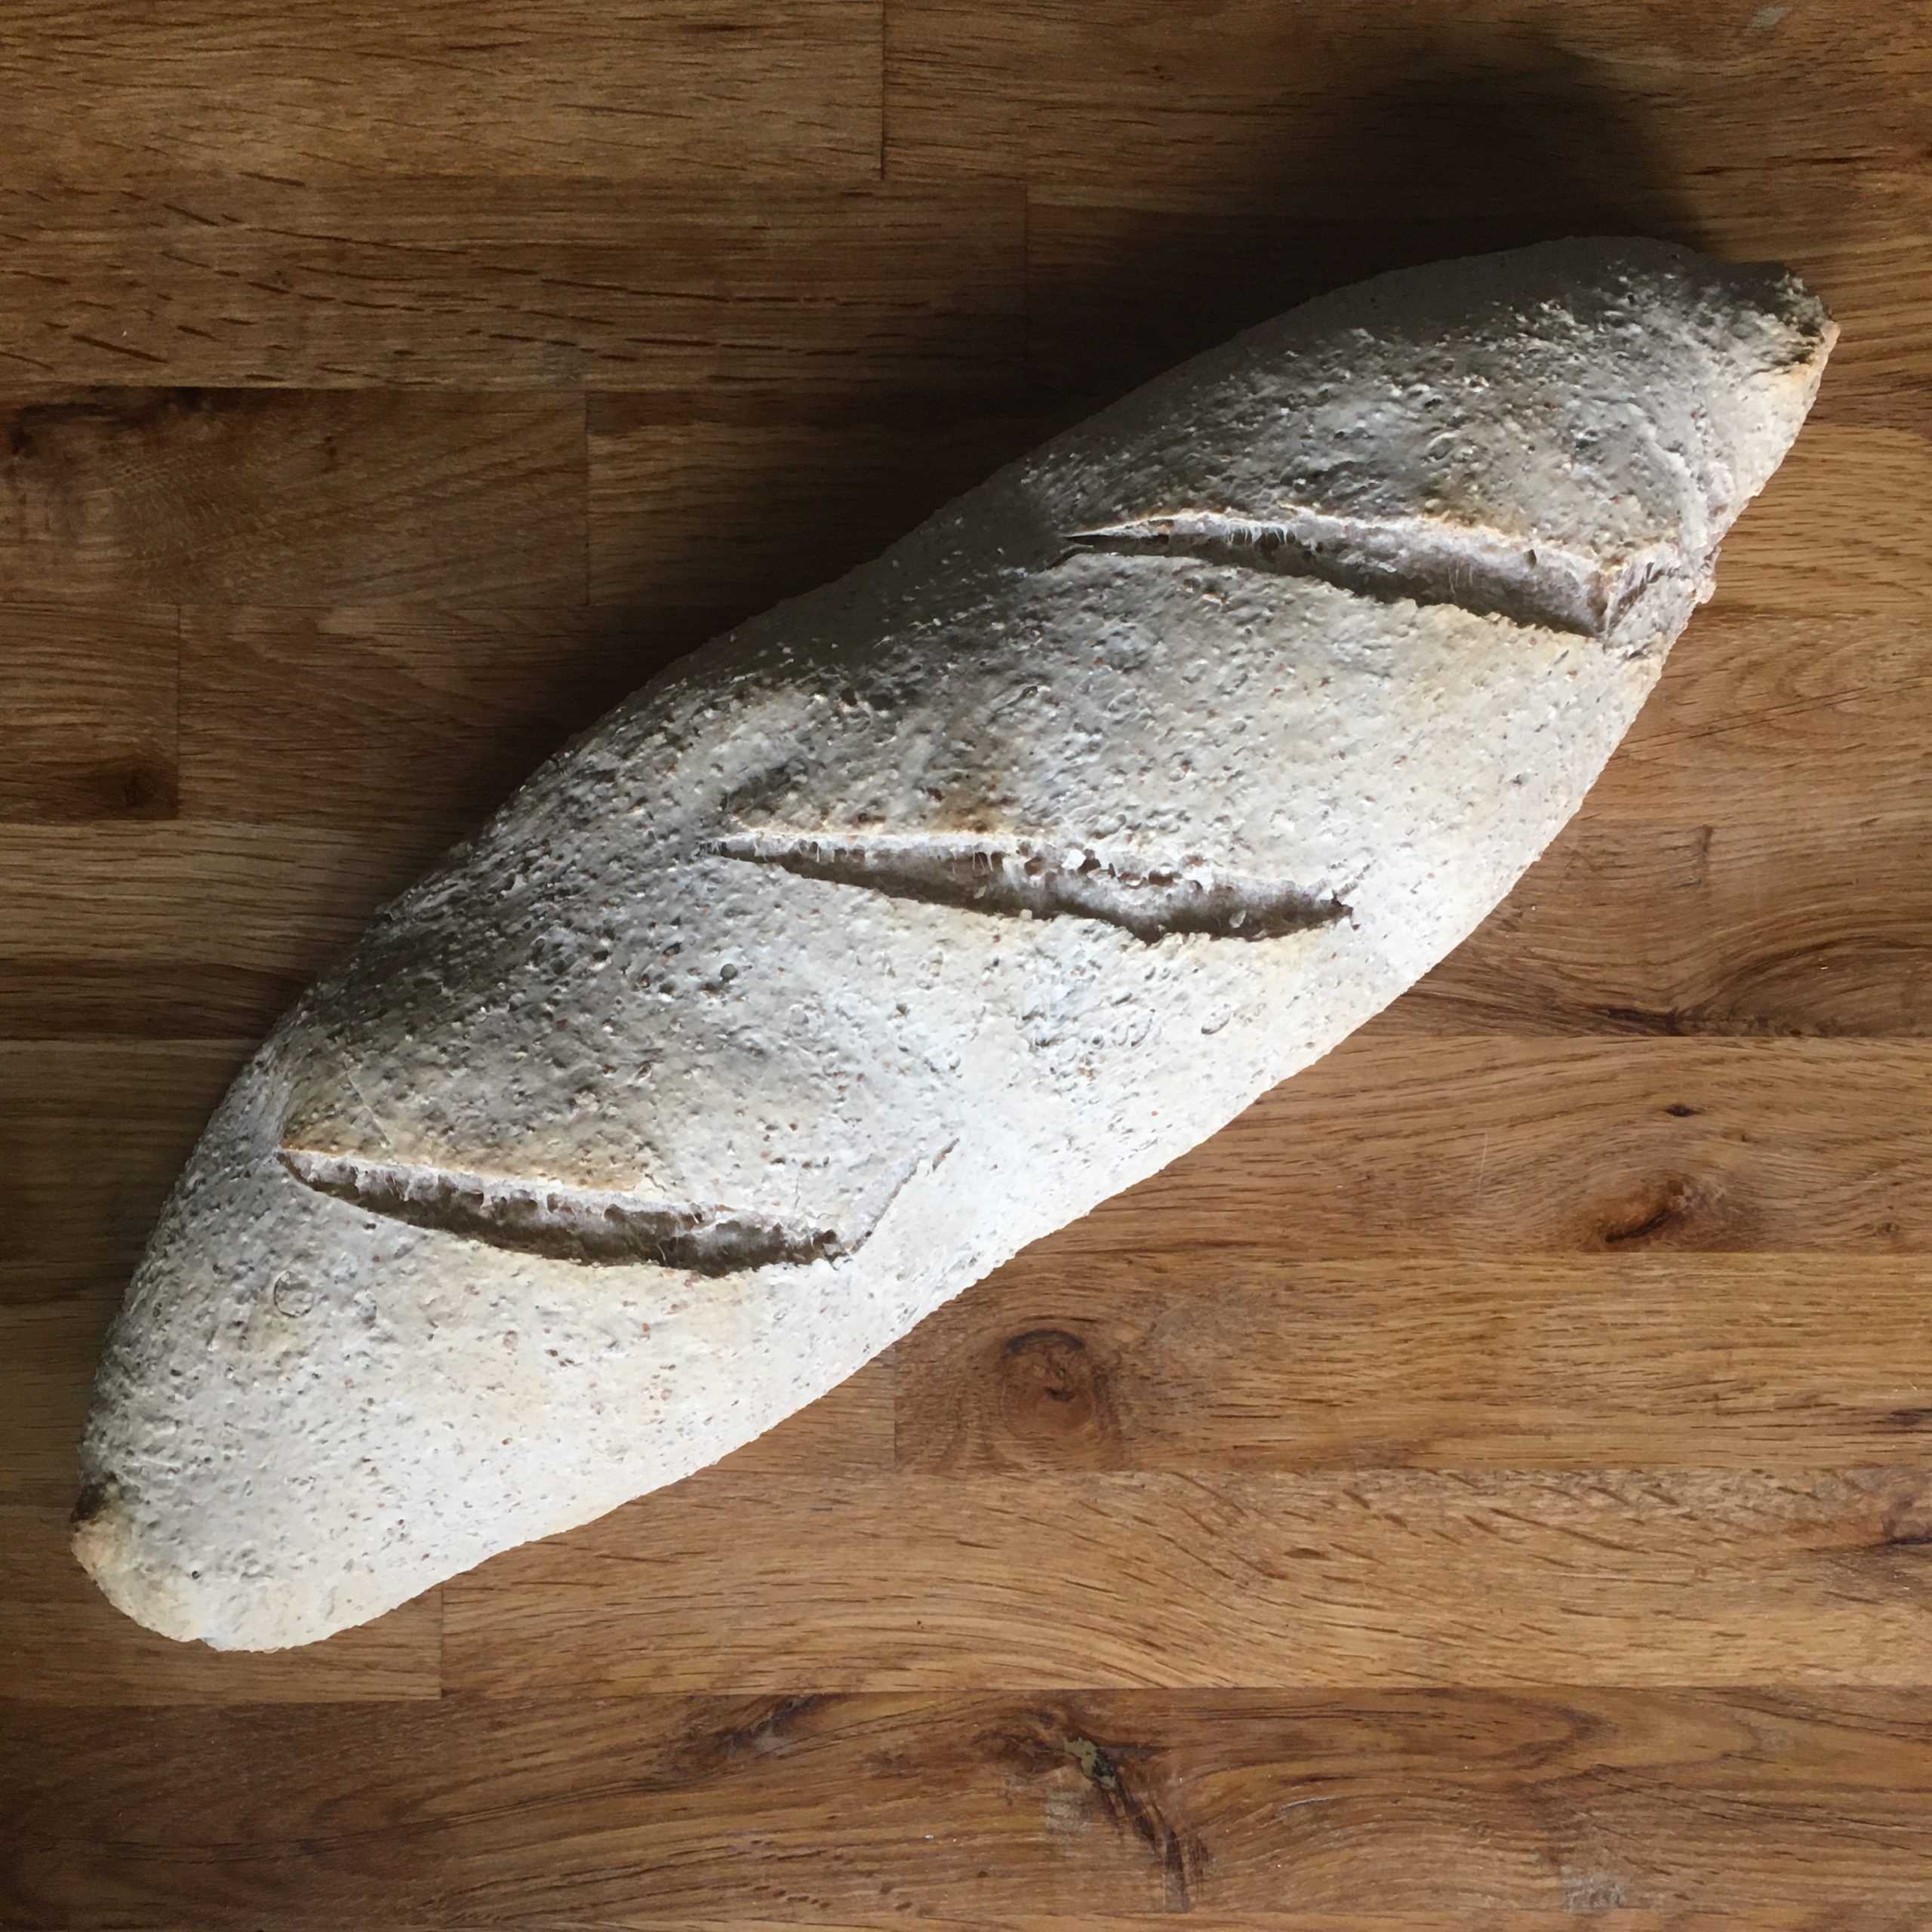
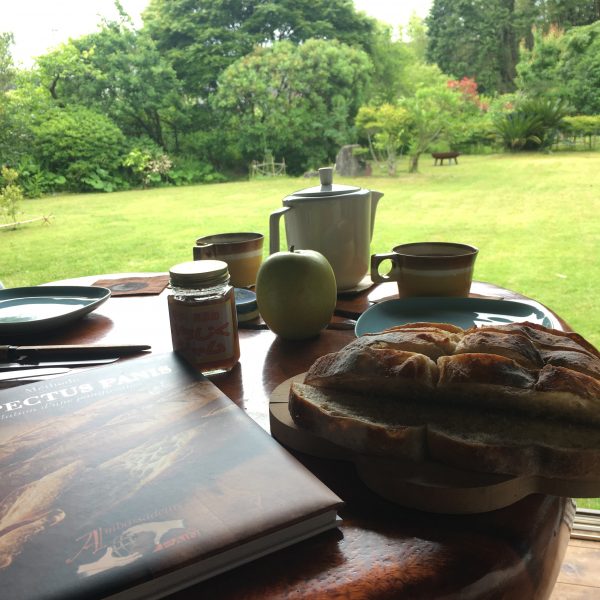
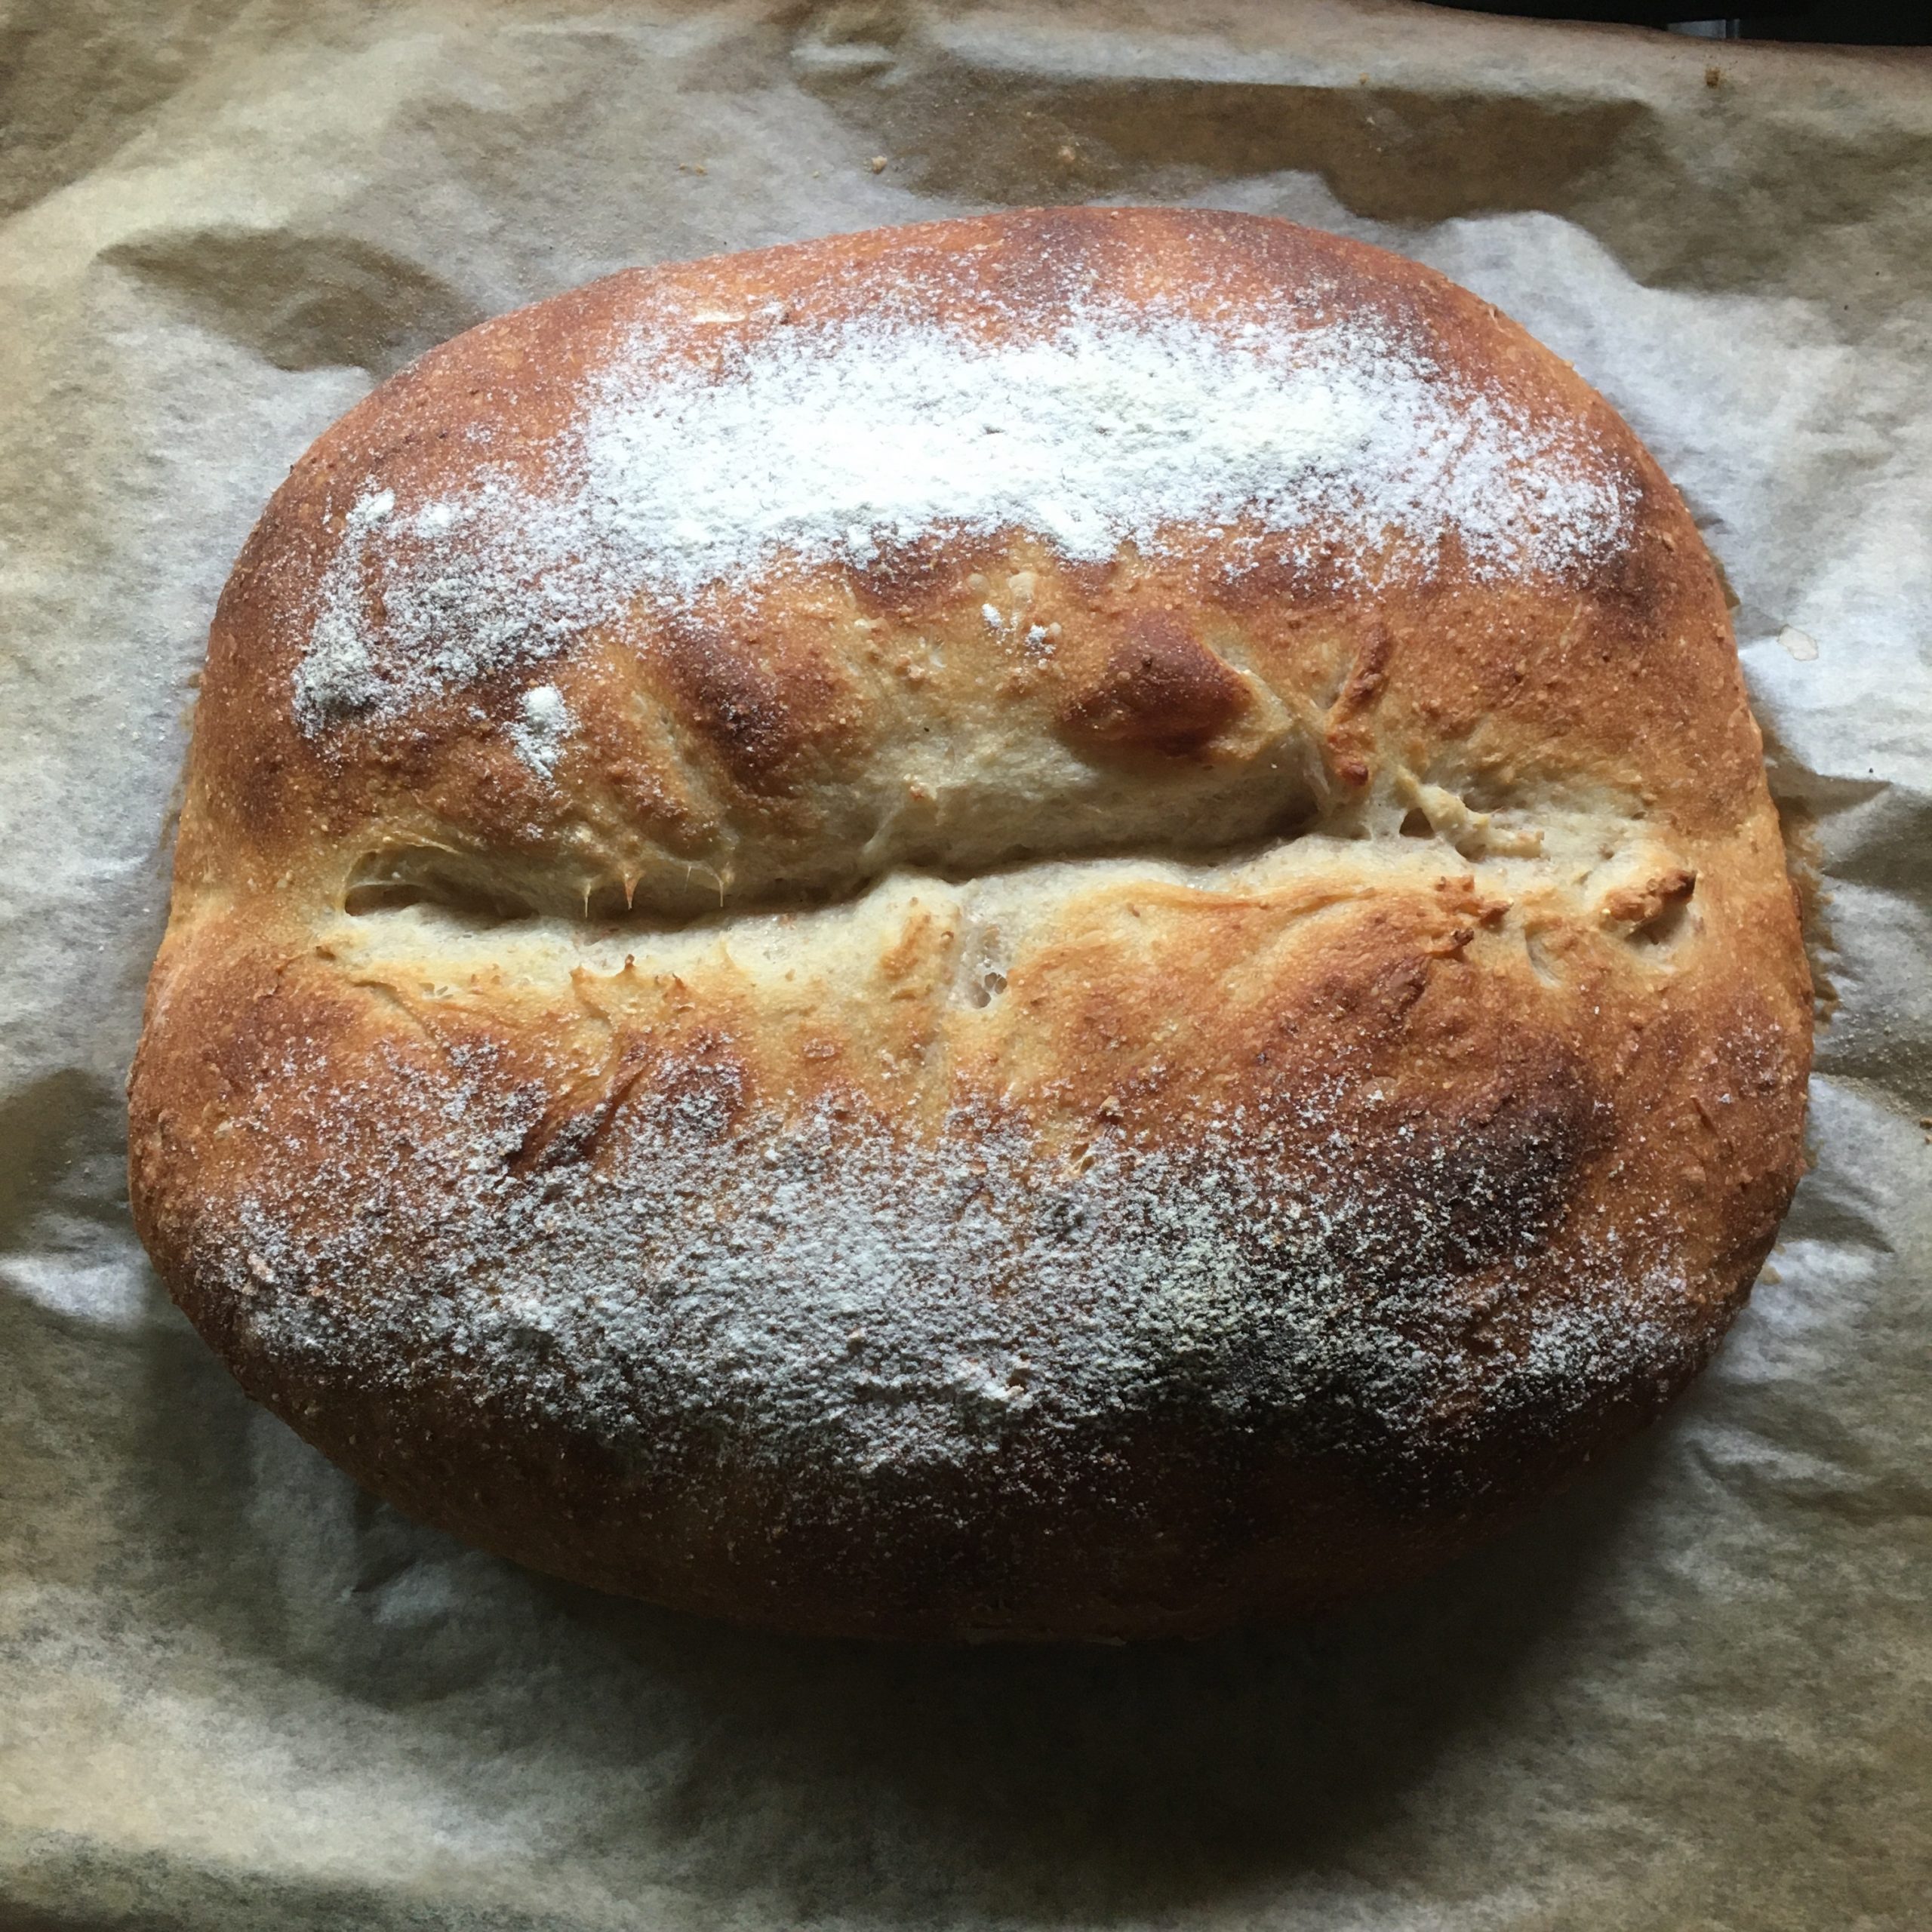
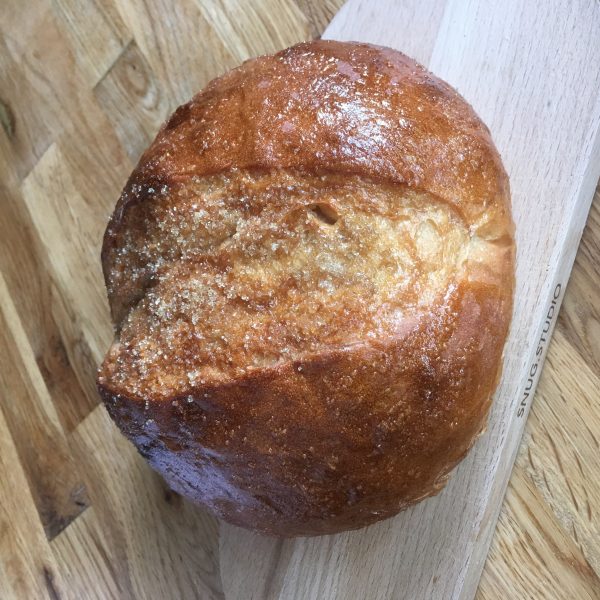
I use to make a lot of fancy breads for breakfast, brioches, viennois bread, milk breads, sugar breads… but since I started using my sourdough Lois, almost a year ago, and was learning how it works, I focused on breads with less ingredients. Yet, milk breads for breakfast are really delicious. And since we now have milk in the fridge 4 days a week or so, I really wanted to make milk breads with milk and sourdough. Originally I planned to do a white flour milk bread but I soon realized that I had no more white flour and all I had was whole wheat flour, so it would be whole wheat milk breads. And rather than making several small breads that dry out rapidly I opted for a giant version that I baked in my panettone mold.

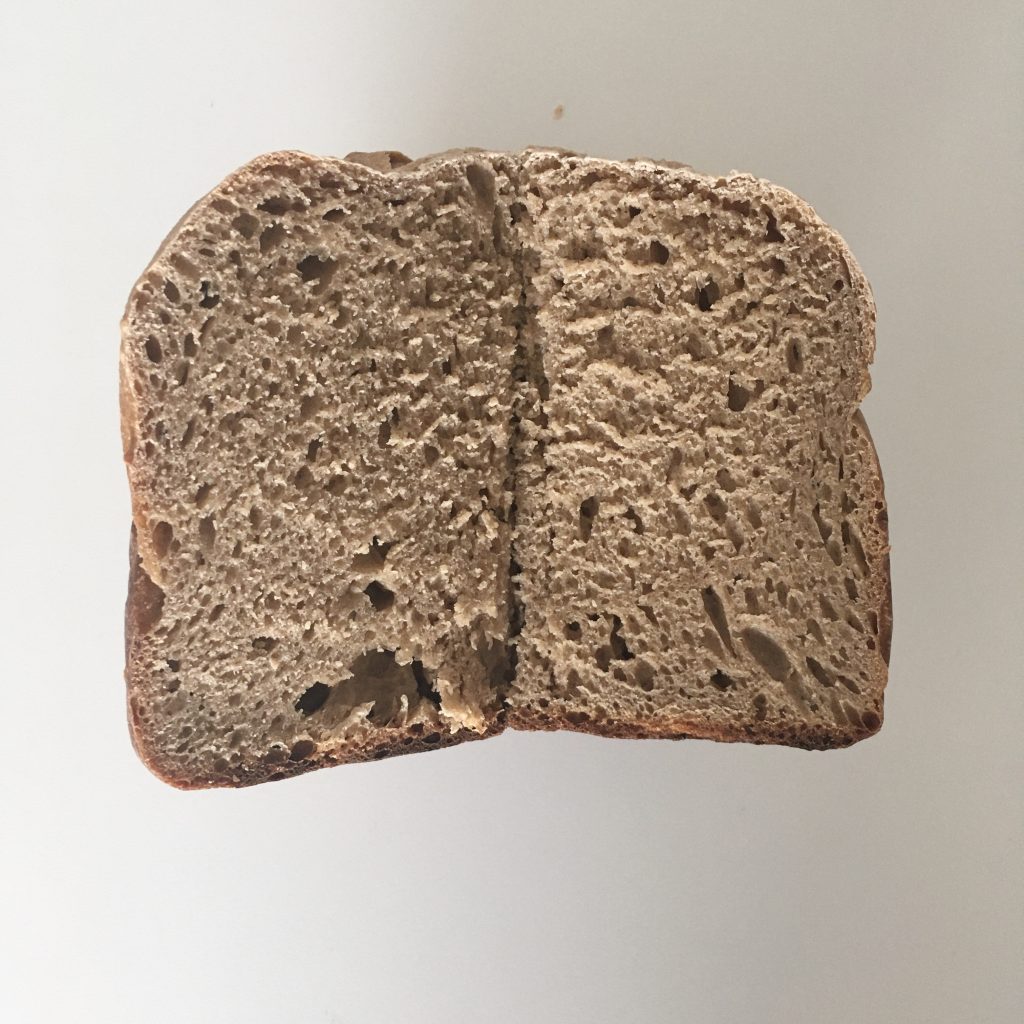
The result was a very soft and mildly sweet bread with a beautiful crumb. so let me share my recipe.

Whole wheat flour mills bread

  • 350g of whole wheat flour
  • 200ml of milk
  • 100g of sourdough
  • 40g of brown sugar
  • 8g of salt
  • Eventually a bit of water

Note that the above quantities are indications. They may need adjustment depending on the type of flour, the humidity in the air, and your liking.

In a bowl put all the ingredients but the water and knead. If the dough is too dry add a bit of water, or milk. Knead until the dough is smooth.

Let rest at room temperature for 4h or until the dough is significantly more voluminous.

I used a panettone mold lined with cooking paper to shape the bread. Made two cuts on top and waited 1h before baking at 200degrees for 40min (I used a bamboos stick to test if the core was well done). Adjust the baking time to the size and shape of your breads.

That’s it!

Breakfast…

Breakfast, as I often say, is my favorite meal and I would never skip it!!! But it wasn’t always the case, it took me twenty years to be able to eat breakfast… Probably because waking up early to go to school wasn’t adapted to my sleep rythme and I’ve never been a morning person… When waking up to the alarm (which I try not to do too often anymore) I am in an autonomous mode for a (A. would say loooong) while. When I first started eating breakfast, I was in college. At first when I was still home, my father would bring my breakfast to me, no kidding!!!! My breakfasts consisted in things that are really easy to serve without preparation: muesli with milk, a pack of fruits compote, a glass of fruit juice and a large cup of tea. I kept the same routine when I moved out. It could be made easily, but I took it in my room on a silver platter, beautifully organized and served. That was part of the routine of making it enjoyable, together with listening to music and getting ready.

We kept a similar routine for a long time, but slowly replaced muesli by bread or equivalent that we would buy, and the compote by fresh fruits. We also got ridden of the fruit juice. I also adapted my schedule (that I am lucky I can control 99% of the time) to something that fits more my morning slowness, by allowing more time to breakfast and avoiding morning craziness. So that now we don’t buy bread anymore, or only croissants or pain de mie from artisan boulangers once in a while. I bake it most of the time or I prepare pancakes or scones. The music is still an important aspect of our breakfast!

I have endless variations of bread recipes that I am now all trying with the respectus panis approach: with not enriched flour, little salt, little yeast. It works great!!! And I found that it is even more adapted to our schedule as now I prepare the dough in the late afternoon, let it prove a few hours, shape the bread in the evening, put it in the fridge, and in the morning bake it for 20-25min depending on the size and type, which is just perfect for a out of the oven bread for breakfast!!!

The bread in the picture is one of my favorite: 4/5 of plain white flour (I am testing organic Japanese flour providers from different regions of Japan, preferably closer than Hokkaido, I’ll keep you posted once I have found something really nice), and 1/5 of roughly stone grounded whole wheat flour that has a lot of coarse bran in it. It gives the bread an interesting texture and a subtle flavor. I bake it low in the oven hence it doesn’t have the golden color on top, but on the bottom!!!!

While this breakfast routine is what I find the easiest to go with every morning, I like both savory and sweet breakfast. Eggs, bacon, cheese, salad, avocado toasts, honey, jam… everything makes me happy! But there is one thing I never prepare but I love dearly is a true Japanese breakfast… I promise a post on Japanese breakfast and a few recipes in a few weeks!!!

Now time to go surfin’ 🏄🏻‍♀️!!!

Bread in a pan…

Who would do that honestly???

I never thought I would… until we moved to our new apartment where the kitchen doesn’t have an oven yet and we are still not sure about the renovations we want to do and given the circumstances we prefer to wait a bit… I don’t see myself stopping telework, I’ve always loved it… and always hated train commute. Nor spending the whole week in the country, it would be too tempting to go surfing and work in the garden instead during the day… and I would start working at night…

So, no oven… I’ve tried to bake bigger breads on Sunday but they are so good that they barely last until Wednesday morning in the best of the best scenario… the rest of the week, I make pancakes… but I get board of plain pancakes, and nothing is better than bread (but croissants and pains au chocolat… but honestly they are just air and they feed us enough to not starve 2h later… and lunch is usually more 4 or 5h later…

Bread is the only option and I remember seeing recipe of breads in crockpot, in cocotte… so I was tempted to try. In Tokyo I have neither crockpot nor cocotte. I have a pan with a more less fitting cover… more less because my pan once felt and since then it is more an ovaloid than a perfect circle!!!!

The bread making and kneading is just the same as usual. The rest time also for the first rise. For the second I read that it can be done while the pot is heating, and I tested the first time, but for me it didn’t work, so I just shaped my bread as a ball, laid it on kitchen paper in the pan and waited 1h. Then turn on the gaz rather high and covered and cooked until the bottom was golden. Then I flipped the bread and cooked on the other side. It avoids the thick crusty bottom and the risk of heart of bread not well cooked, and that’s what made my second pan bread perfect.

Cooking bread in a pot may not seems straightforward but it works very well… and I was surprised about it!!!

Respectus panis

I’ve making bread at home now for what…??? 6 or 7 years… at first I started easy, not every weekend, just once in a while, now it is just part of my daily weekend routine, and even when I could I was baking bread during weekdays!!! I have tested all kind of recipes, followed the books, then went on my own, using my experience and feeling, and except croissants, that I still feel not confident making, I’ve never failed a brioche or a bread. Two years ago when I discovered breadin5, I understood some of what my experience and intuition were suggesting me: the bread making is not such a rigorous process for which quantities and time are that important. If you think about it billions of humans have been making bread for more than 20 centuries… so it wasn’t about 1g plus or more of yeast, or the exact temperature of water! Breadin5 showed me that we can be more playful with bread making, but last winter, my parents offered me a book about bread making “respectus panis” and what they were saying in this book was exactly what I was waiting for: less yeast, less salt, little kneading, long proving time. Well long at 18degrees so I had to wait until the warm weather was there to test properly, otherwise the house temperature is rather 15degrees or less and long would have mean forever!!! I finally did test the method. And I was not disappointed. With half of the regular amount of yeast and salt the dough takes about 12h to bubble well in the current situation, which will shorten as temperature increases, the bread is a lot tastier and enjoyable and keeps very well. I have tested only with some of my classic white bread and campagne bread and was really surprised by the result! I must say the campagne was a huge hit!!!

So now I can save on yeast, which given that recently it’s been hard to find baking powder and yeast, is definitely a good attitude!!! And I can’t wait to try again this weekend!!

Croissants!!!

I use to hunt down the best croissants in Tokyo, I found some, but best shops making the best croissants change over time… Recently we went nearby our place at the factory, and they have probably close to the best pain au chocolat but definitely not the best croissants… and a space that maybe perfect for a gloomy morning but not for a bright sunny day, I preferred the park nearby.

Pain au chocolat from factory

Knowing that finding delicious croissants in Tokyo, you can imagine that in Isumi it is a bit of challenge. Grain makes delicious croissants and pains au chocolat but they open too late to have freshly baked croissants in the morning. The only option was that I tried making some again. Indeed after three or four miserable attempts in the past years, I decided that an ugly weekend would be the perfect timing for another attempt. And that’s just what we got: pouring rain for almost 2 days and strong winds, notwithstanding a drop in temperature back to a modest 5.

Instead of testing again a recipe I had in my books and didn’t work for me, I chose to go online and pick a video tutorial. After watching a few I picked the video by Domi patiss, because it was neither too short, nor too long, because her croissants look really fluffy and delicious, and she had a few hints that made sense to me. I followed her recipe almost to the letter except for quantities and I must say that for the first time I managed to make croissants that both have the taste and appearance of croissants from a boulanger… They were delicious!!!

So here is what I did… there is a lot of waiting/resting time, so it took 24h to make the croissants, but the actual “action” time is always very short. The video by Domi patiss is in French but quite visual to understand the folding and rolling tips she gives.

Croissants (make 6-8 pieces)

– 250g of flour

– 70g of water

– 60g of milk

– 6g of fresh yeast

– 7g of salt

– 20g of brown sugar

– 10g + 110g of butter

In a large bowl I mix the flour, the sugar, the salt, add the water, the milk, the yeast and 10g of butter. I knead until smooth, roll into a 25 by 15cm rectangle, wrap not too tight and set in the fridge for 12h at least. The dough should raise during that time.

http://gentianeetantoine.com/igk/wp-content/uploads/2020/03/video-1.mov

Then I roll it onto a rectangle of about 25cm by 50cm. Cut the 110g of butter (cold) in thin slices and cover half of the dough. Flip the other half on top and roll again to obtain the same size again. Fold in four, wrap and refrigerate for 1h.

Roll again to the same size or larger and fold in three this time. Refrigerate for another hour.

Finally roll again to the same size. Cut the edges to make apparent the feuilletage. Cut 6-8 triangles, roll them into croissant, set for another hour to rest at room temperature.

Apply an egg batter on the croissants and bake at 210deg for 15min or until perfectly golden. Enjoy!!!

Scones forever!!!

There are so many things I love to eat and so few meals and time to eat them all, that I end up forgetting a few things I love. Last weekend I decided to catch up with these. So I prepared avocado rice bowls, quiche and scones. When it comes to scones I usually have in mind something for breakfast or tea-time, but this time, as we went surfing and then were busy fixing things in the house I only get to the kitchen around 18:30… and given the cold weather this weekend it was probably too late for bread. So I decided to prepare scones. And since it was almost time to think of aperitif snacks I went for two recipes.

Both use the same base. One is sweet with yuzu harvested in our garden, the other is savory with pancetta and shiitake. It is very simple and by simply changing the size or shape of the scones it can feel very differently.

Scones

– 180g of flour

– 50g of butter

– 1tsp of baking powder

– a pinch of salt

– milk (quantity will slightly vary depending on flour quality, temperature etc… but usually not more than 200ml)

In a bowl mix the flour, baking powder, and salt. Add the butter cut in small pieces and start kneading. Add milk little by little until the texture is smooth but not sticky. Form a 5cm diameter stick and leave to rest for 30min.

For the yuzu scones:

– 1 yuzu

– 2tbs of brown sugar

– a handful of flour

Wash the yuzu and dice thinly the skin. Add to the dough. Extract the juice roughly and add to the dough. Add a bit of flower if the dough becomes too sticky. Roll 2cm thick, cut to desired shape and size and bake for 12-20min at 180 depending on shape and size.

For the shiitake and pancetta scones:

– 50g of pancetta

– 1 or 2 fresh shiitake

– 1 tsp of salt, pepper

Chop the pancetta, wash and chop the shiitake. In a small pan heated at medium- high heat add the pancetta, stir gently until the fat starts to melt, add the shiitake, and stir once in a while. Cook like this for 5min. Add the cooked pancetta and shiitake to the scone mix, add salt. In really needed add a bit of flour. Add ground pepper generously. Roll 2cm thick, cut to desired shape and size and bake at 180deg for 12-20min depending on size. Enjoy!!!

Actually you may want to add some grated fresh parmigiano in the mixas well…

Extravagant bread!!!

Last night I asked A. what he would like for breakfast, or more precisely what kind of bread, brioche etc… ans he said I want an extravagant bread!!! But not extravagant because there are fancy things inside… hum… that didn’t really help so I started kneading a 1/3 whole wheat 2/3 white wheat and decided it would be extravagant in the shape…

With the chilly evenings now and our house rather cold I have tested over the years many options for the first rise of my doughs. If like me your house is not very warm (20-25deg) and your dough has difficulty rising and you don’t want to invest in a machine for that or use your oven and waste energy you have three options:

1. Prepare your dough 6 or 4h earlier than usual and give it enough time to rise. This only work is the temperature is higher than 18.

2. Soak the bottom your bowl in a sink or larger bowl filled with warm water (35-45 deg). Change the water once or twice if your house is really cold.

3. If like in Japan (and like me) you have the habit to take a bath in the evening, keep the dough in the warm bathroom. It’s very nice because the air in the bathroom is very humid usually and it doesn’t dry the top of the dough.

Personally option 2 and 3 are my favorite options and they work 100% of the time. I tried many others that I found in cook books and on internet but they were not as good: drying too much the dough, not very efficient, wasting too much unnecessary energy…

So back to the extravagant bread, after a beautiful rise, I shaped it as a ring. Indeed, I find that the ring is a more extravagant shape than the classic shapes, it gives a good balance between crust and crumbs and it bakes evenly. So ring it was! And A. was satisfied with the result!

While the bread was finishing to bake I just went in the garden to pick some tangerines (we have plenty this year) and breakfast was ready!

Have a good Sunday!!!

Oh! And the bread shape was perfect to make sandwiches to go for our picnic on the beach after surfing!!! I just prepared an omelet with plenty of greens and a bit of grilled pork.

Hum…

I’m not the kind of person who complains about the weather. I take it as it is and enjoy each day as it comes… I don’t mind the extreme heat, nor the cold, neither the snow, the wind nor the rain… as long as the weather changes regularly… but I think I have had enough of rainy weekends now… honestly since the beginning of June there as not been a single day without rain at some point, and every single weekend has been rainy if not heavily rainy… And usually on rainy weekends we do stupid things (that we never regret! Don’t get me wrong!). 7 years ago we started browsing internet and ended up buying our country house in a flash… sometimes we spend rainy weekends at an arcade and batting center, and last month we browsed internet again and bought a new car…

Oh yes… a car to go to the beach… well now I just wonder when we will go as a typhoon is coming just for the weekend of course. If I had an outdoor job I wouldn’t mind rainy weekends, but my job gets me stuck indoor 12h/day so I miss the rare sunshine…

What else do I do when it rains?

I cook… sweets… of course… to compensate for the lack of activity!!!

I bake and bake and bake… and this time it was coconut milk and white chocolate scones… which were perfect for both breakfast and tea-time! Simple recipes give often the best results: flour, sugar, baking powder, and then coconut milk, coconut oil, and white chocolate chips… that’s it… all mixed together, and baked…

I wish you a happy weekend, stay dry if you are in Japan…

today glimpse of blue sky and sun on my way to work…

Sugar bread

When I was a child we use to spend part of August in my parents country house on the Causse Mejean, France. It was a long drive to go there, we would often stop have breakfast or lunch on the way, have a swim in Gard, and then start the winding road that goes up and down and up and down and finally up. This road is the Corniche des Cevennes and is definitely a beautiful one I would recommend to everyone who likes driving. Once up in our house, the nearest shop is a mere 30min drive. By then their would be food trucks coming with bread, meat and some groceries. I remember the fouace that we would buy and then have for breakfast. It was a heavy kind of brioche but nit buttery, with a sticky crust. After I was 10, this bread wasn’t sell anymore, so it’s been some time I haven’t had any. You can then imagine my surprise the first time I cooked sugar bread from Kayser bread book. It was exactly that. I made sugar bread a few times, and each time it took me back there. So now I want to share this recipe with you. If you think about it, it a classic bread recipe in which you add a bit of sugar, and finish with a syrup to have the sticky soft crust.

Sugar bread (500g bread)

– 250g of white flour

– 160g of tepid water

– 5g of yeast

-5g of salt

– 40g of brown sugar

– 3tbs of sugar and a bit of water for the syrup

Mix all the ingredients together except those for the syrup. Knead until soft. Prove for 2h. Shape as you like. I made a ball but I could also have made a braid. Leave to rest for 1h. Then bake at 200deg for 30min.

Make the syrup by mixing the sugar and water in a bowl. Apply the syrup everywhere and let cool down before eating.

Enjoy your week!!

Proudly powered by WordPress | Theme: Baskerville 2 by Anders Noren.

Up ↑

Verified by MonsterInsights