The mysterious drink you can make at home

OK… after a little time struggling with WordPress I’m back!!!

When I was living with my parents, a long long time ago, my mother always had some kind of homemade preparations such as yogurts, that I was very reluctant to try, and I am still for some reasons not to much tempted by. But when we were at my parents’ place last month, I had a chance to try my mother water kefir. At first I was just wondering what this drink may taste like, and when she told me she only put water, lemon and dry figs in it, and has been drinking every morning for the past few years… I was thinking that I may not die from trying and nothing in it could justify I don’t try. And to be honest I really loved it, and even A. did. So instead of packing tones of tasty cheeses from France I packed a bin of water kefir grains that I smuggled in Japan. (Honestly I don’t know if this is a prohibited product or not… information about water kefir grains are just as scarce as mystic…)

And since we came back, I have been making some every two day or so and we’ve been drinking some every day. I follow strictly my mother recipe but the process of making water kefir is still new to me, and I have been having a lot of questions about it that have been mainly unanswered. This is incredible really to see that such an ancient practice is so little documented, and even the scientific research papers on it are just too little.

The first question that popped to my mind when I was making my first batch was what happens if by mistake I release a kefir grain in the drain and it goes to the river that goes to the ocean… would there be at some point (and kefir grows really quickly) a giant kefir blob on the beach? Am I going to create inadvertently an ecological catastrophe like many have been created. Don’t you know about the terrible taxifolia algae in the Mediterranean sea, escaped from the Monaco aquarium? Or some kind of strange animal like ninja turtles… apparently my mother asked herself the same thing… we couldn’t find any answer… but assuming that water kefir exists for a very long time, if that were to happen, wouldn’t it had happened already?

The second question was, what happens if I drink the liquid and the fermentation is not over. Would that be poisonous? And if by mistake I ingest a grain? Same here, I couldn’t find a clear answer.

But one thing that I learned trying to find information about water kefir according to one paper, is that making water kefir drink industrially seems very difficult. So water kefir can only be made on small batches! Isn’t that amazing?
And the other thing is that the kefir grain composition varies from one place to another. Not totally surprising but interesting… which means probably, like with sourdough, that each one produces a drink with a signature taste!

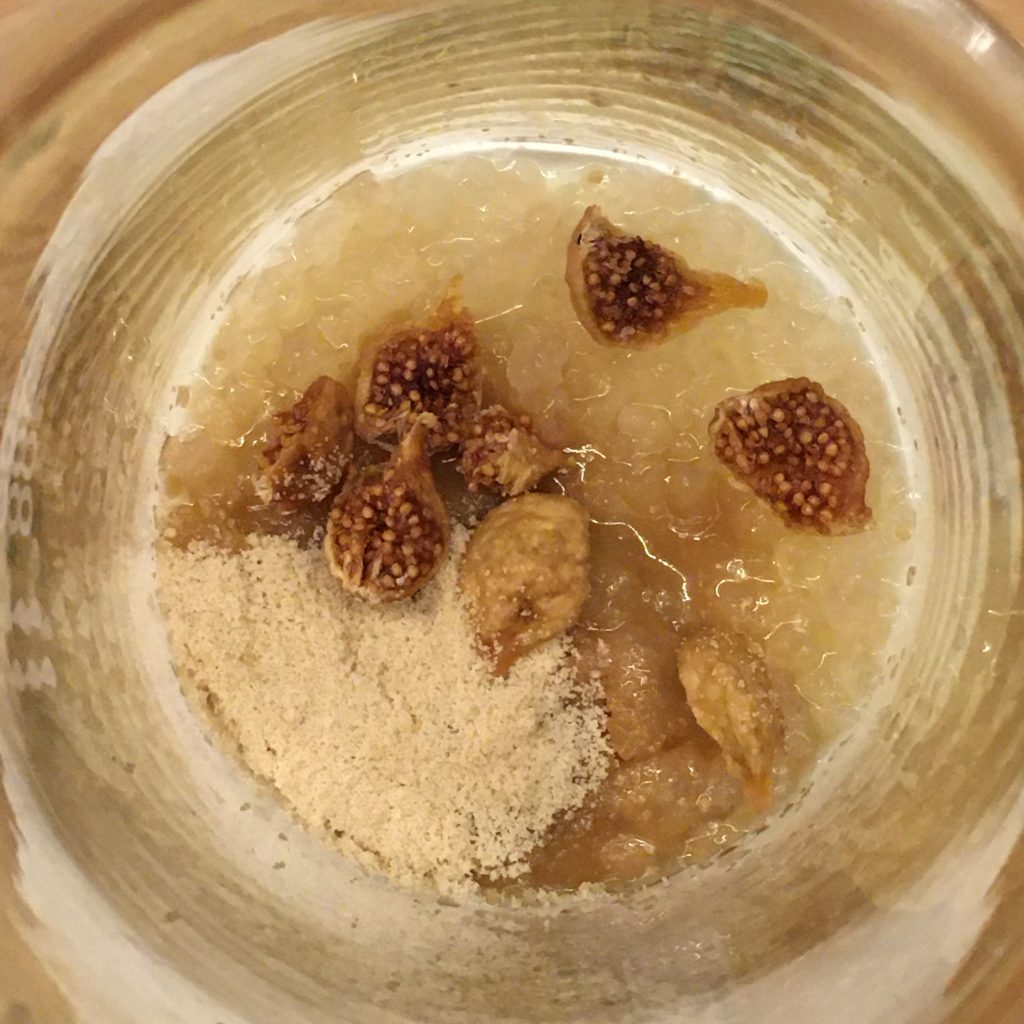
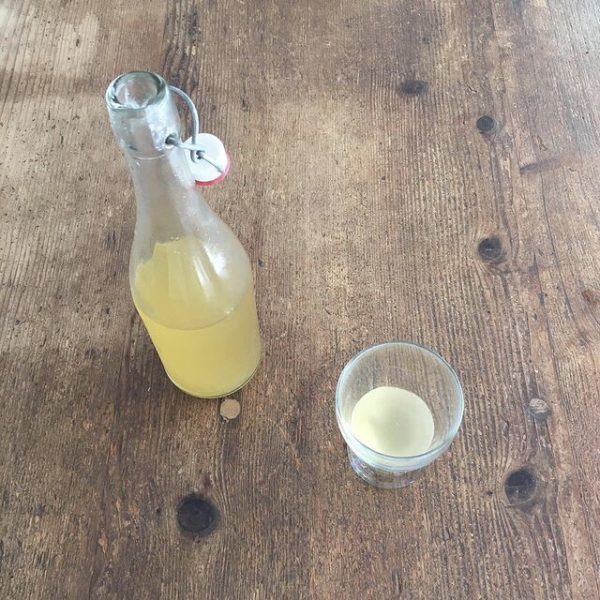
Mine is very mild and I like it’s refreshing taste and very slightly sparkling. I do not store it in an hermetic bottle to make it more sparkling, nor add any other flavoring such as fruits during the second phase. We just drink it like it is, after the first phase I just filter it. And I prepare it solely with dry fig and lemon, and a bit of sugar, but not too much either, may be that’s why the sparkling is very subtle.

I’m still learning and searching for solid info on kefir, so if you have good resources…

Making kefir: dry figs, lemon slices, a bit of brown sugar, kefir grains

The minimal kitchen

When on travel, eating out for every meal has always been a problem for me. Too much food, too rich, too many ingredients, too much preparation, too far… not enough simple food, not enough traceability… there are so many reasons why I love homemade food… I have been used now for a long long time to making my own food even with the simplest ustensiles and in the most rudimentary kitchens, but for long stays cooking with a kettle, a plate and a knife used for eating, that would be a little too constraining. So when we decided to travel to Paris I had one strong requirement: our hotel room should have a kitchen. We found a place that checked all the boxes finally: the Majestic hotel. The kitchen wasn’t even tiny, with a great opening on the terrace, but minimally equipped: a frypan and a pan. I bought a kitchen knife, a wooden spoon and a bottle of olive oil, and I was ready to cook for 10 days. I need nothing more than that.

The farmers market down the street on President Wilson Avenue on Wednesdays and Saturdays provided us with all the basic, local and seasonal ingredients we would need. The fish mongers, the cheeses and the organic stalls are really great. For breads there is also a nice stall. You can also find there beautiful flowers, kitchen knives, and a few Italian food stalls, perfect for ravioli and others stuffed pasta. We didn’t test the meat stalls, as I barely cook meat, but there are a few with a nice selection.

May in France is the season for strawberries, the very first cherries, green peas, asparagus, artichokes, new potatoes, new carrots etc… I focused my shopping on products I would usually not eat in Japan. Artichokes and white asparagus definitely were on the top of my list.

Nearby you can also find one of the trending patissier-boulanger shop: Cyril Lignac, which is the first one to open in the area: 7:00AM. With the jet-lag it’s almost too late, but we could manage to postpone breakfast until then and eat fresh pastries for breakfast. I would particularly recommend their pain aux raisins. Extremely delicious.

As a result, I tested some classic recipes and also created a super simple white asparagus recipe that I’d like to share with you.

White asparagus in tomato sauce

  • 5 white asparagus/person
  • 2 ripe and large tomatoes/person
  • 1tbs of olive oil
  • A pinch of salt and pepper

Wash and peel the asparagus. Cut in 3cm long chunks. Blanche them. Drain, let cool down and pat dry. In a pan add the olive oil and the diced tomatoes. Cook until it has reduced enough and it becomes a thick tomato sauce. add the cooked asparagus. Stir well and serve. That’s it!!!

Colorful as a Swiss chard

In France we have chards and they are green, with beautiful leafy greens and rather stiff whites. Both are delicious and I have always liked when my mother was making some. Compared to spinach they have a distinctive earthy flavor that I love. It took me a long long time to find chards in Japan. I only found some once we started to shop at local farmers’ markets in Isumi or once in a while at Mitsukoshi Nihonbashi. I think not because of the location but because they are just becoming more popular now and are not originally a green from Asia (we have so many already there…).

What surprised me the most was that instead of being the classic white and green vegetables I knew, they came in various bright and beautiful colors. Vibrant pinks, bright yellows… and the colors stay rather well even after cooking. The other funny fact is that the fibery white part (now colorful part) is a lot less fibery and stiff.

Actually growing some is also not too difficult so we had a try at it last year, and we enjoyed the very young ones not even cooked, just row and they make beautiful salads!

Last weekend on our way to visit some plots of land, we stopped at a local farmer that was selling some. And he gave us a real lot of colorful Swiss chards, and some new onions too. So Swiss chards and new onions have been on our plates pretty much every day. First with some simple pasta and olive oil, then I started to think about other possible recipes. My top 3 of the things I cooked with New onions and Swiss chards is as follow:
1. Steamed buns
2. With coconut milk and cashew nuts, served with spicy Basmati rice
3. With paprika and served with buckwheat pancakes

So here are my recipes. They are all vegan and super easy to make. I hope you’ll enjoy them!

Steamed buns with Swiss chards and new onions (makes 4 large ones)

  • a bundle of Swiss chard
  • 2 new onions
  • a pinch of cumin
  • salt and pepper
  • 1tbs of olive sesame oil
  • 200g of flour
  • 1tsp of baking soda
  • a pinch of salt
  • water

In a bowl mix the flour, baking soda and salt, add water little by little and knead until the dough is soft and smooth. (If you have time, replace the baking soda by sourdough and wait 12h after kneading).

Wash and chop the chards, peal and chop the onion. In a frypan, put the sesame oil, and the chopped vegetables and cook at medium-low heat until they are soft. Add the cumin and salt and pepper and stir well.

Cut the dough in 4, make balls, and roll them into an 18cm disc. Split the filling into 4 portions and put in each disc. Form the buns and steam for 20min. Enjoy with a bit of soya sauce or without!

Swiss chards in coconut milk with super fragrant rice (2 servings)

  • a bundle of Swiss chard
  • 2 new onions
  • 200ml of coconut cream or coconut
  • 1 handful of cashew nuts (shelled)
  • salt and pepper
  • 100g of Basmati rice
  • a pinch of cinnamon, of cardamom and coriander, 2 star anises
  • A bit of butter if you don’t mind

First, steam the rice with the spices, and the butter if you use some. Then, while it is cooking, wash and cut in chunks the onions and chards. In a pan put the vegetables, the coconut milk and the cashew nuts roughly broken. Cook for 10minutes at medium heat, while stirring once in a while. Then serve with the warm rice and enjoy.

Buckwheat pancakes and Swiss chards and new onion stew (2 servings)

  • a bundle of Swiss chard
  • 2 new onions
  • 1tsp of olive oil
  • 1tsp of paprika
  • a pinch of turmeric
  • salt and paper
  • 120g of buckwheat flour
  • 1tsp of baking powder
  • water
  • a bit of oil for cooking the pancakes

In a bowl, mix the buckwheat flour, the baking soda a pinch of salt and add water until the dough is creamy, but not liquid.

Wash and chop the vegetables and cook them in a pan with olive oil while stirring once in a while. Add the turmeric and paprika, salt and pepper and stir again.

In a greased pan cook the pancakes (size is up to you) on both sides. Serve with the vegetables and enjoy.

Et voila, three really easy and delicious recipes with Swiss chard and new onions!

The endless discoveries

There is no need to go far to discover new things and in particular when it comes to food, there is always something new and curious to discover at the farmers market. You just need to look around and you’ll surely find something you haven’t seen before. This time I found negibosu 葱坊主 leek’s flower buds. You can often spot the beautiful flowers in kitchen gardens in the spring, they are amazing ornaments. But I never guessed that would be edible, and that even you would be able to buy them in the bud version at the farmers market. But it is!

So here I am with my negibosu… I thoughts immediately that tempura would be an appropriate recipe. For some reasons, tempura always work well with any green, even with strong flavors: fukinoto is a good example. But what else… and would actually negibosu be strong in flavors? So I browsed a bit the net. Nothing came out neither in French nor in English but for the fully blossomed leek flowers. It was of no help, so I turned to Japanese and bingo! Negibosu have a significant number of entries in cookpad, more than half of them being…

Tempura of course… hum… not helping much either… digging a bit more I finally found the other classic Japanese recipe to accommodate greens: miso ae. Miso ae, in my opinion, works better with creamy miso, the one I have, that I make, is more granular and won’t work as good… one recipe in the end attracted my attention: a goma ae one. So I decided to go for this one, well, my way though. (and the tempura… just in case!!)

So here’s my recipe of goma ae. Suri goma すり胡麻 is ground sesame powder. It’s very easy to make from the sesame seeds, or to buy already powdered.

Making ground sesame: suri goma

Negibosu goma ae (2 servings)

  • A dozen of leek flower buds
  • 1tbs of sesame seeds
  • 1tbs of soya sauce
  • 1tsp of brown sugar

Wash the negibosu, remove the hard part if any, and blanche for a few minutes. Drain and pat dry.

Blanching negibosu

Once cool enough, cut in tiny bite size.

In a mortar, crush the sesame seeds with a pillar to obtain a paste. Add the sugar and soya sauce and stir. Add to the negibosu, stir and that’s ready!! Yes, it’s that simple and you’ll see it’s delicious!!!! Enjoy!

Final result!!!

Never tired of bamboo shoots

The season for bamboo shoots in Chiba has started just a few weeks ago… juggling between bad weather, and cold days, we went once to search for some with our neighbors but were not lucky enough to find any. Too early for that side of the area. Probably a few wild boar were also quick enough to come before us and dig to pick their own. But it doesn’t matter, we have friends who have friends who have bamboo shoots. And so I ended up with 2 beautiful shoots. I didn’t have time to prepare them in The country, so I took them with us to Tokyo. What a mess to prepare them in my pocket kitchen! But what a reward to eat them!!! I never regret!

This year, after a classic bamboo shoots rice, back then when my parents were visiting, I decided to go with a few different and more creative recipes. I prepared two different recipes. One is a simple sautéed version. So delicious I had to do a second batch! The second is a recipe of steamed buns. Last year I made eagle fern and bamboos shoot ones, but as I am getting better at making buns, I felt it is worth sharing this one!

Both recipes assume that you have a parboiled bamboo shoot. For picking and parboiling look at my earlier post here.

Sautéed bamboo shoots

  • 1 bamboo shoot fresh and parboiled
  • 1tsp of cooking oil
  • salt and pepper as you like

Cut the bamboo shoot in 4 vertically. Slice each quarter. In a fry pan heat the oil. The add the shoots sliced. Cook until golden, flip on the other side, cook until golden. Sprinkle salt and ground pepper and serve immediately.

Steamed buns (make 8 small, perfect for 2 people as main)

  • 150g of flour
  • 1tsp of baking soda
  • 1 pinch of salt
  • Water
  • 1/2 bamboo shoot
  • 100g of pork fillet (leftover are perfect)
  • Soya sauce
  • Mustard

First prepare the dough by mixing the flour, baking soda, salt and add water little by little until obtaining a smooth dough. Put under a wet cloth and let it rest at least 30min. More is better.

Cook the pork filet if not yet cooked. Simply, in a pan with pepper. Then chop finely.

Chop the bamboo shoot in coarse manner. You want chunks to remain as it will bring the contrast between the smooth dough and meat and the crunchy bamboo. However, if too coarse, filling the buns will be hell. So 3-8mm is a good target.

In a bowl mix the chopped bamboo shoot, the pork, add 1tsp of soya sauce and stir well.

Back to the dough now. Cut in 8 pieces. Make balls and roll with a rolling pin into 12-15cm diameter circle. Put a large spoon if filling in and close the dough. I don’t have a very good technique, but it works well when I first fold in two then fold in the orthogonal direction, then I add fold in each quadrant. For this specific recipe instead of cooking them folds up, I flipped them to hold the folds under. Then steam for 15min. Serve with soya sauce and mustard and enjoy!

Always the same, never the same

Since we’ve been working from home, I cook three to four meals a day (we wouldn’t miss a good tea time!) and a whole new routine of recipes slowly replaced old habits. More meals to cook = more chances to explore. I cook more quiche as we spend more time in Ohara, I also cook more steam buns and gyoza, also one dish that has been an almost weekly thing is brown rice and spicy vegetables. As much I love Japanese brown rice, it takes too much time to cook it after coming back from work and have it ready for dinner (about 2 to 3h) so I would almost never make any. Working from home as this perk that starting a recipe is really simple, squeezed between two meetings.

For some reason Thursday is the day we most often have brown rice. And one thing I really love is to have it with some seasonal vegetables and a light spicy sauce. Versions are endless. And with the spring coming and the new vegetables I prepared a very simple and ultra full of flavors version. A few chick peas remaining from the hummus I made the other day, a bit of coconut cream, and a lot of new and fresh onions that our friends gave us. Add some super ripe tomatoes and, because winter is still not completely gone, a sweet potato, you have a great base. Normally I would have added curry to the mixture, but curry powder is on my shopping list and I didn’t have time to go grocery shopping this week. And actually it was good that way. It forced me to explore other spice combination and I realize that curry is not necessary. So if you want a very mild and very tasty recipe for your new onions and your brown rice, just read below and enjoy!

New onions with spice and coconut milk

  • 2-3 new onions
  • 1 sweet potato (one carrot could do, nothing could do too)
  • 1 large and ripe tomato (if you can’t find one just do without)
  • 200ml of coconut cream or coconut milk
  • 1 cup of chick peas, boiled and drained
  • 1tsp of ground cardamom
  • 1tsp of turmeric
  • 1/2tsp of all spice
  • 1/2tsp of ground cumin
  • 1/2tsp of salt
  • ground black pepper

Remove one layer of onion skin and cut them in 8. Wash and cut the vegetables in bite size.
In a greased pan, on medium heat, put all the vegetables, and the chick peas, and cook for 10min while stirring regularly.
Add the coconut cream, the spices and stir well. Cook under cover for 5min. And that’s ready. Serve with brown rice, but I bet it is also a killer with flat breads or basmati rice.

March 26th tart

The day has come again, faster and in a busier moment than usual, my parents being with us. It’s A.’s birthday. The weather has been bad enough to be remembered, A. always says it’s usually sunny on that. Today was not, and after drizzling now it’s pouring. That gave me plenty of time for preparing A.’s birthday cake, or rather tart. He originally wanted a strawberry tart, the classic one, but after stopping at three different places I couldn’t find proper local strawberries with the correct size. So we agreed on a chocolate tart. Last year one was a big hit!

But you know me… I like to try new recipes rather than doing over and over the same things. So I made a classic dark chocolate tart using my recipe from last year, but I also improvised a new one with A’s favorite white chocolate, coconut and cardamom. And though I am not a fan of white chocolate, it was surprisingly not as rich I thought it would be and I enjoyed it a lot. So here is my recipe.

White chocolate tart (4 servings)

  • Flour, sugar, butter and a bit of water for the dough.
  • 110g of white chocolate
  • 100ml of coconut cream
  • 2tsp of ground cardamom
  • 1tbsp of brown caster sugar
  • 4tbs of ground coconut
  • 1 egg

Prepare the dough and bake it, until still soft and about to golden.

In a pan heated at low heat stir together the chocolate, coconut cream, add the sugar, the ground coconut and the cardamom. Let cool then add the egg. Stir well and pour in the baked pie crust. Bake for 10-15min at 150deg. Let cool a bit and enjoy!

Sorry for neglecting you…

For those who follow me on instagram or Facebook, you already know what I was up to, for those who don’t let me summarize why there hasn’t been a post in two weeks.

No, I have not decided to go on a two week fast. No I have not stopped cooking. Well… I have been what we call “busy”. Started a new professor position with the University of Tokyo on the first. The day Japan started accepting new visa applications. Then it’s been a race to know if my parents would get one, how, produce all the documents, run here there to gather and send everything. Then prepare their arrival, cancel, rebook etc… and finally, 2 days before the D-day they arrived in Japan.

Then now spending some time with them. Cooking for them, strolling around with them, and working too.

Enjoying tourist-free Tokyo

Yesterday I received the insignia of the French National Order of Merit (the reason why my parents could enter Japan!) and we could share this moment altogether.

And now we’re enjoying some time in the country… eating delicious local food.

So, accept my apologies if I am not trying new recipes or inventing new ones. I’ll be back soon!!

End of winter recipe

It was 13 years since I left Tokyo University for Tokyo University of Agriculture and Technology, and started my own research lab. The beginnings were hard but the past few years I really reached a stable balance… maybe too much balance… it was time to change… I’m back at the university of Tokyo… and starting from 0 again!!! You may call me crazy but I need some challenges to feel good. So as you can imagine the transition is keeping me busy and I don’t have much time to spend in the kitchen. Even though…

I can’t help spending 10min to prepare something to eat, and improvise a little new recipe with what was in the fridge: tiny potatoes, komatsuna and eggs. The preparation is very simple, it takes just a bit of time to cook it, which is perfect, hands are free to work!!!

Komatsuna jagga 小松菜じゃが (2 servings as full course)

  • 10 small potatoes
  • 3-5 bundles of komatsuna
  • 1 piece of thin aburage
  • 20g of katsuobushi flakes
  • 2tbs of soya sauce
  • 1tsp of oil
  • 2 eggs (optional)

Peel the potatoes and slice them, wash the komatsuna and cut them 2cm long. Slice thinly the aburage. In a greased (with the oil) pan put the potatoes and komatsuna and cook at high heat for 2min. Then add the aburage and cover with water, add the katsuobushi flakes, the soya sauce, and the eggs, stir well and cover. Let cook for 10min or until the potatoes are soft. You can serve as a soup or remove the cover and let the liquid evaporates before serving. Eat hot, because spring may be around the corner, evenings are still cold!!!

Proudly powered by WordPress | Theme: Baskerville 2 by Anders Noren.

Up ↑

Verified by MonsterInsights