Artichokes are not common in Japan. You would never see fresh ones in a supermarket unless you go to the expat supermarkets in Hiroo or Azabu. And there, they are imported from who knows where and super expensive, while not very good…
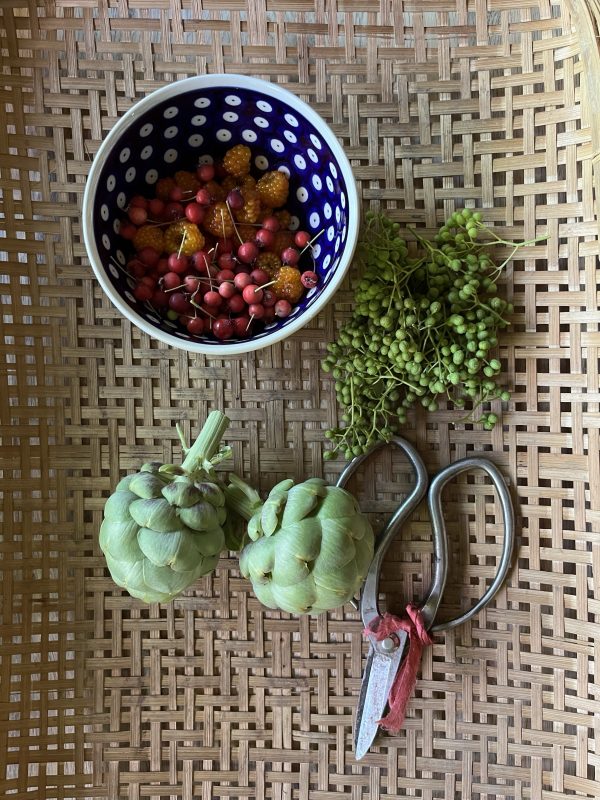
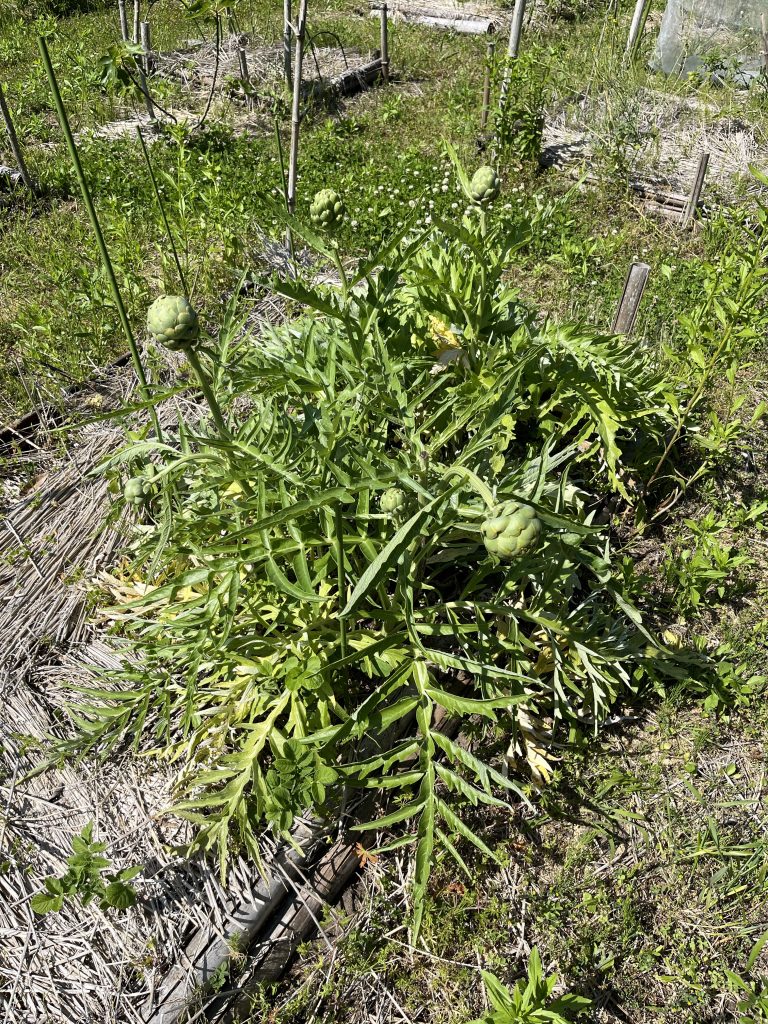
So a few years ago I decided to plant some in the kitchen garden. The first year was only leaves… the second year I harvested three tiny artichokes, and this year, the third, I finally start to have a decent supply of two artichokes per week!! They are not as big and creamy as I expected but they are tasteful. And I love that they grow year after year without having to be replanted.
My artichokes in the garden
Now with this constant little supply I needed to come up with some recipe, and with the last lemons on the tree, I came up with this recipe of neither barigoule, neither greek style, but my style lemon artichokes. It is super easy and so delicious, the perfect side dish for grilled tuna, swordfish or just with a slice of sourdough bread.
Lemon artichokes (2 servings)
4 artichokes
1/2 lemon
2 large onions
Olive oil
Salt, pepper and red pepper
Remove the bottom leaves of the artichokes, cut the top and cut in four. Remove the hair.
In a pan heat some olive oil, add the onions chopped very coarsely. Stir until they have softened. Add the artichokes, the lemon cut in four, salt, pepper and red pepper, cover with water and let simmer at medium heat until the liquid is almost gone.
It’s ready and delicious hot or at room temperature.
Last week we went out for dinner to try Cimi Restorant, a restorative kitchen that proposes an interesting concept, with only 10 guests all sitting at one table, in an old house, redesigned for the restaurant, in a mix of old and new. Most dishes are plant based. All the dishes they served were very simple, using a few ingredients very carefully chosen, from farms producing organic, biodynamic or in permaculture. Though I was a bit confused that they do not use more local ingredients as part of reducing the environmental footprint and being furthermore restorative.
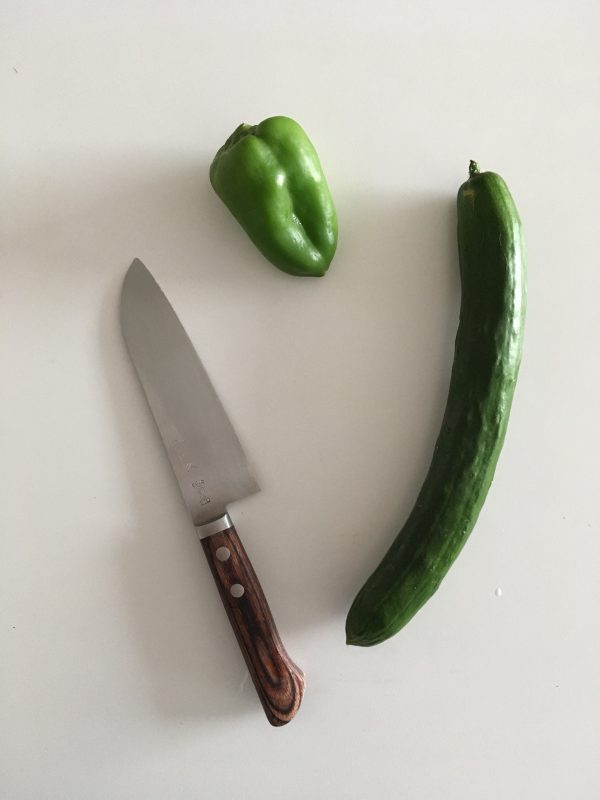
One of the plant based on the course menu was a cold cucumber soup. And it was obvious after the very first spoon that it was not just cucumber, there was also some green bell pepper and a few other vegetables. It was refreshing and very tasteful.
Perfect timing, last Sunday we got some cucumber from a lady with whom we played tennis, and I had just bought green bell pepper. So I decided to try a simpler version if that soup at home. The result was way over my expectations at first try! So here is my recipe.
Summer green chilled soup (2 servings)
2 Japanese cucumbers (or one European)
2 green bell peppers
1/2 cup of vegetables consommé
Salt and pepper
Optional: olive oil and a slice of sourdough bread
Prepare the vegetables consommé and let it chill.
Wash the vegetables. Cut the stems and remove the seeds of the bell peppers, and of the cucumber if it feels like that (not necessary with Japanese cucumbers).
Put the vegetables and the consommé in a blender and liquify. Dress in adequate plates or bowls. Top with z pinch of salt and freshly ground pepper (I used a mix of pink and white peppers).
If you feel like it add a drizzle of olive oil. Or cut the slice oc sourdough bread in bite size and roast them in a bit of olive oil in a pan. Top the soup.
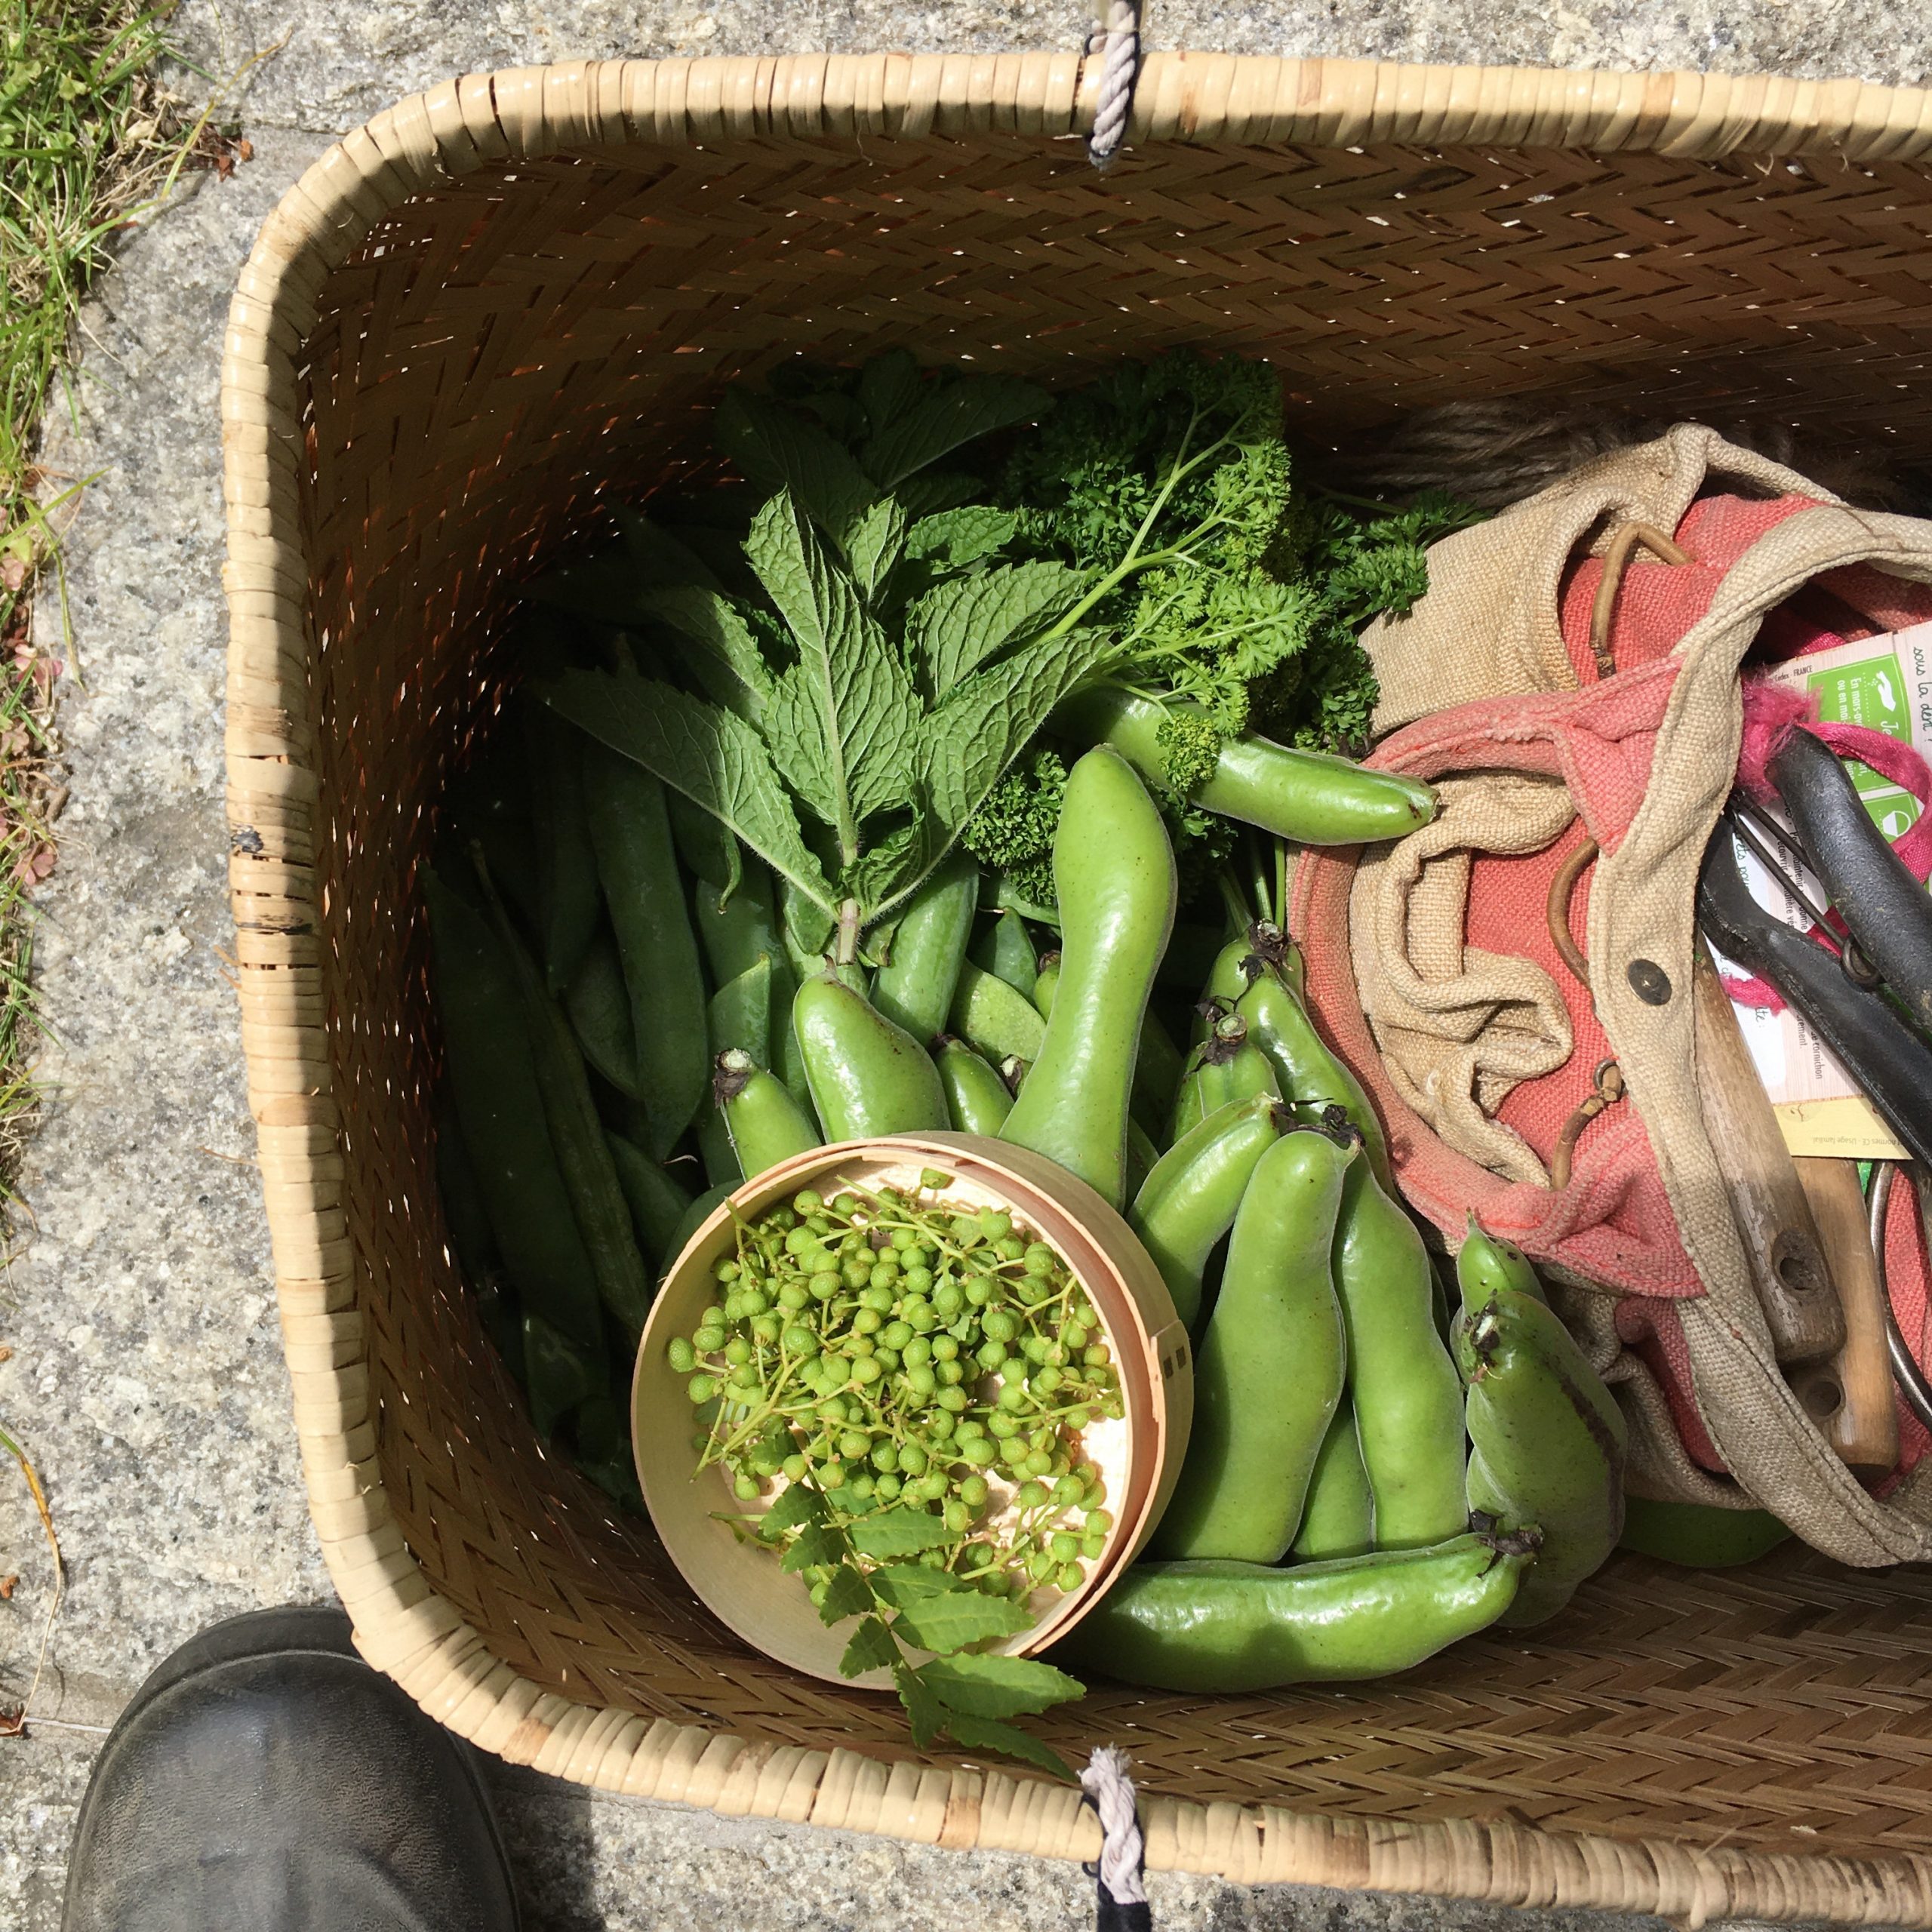
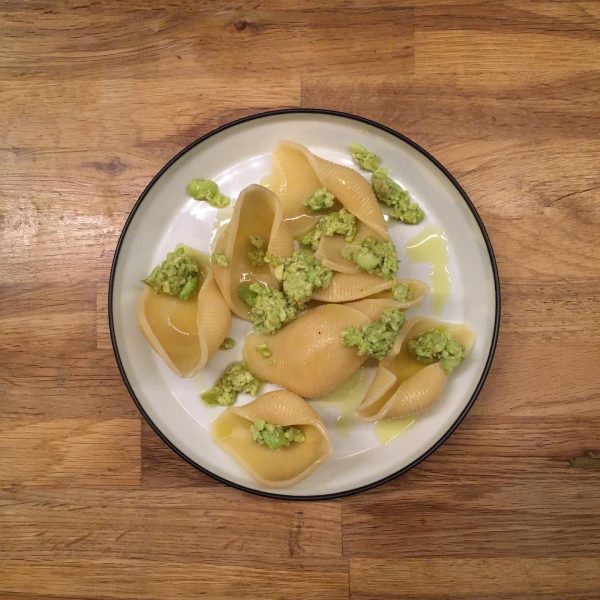
Harvest from the kitchen garden: plenty of green peas, fava beans and herbs.
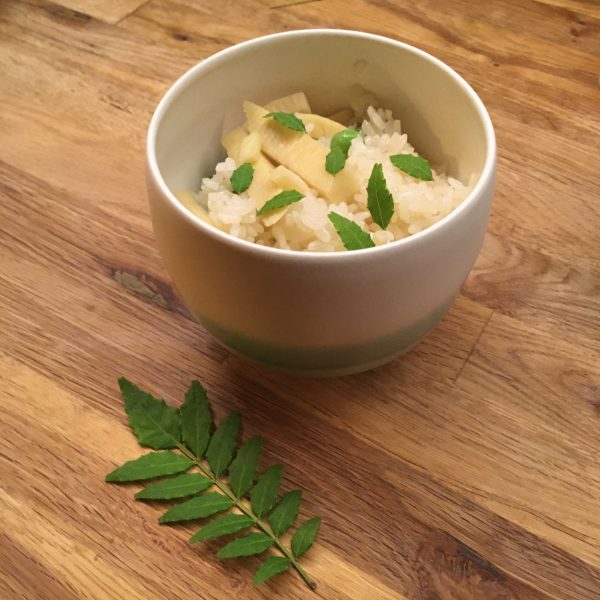
Late spring brings in so many vegetables! Our modest kitchen garden produced a beautiful crop of green peas. Not over a long period of time like last year, but a few kilos in a very short time. I also harvested a lot of sansho pods, and while looking at the recipe to prepare them in my book of Shojin cuisine, I just found a recipe that so far curiously never attracted me before but was perfect with what I had in the fridge: bamboo shoot and green peas sushi rice. It took just one second to verify I had all the ingredients I needed and my mind was all set. I don’t eat fish and seafood sushi, but I love sushi rice, slightly vinegary and sweet. It is very easy to prepare but somehow never make any…
It was time to change this!
Here is the recipe I prepared, slightly modified from the original.
Bamboo shoot and green peas sushi (4 servings, side dish)
2 go of rice (or 2 cups but that would be more)
A handful of fresh green peas
1 fresh bamboo shoot
A pinch of salt
2tbs of rice vinegar
3tbs of sugar
1tbs of soya sauce
A few sansho leaves
Cook the rice. In the meantime, peel the bamboo, cut it in 3mm thick slices, and the cut the the slices in 2cm strips and boil it for 15min. Drain. In a pan set the bamboo and the green peas, add 2tbs of water, 1tbs of sugar, 1tbs of soya sauce. Cook at medium heat until almost all the liquid is gone. Mix the vinegar and the 2tbs of sugar with the rice. Stir well, add the vegetables and stir gently. Add the sansho leaves and enjoy!
Do not refrigerate, the rice would become hard and flavors would vanish.
The summer is slowly reaching its end and the end of summer vegetables start to arrive such as butternut squash and kabocha, but before the summer ends for real, let’s enjoy a little more the summer vegetables: eggplants, cucumber, edamame and jute mallow…
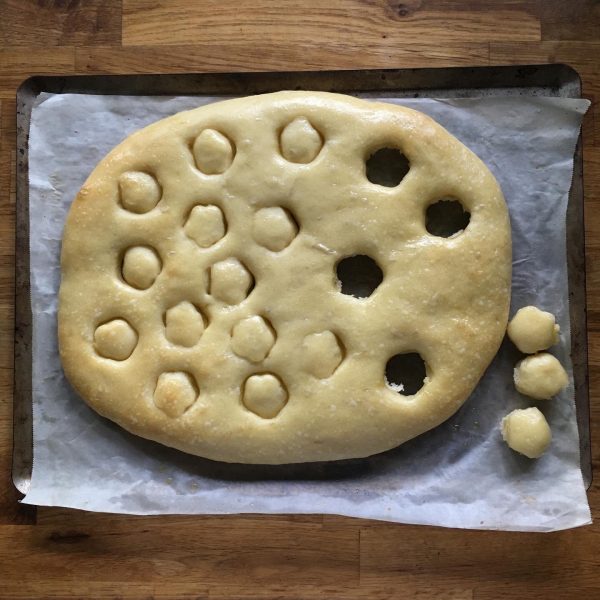
When I was a child, my mum would come to pick us at school for lunch, then we would walk to the car and somedays, on the way stop to buy some bread at Mr. Richard bread shop. And one bread in particular, fougasse. His signature fougasse unless most other bread shop was not the one with olives, or whatever else you can put in, it was the simplest plain fougasse, and instead of the classic shape it would little hearts cuts and you could pull the little hearts of bread. We lived to eat the little hearts on the way back to the car, and even more when the bread was still warm!!
While fougasse is eaten all year round, I like to have some ready in the summer. It makes the perfect meal with some fresh vegetables and a piece of grilled fish. And it is even more perfect when you have it ready when you get back home after a surfing session at sunset. I love to go surfing on Sunday evening after 17:30, when most day trippers are leaving and you get the ocean for just you, your friends and a couple of regulars. I love driving back home at dusk, seeing the sky becoming purple and the rice paddies turning yellow. And then I am hungry and the fougasse and a fresh cucumber from the garden are waiting to be eaten!
Fougasse
250g of flour
20g of olive oil plus some for the finish
20-30g of sourdough starter
8g of salt
70g of water (may need adjustment depending on flour and sourdough)
Mix all the ingredients and knead lightly. If the dough is too dry add a bit of water, if too wet a bit of flour. The dough must be rather hard and have not much moisture.
Wait a few hours until it has grown.
Then flatten the ball with the hand and wait 15 minutes. After that, roll the dough with a cooking pin to obtain an oblong shape of about 2-3cm thick. With a shaped cutter of the shape you want, I chose plum because I didn’t have hearts like Mr. Richard’s fougasse, cut a few places with the design you fancy.
Bake at 230deg for 15min or until golden. When out of the oven spread a layer of olive oil with a brush.
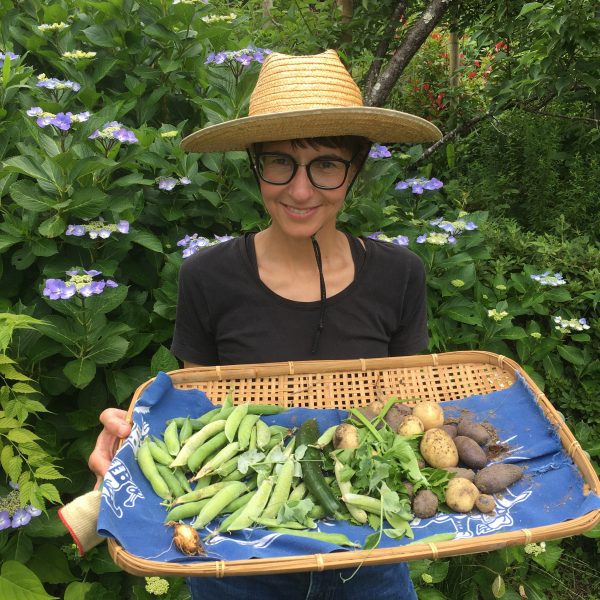
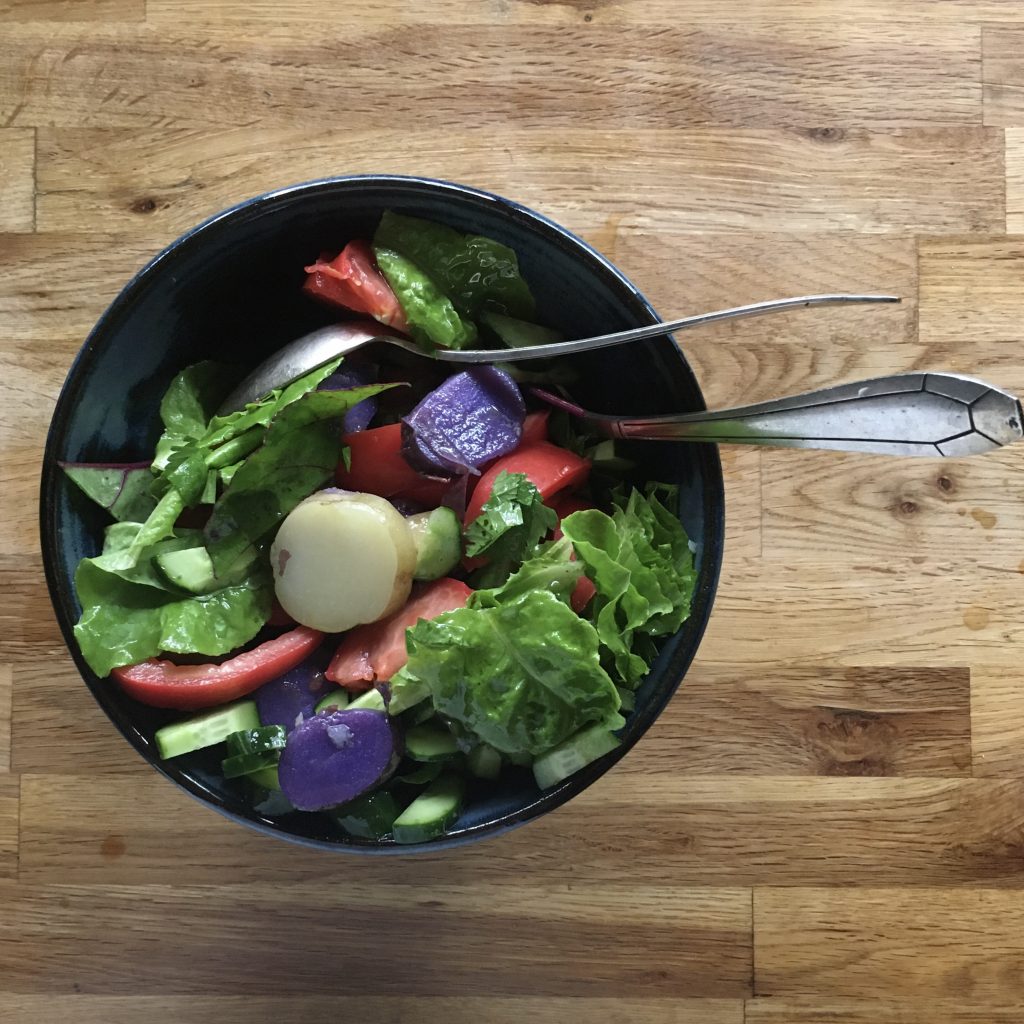
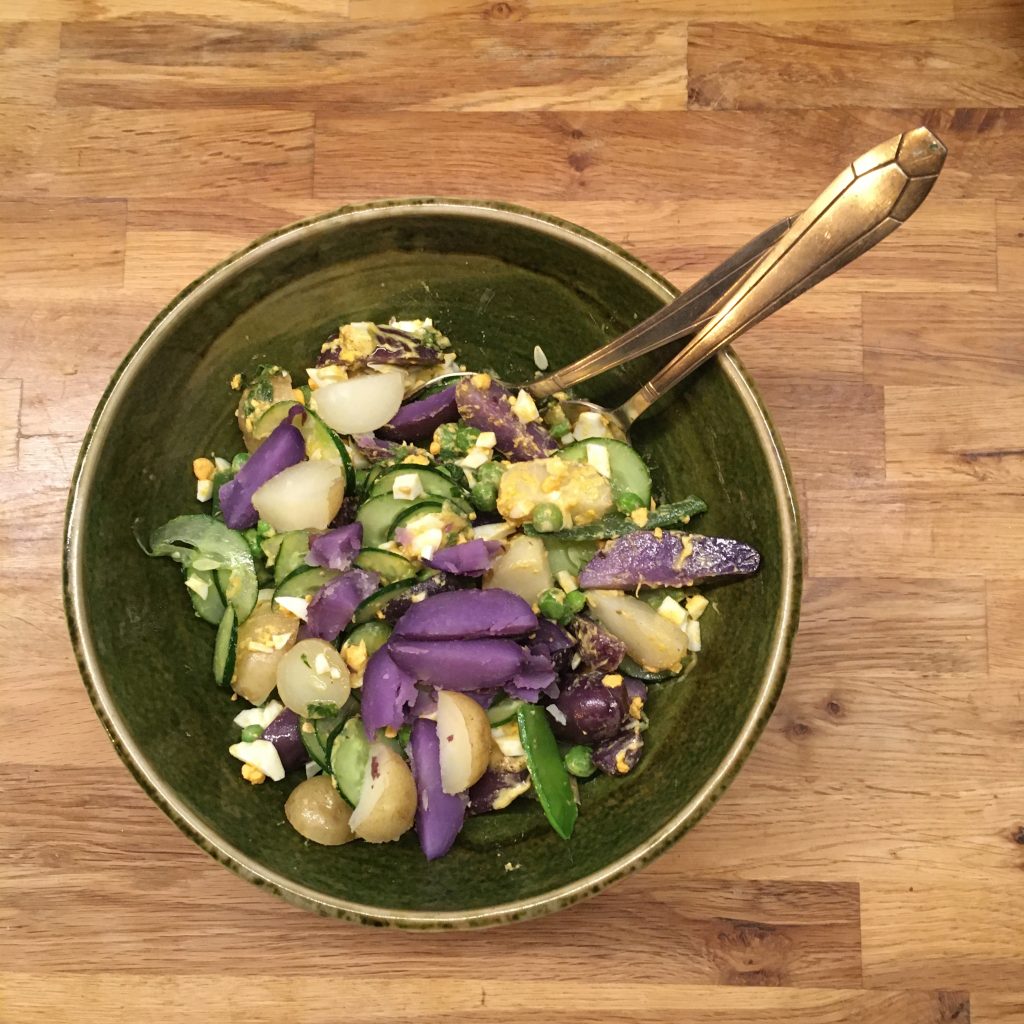
I have tried many things in the kitchen garden during the past 10 years. Eggplants, cucumbers, snap peas, tomatoes, cabbages etc… most of which were total failures, eaten by the kions, or the snails, or whoever was around. My most successful crop, by far, has been potatoes for a few years now. Except for this year, I tried green peas and that was a big hit… My specialty is actually purple potatoes: vitelottes. I like to grow them and harvest them and I love the color they bring to the plate. And those potatoes are absolutely impossible to find if you don’t grow them (at least for now), so this is why I keep growing some.
This year I grew them in the new kitchen garden. The soil is still under making so the harvest was not as good as I expected, even though I expanded the surface by two, but there were quite enough to make several meals and enjoy their bright color. The way I like to cook them best is simply washed and boiled, then sliced and eaten with other colorful ingredients. Perfect with eggs and cucumbers, dressed with plenty if mustard and olive oil for a classic potato salad, or simply fresh green leaves and tomatoes with olive oil for a fresh and lighter version.
I am quite proud to say that, except the tomatoes and the eggs, all the vegetables and herbs come from the garden. I cannot say that we’re successful with cucumbers but by far the best harvest we’ve ever had, and salad leaves, celery and herbs are doing rather well. The regular potatoes come also from our garden, from a few old potatoes that started growing in the fridge and I decided to plant. I don’t know how you love your potatoes but I’m sure it’s delicious!!!
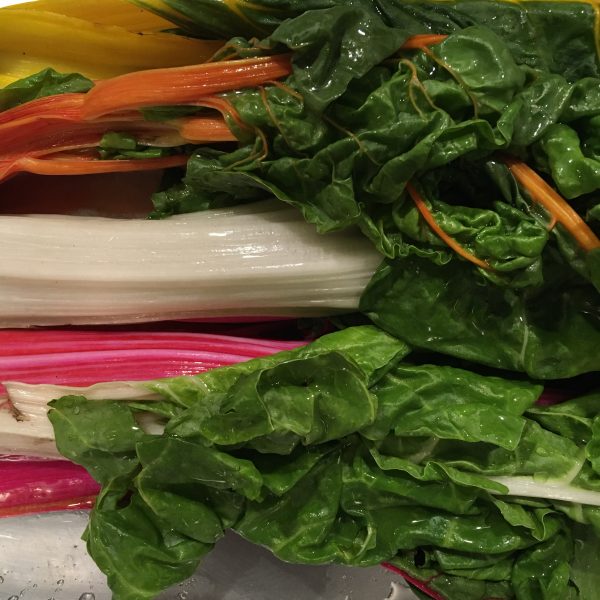
Three Swiss chard and new onion new ideas of recipe
In France we have chards and they are green, with beautiful leafy greens and rather stiff whites. Both are delicious and I have always liked when my mother was making some. Compared to spinach they have a distinctive earthy flavor that I love. It took me a long long time to find chards in Japan. I only found some once we started to shop at local farmers’ markets in Isumi or once in a while at Mitsukoshi Nihonbashi. I think not because of the location but because they are just becoming more popular now and are not originally a green from Asia (we have so many already there…).
What surprised me the most was that instead of being the classic white and green vegetables I knew, they came in various bright and beautiful colors. Vibrant pinks, bright yellows… and the colors stay rather well even after cooking. The other funny fact is that the fibery white part (now colorful part) is a lot less fibery and stiff.
Actually growing some is also not too difficult so we had a try at it last year, and we enjoyed the very young ones not even cooked, just row and they make beautiful salads!
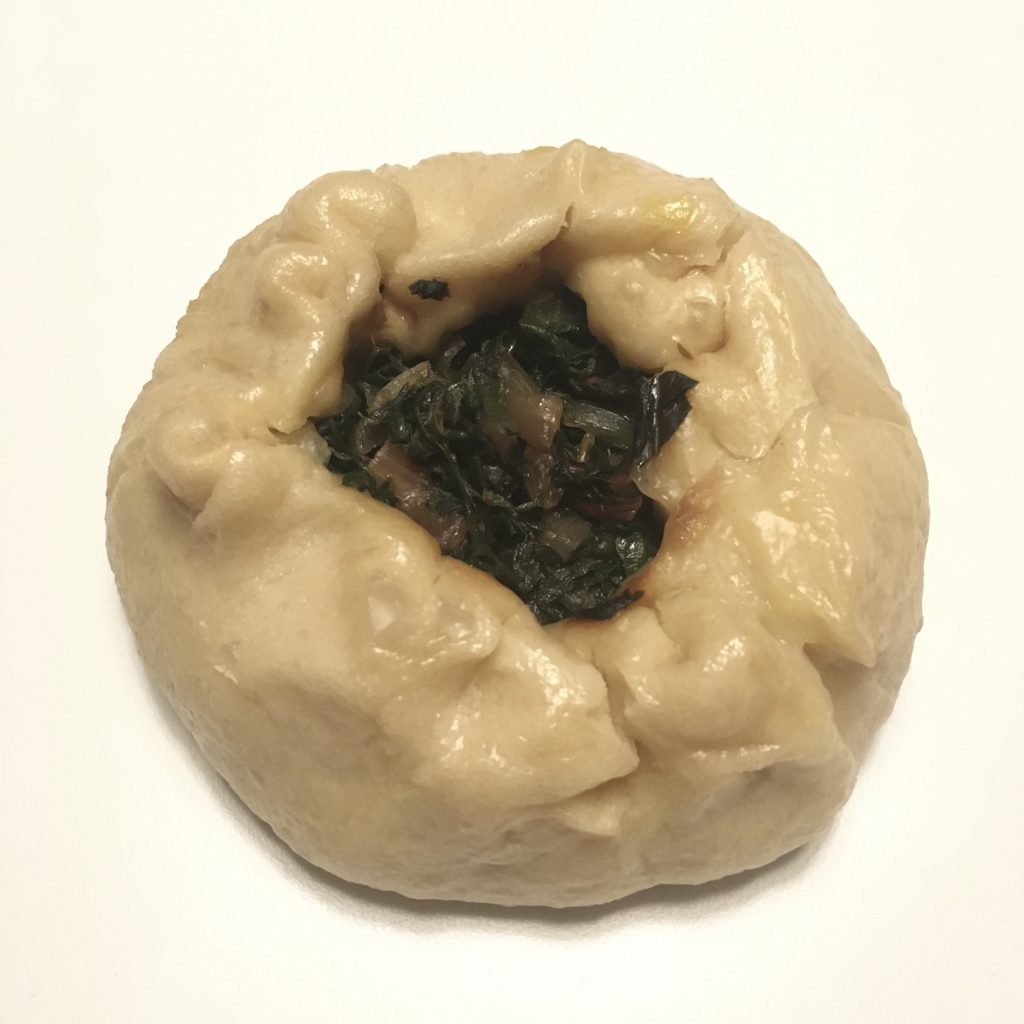
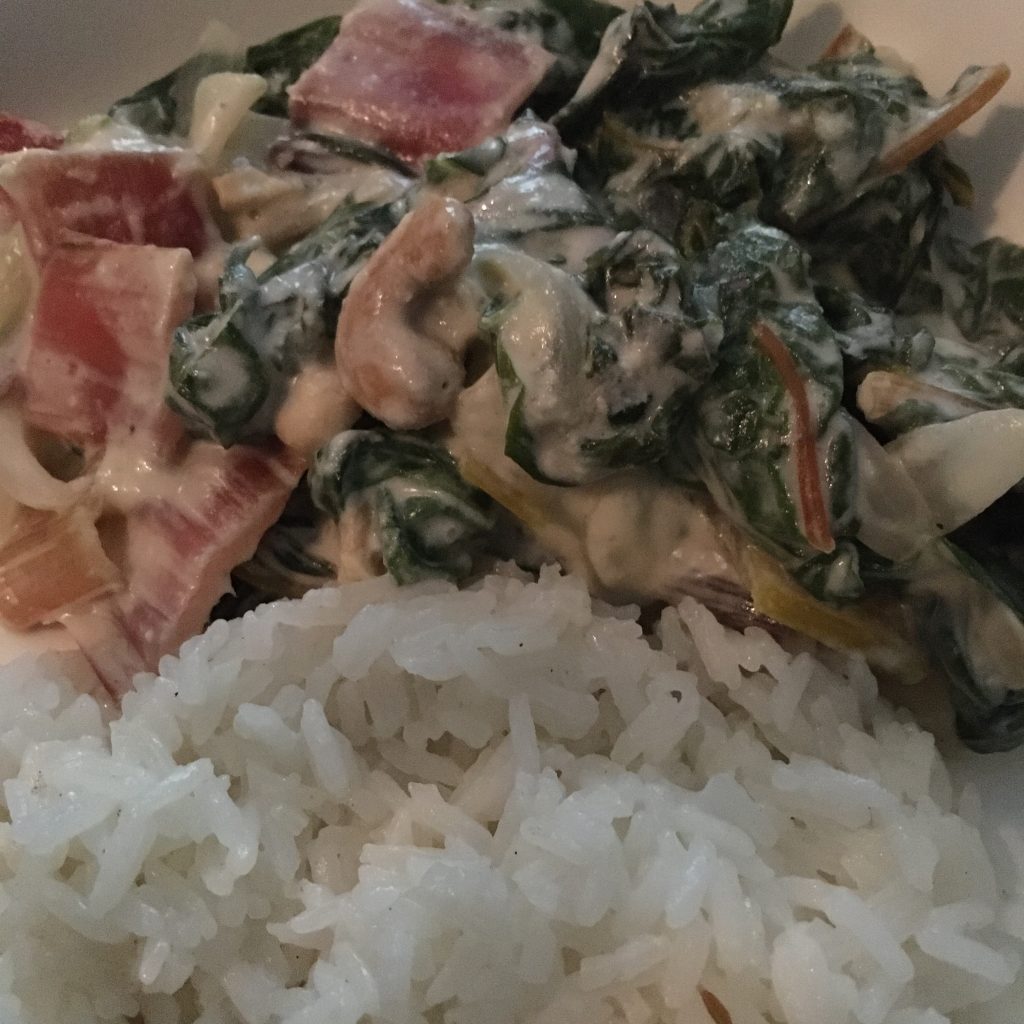
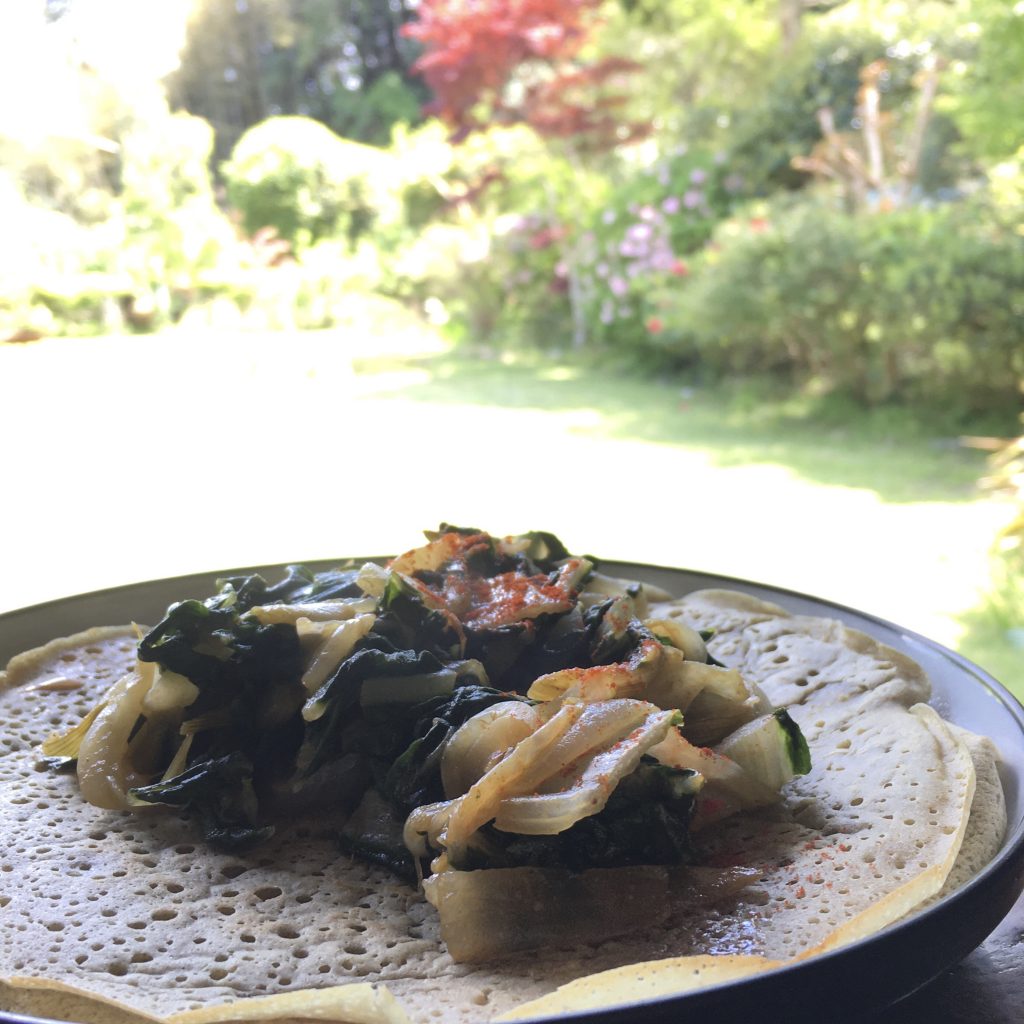
Last weekend on our way to visit some plots of land, we stopped at a local farmer that was selling some. And he gave us a real lot of colorful Swiss chards, and some new onions too. So Swiss chards and new onions have been on our plates pretty much every day. First with some simple pasta and olive oil, then I started to think about other possible recipes. My top 3 of the things I cooked with New onions and Swiss chards is as follow: 1. Steamed buns 2. With coconut milk and cashew nuts, served with spicy Basmati rice 3. With paprika and served with buckwheat pancakes
So here are my recipes. They are all vegan and super easy to make. I hope you’ll enjoy them!
Steamed buns with Swiss chards and new onions (makes 4 large ones)
a bundle of Swiss chard
2 new onions
a pinch of cumin
salt and pepper
1tbs of olive sesame oil
200g of flour
1tsp of baking soda
a pinch of salt
water
In a bowl mix the flour, baking soda and salt, add water little by little and knead until the dough is soft and smooth. (If you have time, replace the baking soda by sourdough and wait 12h after kneading).
Wash and chop the chards, peal and chop the onion. In a frypan, put the sesame oil, and the chopped vegetables and cook at medium-low heat until they are soft. Add the cumin and salt and pepper and stir well.
Cut the dough in 4, make balls, and roll them into an 18cm disc. Split the filling into 4 portions and put in each disc. Form the buns and steam for 20min. Enjoy with a bit of soya sauce or without!
Swiss chards in coconut milk with super fragrant rice (2 servings)
a bundle of Swiss chard
2 new onions
200ml of coconut cream or coconut
1 handful of cashew nuts (shelled)
salt and pepper
100g of Basmati rice
a pinch of cinnamon, of cardamom and coriander, 2 star anises
A bit of butter if you don’t mind
First, steam the rice with the spices, and the butter if you use some. Then, while it is cooking, wash and cut in chunks the onions and chards. In a pan put the vegetables, the coconut milk and the cashew nuts roughly broken. Cook for 10minutes at medium heat, while stirring once in a while. Then serve with the warm rice and enjoy.
Buckwheat pancakes and Swiss chards and new onion stew (2 servings)
a bundle of Swiss chard
2 new onions
1tsp of olive oil
1tsp of paprika
a pinch of turmeric
salt and paper
120g of buckwheat flour
1tsp of baking powder
water
a bit of oil for cooking the pancakes
In a bowl, mix the buckwheat flour, the baking soda a pinch of salt and add water until the dough is creamy, but not liquid.
Wash and chop the vegetables and cook them in a pan with olive oil while stirring once in a while. Add the turmeric and paprika, salt and pepper and stir again.
In a greased pan cook the pancakes (size is up to you) on both sides. Serve with the vegetables and enjoy.
Et voila, three really easy and delicious recipes with Swiss chard and new onions!
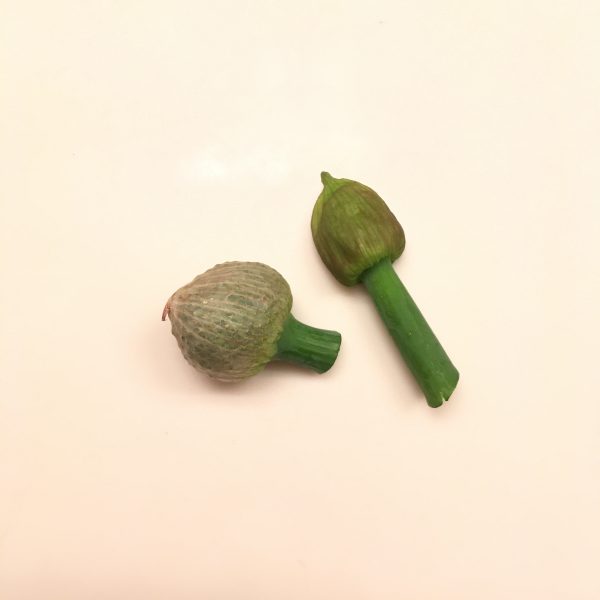
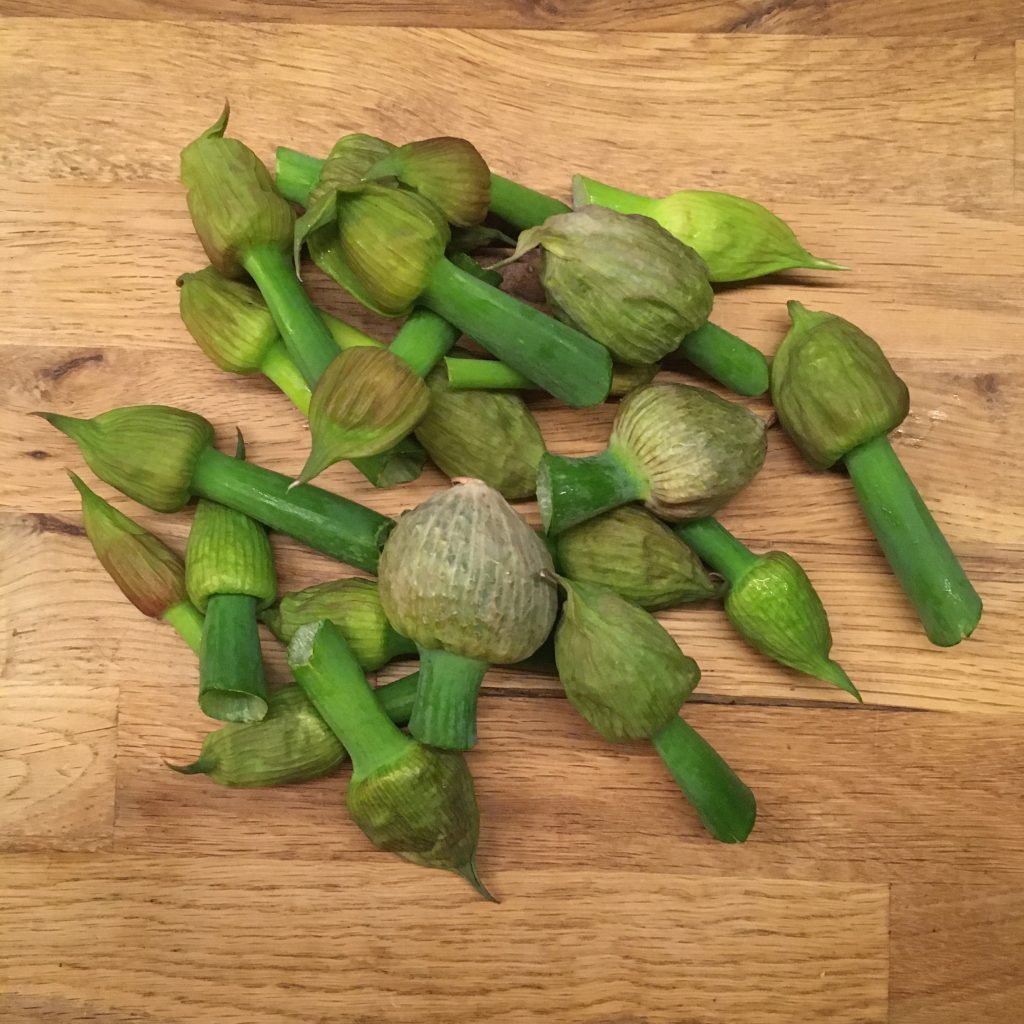
There is no need to go far to discover new things and in particular when it comes to food, there is always something new and curious to discover at the farmers market. You just need to look around and you’ll surely find something you haven’t seen before. This time I found negibosu 葱坊主 leek’s flower buds. You can often spot the beautiful flowers in kitchen gardens in the spring, they are amazing ornaments. But I never guessed that would be edible, and that even you would be able to buy them in the bud version at the farmers market. But it is!
So here I am with my negibosu… I thoughts immediately that tempura would be an appropriate recipe. For some reasons, tempura always work well with any green, even with strong flavors: fukinoto is a good example. But what else… and would actually negibosu be strong in flavors? So I browsed a bit the net. Nothing came out neither in French nor in English but for the fully blossomed leek flowers. It was of no help, so I turned to Japanese and bingo! Negibosu have a significant number of entries in cookpad, more than half of them being…
Tempura of course… hum… not helping much either… digging a bit more I finally found the other classic Japanese recipe to accommodate greens: miso ae. Miso ae, in my opinion, works better with creamy miso, the one I have, that I make, is more granular and won’t work as good… one recipe in the end attracted my attention: a goma ae one. So I decided to go for this one, well, my way though. (and the tempura… just in case!!)
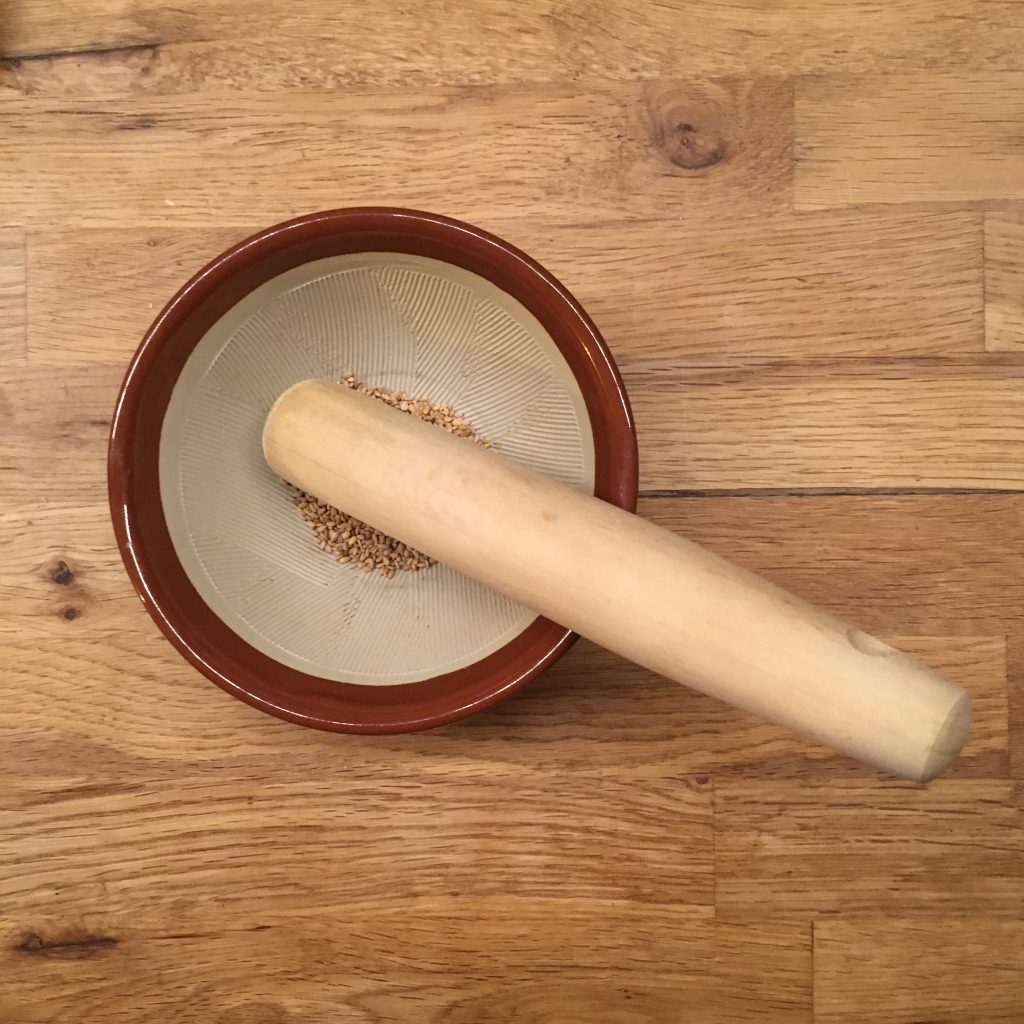
So here’s my recipe of goma ae. Suri goma すり胡麻 is ground sesame powder. It’s very easy to make from the sesame seeds, or to buy already powdered.
Making ground sesame: suri goma
Negibosu goma ae (2 servings)
A dozen of leek flower buds
1tbs of sesame seeds
1tbs of soya sauce
1tsp of brown sugar
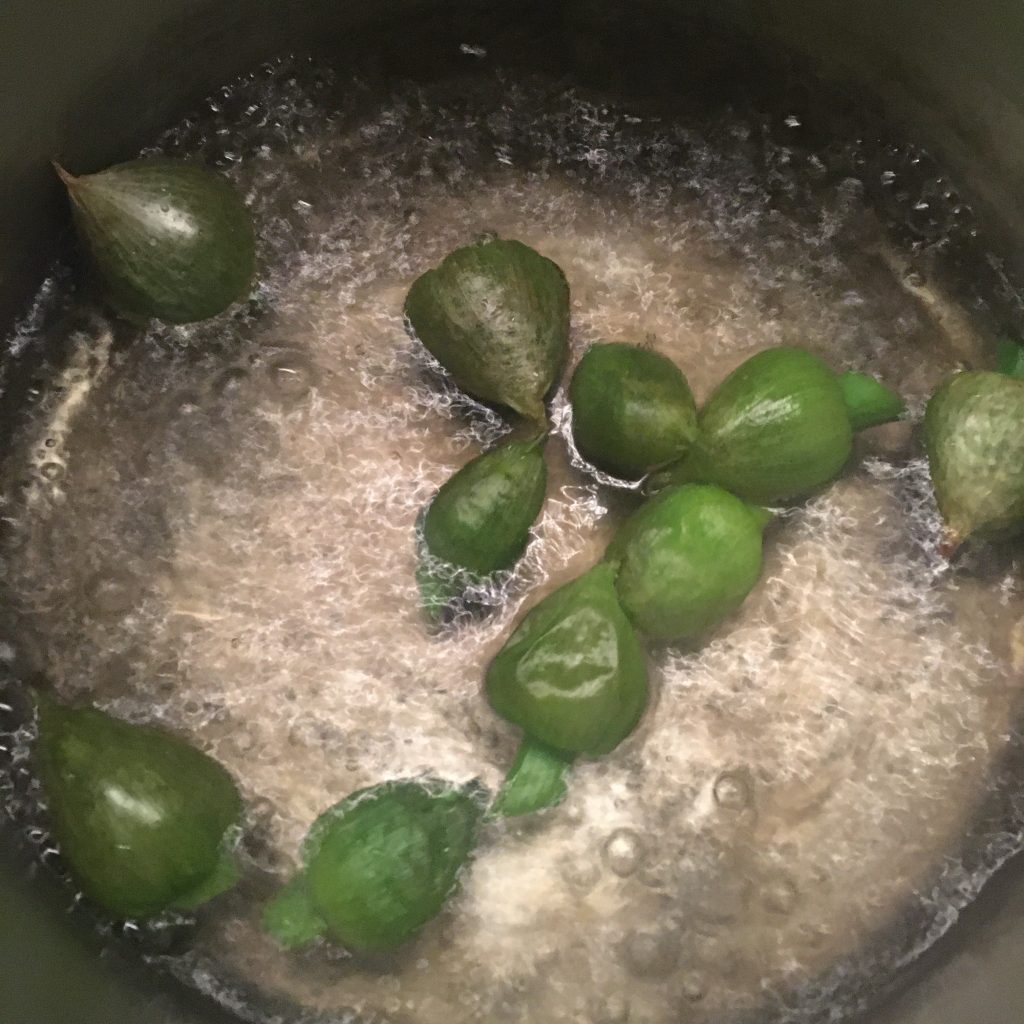
Wash the negibosu, remove the hard part if any, and blanche for a few minutes. Drain and pat dry.
Blanching negibosu
Once cool enough, cut in tiny bite size.
In a mortar, crush the sesame seeds with a pillar to obtain a paste. Add the sugar and soya sauce and stir. Add to the negibosu, stir and that’s ready!! Yes, it’s that simple and you’ll see it’s delicious!!!! Enjoy!
Since we’ve been working from home, I cook three to four meals a day (we wouldn’t miss a good tea time!) and a whole new routine of recipes slowly replaced old habits. More meals to cook = more chances to explore. I cook more quiche as we spend more time in Ohara, I also cook more steam buns and gyoza, also one dish that has been an almost weekly thing is brown rice and spicy vegetables. As much I love Japanese brown rice, it takes too much time to cook it after coming back from work and have it ready for dinner (about 2 to 3h) so I would almost never make any. Working from home as this perk that starting a recipe is really simple, squeezed between two meetings.
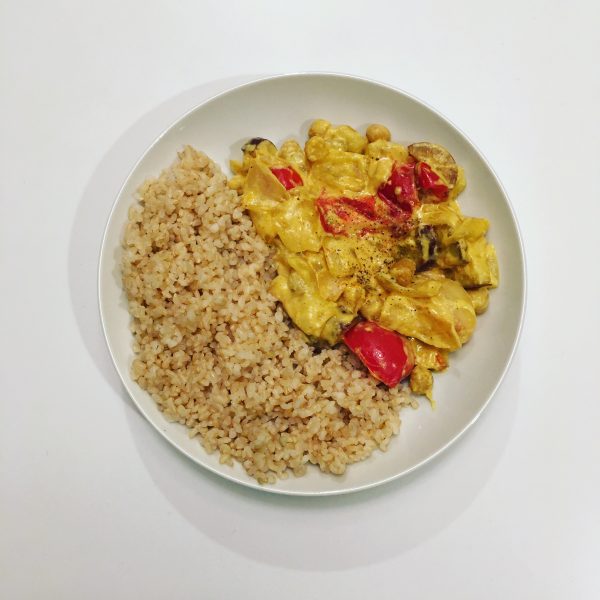
For some reason Thursday is the day we most often have brown rice. And one thing I really love is to have it with some seasonal vegetables and a light spicy sauce. Versions are endless. And with the spring coming and the new vegetables I prepared a very simple and ultra full of flavors version. A few chick peas remaining from the hummus I made the other day, a bit of coconut cream, and a lot of new and fresh onions that our friends gave us. Add some super ripe tomatoes and, because winter is still not completely gone, a sweet potato, you have a great base. Normally I would have added curry to the mixture, but curry powder is on my shopping list and I didn’t have time to go grocery shopping this week. And actually it was good that way. It forced me to explore other spice combination and I realize that curry is not necessary. So if you want a very mild and very tasty recipe for your new onions and your brown rice, just read below and enjoy!
New onions with spice and coconut milk
2-3 new onions
1 sweet potato (one carrot could do, nothing could do too)
1 large and ripe tomato (if you can’t find one just do without)
200ml of coconut cream or coconut milk
1 cup of chick peas, boiled and drained
1tsp of ground cardamom
1tsp of turmeric
1/2tsp of all spice
1/2tsp of ground cumin
1/2tsp of salt
ground black pepper
Remove one layer of onion skin and cut them in 8. Wash and cut the vegetables in bite size. In a greased pan, on medium heat, put all the vegetables, and the chick peas, and cook for 10min while stirring regularly. Add the coconut cream, the spices and stir well. Cook under cover for 5min. And that’s ready. Serve with brown rice, but I bet it is also a killer with flat breads or basmati rice.