Colorful as a Swiss chard

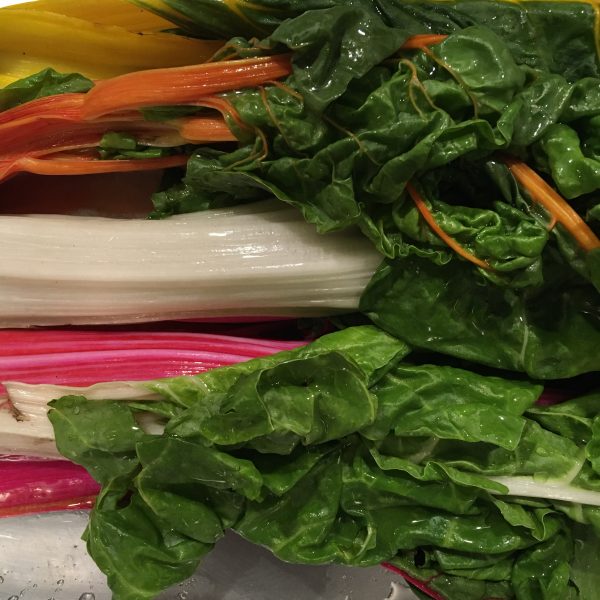
In France we have chards and they are green, with beautiful leafy greens and rather stiff whites. Both are delicious and I have always liked when my mother was making some. Compared to spinach they have a distinctive earthy flavor that I love. It took me a long long time to find chards in Japan. I only found some once we started to shop at local farmers’ markets in Isumi or once in a while at Mitsukoshi Nihonbashi. I think not because of the location but because they are just becoming more popular now and are not originally a green from Asia (we have so many already there…).

What surprised me the most was that instead of being the classic white and green vegetables I knew, they came in various bright and beautiful colors. Vibrant pinks, bright yellows… and the colors stay rather well even after cooking. The other funny fact is that the fibery white part (now colorful part) is a lot less fibery and stiff.

Actually growing some is also not too difficult so we had a try at it last year, and we enjoyed the very young ones not even cooked, just row and they make beautiful salads!

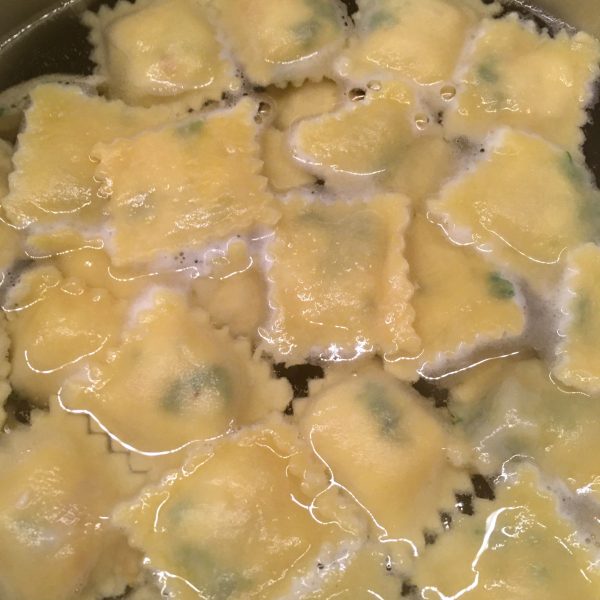
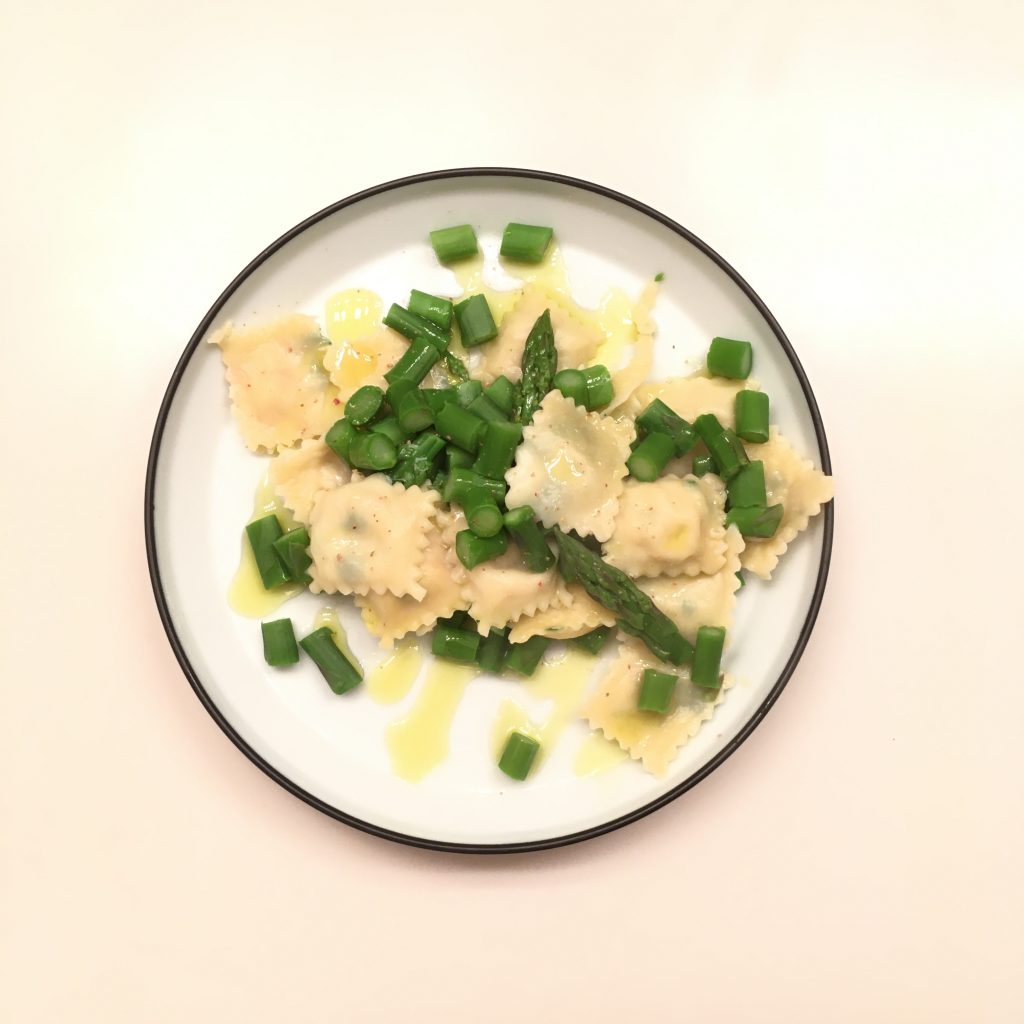
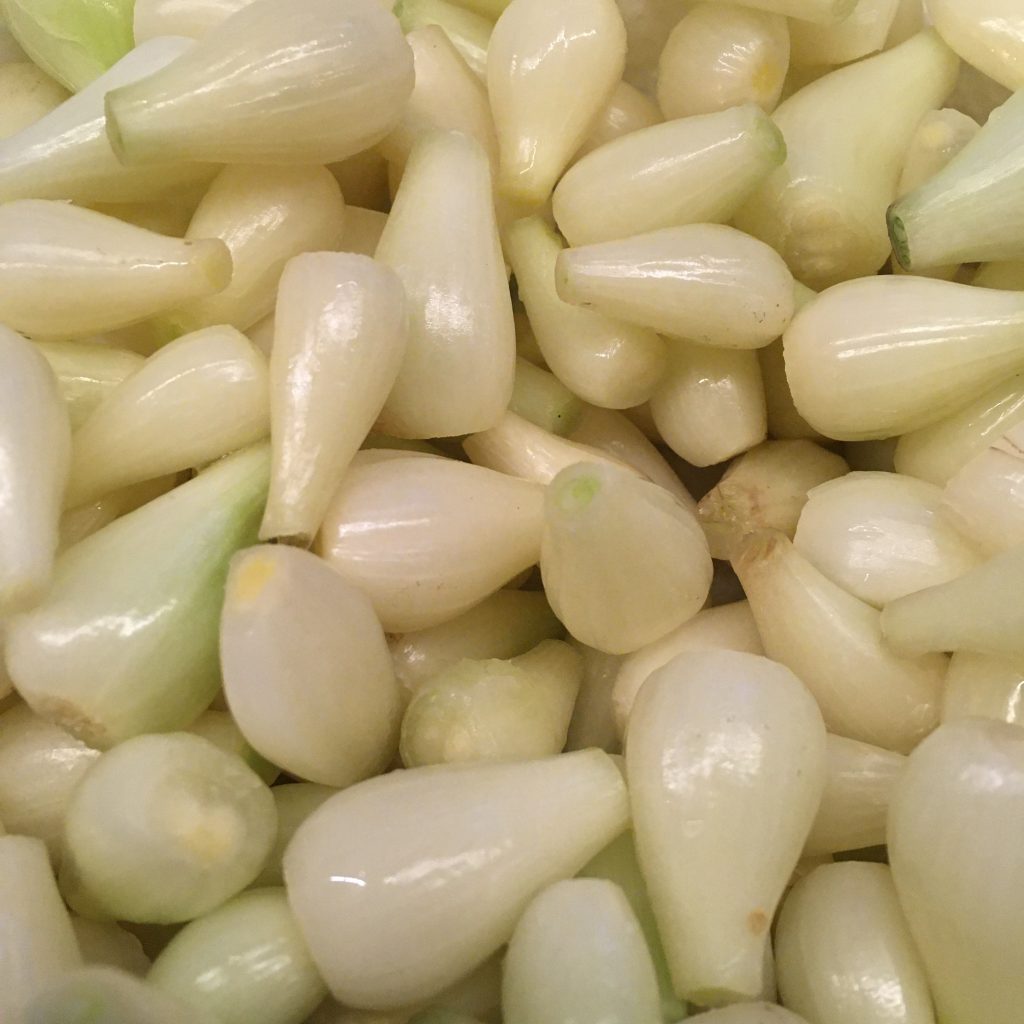
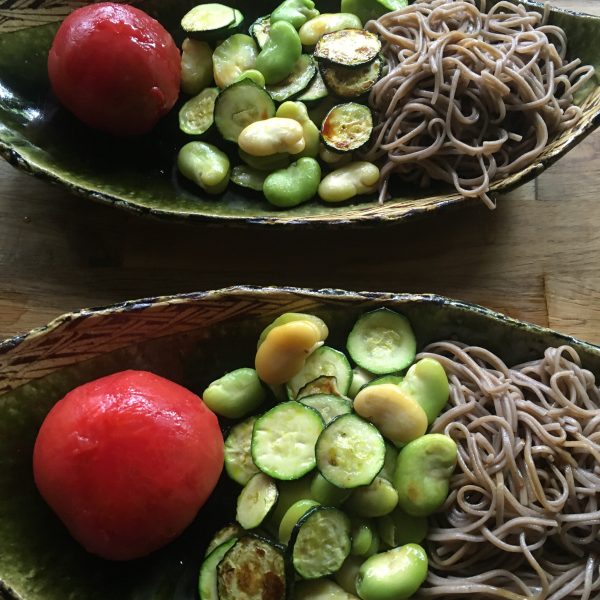
Last weekend on our way to visit some plots of land, we stopped at a local farmer that was selling some. And he gave us a real lot of colorful Swiss chards, and some new onions too. So Swiss chards and new onions have been on our plates pretty much every day. First with some simple pasta and olive oil, then I started to think about other possible recipes. My top 3 of the things I cooked with New onions and Swiss chards is as follow:
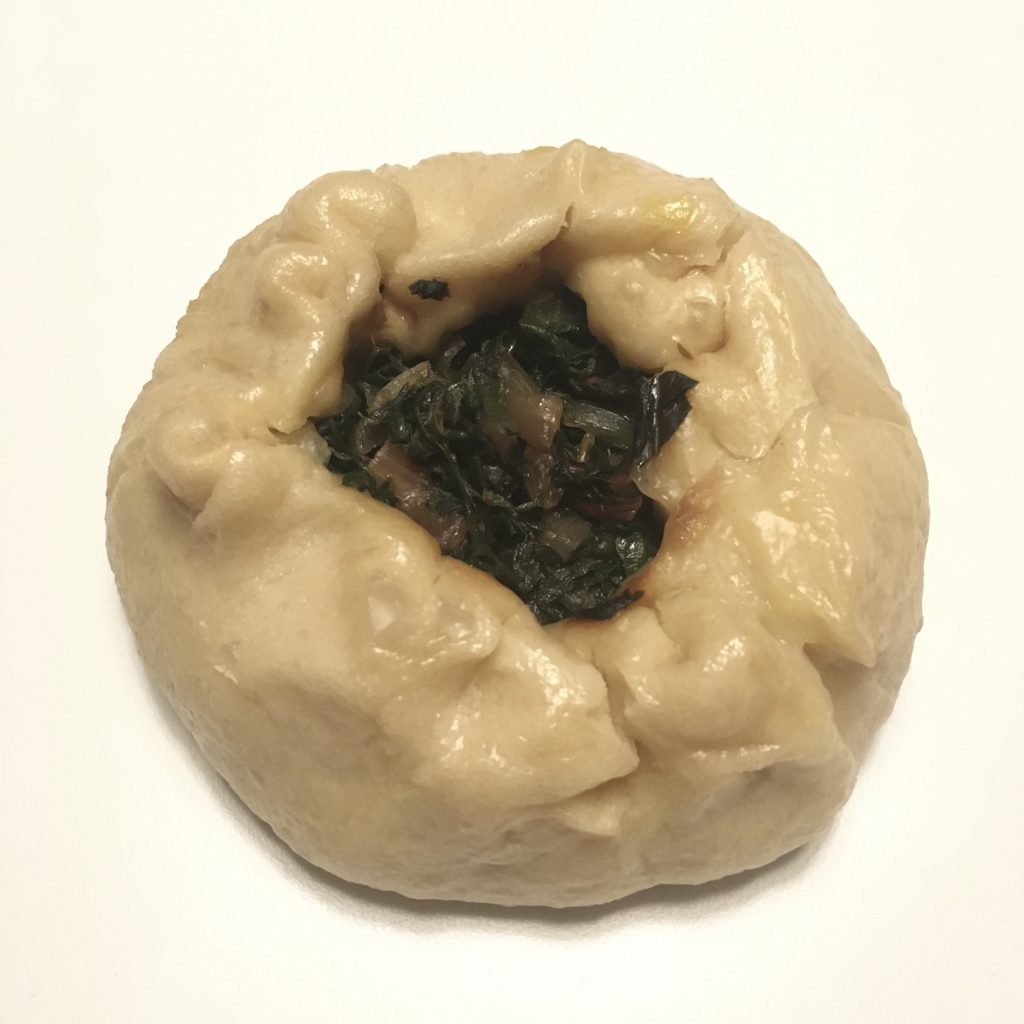
1. Steamed buns
2. With coconut milk and cashew nuts, served with spicy Basmati rice
3. With paprika and served with buckwheat pancakes

So here are my recipes. They are all vegan and super easy to make. I hope you’ll enjoy them!

Steamed buns with Swiss chards and new onions (makes 4 large ones)

  • a bundle of Swiss chard
  • 2 new onions
  • a pinch of cumin
  • salt and pepper
  • 1tbs of olive sesame oil
  • 200g of flour
  • 1tsp of baking soda
  • a pinch of salt
  • water

In a bowl mix the flour, baking soda and salt, add water little by little and knead until the dough is soft and smooth. (If you have time, replace the baking soda by sourdough and wait 12h after kneading).

Wash and chop the chards, peal and chop the onion. In a frypan, put the sesame oil, and the chopped vegetables and cook at medium-low heat until they are soft. Add the cumin and salt and pepper and stir well.

Cut the dough in 4, make balls, and roll them into an 18cm disc. Split the filling into 4 portions and put in each disc. Form the buns and steam for 20min. Enjoy with a bit of soya sauce or without!

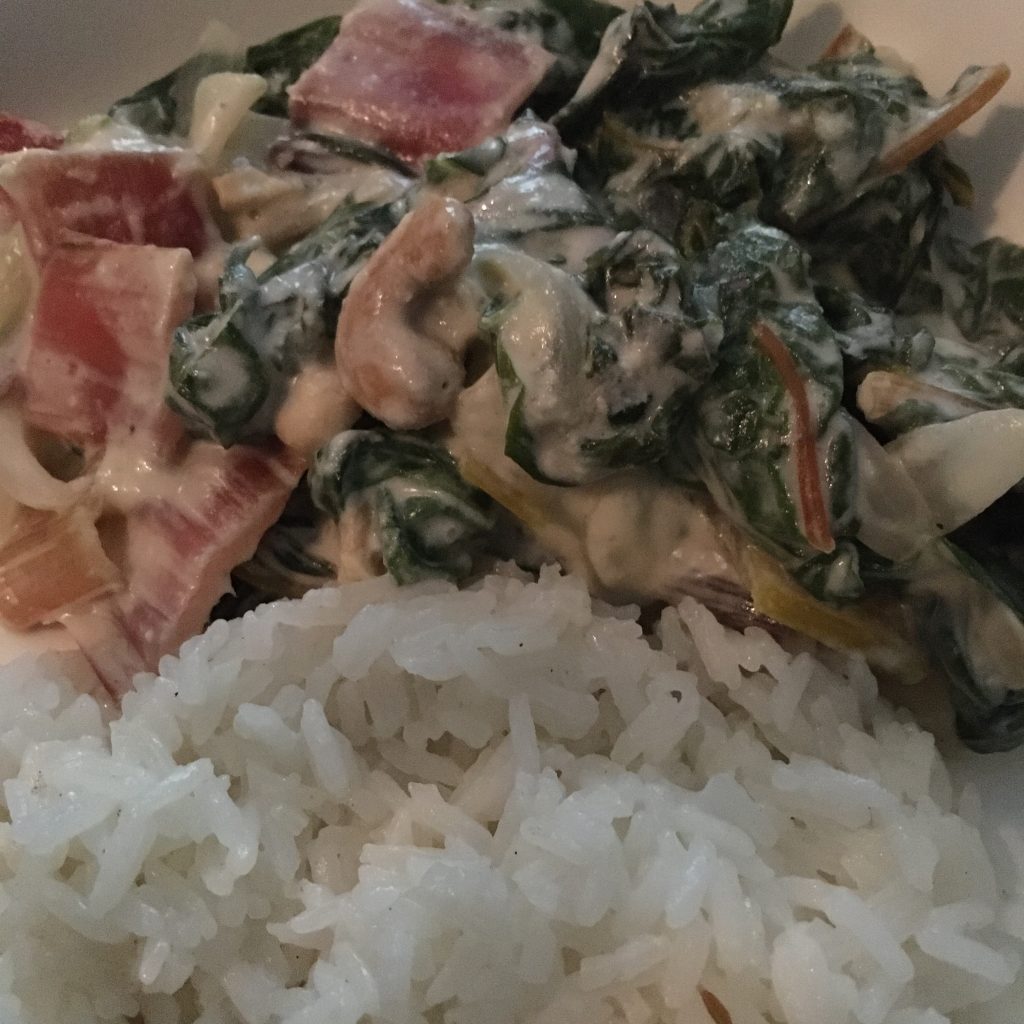
Swiss chards in coconut milk with super fragrant rice (2 servings)

  • a bundle of Swiss chard
  • 2 new onions
  • 200ml of coconut cream or coconut
  • 1 handful of cashew nuts (shelled)
  • salt and pepper
  • 100g of Basmati rice
  • a pinch of cinnamon, of cardamom and coriander, 2 star anises
  • A bit of butter if you don’t mind

First, steam the rice with the spices, and the butter if you use some. Then, while it is cooking, wash and cut in chunks the onions and chards. In a pan put the vegetables, the coconut milk and the cashew nuts roughly broken. Cook for 10minutes at medium heat, while stirring once in a while. Then serve with the warm rice and enjoy.

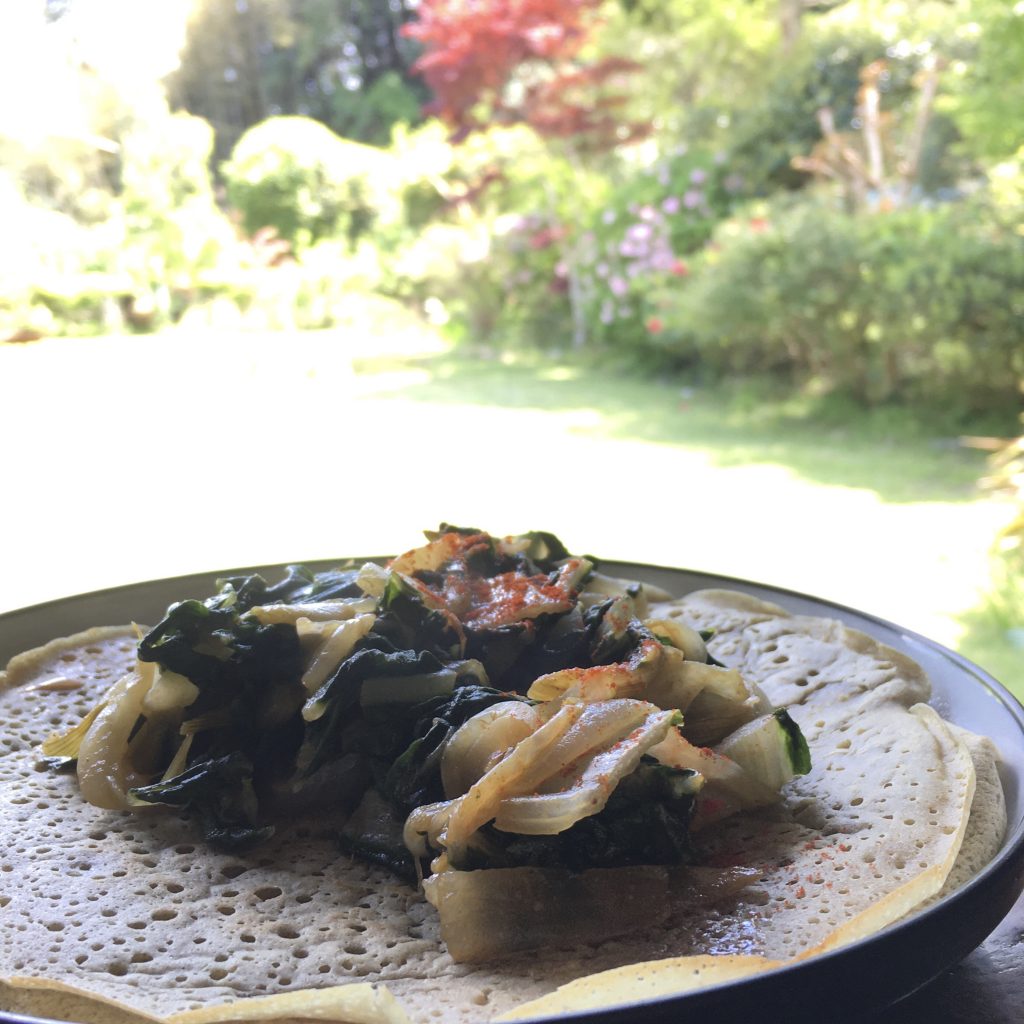
Buckwheat pancakes and Swiss chards and new onion stew (2 servings)

  • a bundle of Swiss chard
  • 2 new onions
  • 1tsp of olive oil
  • 1tsp of paprika
  • a pinch of turmeric
  • salt and paper
  • 120g of buckwheat flour
  • 1tsp of baking powder
  • water
  • a bit of oil for cooking the pancakes

In a bowl, mix the buckwheat flour, the baking soda a pinch of salt and add water until the dough is creamy, but not liquid.

Wash and chop the vegetables and cook them in a pan with olive oil while stirring once in a while. Add the turmeric and paprika, salt and pepper and stir again.

In a greased pan cook the pancakes (size is up to you) on both sides. Serve with the vegetables and enjoy.

Et voila, three really easy and delicious recipes with Swiss chard and new onions!

Peanuts…

It may seem strange but peanuts grow quite easily in Japan and peanuts from Chiba are among the most famous. Peanuts in Japanese is called rakkasei 落花生, which literally means the falling flower’s life or something of the kind… because peanuts are a very intriguing plant indeed! It looks like a low pea, with nice flowers, which then stem underground, where the peanuts actually grow. My curiosity, the fact that they are local so normally adequate for the weather, and that I am slightly better at growing underground things than overground, peanuts were definitely on my list of things to grow. I did a first attempt in 2019, more or less successful, and tried again this year, more successfully. I harvested a little basket of fresh raw peanuts.

After debating about what to do with them… we usually don’t eat peanuts… I decided I would simply boil them… simple enough and actually really super delicious. So here is my recipe.

Salted boiled peanuts

  • Fresh raw peanuts
  • Salt
  • Water

Remove all the soil and dirt of the peanuts. I gently washed them while shaking them. Then I let them rest overnight in water, and rince again. But if yours are clean enough just go ahead.

In a pan set the peanuts, cover with ample water, add one tea spoon of salt and set to a boil. When it boils cover and let cook for 3-4 hours a low heat, checking once in a while that there is still water. And that it! Let cool and start eating!

I kept them refrigerated, but they were gone in a few days!!!

The disappointing fruit: akebi

Every day brings surprises, those you’ve worked hard for, those you were dreaming of and those that the cherry on the top, but also its share of disappointments. For example, after almost 3 years since our stray cat Holly disappeared and the little Ephy very brief passage, what a surprise to see that stray cats are back and we have three coming now. They are very shy and still scared of us, but one now arrives when hearing us parking home for the weekend and waits to be fed… It took us 6 months to be able to approach and touch Pablo, so I am expecting not less for these ones too… though Pablo was more interested by company than food… time will tell us…

Other surprises are often in the small things of daily routine… and when the other day at a local products store I found a fruit I never saw before but knew about and immediately identified; akebi あけび, chocolate vine. I couldn’t help remembering Little Forest when they put so much efforts in trying to harvest akebi and then delightfully eat them (watch here!!)… so I grabbed the bag of fruits and went to the cashier, and back to A. who was waiting outside, so proud of my finding!!!

It was the first time ever to see akebi for real, so I did my homework and studied how to eat it and possibly cook it. I also searched a bit why it is bot so common in Chiba… then opened the first fruit. the skin was not too thick and the inside less white than I imagined it would. And the first fruit was really tedious to eat, so tedious that A. said he would not eat a second akebi in his life ever!!!!! I persisted and became more fluent at eating them, but the promised sweetness etc… was definitely not here. So over all it is a huge disappointing experience.

Recipe book also said that the skin is good in tempura, but looking at the one of my fruits, I lost confidence and decided I wouldn’t try further…

So overall, akebi is a beautiful fruit, but not as delicious I expected it would be, so either the fruits from Chiba are very much less good than those from Yamagata, or Someone is lying about akebi deliciousness!!!

In any case have a very good weekend!!!!

Okara muffins

In Japan okara is a very easy to find and very cheap product. Indeed, as it is a by-product of soya milk and tofu, there’s quite a lot of it. Up-cycling it in your cooking is also very easy. Apparently it has a good nutritional balance, but what I like with it is the little something different it brings. Added to an omelette for example it makes it extra fluffy and slightly pancake like. In a batter it adds some texture and firmness. Okara flavor is usually very mild and it is really the texture it adds that is interesting .

Okara: soya pulp after pressing to make tofu or milk

Okara is used in traditional recipes such as u no hana, or often in croquettes. I had times when I bought some often, but it was months if not years I didn’t. Probably because I liked one specific brand that was sold near the university but the shop selling it has closed and Has been replaced by another one that don’t have it. So when we went grocery shopping the other day at the local store and with the tofu there was fresh okara from the tofu maker I jumped on the occasion. I made some of the usual recipes aforementioned, but I really wanted to test okara in sweet preparations. I opted for chocolate muffins. I simply added okara instead of part of the flour. Added chocolate chips for the tiny ones and made a melty chocolate heat for the larger ones. And bet what…??? A. just loved them!!! And so did I!!!

The garden presents…

On a rainy Sunday like today we met with what would be our little hideaway and resting place. (More about how we ended up here here)

Hydrangeas in our garden

The few things that I found charming as soon as we arrived was the hydrangeas, in full bloom under the rain, with their vibrant gradation of blues and purples. The abundant plum trees covered with fruits, and the lush green of the Japanese maple trees, the gingko, the pine and the azaleas. Everything that makes a Japanese garden, Japanese. I obviously didn’t see many thing that were also there: the loquat tree, the strawberry tree… After 8 years I now know pretty much all, even if I am uncertain about the 3 or 4 different types of plums we have, and every year I harvest more fruits than we can process! In particular the plums and the strawberry tree fruits. So I give away a lot. This year 15kg of plums went to my secretaries at the university!!! And used 5kg for syrup and 3kg for umeboshi. The rest is for the birds, the worms and the ants ;).

After years of struggle making umeboshi and failing, I realized umeboshi are not so difficult to make if you have the proper instruments. I use to make them with whatever I had, before investing in a proper pickle box, that is wide enough and has a lid with a spring where you can apply sufficient pressure and get rid of the heavy stone, the overflowing ume juice and the failure… largely due also to the fact that I cannot check them every day. So if you plan to make umeboshi I highly recommend you invest in the proper recipient. I use a pickle box called Picre.

Umeboshi

  • 2kg of Japanese plums (yellowish rather than greenish)
  • 360g of salt

If your plums are really hard or toi greenish, dip them in water a few hours before starting.

Wash them and pat them dry carefully. Remove the stems.

Sterilize your recipient. It should be 3-4 times the volume of your plums to avoid overflowing accidents. Set half of the salt in and create an even layer. Organize the plums on the layer in order to remove space between the fruits as much as possible. Sprinkle a bit of salt. Create a new layer on top remove space as much as possible between all fruits. Sprinkle salt and repeat until all plums are well organized in a compact manner. Sprinkle the remaining salt on top.

Sterilize the lid and set on top to gently squeeze the plums. Set a heavy weight or pressure on top. After a few days the liquid from the plum will start to be released and a brine will be created. This is umezu. A precious liquid to use for pickling, energy drinks etc… after a week, the liquid should be about the height of the plums. It will continue rising and can be 2-3 times the height of your original plums height hence why choosing a recipient big enough.

Leave that way until the end of July. And see you then for the next step!!!

Ravioli piccolini

Ravioli… oh! It’s been really a while I didn’t make ravioli… it was high time to fix that… but with all we got from the local shops I wasn’t sure about what use for s filling: korinki and cream cheese, asparagus, eggplant, or flounder… after a certain thinking I had in mind flounder in a sort of bouillon and served with rouille… I was thinking of my own special way of making bouillabaisse… but then something came up at work, upset me and I was working instead of cooking… the dough was ready, the flounder grilled, but neither the bouillon nor rouille were to be done anytime soon… and the clock was ticking and A. was hungry… and past 21:00 I had to go back to the kitchen. Except that now it was too late for a fancy dish… So I ran in the kitchen garden, chopped some fresh parsley, add it to the fish and decided that would be it. Rolled the ravioli dough, filled them in tiny size, and while I was poaching them I felt it was missing something, so I added some asparagus, a fragrant olive oil and that was it.

And you know what: flounder x parsley was a killer filling and I will do again!!! A creamy sauce could have worked fine as well I reckon…

Parsley and flounder filling

Summer vegetables

I call summer vegetables the ones I have grown up with: tomatoes, zucchini, eggplants, melons… while here they are for most of them early summer vegetables as they are not endemic. For instance the zucchini season is at its peak now and will end very soon normally. Except that this year the rainy season is rather dry so may be we will have zucchini for longer… that would be good!!! Maybe I won’t have to struggle finding zucchini in the middle of summer to make a good pesto soup!!!

Anyway, at the moment I enjoy cooking them in various ways as long as I can find them. I cook them with my “traditional” or classic recipes but I am also investigating new ways of cooking them. I found that zucchini and green beans go very well together and I came up with a few new nice recipes, super simple and easy to make as I am quite busy these days with several projects on the run… Let me share two recipes here today: a simple savory tart and a vegetable curry-rice. I hope you’ll like them!

Savory tart

  • For the pie crust: 150g of flour, a pinch of salt, 3tbs of olive oil, water
  • 2-3 zucchini depending of the size
  • A handful of green beans
  • 150g of ricotta or cottage cheese
  • Fresh basil

Prepare the dough as usual, and roll it for your pie dish.

Wash the vegetables. Slice thinly the zucchini (with a mandolin if you have one) and set on the dough. Cut the green beans to 2-3cm long pieces and add on top. Crumble the ricotta or the cottage cheese, chop the basil and sprinkle on top. Bake 40min at 180deg or until golden. Enjoy hot or cold.

Veggie curry-rice

  • 1 large zucchini or 3 small (better)
  • 1 large ripe tomato
  • 1/2 onion
  • 10 green beans
  • Japanese white rice cooked
  • 1tsp of curry powder
  • 1/2tsp of cumin powder
  • A pinch of salt

Wash the vegetables. Cut them in bite size. In a pan greased with a bit of oil add the vegetables. Cook for 5 min at high heat then lower to medium. Add the spices. Cook another 5-10 min until you obtain the level of moisture you want. Personally I like rather soupy so that the rice can suck it in. Serve with the Japanese white rice and enjoy while hot. (Top picture)

Rakkyō

If you have ever eaten curry-rice in a restaurant you surely have eaten the little white pickle served with it and then you have eaten pickled rakkyō 薤. A little vegetable that looks like a shallot a bit and is often called Chinese onion. I love the crisp and fresh taste it has and it’s hard to stop eating! A little like French cornichon, but less sour and salty!!!

The season for fresh rakkyō harvest is right now and it is fairly easy to find in coop and farmers markets. Pickling them is rather simple though washing and pealing is a bit tedious and you have recipe several options.

The easiest one is to use a prepared ready to use “rakkyō su” which is a mix of vinegar, sugar, dashi that is chiefly used for pickling rakkyō but can also be used for other preparations such as curry onion pickles. Though I am not necessarily a fan of ready to use products, they are a good way to start when you are unsure of the result and what you do and want to maximize success.

Other methods are to prepare your own brine for pickling the rakkyō. One recipe I have in an old Japanese cookbook is quite lengthy and probably the most genuine one, yet I couldn’t find a similar one anywhere, so I tempted to share it with you. My rakkyō are still in their first week of picking so I don’t yet the result… we’ll see!!!

So first the recipe for a quick sure outcome, and then the lengthy one. Choose the one you prefer!

Easy-peasy pickled rakkyō

  • 1kg of fresh rakkyō
  • 1 bottle of rakkyō su らっきょ酢

Start by washing the rakkyō and removing the first layer of skin to obtain a smooth and shiny surface. Remove the hard base and top too. Bring a large pan filled with water to a boil and throw the rakkyō in for one minute. Drain and pat dry the rakkyō.

In a sterilized bin put the dry rakkyō and cover with the rakkyō su. Close the bin with a lid. Leave to rest for 14 days. Shake the bin 2 times per day on the first 3 days. After 14 days enjoy!

Classic recipe of pickled rakkyō

Brine for pickling (used 14 days later)

  • 2 cups of rice vinegar or other white mild vinegar
  • 300g of sugar
  • 1 cup of white umezu (brine of the umeboshi unflavored with shiso), can be replaced by 1 cup of vinegar + 1tsp of salt
  • 1/2 cup of mirin or konbu dashi
  • 5 dried red pepper (optional)

Pickling step 1

  • 1kg of fresh rakkyō
  • 30g of salt
  • 4tbs of vinegar
  • 1l of water

Start by washing the rakkyō and removing the first layer of skin to obtain a smooth and shiny surface. Remove the base and top too.

In a pan, set the water, salt and vinegar and the prepared rakkyō. Bring to a boil and stop right away. Drain and pat dry and put in a bin or a pickle-pot. Cover with the brine you made or of commercial brine. If you can set a heavy lid, otherwise everyday shake the bin. Wait for two weeks.

Pickling step 2

After two weeks drain the rakkyō and set them in salted water for 3-4h. Renew 2-3 time the water. Then set to dry in the air for half a day. Ideally in the sun, but any well ventilated place will do.

Finally prepare the brine by mixing all the brine ingredients together (but the red pepper) and bring to a boil. In a sterilized bin put the rakkyō and cover with the brine. Add the red pepper if you plan to use some.

Now it’s ready. Rakkyō in brine should keep a year or so., so enjoy!

Fireflies season

The end of May in Ohara is a beautiful season. The greens on the hills change from fresh greens to rich ones and the paddies from the typical yellow green if very young rice plants to a beautiful shamrock green. It is also the beginning of the rainy season, of hydrangeas blooming and warmer days. At bight it is possible for a few weeks to see fireflies.

Japanese have something for fireflies 蛍 hotaru. I didn’t recall seeing fireflies often as a child, a rare few times in Lozere, but not much. And since we moved to Japan and went to see fireflies at Chizanso in Tokyo with our friend I. who always had the best info about things to do, I kind of understand the sweet magic and the kind of nostalgia they bring. Seeing fireflies at Chizanso was great, but it is an orchestrated event when they release fireflies in the garden. While the magic is there, the artificiality of it is hard to neglect. It’s like seeing lions in a zoo…

In Ohara we are blessed with rather clean streams of water and great nature (I can’t say it is everywhere when I see the palettes of glyphosate at the garden center…) and we can see fireflies in their ecosystem. We first saw some in our garden one Sunday night, and since then every year we go for a walk when the season comes. And for sure with a bit of patience and the habituation to darkness you can spot a little green light blinking. If we want to be lazy, we walk to the nearest stream in the paddies, and there we can see plenty.

A firefly in our garden

The fireflies season is the perfect transition between the end of spring and the beginning of the summer. It brings many greens in the plate broad beans and zucchini. Tomatoes from the green house that are ripe, sweet and juicy. It inspired me for the recipe of the simple plate on the top picture: soba, fava beans and zucchini in soya sauce and a peeled tomato, also with soya sauce. I love when the juice of the tomato mix in the soya sauce, eaten together with the cold soba it is divine.

Proudly powered by WordPress | Theme: Baskerville 2 by Anders Noren.

Up ↑

Verified by MonsterInsights