Welcoming another new year…

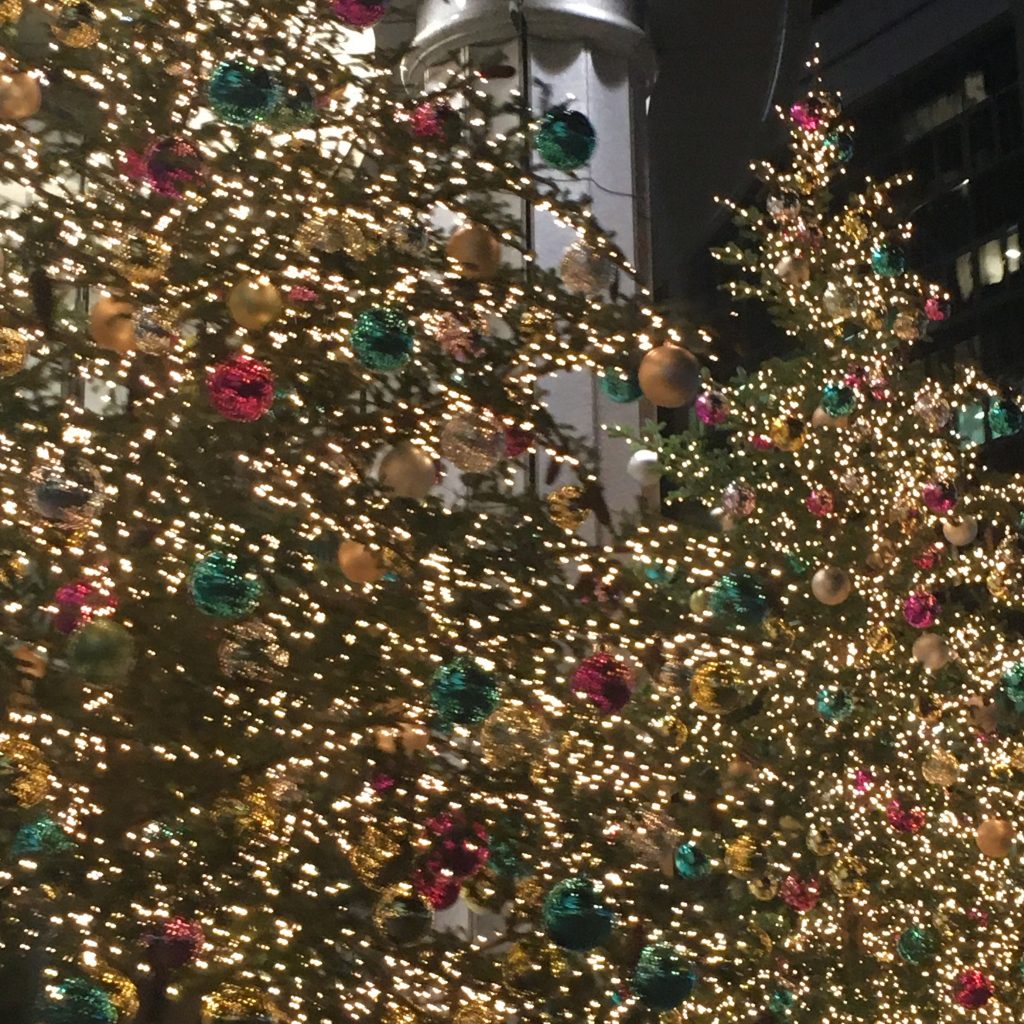
I am not good at welcoming new years… Probably because it is too close to my birthday, and I just myself turned one more year and still try to understand what it means… also we celebrate more personal events than any other: birthdays, anniversaries… For many it is a time to look back at achievements and look forward to goals. I have no regrets , and as long as I can remember I never made a good resolutions list. I have no bucket list, nor list of things I want to fix in my life, bad habits I need to get rid of, diets I need to start, addictions I need to quit or things I could do better. Not that I am perfect of course not, but I don’t make lists. Usually when I need to do something I just do it and organize myself to stick to it! January 1st wouldn’t be the time I would particularly change and set goals for myself. So the welcoming of the new year is not so important for me. And for the past 17 years we’ve spent a lot of the new year eves either in a plane or with a big jet lag in the countryside, when it is cold and we usually go early to bed and wake up early too. Though I like the Japanese celebration of new year at a nearby temple or shrine for the festive simplicity of hatsumode 初詣, the first visit of the year to a shrine or temple, and have nice memories of so many spent with friends or family in so many different places in Japan they are also often memories of hours in the cold, waiting in crowded lines for the time to arrive, with bonfire to warm us once in a while. So we now often skip the midnight visit and go later in the day, when it’s less crowded.

Even though we don’t celebrate much, I prepare a nice dinner (as I do every day ;)) and we spend a quiet evening together, as we always do. Nothing fancy… and I like it that way very much.

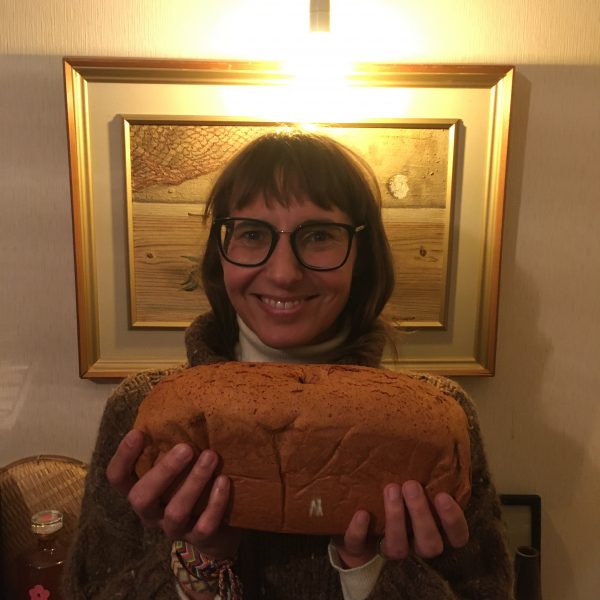
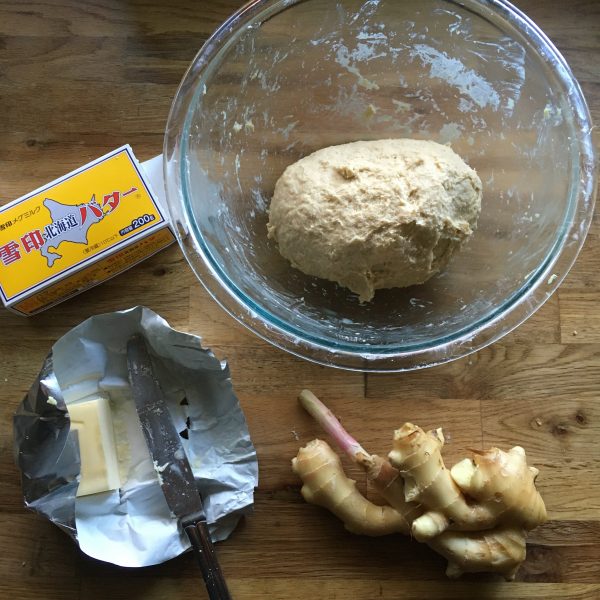
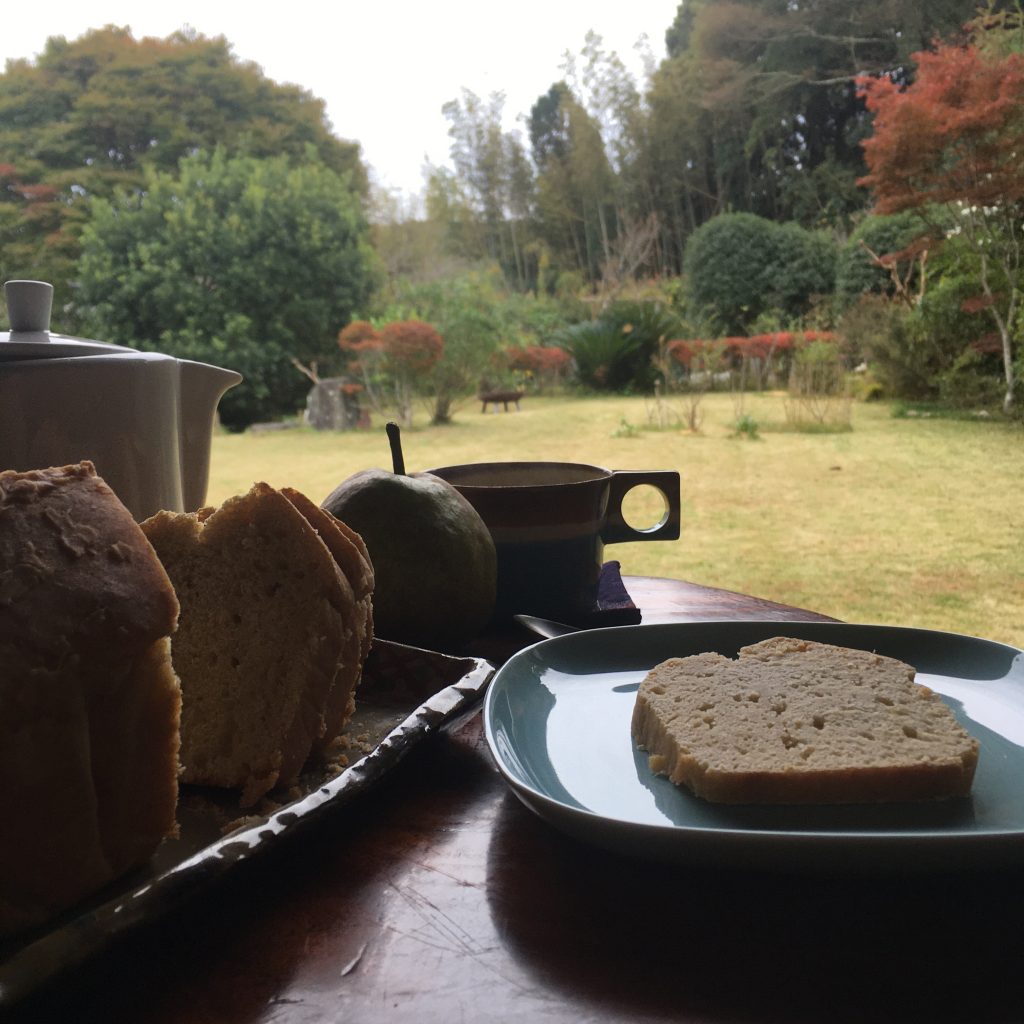
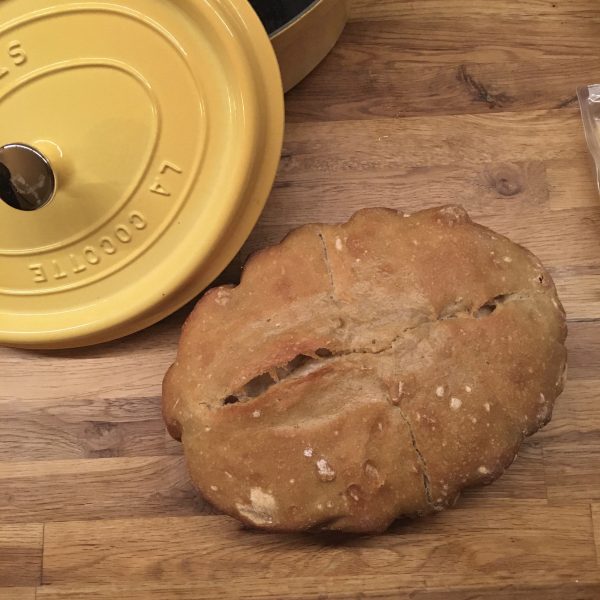
This year is just the same. At the time I write, everything is quiet outside, though the shrine is all lit up to welcome a few visitors during the night. A. is fast asleep, I am struggling to keep an eye open. We will wake up when the day breaks tomorrow. It will be cold and sunny. I have already baked the bread for our breakfast as I tested a new (to me) baking method using a cast iron pot, which has helped me understand why my breads are often too pale. I have an issue with moisture when I bake them. The cast iron pot just solved the problem and I finally could bake a golden bread, with a crust crunchy outside and well balanced crumbs.

So now I can sleep tight, wish you a good end of the year and see you in 2022!

The magic of the pain d’épices

A few weeks ago I started to think about how much I love the French gingerbread called pain d’épices, that I don’t recall seeing any in Japan and that I never made some… It is heavy in the hand, yet light when eaten, with a beautiful golden color and flavors and aromas that sparkle in the mouth, and the texture is a very melting one. One of my favorite pain d’ épices of all time is that of my horse ridding teacher. She has a gift not only for gardening but also for cooking sweets. In summer during intensive training camps, she would bake while we would play around with the horses, and make fruits charlottes with the fruits from the orchard. In the fall or winter she would make pain d’épices. I was so found of it that I remember asking her the recipe, and she told me she just mixes 1kg of flour with 1kg of honey. I was probably 12 when I asked but I still remember this recipe because it didn’t make sense for me at the time, honey and flour, that’s it, really??? and I never tried, too scared of wasting 1kg of honey!

But when I started to look at how to make pain d’épices how surprised was I to see that, this is indeed the recipe for classic pain d’épices from Reims. What I didn’t know then was that the mix, with spices added, should be kept days or weeks to start the fermentation that will guarantee the fluffiness. Last year I would probably have been very skeptical trying such an attempt, as I was not very sure how all this fermentation worked, but since I made my sourdough Lois I feel a lot more confident to do flour base fermentation. Finally, last week I decided to start the experiment and prepared a mix of 600g of flour and 600g of honey together, some said that adding the spices at that stage would increase the development of aromas, so I added them too. I left the preparation in a container under a lid the whole week at home (with the winter temperatures settling in, the house temperature is about 5 to 9 now, so no big risk of seeing things rotting, or mold developing!!!!) And today I just found my mixture, it hasn’t changed much but it is not looking bad at all so I prepared it and baked it. The result???

A perfect pain d’épices! The look, the color, the texture, the smell… Exactly as you would find on in France, a happy A. and a happy me, eaten it with a cup of Christmas tea at tea-time or for breakfast. We even used it for toasts with cheese for me and some pork paté for A. and we were very satisfied. The recipe is very simple and except for the one week wait it is very simple to make. Definitely a must do again one. This recipe is will become a new classic like my pompe a l’huile.

Pain d’ épices (1 big loaf or 2 smaller)

  • 600g of flour
  • 600g of pure honey (liquid is easier but creamy can work too)
  • 1tsp of ground cardamom
  • 1tsp of ground cloves
  • 2tsp of cinnamon
  • 1 ping pong size piece of fresh ginger, pealed, grated or chopped thinly (I use fresh ginger because it is easy to find and I just chopped it roughly but you may use ground ginger, then 1/2tsp should be good enough)
  • water
  • additional 1/2tsp of baking soda (if your rise time is short)

About 5days to two weeks before you want to bake your pain d’epices prepare the dough. For that, in a container with a lid mix the honey the flour and the spice. If your honey is really to creamy and hard too work you can melt it in a pan at very low heat to liquify it. Stir to incorporate all ingredients. I used a spatula to do that as the mix is way to sticky to put hands in. One everything is well incorporated put the lid on the container, and let rest for as long as you want, but at least a few days.

After a few days, the spices may have start to color the dough a bit but it may not have changed much otherwise. When you want to bake your pain d’epices, pre-heat your oven to 150deg, just add a little of tepid water to the mix to soften it and knead. The dough is sticky but not terribly sticky. If you think your rise time is rather short (just a few days), you may want to add a little of baking soda now, to ensure perfect fluffiness. Knead and add water to obtain a compact yet smooth dough. Using parchment paper set in a cake dish or split in two and make two, or more. And bake for about 2h if you make a big one (check with a knife or stick if the dough is well cooked inside), for 2 smaller, about 1h should be enough.

I made a very large one and baked about 2h at 150deg, but wasn’t sure it was perfectly baked so I finished with 10 min at 180deg just to be sure. Let cool down before cutting and eating.

Pain d’epices normally keeps well, this is tone he purpose of the original recipe. But in our house, we didn’t had time to see how long it can keep!!! We’ve eaten it in a snap!!!

Look at this beautiful color and perfectly dense but bubbly texture!!!

Faraway from the Christmas frenzy

I always feel excited when the days are becoming short and colder. Spending time outside when the sun is high, and as soon as the sun sets down, it is time to sit for hot spicy tea, a slice of cake or a piece of something comforting. I bake Provencal pompes a l’huile, panettone, or brioches. This is an habit I took when we were in Florence, and I cherish it very much. I also like to go for a walk at night and see the illuminations. Tokyo is really good at creating a festive atmosphere, would it be for the new year, the cherry tree blooming, the summer fireworks… there is always a good reason to decorate and makes us feel like little children.

Christmas decorations at Mitsukoshi Nihonbashi

But when I look at western magazines and IG feeds, it is all about festive food, or so-called, but it is just an accumulation of decadent food, that I must say is a mood killer for me. Rich buche de Noel or Christmas cakes, menus with heavy terrible food such as foie gras, or very creamy things I am just running away from these. I don’t like most of the fancy food: truffles, caviar, oysters, foie gras. and all these pictures instead of appalling to me they only make me crave for simple food, nourishing and warming yet elegant.

This is when I make more often than ever ochazuke and soups with vegetables and grains. I really love a warm bouillon with some nourishing pasta or rice or chickpeas, lentils, spelt, beans… Today I came up with a super delicious recipe, so I am very happy to share it now!

Farro winter soup

  • 1cup of farro
  • 1/4 of Chinese cabbage
  • 1/4 of butternut squash
  • 8 shiitake
  • 1tsp of turmeric
  • 1/2tsp of ground cumin
  • 1/2tsp of cumin seeds

Wash the cabbage and chop it. Same with the shiitake. Peel and cut the butternut. Put them all in a pan and amply cover with water. Add the farro. Cook at high heat to bring to a boil, then cook for 30min at medium to low heat. Verify that there is still enough liquid, add some if necessary. Add the turmeric, the cumin powder and seeds, a big of salt and pepper. Give a good but gentle stir and serve. Eat hot. No need for an drizzle of olive oil in my opinion but you can add one if you want !

Spinach ragoût and flat breads

There are things I love I don’t make often enough. Among them are cha-kaiseki cuisine, ravioli, steamed buns and flat breads. Even though they are easy enough to make I just get distracted, or don’t have the right ingredients, or prepare something else. So last night when time to prepare dinner came I had my mind set on flat breads and couldn’t change it. But with what??? It took me a bit of time to come up with something that would be a good match, but suddenly spinach and sweet potatoes ragoût appeared as the only option. A bit pf spice and I knew it would be a hit! And damned it was!!! As simple as it you can improvise your own recipe, just in case, I share mine.

Flat breads (8 15cn pieces)

  • 150g of flour
  • A pinch of salt
  • A pinch of baking soda
  • Water

Mix the flour, salt and baking soda together. Add water little by little while kneading until you have a smooth dough. Leave aside.

After you have prepared the veggies (see below) cut the dough in 8 pieces. Roll each to a 15cm and cook them in a pan on both side until golden.

Spinach ragoût (2 serving)

  • 2 large bundles of fresh spinach
  • 2 sweet potatoes
  • 1 cinnamon stick
  • 2 cardamom pods
  • 1tbs of carvi seeds
  • 3tbs of olive oil
  • Salt and pepper

Wash the vegetables. Cut the sweet potato in bite size. In a large pan heat the olive oil. Add the vegetables, and cover with water. Cook slowly. Add the spices. Let cook at low heat until all the liquid is gone. Stir sometimes.

Eat altogether and enjoy!!!

Blanquette… don’t misunderstand with blanket!!!

Blanquette (pronounce “blanket”, but don’t get confused) is a very French, very traditional dish that my grandmother would often prepare when we had family lunches. She would make it with veal meat. But I guess everyone has its own recipe. Hers would also includes some green olives. It’s been a long time since I have quit eating veal… and a few times, long ago, I prepared some with chicken breast, but to be honest this is something I have not prepared in years if not a decade!!! Yet with carrots and mushrooms in the fridge, it suddenly reminded me of blanquette, and felt like I would do a vegetable only version, and eat it with steamed basmati rice for a change. When you use only vegetables it is rather quick to prepare and ended up being a great dinner dish after work and workout. So here’s my recipe, and a few variations possible to twist it to your liking! Enjoy!

Blanquette (2 servings as main dish)

  • 3 carrots
  • 5-10 mushrooms depending on size
  • 1 leaf of laurel
  • Salt and pepper
  • 15g of butter
  • 1tbs of flour
  • Water

All the following are optional

  • 10 green olives
  • 1 chicken breast
  • 1 leak…

Melt the butter in a pan. Wash and cut the vegetables. Cut mushrooms in four, carrots in bite size, leak in small chunks, chicken in bite size. Add to the melted butter and stir well to coat them, at low heat. Add the flour little by little while stirring, to make the roux, then add water to just half cover. Add salt and pepper and the laurel. Cook at low heat until the liquid turns into a thick and creamy texture (if too thick just add a bit of water and cook a bit longer, same if you think you want your vegetables more tender). Add the olives if you use some, stir again. And serve hot with rice (not Japanese rice, better with long grain rice)

I hope you love lemons!!!

As much as I do!!! I’ve always loved lemons, and lemon juice. In France and in Italy when every one goes to the cafe to have an expresso, I would either have a freshly squeezed lemon, when it’s cold in winter, with some hot water in it. That’s really something I love about cafes, and that, with freshly squeezed orange, is probably the only fresh thing you can have.

Our lemon tree this year had a lot of flowers but none went to maturity so we’ll have no fruits. So when my secretary sent me a giant box filled with giant lemons from her garden, I can only be thankful, and super happy. Who doesn’t love no chemical at all grown vegetables or fruits???

It took me a bit of time to think about what to cook… I love lemon tarts, lemon cakes, lemon squares… but I wanted to try something else… so while sipping hot lemon, I browsed the net for some recipes and found a lemon brownie recipe. Buttery and sweet, that would be a hit with A. No doubt!

Except that the recipe I found was a little odd: they didn’t say when to put the sugar, the proportion of butter was just too much and all sounded a bit awkward, so while using a classic chocolate recipe I came up with my own lemon brownie recipe, and it was great (lucky I cut the butter by a fourth, it is already very buttery!!!)

Enjoy! It is really super easy!!!

Lemon brownie (makes a large pie dish for at least 6 pieces)

  • 180g of flour
  • 150g of sugar
  • 150g of butter
  • 4 eggs
  • The zest of one large lemon or two small
  • The juice of one large juicy lemon or two smaller or less juicy
  • A pinch of sal
  • A pinch of baking soda

Melt the butter. In a large bowl mix the flour, the salt, the baking soda and the lemon zest, add the butter and stir.

In another bowl, whisk the eggs, the sugar and the lemon juice. Add to the previous bowl and stir. Set in a buttered and floured pie dish to have about 1.5cm thickness.

Bake 30min at 180degrees. That’s it!!!

Chickpea velouté

Every time I receive a parcel from my parents from France, there is inevitably some of my favorite staples in it. Chickpeas and chickpea flour are part of them. They are made by an acquaintance and I love cooking with them. So yesterday I decided to cook a big batch of chickpeas and I used most them in raggu with other vegetables etc… but I ended up with about two handfuls remaining and it was lunch time… and it was a bit of a chilly wind outside, I have had a long walk so wanted something warming… it would be soup. While minestrone with chickpeas is quite common in Italy, I opted for a version where the chickpeas are blended to obtain a creamy consistency. I added an hard boiled egg on top may be because I wanted one but it is totally optional.

Want to try my recipe of the chickpeas velouté? Here it is!!!

Chickpeas velouté (1 serving)

  • Two handful of boiled chickpeas
  • Water
  • 1tbsp of olive oil
  • Cumin powdered
  • Paprika
  • Turmeric
  • Black pepper grounded

In the bowl of your blender put the chickpeas, 1 glass of water and 1tbs of olive oil. Blend. If it is too thick add a bit more water. Add the spices and blend again. Move to a pan and heat slowly. Serve and enjoy!

I am sure you could add cream and other things to make the soup richer and silkier, but I like simple things and I prefer olive oil rather than cream… so that’s my way of doing it!

Fresh ginger

Just after myoga, fresh ginger season is starting. Both plants may look very similar, but in ginger we eat the root mainly. Unfortunately we don’t have ginger growing in our garden yet, so I usually buy fresh ginger at the farmers market. I’m big fan of candied ginger, and prepared some sometimes, but so far I didn’t get time. Work has been really busy, and everyday is full from morning to evening, if not with work, with surfing, gardening and trying to get familiar with Pistache. Progresses in any of the above are really slow: I’m getting better at spinning but it’s not quite yet very nice… the new garden soil is slowly shaping up, very slowly… and the cat… hum she’s around a lot but it is still too early to get anywhere close…

Pistache

All that to say that I didn’t make candied ginger, but instead used the fragrant roots for honey drinks, and for a delicious brioche. The drinks are easy, I just peel and slice thinly the root. Add a tablespoon of honey and top with hot water. For the brioche, the recipe is below.

Hot ginger

Ginger and lemon brioche

  • 400g of flour
  • 3 eggs
  • 100g of butter
  • 50g of brown sugar
  • 100g of fresh sourdough
  • 1 root of fresh ginger grated with its juice too or ginger powder
  • The zest and juice of one lemon or lemon extract

Mix all ingredients in a bowl and knead until smooth and soft. Leave for as much as it needs to grow. That will depends on the room temperature. Once the sourdough has clearly worked, flatten the dough, wait 15min and shape (I used a cake dish). Leave for another 1h or 2 before baking at 200deg for 40min or until golden.

Breakfast with the ginger and lemon brioche

Peanuts…

It may seem strange but peanuts grow quite easily in Japan and peanuts from Chiba are among the most famous. Peanuts in Japanese is called rakkasei 落花生, which literally means the falling flower’s life or something of the kind… because peanuts are a very intriguing plant indeed! It looks like a low pea, with nice flowers, which then stem underground, where the peanuts actually grow. My curiosity, the fact that they are local so normally adequate for the weather, and that I am slightly better at growing underground things than overground, peanuts were definitely on my list of things to grow. I did a first attempt in 2019, more or less successful, and tried again this year, more successfully. I harvested a little basket of fresh raw peanuts.

After debating about what to do with them… we usually don’t eat peanuts… I decided I would simply boil them… simple enough and actually really super delicious. So here is my recipe.

Salted boiled peanuts

  • Fresh raw peanuts
  • Salt
  • Water

Remove all the soil and dirt of the peanuts. I gently washed them while shaking them. Then I let them rest overnight in water, and rince again. But if yours are clean enough just go ahead.

In a pan set the peanuts, cover with ample water, add one tea spoon of salt and set to a boil. When it boils cover and let cook for 3-4 hours a low heat, checking once in a while that there is still water. And that it! Let cool and start eating!

I kept them refrigerated, but they were gone in a few days!!!

Proudly powered by WordPress | Theme: Baskerville 2 by Anders Noren.

Up ↑

Verified by MonsterInsights