A., and I too, are big fans of Brussels sprouts. Anytime there are some at the farmers market I would bug some even ic sometimes there are sold in tiny portions of 5 or 6! A few years ago we tried growing some in our kitchen garden, hoping for a consistent harvest, but once again the slugs and caterpillars were too quick at first and since then the plants grow leaves every year but never sprouts… I keep them thought, just in case!
Another winter favorite is turnips. The small and firm turnips of all possible shades from white to purple. That we never tried to grow yet… but they are easy to find by rather big bundles.
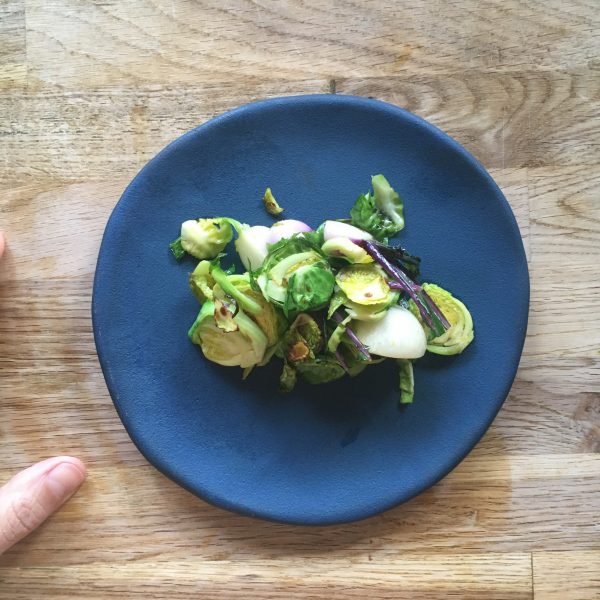
With these two in my basket I came up with a super delicious recipe, perfect for a side or starter. that can be eaten at room temperature or just warm: a beautiful and colorful plate of Brussels sprouts and tiny pink turnips. I dressed them in olive oil only bug you could easily think about adding a few drops of yuzu juice, or even more Japanese, a white miso and yuzu light sauce. So let me share my recipe.
Turnips and Brussels sprouts salad (2 servings)
6 Brussels sprouts
6 little turnips
1tsp of olive oil
Salt and pepper
Optional: a few drops of yuzu juice or grated yuzu peel, 1 tea spoon of white miso
Wash carefully the vegetables. Slice the Brussels sprouts in 4 or 5. Cut the turnips in 4. If you can’t find tiny turnips then slice them. In a heated pan add the olive oil and the vegetables. Cook while stirring gently for 5 minutes. Add salt and pepper. at this stage you can serve. Add if you want to use them, the yuzu juice and/or the grated yuzu peels. If you use white miso, stir well the yuzu juice with the miso and too the vegetables.
Voila! Really not difficult and soooo scrumptious.
It’s been months I didn’t bake scones. Last year at the same period I was making some probably once or twice a week and then I suddenly stopped… Why? I don’t think I even know the answer… but today, for a change, instead of making crepes for tea-time after our tennis game, I was in the mood for scones. Maybe because it was not late and I had time, and because I already had my hands dirty as I was kneading dough to make bread for tomorrow. Yes… with the cold temperatures it’s about 24 hour or more I need to obtain good rises.
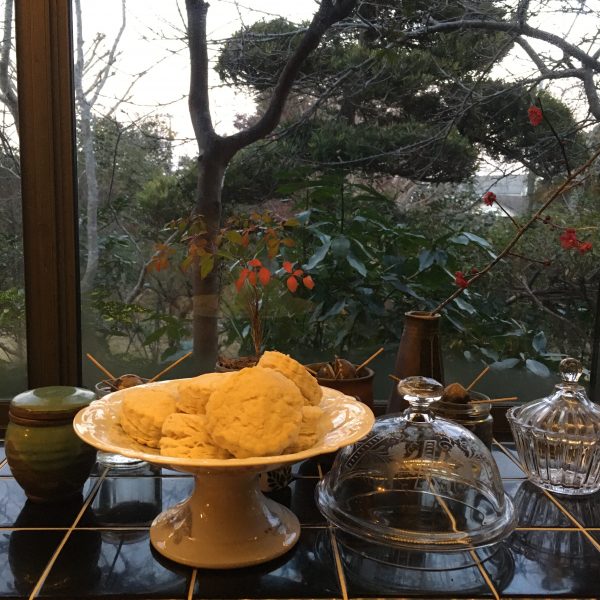
So, hop hop! Here I am, moving my hands from one bowl to the other and starting preparing scone dough. I have now a zero failure recipe, that is really simple. After mixing flour, baking powder and a bit of sugar, I knead with just a bit of butter (1/5 or 1/6 of the flour weight at most) and I use milk, only milk, to moisten the dough, added little by little until I have just the right consistency, just a bit sticky. But really just a bit! Then I roll the dough on a piece of parchment paper to 1cm high and cut them. I made bite size scones. I bake at 200degrees for 15 minutes. And what I like the most with scones is to eat them straight from the oven. Today I chose cream cheese to top them. And I am in love with scones again. Great! Because I made an extra batch for breakfast tomorrow!!!
If there is one traditional food I don’t care much about it’s the Epiphany kings’ galette, the “galette des rois”. Whether the brioche or the frangipane, I don’t care much about them. Not that I dislike them but I don’t like them either. They are not part of my must-eat food. And since I am bad at making puff pastry, that’s even easier to forget about it… but this year IG was covered with galettes and though I was insensitive to them A. wasn’t… and he asked me why we never have galette though he loves it so much!
What???? Why on earth would you wait more than 20 years to tell me???
How could I have not imagined he would love galette. He who doesn’t like almonds but loves calisson and financiers, he who doesn’t love butter but loves croissants and brioches… of course he loves galette… of course I ignored that…
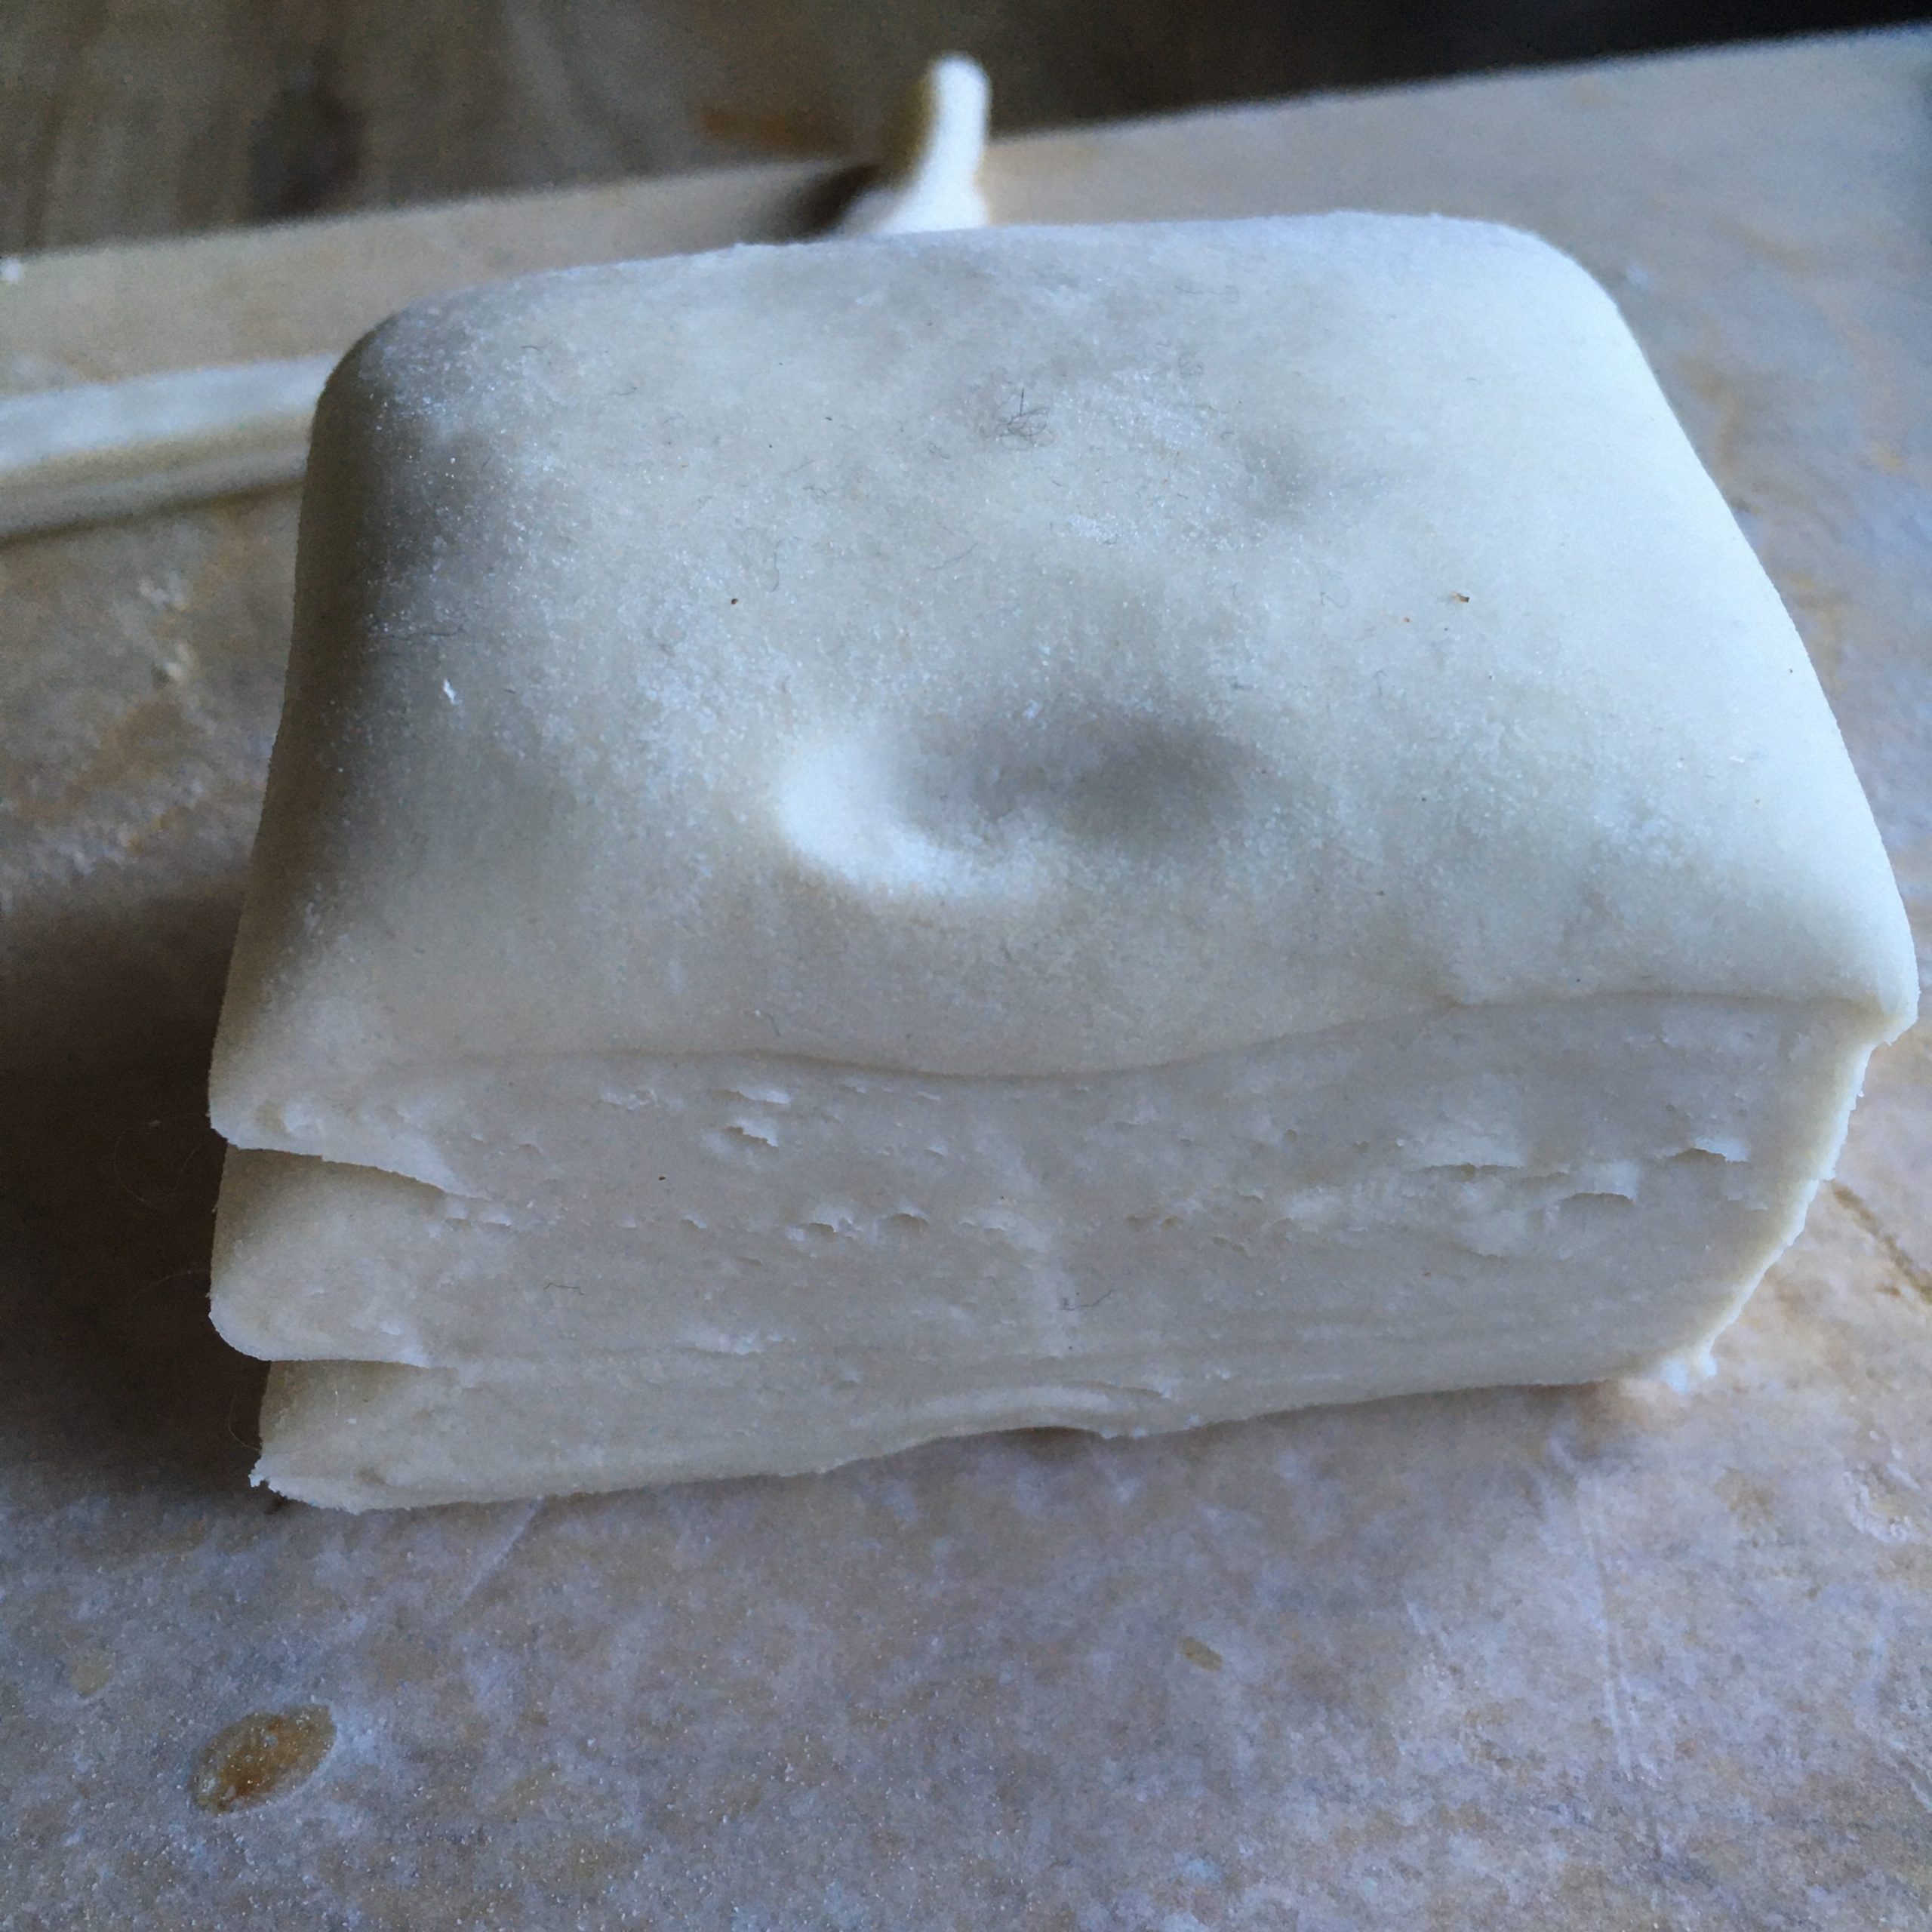
Well then… I took all the courage it takes to make an attempt at puff pastry when I have failed so often.
So here I am folding and rolling and turning every hour my puff pastry by the book, hoping it will become something… probably because of the cold temperature inside it is not as tedious as I remembered, and no butter spill.
For the frangipane I used a standard recipe: almond powder plenty, 1 egg, a bit of sugar and a tiny bit of butter, stirred into a dense pomade.
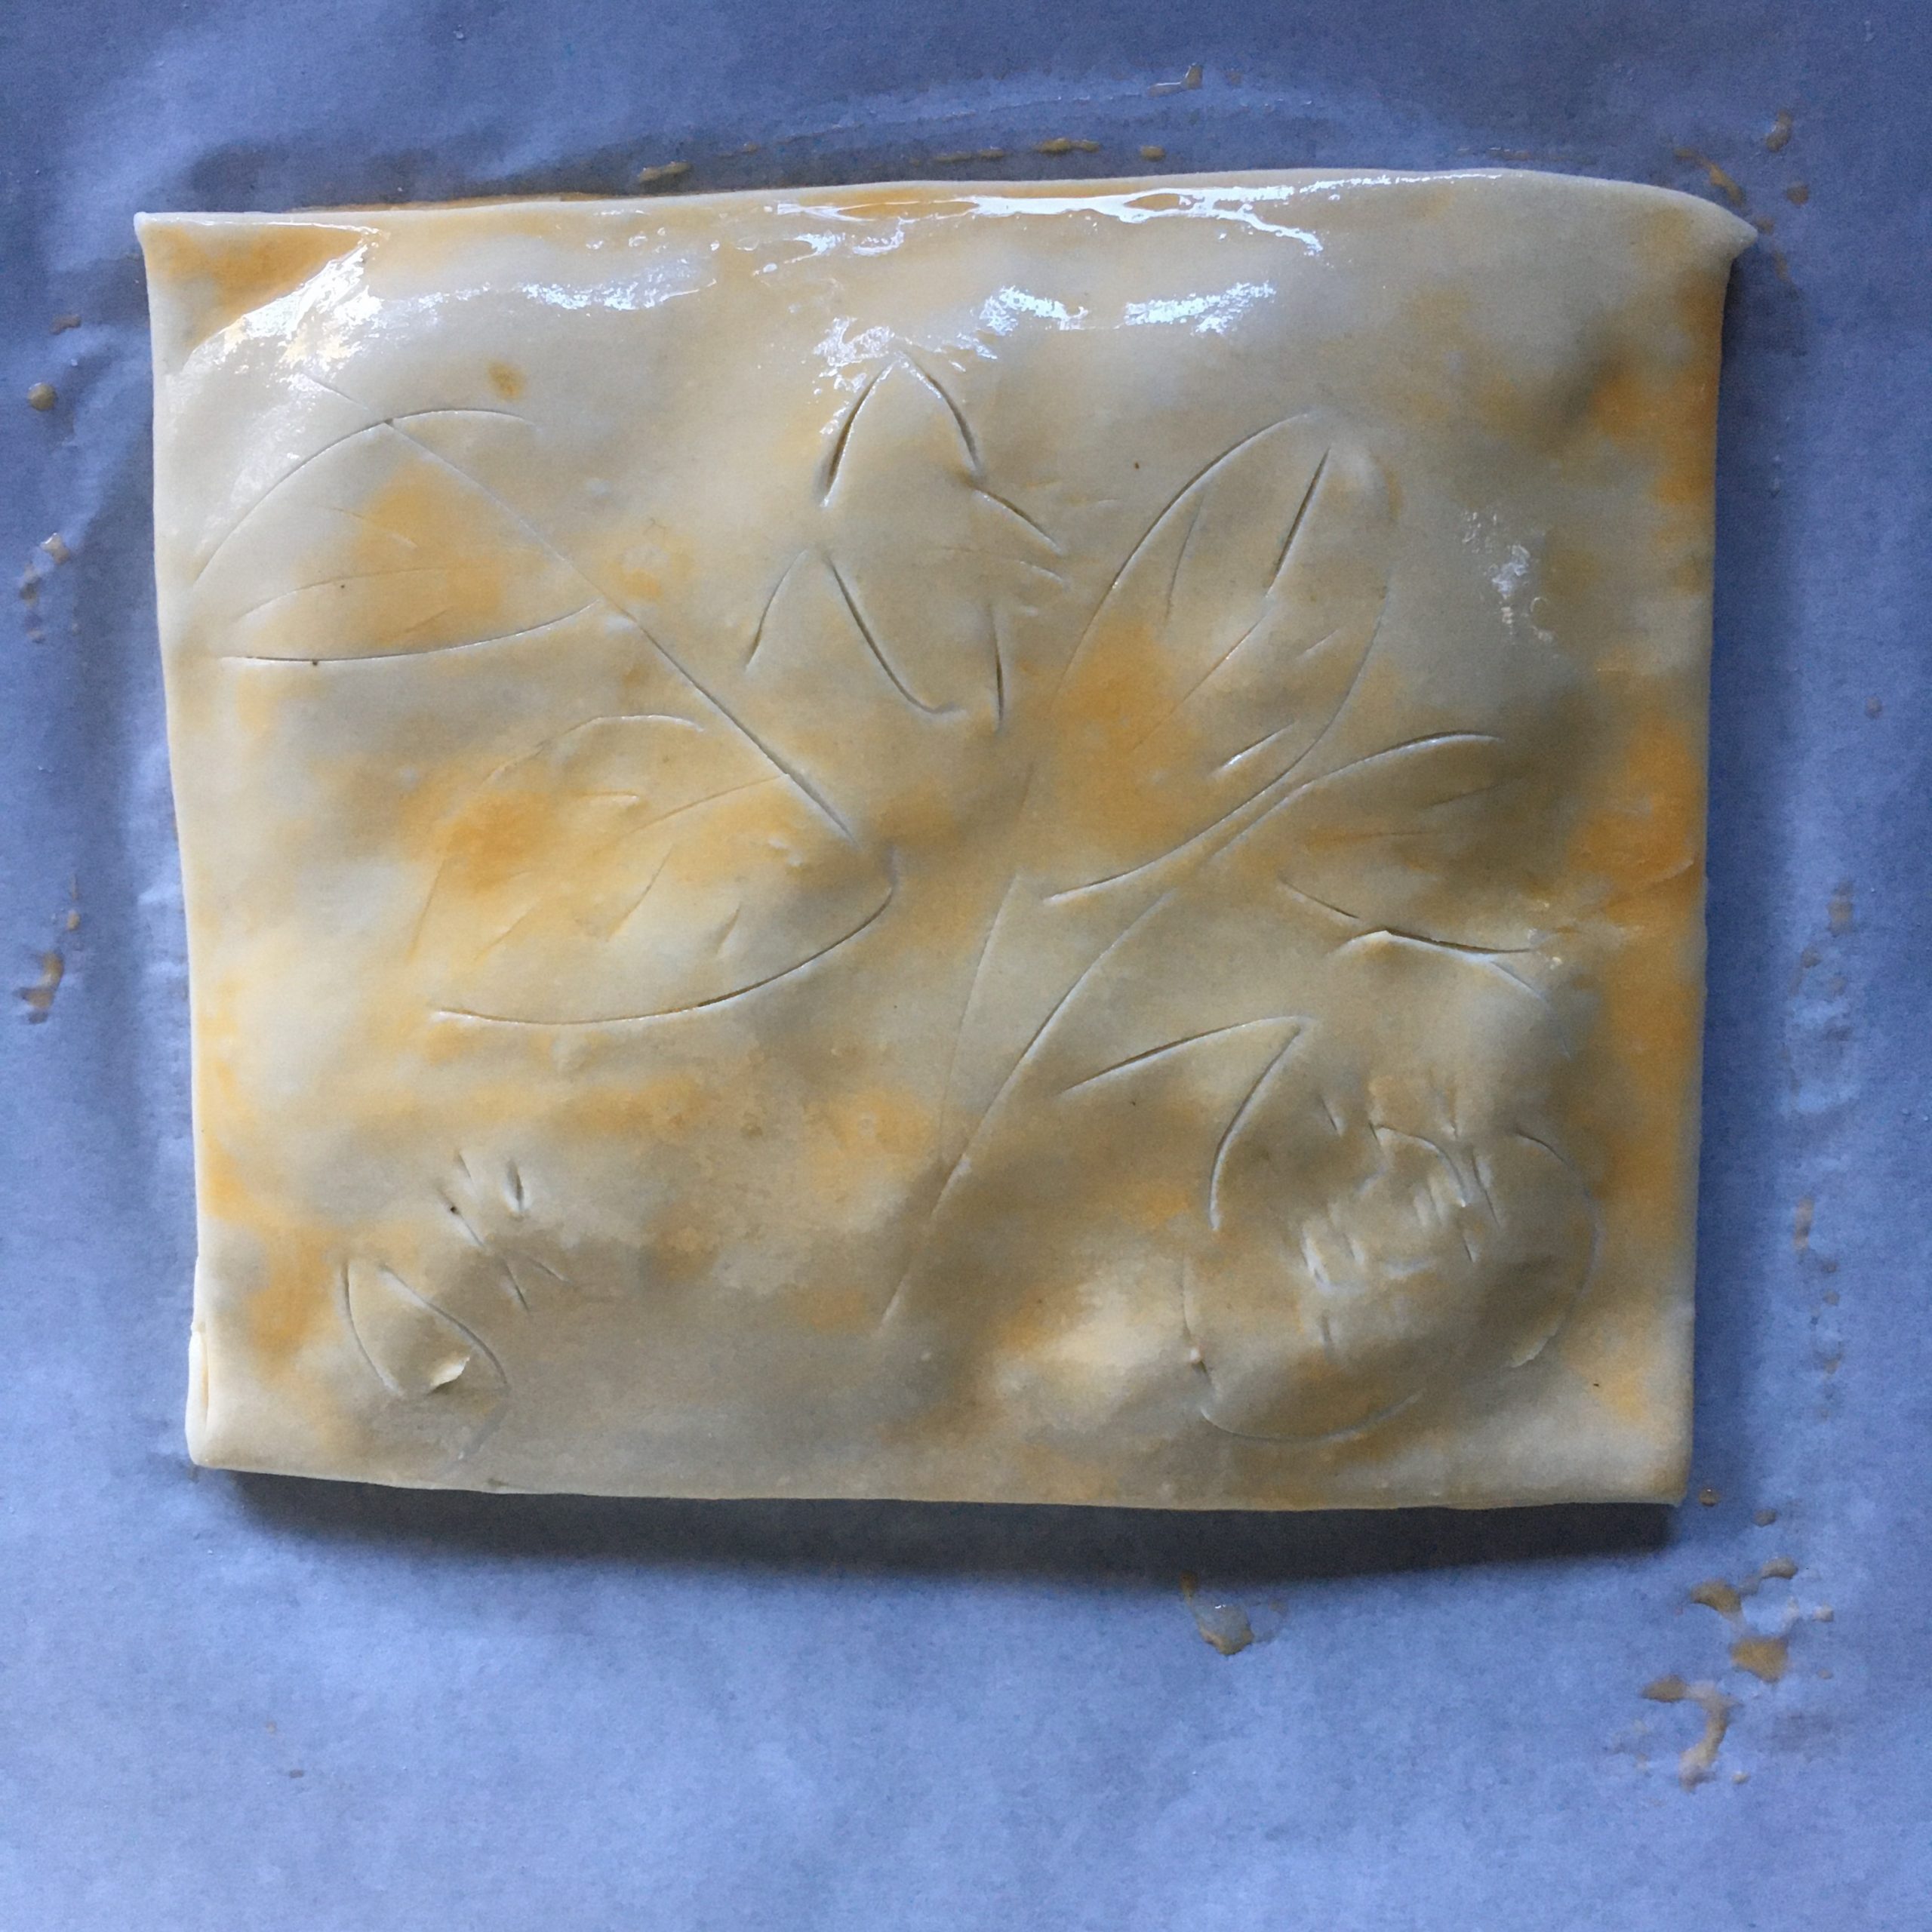
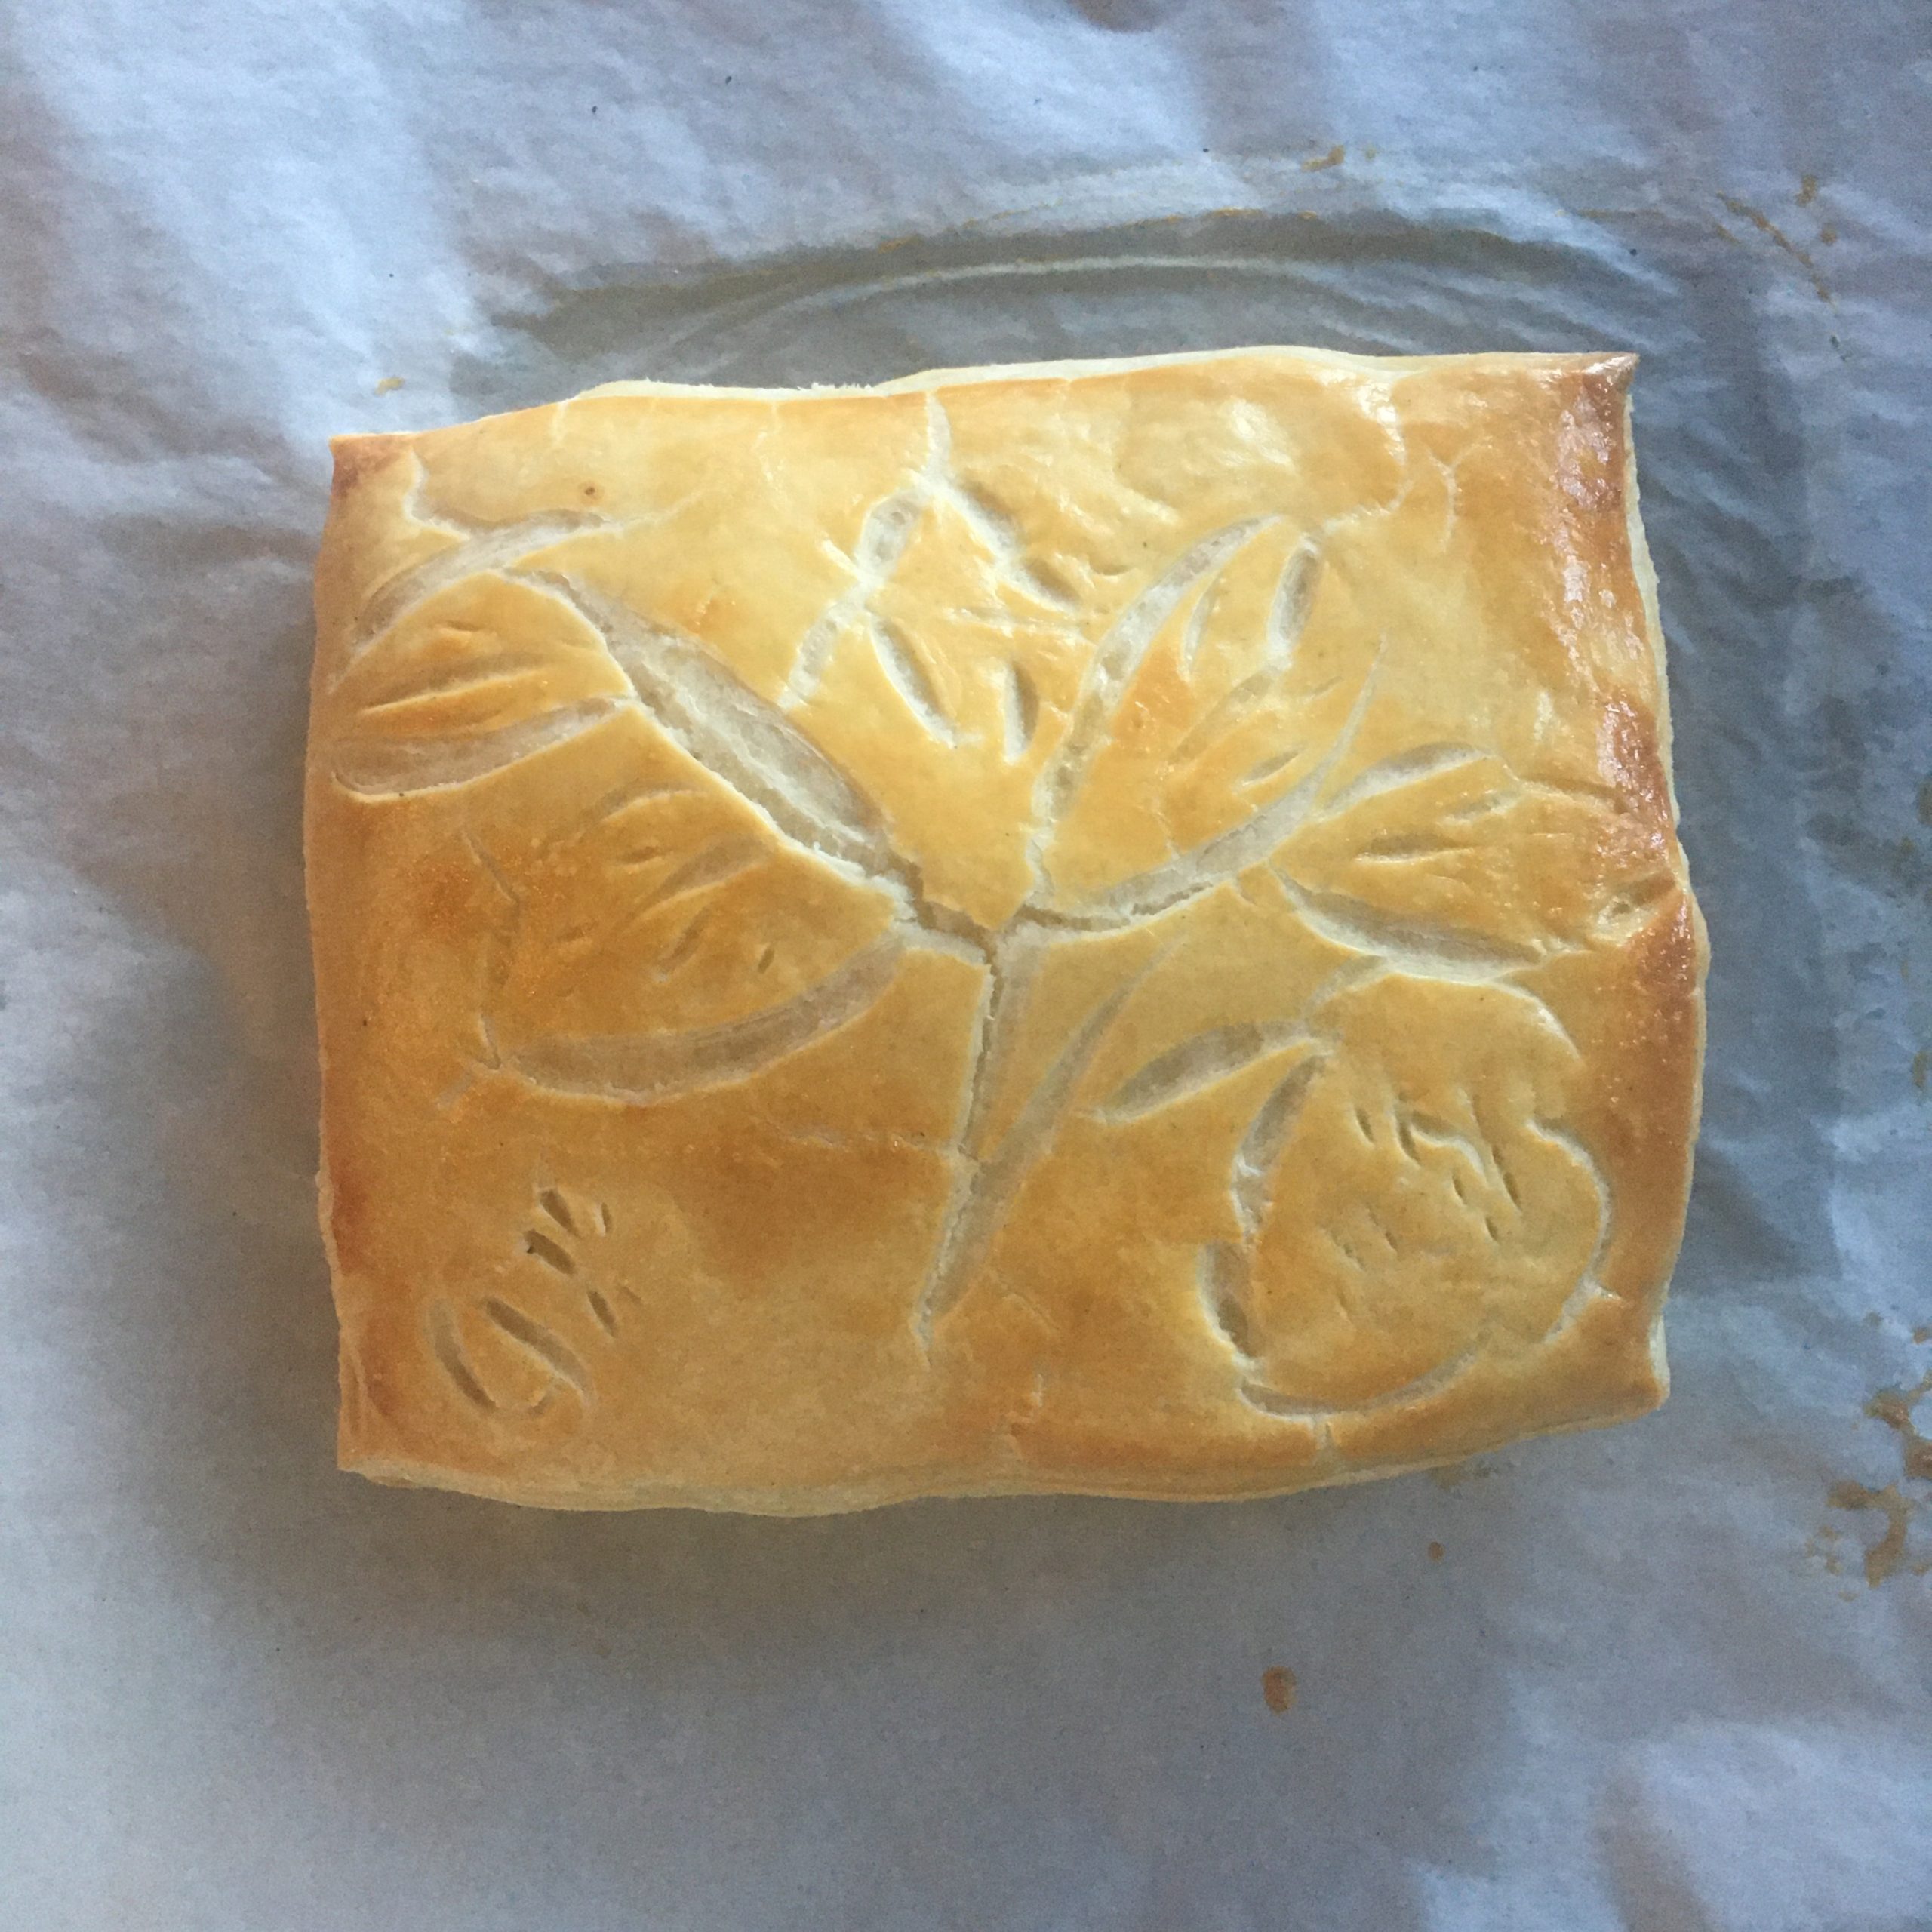
The rest is just simple. I decided for a square galette, rolled one layer of dough, topped with frangipane, leaving enough room to close it. Rolled another layer of dough to put on top, sealed the borders well. Paint an egg batter. Made a little seasonal drawing: blooming camellia japonica as we have so many in the garden, and 30min at 200deg. Until just golden. A. couldn’t wait any longer!!!
The result was surprisingly delicious. It didn’t have the sticky sugary top it too often has in shops, it was not too sweet, actually very nice, and the puff pastry worked well! Beginner’s luck!!!
Many of you may be familiar with golden milk, this Indian drink with turmeric and milk, rooted in Ayurveda. Not that I am a fan of it, but borrowing the idea, I prepared myself a warming and bright lunch on a snowy day. Snow doesn’t fall often in Tokyo. Usually once or twice a year in January and March. It is very sudden, it snows a lot for a few hours to cover everything under a beautiful white blanket, and then the next minute is sunny and the blanket melts into a mess of mud and ice. But for a few hours it is magic. The city becomes suddenly quiet.
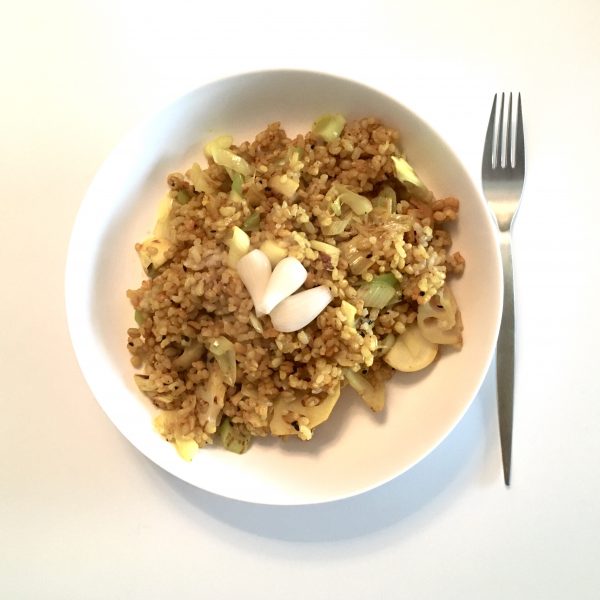
So before going outside for a walk, what best then having a warm lunch? A what if it is not only warm, it is also bright and full of flavors? That’s how I came up with this golden sautéed rice recipe.
Golden rice (2 servings as main dish)
1 cup of brown rice
1 or 2 leaks
3 little turnips or 1 large
1 little lotus root
1tsp pf curry powder
2tsp of ground turmeric
Ground black pepper
A punch of salt
1tsp of vegetal oil
6 rakkyo (optional)
Cook the rice. Wash and cut the vegetables. In a pan large enough, heat the oil, add the vegetables and cook while steering. Add the rice, the spices and pepper and steer very well. Serve and top with the rakkyo. Eat while watching the cold outside!!
If you have read Natsume Soseki’s novel the cat, watched Juzo Itami’s Tampopo or check the Japanese news today, you may not think highly of this Japanese new year specialty that is eaten widely, but kills about 300 people every year!!! No kidding! Despite the caution announcement every year before new year. And if you are more than 65 the risk maybe high that you suffocate eating mochi if you are not careful! But being careful is easy, and mochi is delicious. So let’s get passed the first bad impression, talk about mochi and let me share with you a few delicious ways to eat mochi.
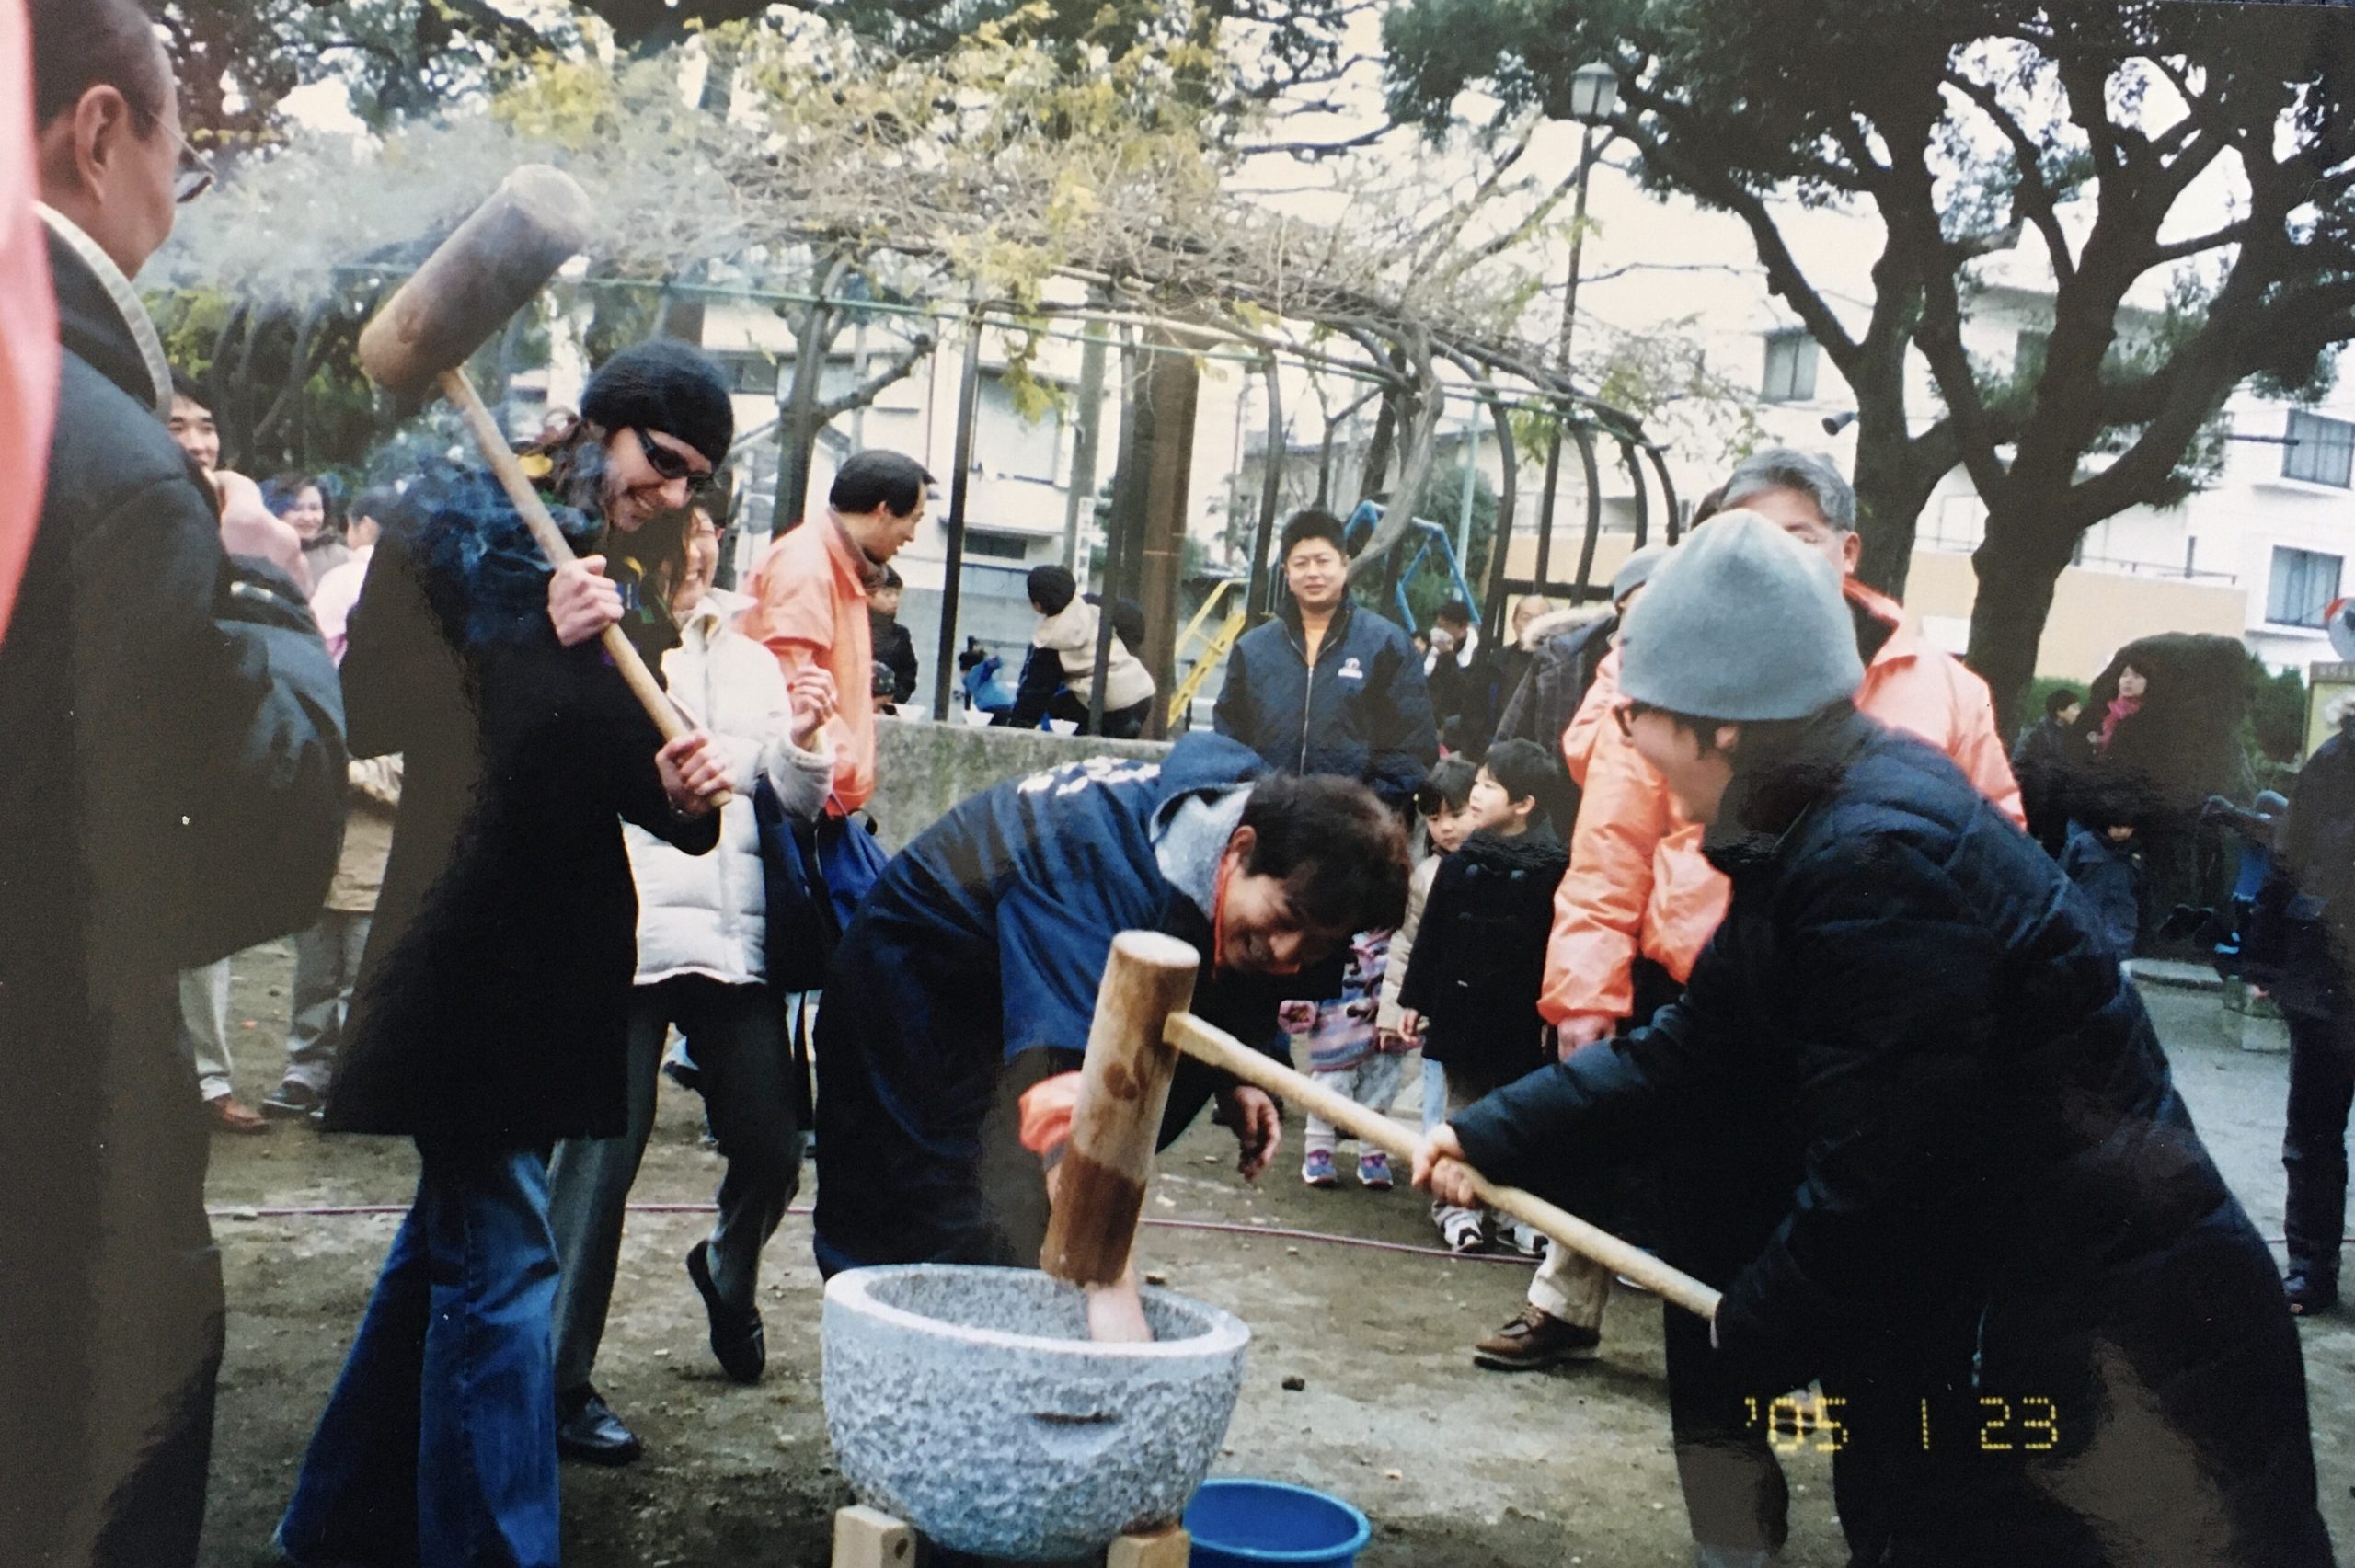
First thing first, you may have heard about mochi but what is it exactly? In most places it is translated as rice cake, but I think it is a bit misleading. Mochi is made of mochigome 餅米 a round rice, slightly more glutinous than the rice you would eat normally, it is cooked them crushed into a paste, the paste is then shaped into a ball of various sizes (smaller are less dangerous to choke on). Making mochi for new year is a tradition and there are plenty of opportunities to go to mochi-dsuki 餅つき events in local communities. We went to our first one in January 2005 with our Japanese teacher. That was fun to pound the rice in a large wooden standing bowl called usu 臼, carved in a trunk, with a huge wooden mallet or pestel called kine 杵.
Me on the left pounding mochi with I. on the day we met for the very first time. (January 2005)
Of course we were scared to try eating it (for the above reasons ;)), but in the end we enjoyed it very much in many many ways: in soup (ozoni), with nori and soya sauce, with kinako, with red beans etc… Not everyone is equipped with a set to make mochi at home and not everyone makes at least 2kg of mochi at once, so there are other ways to get your hand on mochi and to try this very special Japanese specialty. Here are some options I recommend: steamed mochi rice hand crushed and pound in a mortar, fresh mochi in grocery shops (not so easy to find in the city, easier in the countryside) but it doesn’t keep for long, kirimochi 切り餅, it is basically dried mochi that is very easy to use and keeps much longer and is nice for also making grilled mochi (if you want some let me know I can arrange shipment wherever you are, DM me on Instagram or Facebook). Some websites offers to make mochi with a mixer, but it seems that without a powerful one all you may do is burn your motor, so I wouldn’t actually recommend it. Some others propose to make it from mochi rice flour, I have never tried and I guess it is OK but it will lack the slightly granulous texture that you can have with pounded rice.
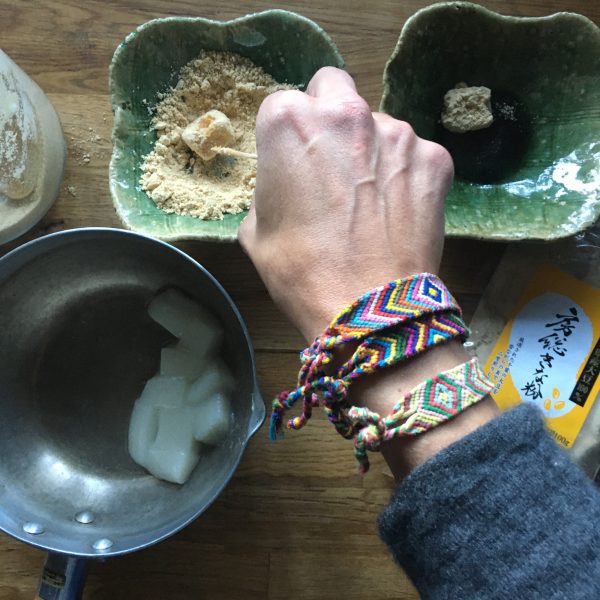
Once you have your mochi ready it is really easy to prepare in one of the many possible versions savory or sweet. If you use kirimochi you may need to return it to softness by simply putting in a pan cover with water and boil it a few minutes on both sides until tender. Today I introduce two recipes, one savory ozoni, in a version with only clear broth inspired by a picture I saw on Instagram, but reinterpreted, but you can also add white miso to it to make it more Kyoto-style! and one sweet kinako mochi, but there are many others. Actually one I love is mochi with soya sauce, very simple but so delicious and perfect as a side for a piece of grilled fish or with some vegetables.
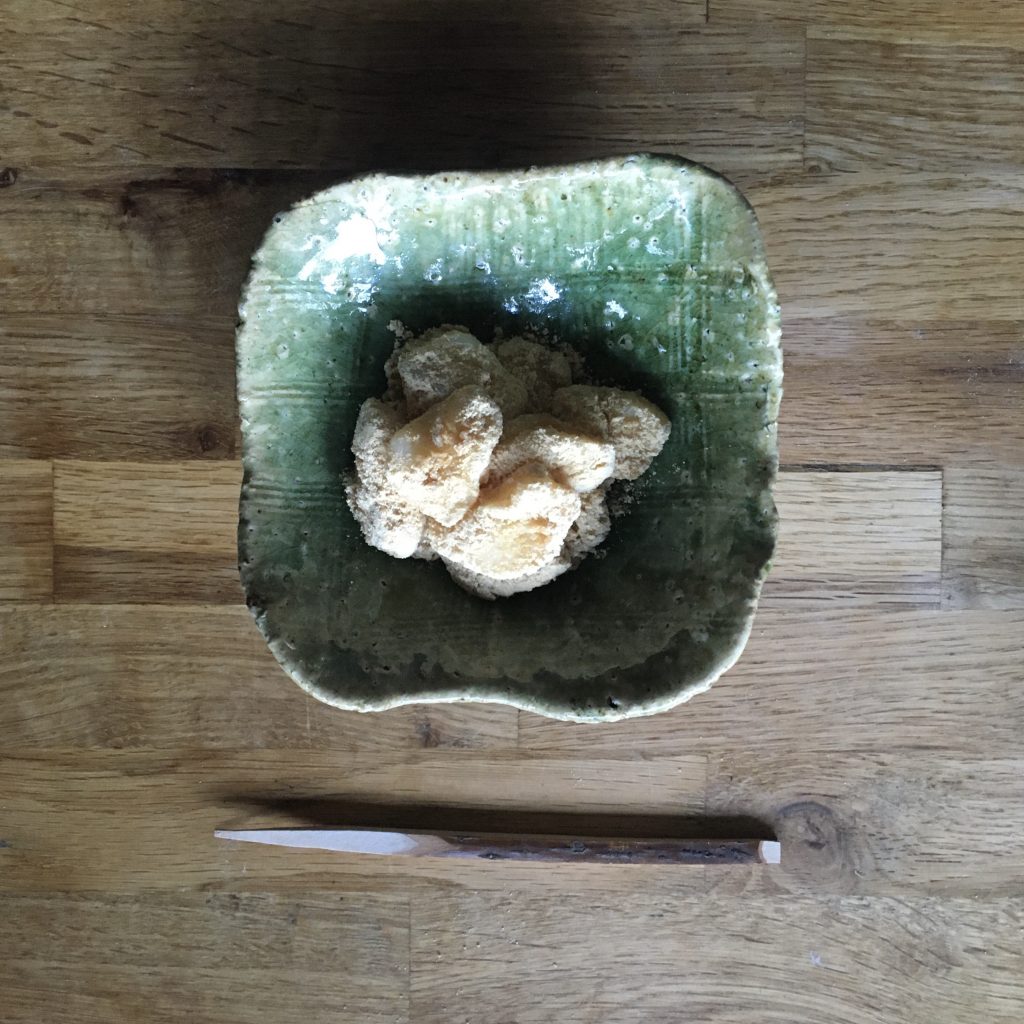
Kinako mochi
soft mochi (if you use kirimochi it needs to be returned to softness)
kinako (torrefied soya bean powder)
brown sugar
I a bowl mix 4/1 kinako/sugar (for example 4tsp of kinako and 1tsp of sugar). Cut the mochi into bite sizes. Dip the mochi in water and roll in the kinako mix, set in a bowl. You can make as much as you want it is very easy to eat and really delicious!!! The picture below is what I made for two for a tea-time snack. There was about 8-10 small bites.
kinako mochi
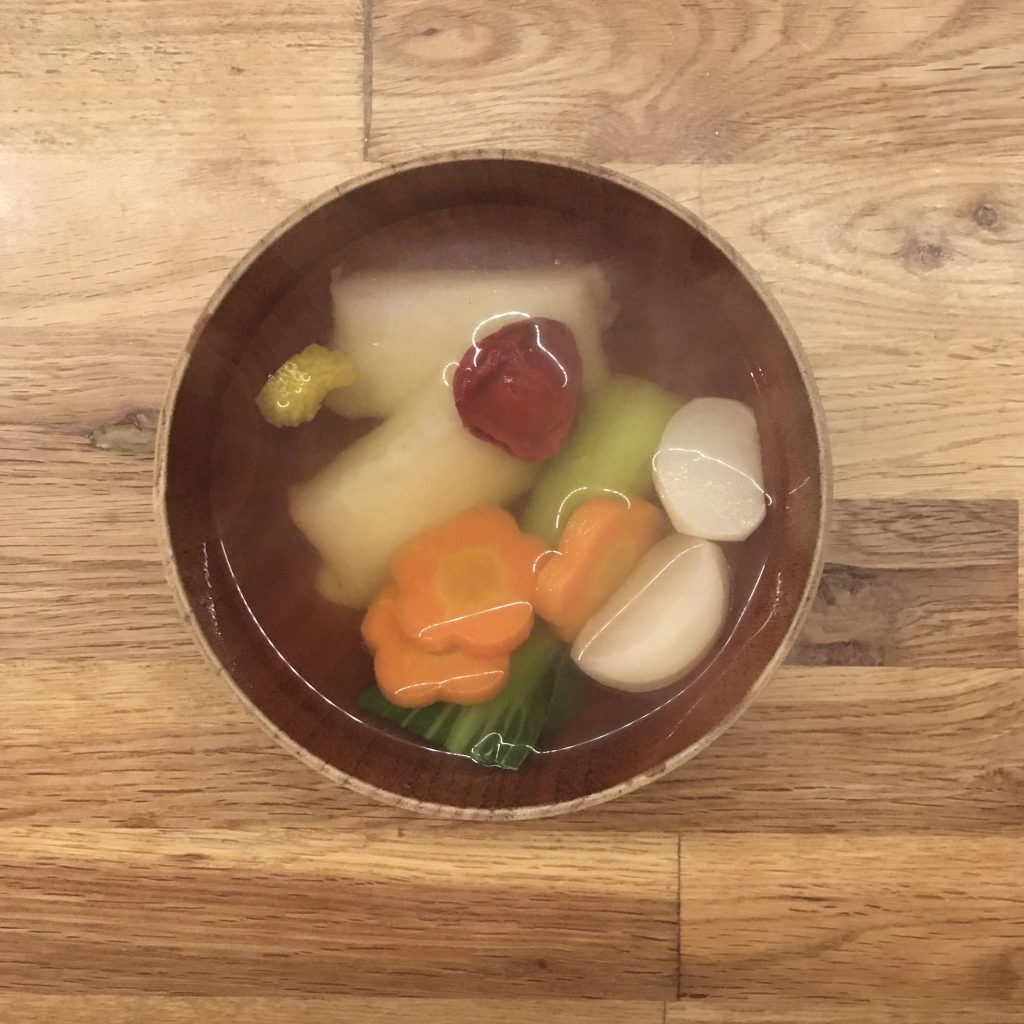
Ozoni (without miso) (2 servings)
500ml of dashi ( I use ichiban dashi (konbu & katsuo) but you can also do with konbu & shiitake dashi for a vegan version)
2 pieces of kirimochi
2 umeboshi
a few seasonal vegetables: 1 carrot, a few spinach leaves or 1 small bok choy…, 2 little turnips…
optional a zest of yuzu
In a pan, prepare the dashi. In another pan, return the kirimochi until soft. Prepare the vegetables (I used a cookie cutter to make the carrot in plum shapes). Cook them in the pan with the dashi, until just tender. In a bowl of your choice set the mochi, dress the vegetables, add the umeboshi, the yuzu peel and cover with the dashi. Enjoy while it’s hot.
Again send me a message on Instagram or Facebook if you want dashi, kinako or kirimochi.