I knew it…

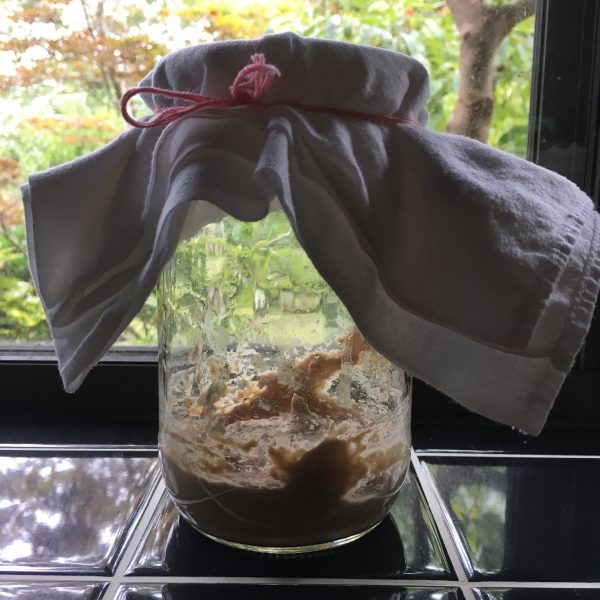
Well… while this week has been crazy busy with work, I also was very excited with my sourdough experiment… and things turned out almost as I expected they would… with utter fun when Lois grew and foamed and in utter disappointment when it stopped, finishing in a nauseous mess that stunk like I couldn’t imagine it would. Sourdough is not for me, I knew it…

Lois on the 2nd day, gently bubbling

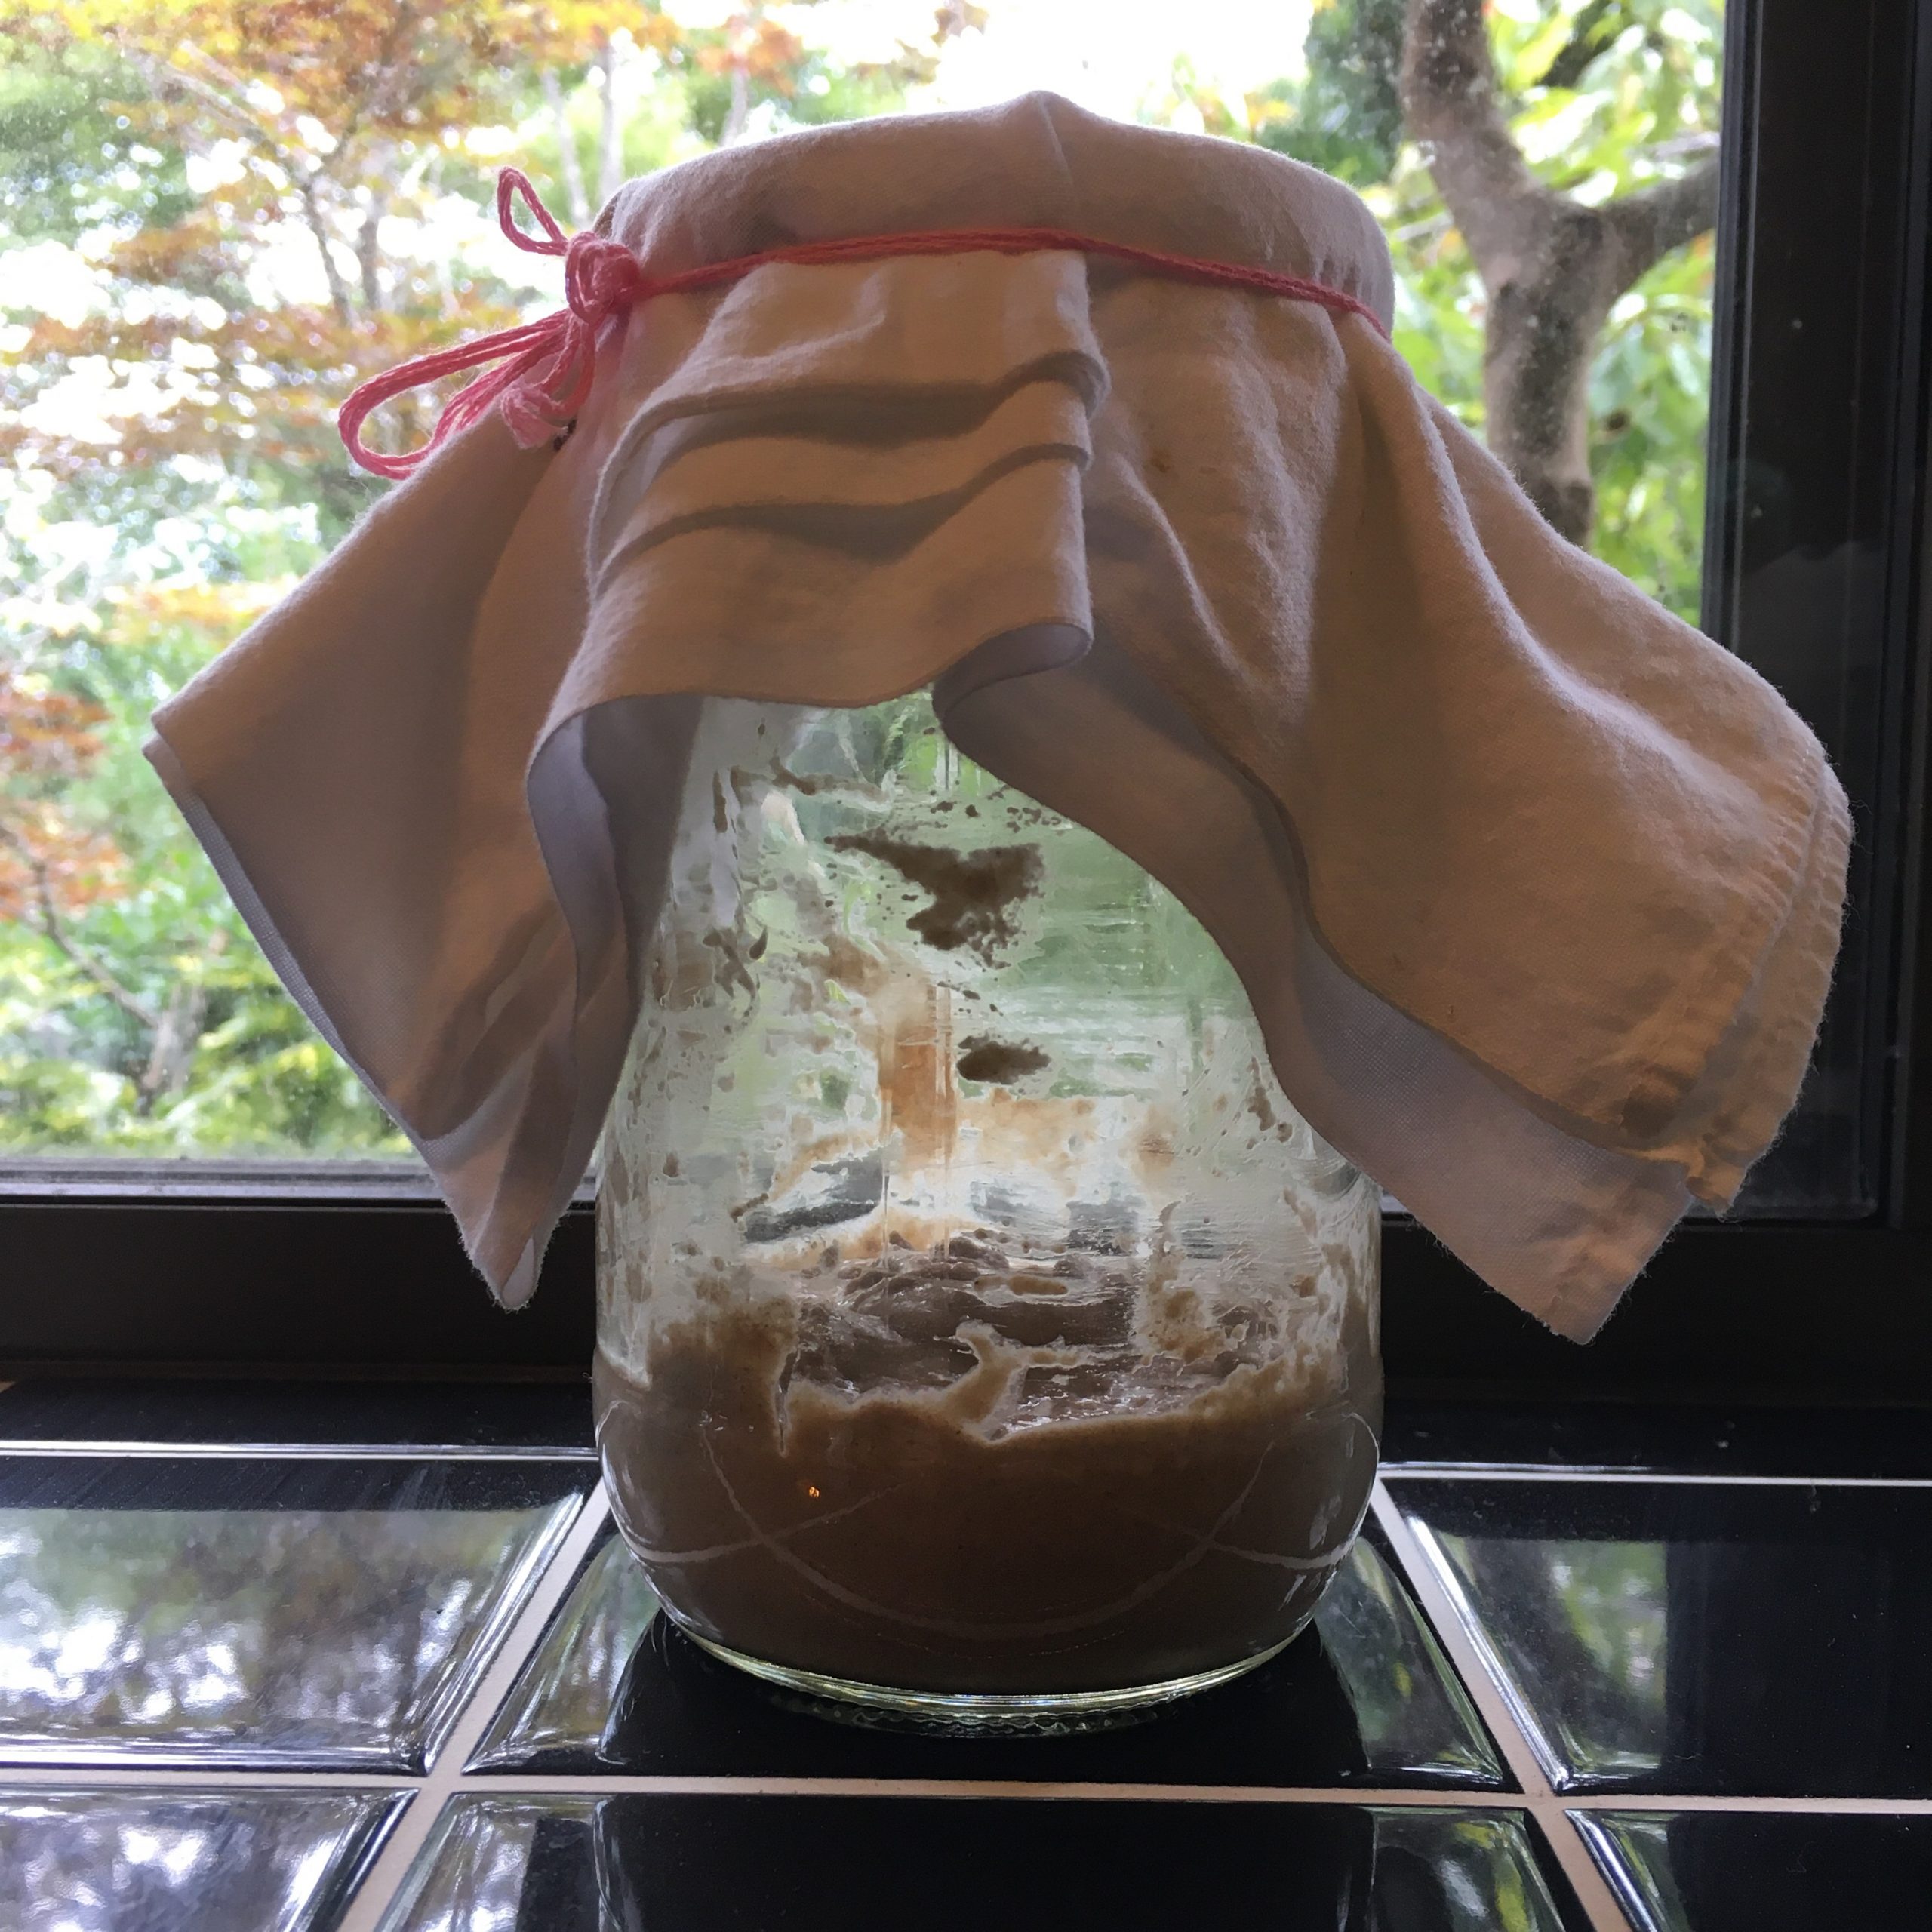
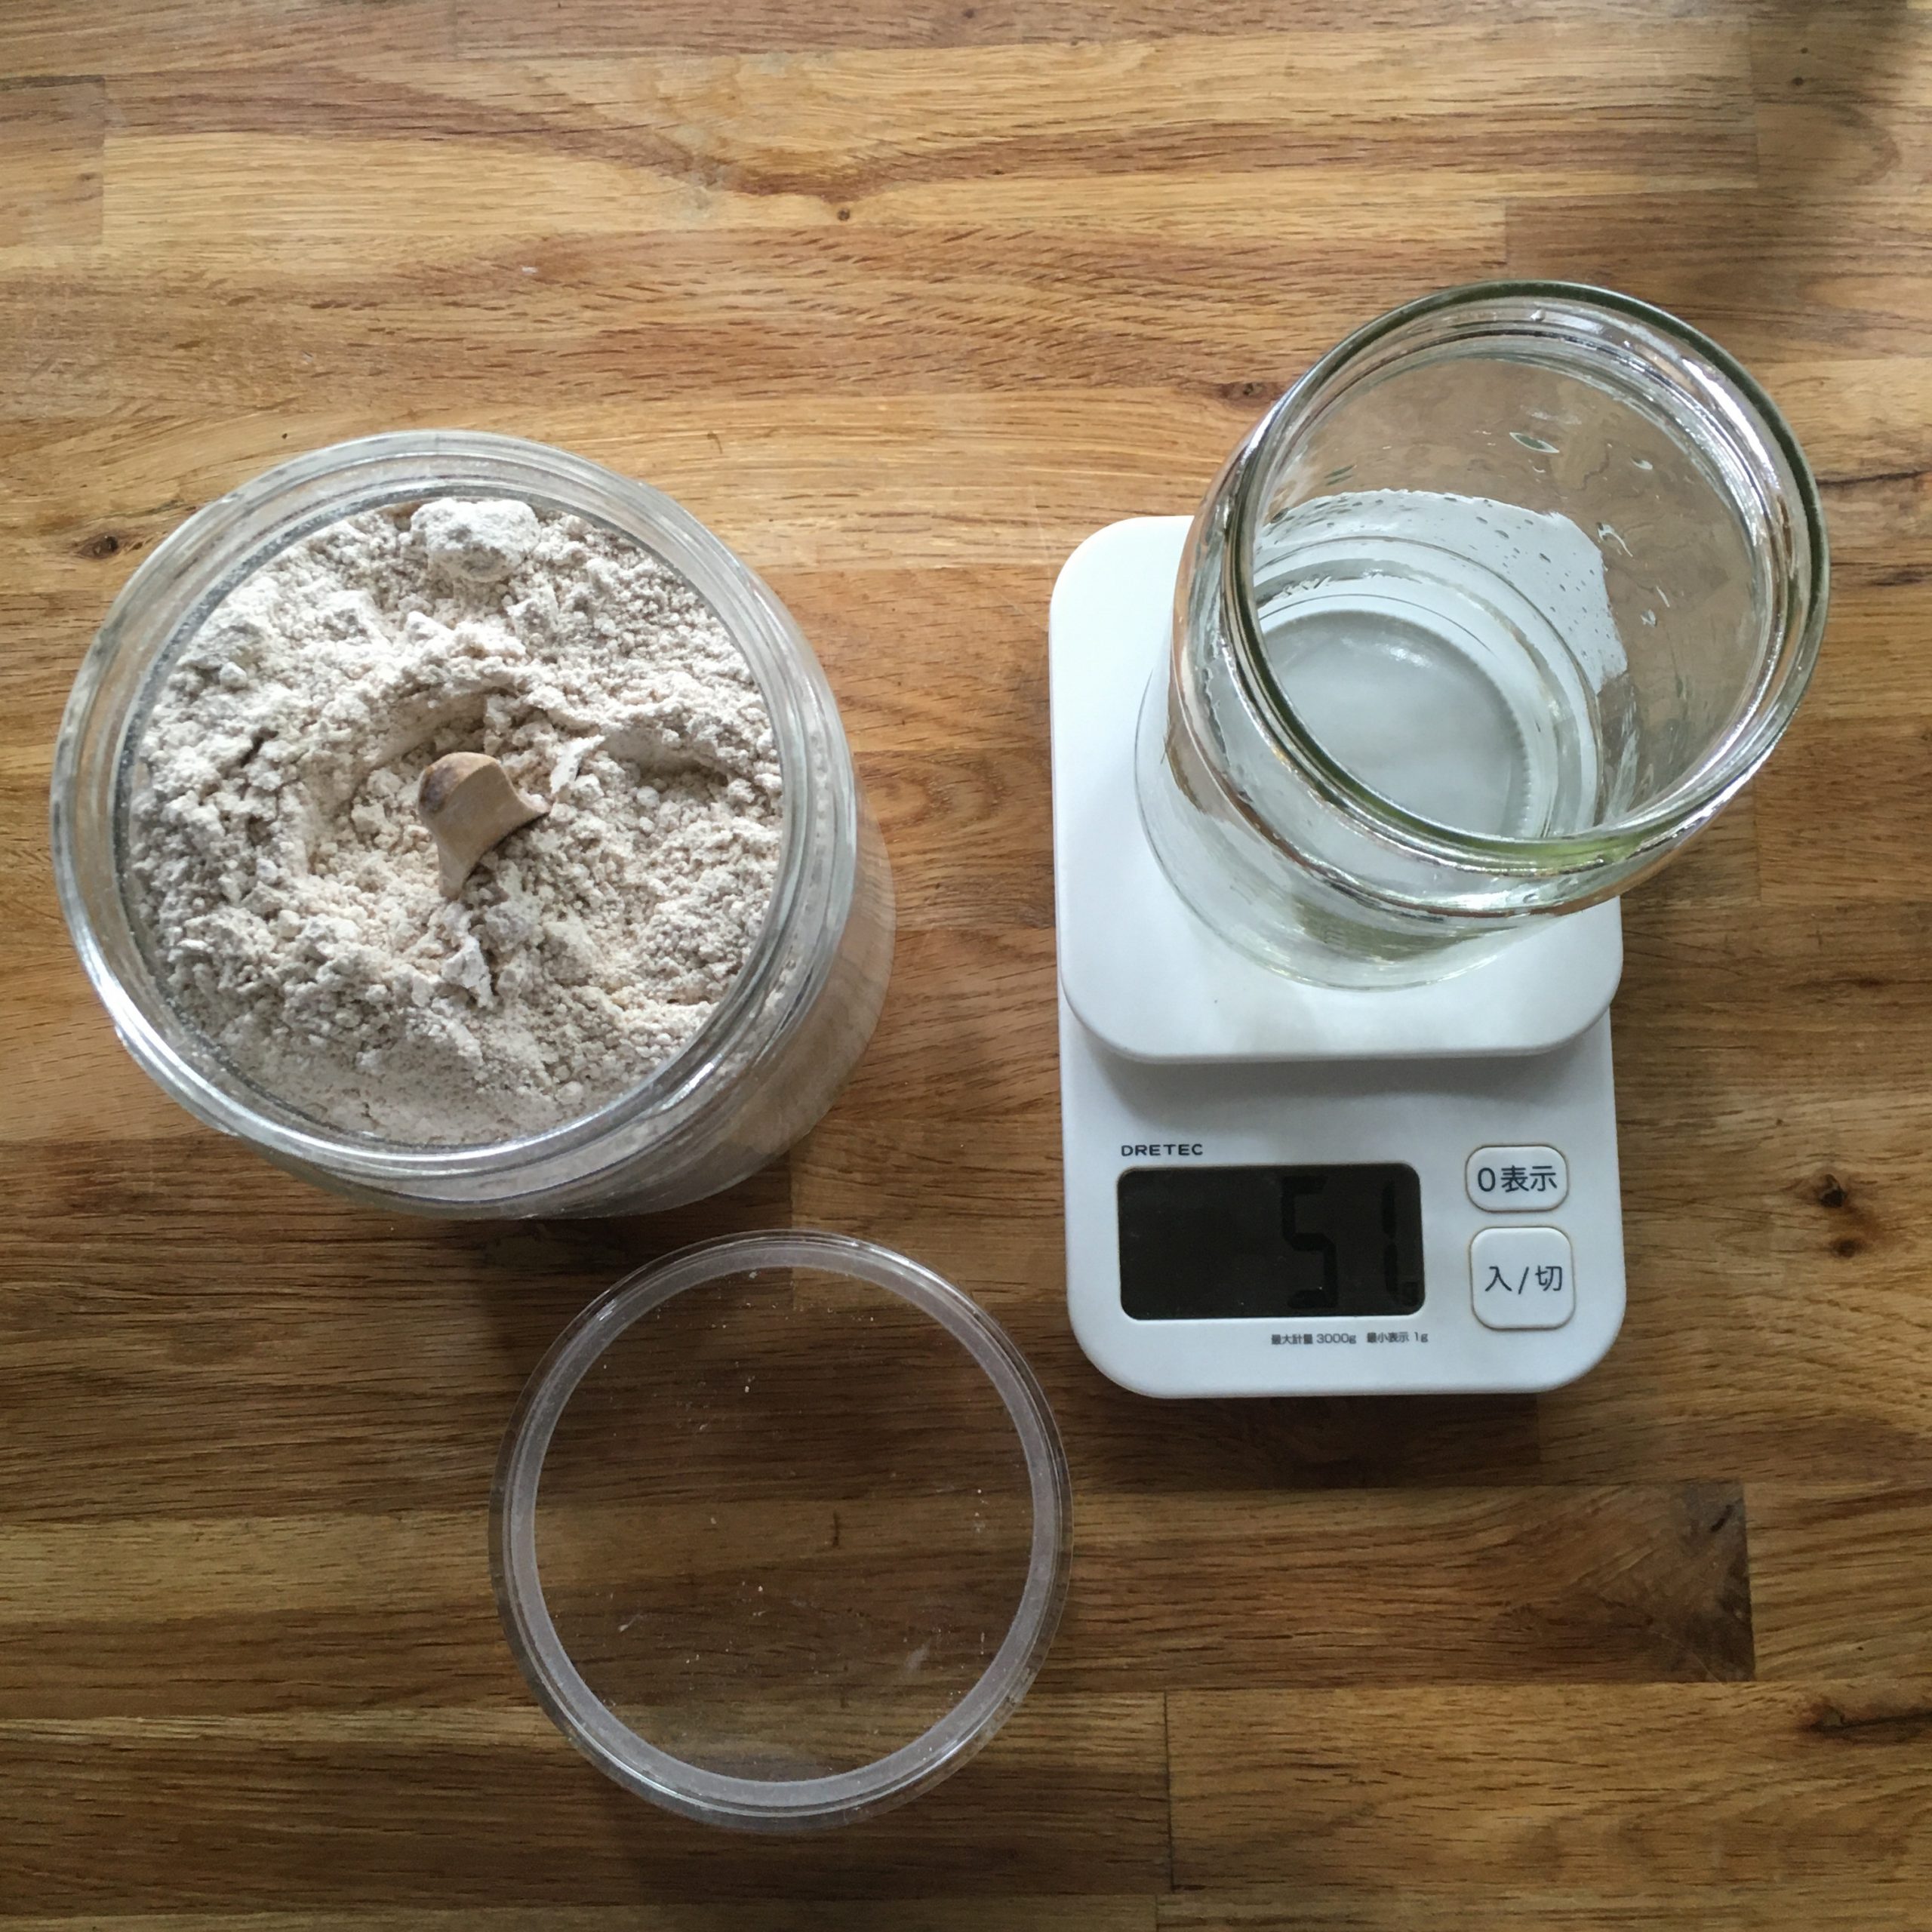
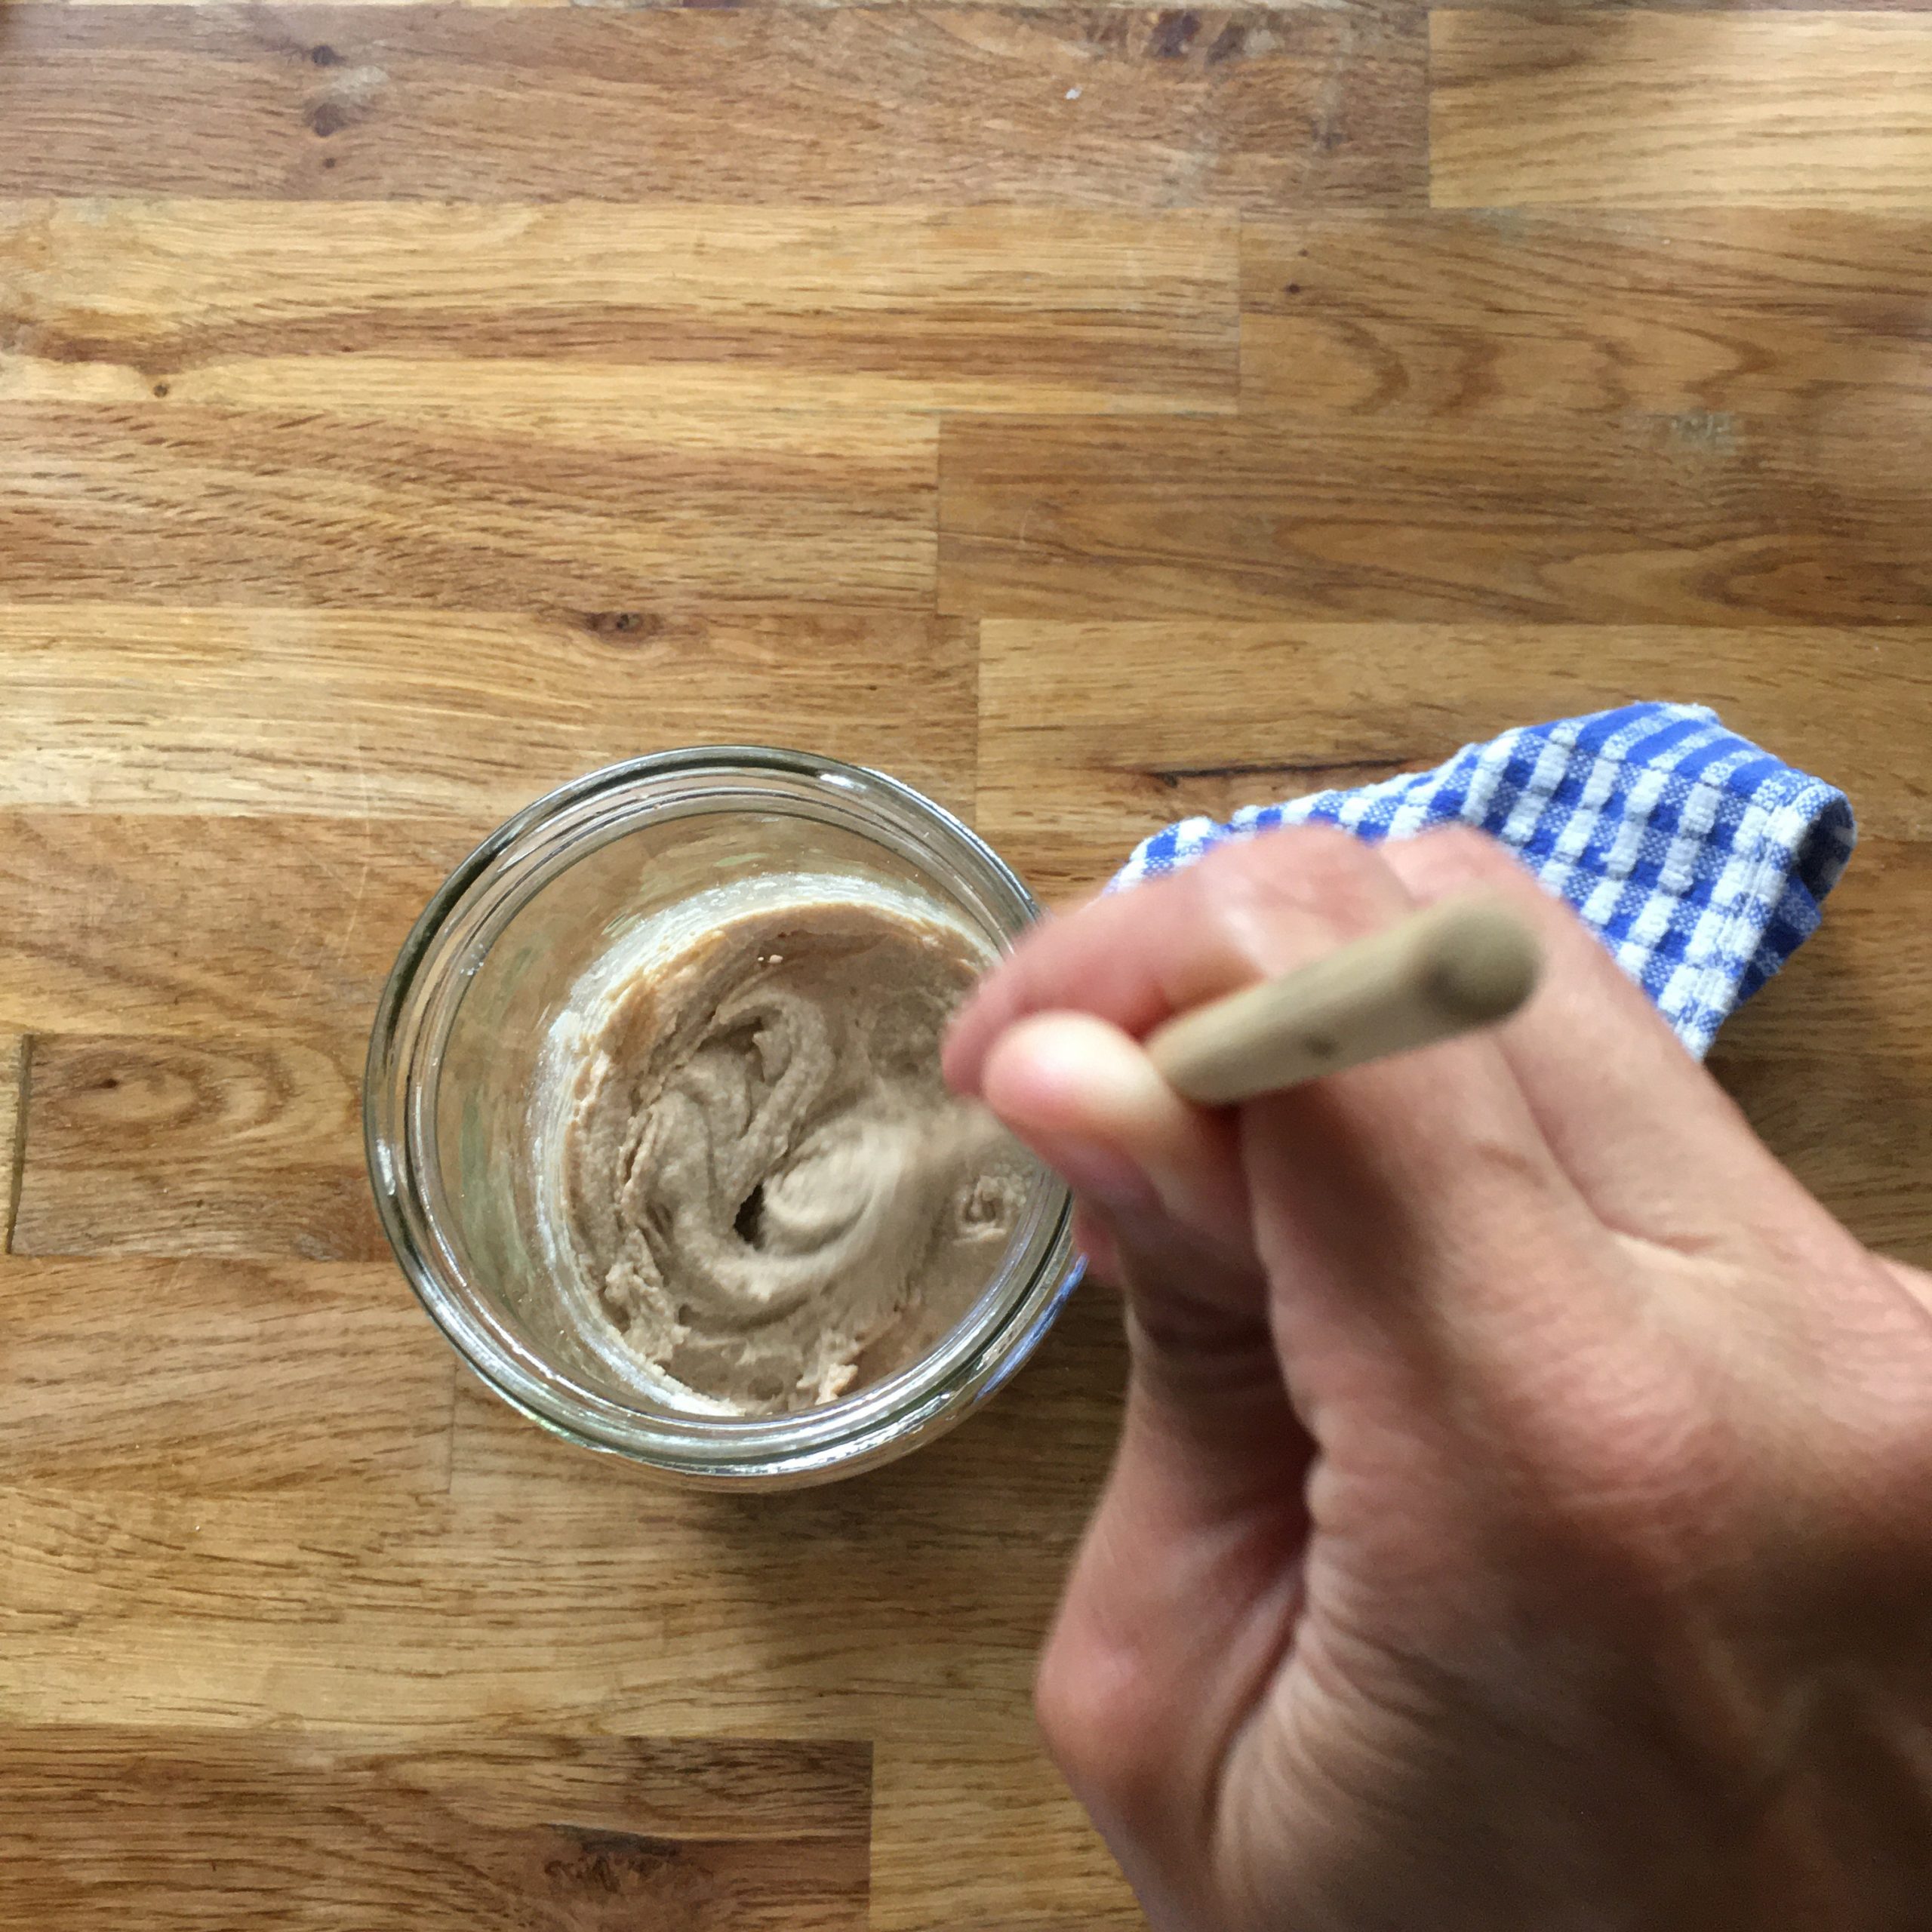
I read books, blogs, websites about sourdough before starting (it took me 5 years to get ready for the commitment!!!!) and while I was observing it growing. I wanted to do right, not to waste precious time and resources. Then I was almost desperate when it started to stink, read even more about all the possible tricks, tested them all: sugar, malt, fridge, not fridge, more food, more mixing, rest, splitting it and starting afresh… nothing seemed to have worked truly. Almost 1kg of mixture went down the drain in a terrible smell. The rest is sitting in the kitchen in a desperate hope I can still save it. The smell is gone but no foaming and bubbling as I thought it would… part of the passive mixture was used for pancakes this morning…

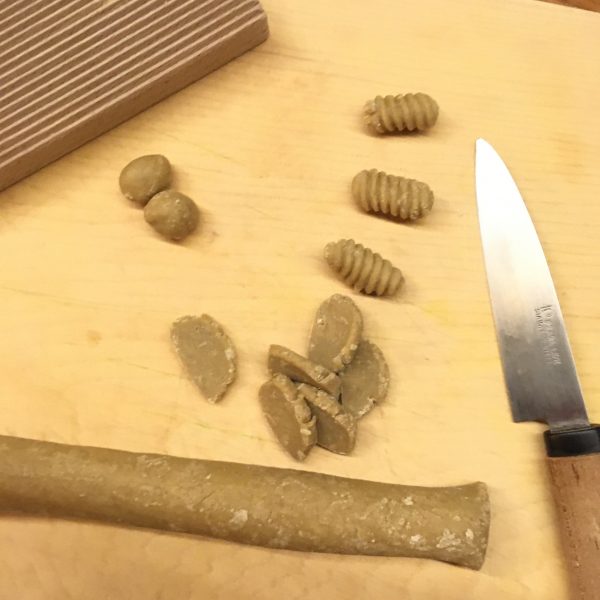
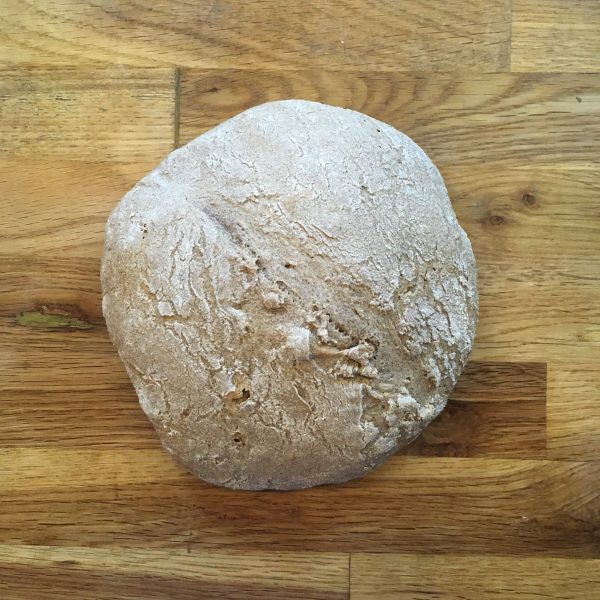
But before things went south I had on the third day just enough to make a tiny bread to test it when it was still good! And damned! Even if I rushed it a bit ( temperature went down with the rain so the rising was too slow for the impatient me!) the crust was perfectly crusty, the crumbs were moist and soft, and the taste of whole wheat and sourdough was amazing. Enough to keep me trying to save what is left of Lois… so now I am in this terrible situation where I want to stop hoping I can grew a stable relationship with my sourdough, but I can’t take the final decision to trash it all, as the taste of sourdough bread was so perfect…

Lois

It’s been more than 5 years that I bake weekly or more and since the beginning I was tempted by preparing my own sourdough starter, but the traveling back and forth between Tokyo and Isumi and our almost monthly business trips abroad stopped me from doing it… yet I never fully abandoned the idea, and recently I got a bit disappointed with dry yeast. Even using respectus panis proportions, I felt I couldn’t control the yeast. One day it bubbles in 30min like crazy, the next, even after 2h I barely see a difference… Then, I had long discussions with my best friend M. about sourdough and bread making, saw how sourdough breads look much nicer, with darker crust and soft and moist crumble on IG, and to finish convincing me I should try, I read Robin Sloane’s Sordough and not that the novel convinced me to have my own sourdough, rather it made me more intrigued with this strange life-of-its-own thing. Since we probably won’t be traveling at all this year, and we have 4 days in Isumi, so I just decided it was time to try.

So here is Lois, my sourdough starter in the making… just freshly mixed: 50g of whole wheat flour and 50g of water… well… now, see you in 3 days hopefully with some bubbling…

Japanese simplicity

Who said that cooking Japanese cuisine was complex???

I have the simplest and most delicious recipe of miso soup for you today and an ultra easy ochazuke recipe. Of course both require basic Japanese ingredients: dashi, and miso for the first one, and Japanese rice, dashi and umeboshi for the second one. Indeed now is the time rice harvesting in Isumi is just finished new rice of this year harvest is now available. Delicious brown rice, slowly cooked to be just perfectly soft goes perfectly well in ochazuke recipes I find, almost better than plain white rice.

For the dashi of both recipes you can choose from katsuobushi, ichiban dashi, konbu dashi or shiitake dashi. Personally I love ichiban dashi. Ichiban dashi 一番だし is a basic in Japanese cuisine and particularly in cha-kaiseki 茶懐石, so I mostly make ichiban dashi, so let’s start with its recipe.

Ichiban dashi – 一番だし

  • 1L of water
  • 15g of katsuobushi blakes (not too thin)
  • 15g of konbu

In a pan set 1cm of water, add the konbu and bring to a boil at low heat for 10min. Add the bonito and the rest of the water. Keep boiling at low heat for 5 minutes. Let rest and filter. Your ichiban dashi is ready, you can use it as a base for soup, cooking vegetables, fish, tofu, rice etc…

With the dashi made, we can then move to the other recipes. First the eggplant miso soup. Then below the ochazuke.

Eggplant miso soup (for two servings)

  • 2 little Japanese eggplants
  • 1 tbs of miso
  • 600ml of dashi
  • a bit of neutral frying oil

Wash and cut the eggplants (see top picture fir cut). In a frypan greased with the frying oil, cook the eggplants until just golden and soft, serve then evenly in two large miso soup bowls.

Heat your dashi if it was prepared ahead, or use the one you just prepared. Top the eggplants with the dashi. Set half a tbs of miso in each and stir gently. That’s it!!!

Simple ochazuke (2 servings)

  • 1 cup of Japanese brown rice or white rice cooked
  • 400ml of dashi
  • 2 pickled plums
  • 1 bundle of komatsuna or other green (water spinach, spinach…)

Serve the rice in a large bowl. Heat the dashi. In the meantime wash the green vegetable, cut in 5cm long and blanche. Drain well.

Top the rice with the vegetables, then serve the dashi, add the pickled plum. That’s it!

Have a good day!!!

An old recipe

Making a quiche requires quite many ingredients. First flour and butter for the dough, then eggs and milk or cream fir the egg base and finally something to put in: vegetables, bacon, fish, cheese… then it takes 30-40min to bake it to perfection. It’s not something you prepare and serve 20min after you’ve started cooking.

But one day, when I was rather young and staying at my best friend’s house, her mother made a quiche, or rather what in French we call a savory tart with minimum ingredients and cooking time: the mustard tart. Back in France many people buy ready-to-use rolled pie crust so this makes it even simpler, but here what is stunning is the baking time. Because there is no egg base, it is really short.

Unfortunately the original recipe is all about cheese, and this doesn’t work for A. so I barely cook mustard tarts, until the other day when I decided to replace his share of cheese by thinly sliced local sausages. He had his meat, I had my cheese and everyone was happy to have lunch ready in no time!!!

So if you want to try, here is the original recipe and my recipe:

Mustard tart (classic)

  • flour, butter, water for one pie crust
  • 2 large and ripe tomatoes
  • 2tbs of mustard
  • 1-2 handful of grated emmental or gruyere cheese

Prepare the dough and roll for a 30cm low pie dish. Spread the mustard. Wash and thinly slice the tomatoes, sprinkle the cheese. Bake at 200deg until the cheese os melted and slightly golden. That’s it!!!

Mustard tart (meaty version half/half)

  • flour, butter, water for one pie crust
  • 2 large and ripe tomatoes
  • 2tbs of whole grain mustard (makes the whole milder)
  • 1 handful of grated emmental or gruyere cheese
  • 2-4 little sausages

Proceed exactly as above but just slice the sausages, sprinkle them on one half, and the cheese on the other. It is really that simple!!!

Buckwheat gnoccheti and sweet palermo

Discovering again and again new vegetables… this one seems to be a new breed of sweet pepper… not that I am a fan of new breeds… there are so many existing that I am not sure to see the point… in the meantime that’s how many vegetables and fruits have been created… anyway I didn’t know when I bought it, it looked nice and was a good change, as with the end of the summer it’s all about eggplants, cucumbers, okras and tomatoes… and I don’t want to start too quickly with the fall vegetables, there will enough time for that… and it’s still hot, so I don’t feel like kabocha and sweet potatoes yet!!!

The name of this new vegetable is “palermo”… it reminded me Sicily, so I put it in my basket. Yellow, long and firm… just like a bell pepper. I was hoping it wouldn’t be strong and spicy, all the contrary. The taste is very mild and rather sweet. But the flesh is thinner than that of the regular red, orange or yellow bell peppers, so it feels not very nourishing. I prepared it with a fresh tomato sauce, to serve with gnochetti.

Gnochetti that I made with buckwheat. Indeed, the meal I had in mind was very different… I was planning to prepare soba with some green vegetables, when I realized that all the soba were gone and I only had buckwheat flour in the pantry… I didn’t feel like trying to do handmade soba at the very moment, instead I opted for something I knew I could succeed in easily… 😉 gnochetti felt perfect, but then I needed to change the vegetables and thought about the palermo. All set and here are my recipes.

Buckwheat gnochetti

  • 50g of buckwheat flour
  • 25g of whole-wheat flour
  • 25g of flour
  • 1 egg
  • A bit of water

Mix all the flours together, add the egg and knead. Only if the dough is really hard or if all the flour is not well incorporated then add a few drops of water and knead well.

Keep 30min to rest. Then make a 1.5-2cm diameter roll and cut chips of 1-2mm thick (see top picture). Make balls with the chips and roll on a gnocchi board.

In a large pan filled with water boil the gnochetti and remove them when afloat. Put the gnochetti in the pan of the sauce (see below)

Tomatoes and palermo sweet pepper sauce

  • 2 tomatoes
  • 1 palermo bell pepper
  • Olive oil
  • Salt and pepper

In a large frypan, splash some olive oil. Wash and cut the tomatoes and add to the pan. Start cooking at medium heat. Wash, remove the seeds and slice the palermo, add to the tomatoes. Cook at low heat until there is only a thin layer of liquid remaining. Stop cooking.

Add the boiled gnochetti to the sauce pan, add salt and pepper, a splash of olive oil and stir well at medium heat. Serve and enjoy!!!

Edamame and eggplant

Whether on weekdays, when we have little time to have lunch or on the weekends when we are busy with surfing/bodyboarding, playing tennis or gardening, having a good lunch easily ready is important. Moreover, if that can be prepared in advance it is even better! Fresh pasta have been quite a good candidate as they can be accommodated easily, be eaten warm or cold… and since it it is the end of the summer we want to continue enjoying the summer vegetables a little longer, in particular, enjoy the last edamame of the season. I know that we will have eggplants and tomatoes for quite a few weeks or even months but they add a real summer touch to a dish. So I came up with a recipe of edamame pasta with eggplant that is all creamy and divine and I couldn’t wait sharing that recipe with you, as if you want to try you’ll have to hurry!

Edamame, fava beans, and similar are a good match with eggplants and are traditionally used together in Japanese cuisine. I revisited this classic combination in a more western style.

Edamame and eggplant creamy pasta (2 servings)

  • a handful of edamame
  • 2 eggplants
  • fresh pasta
  • olive oil
  • salt and pepper
  • grated Parmigiano (optional)

Boil the edamame, grill the eggplants to be able to peel them. Once the edamame have cooled down peel them completely and in a mortar puree them. Add a bit of olive oil, salt and pepper. Peel the eggplant and add to the mix and pure roughly. Boil the fresh pasta, once drained add the mix, stir well ad serve. Add grated Parmigiano if you like.

Yes! that’s it! Isn’t that simple? And you’ll see it is truly delicious!

Proudly powered by WordPress | Theme: Baskerville 2 by Anders Noren.

Up ↑

Verified by MonsterInsights