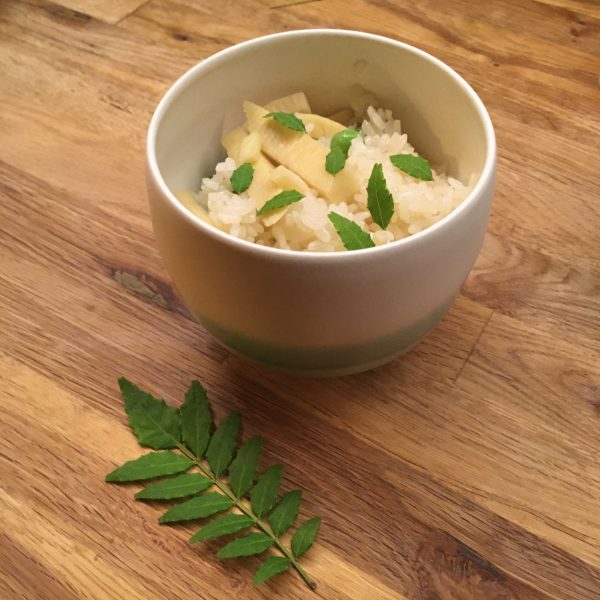
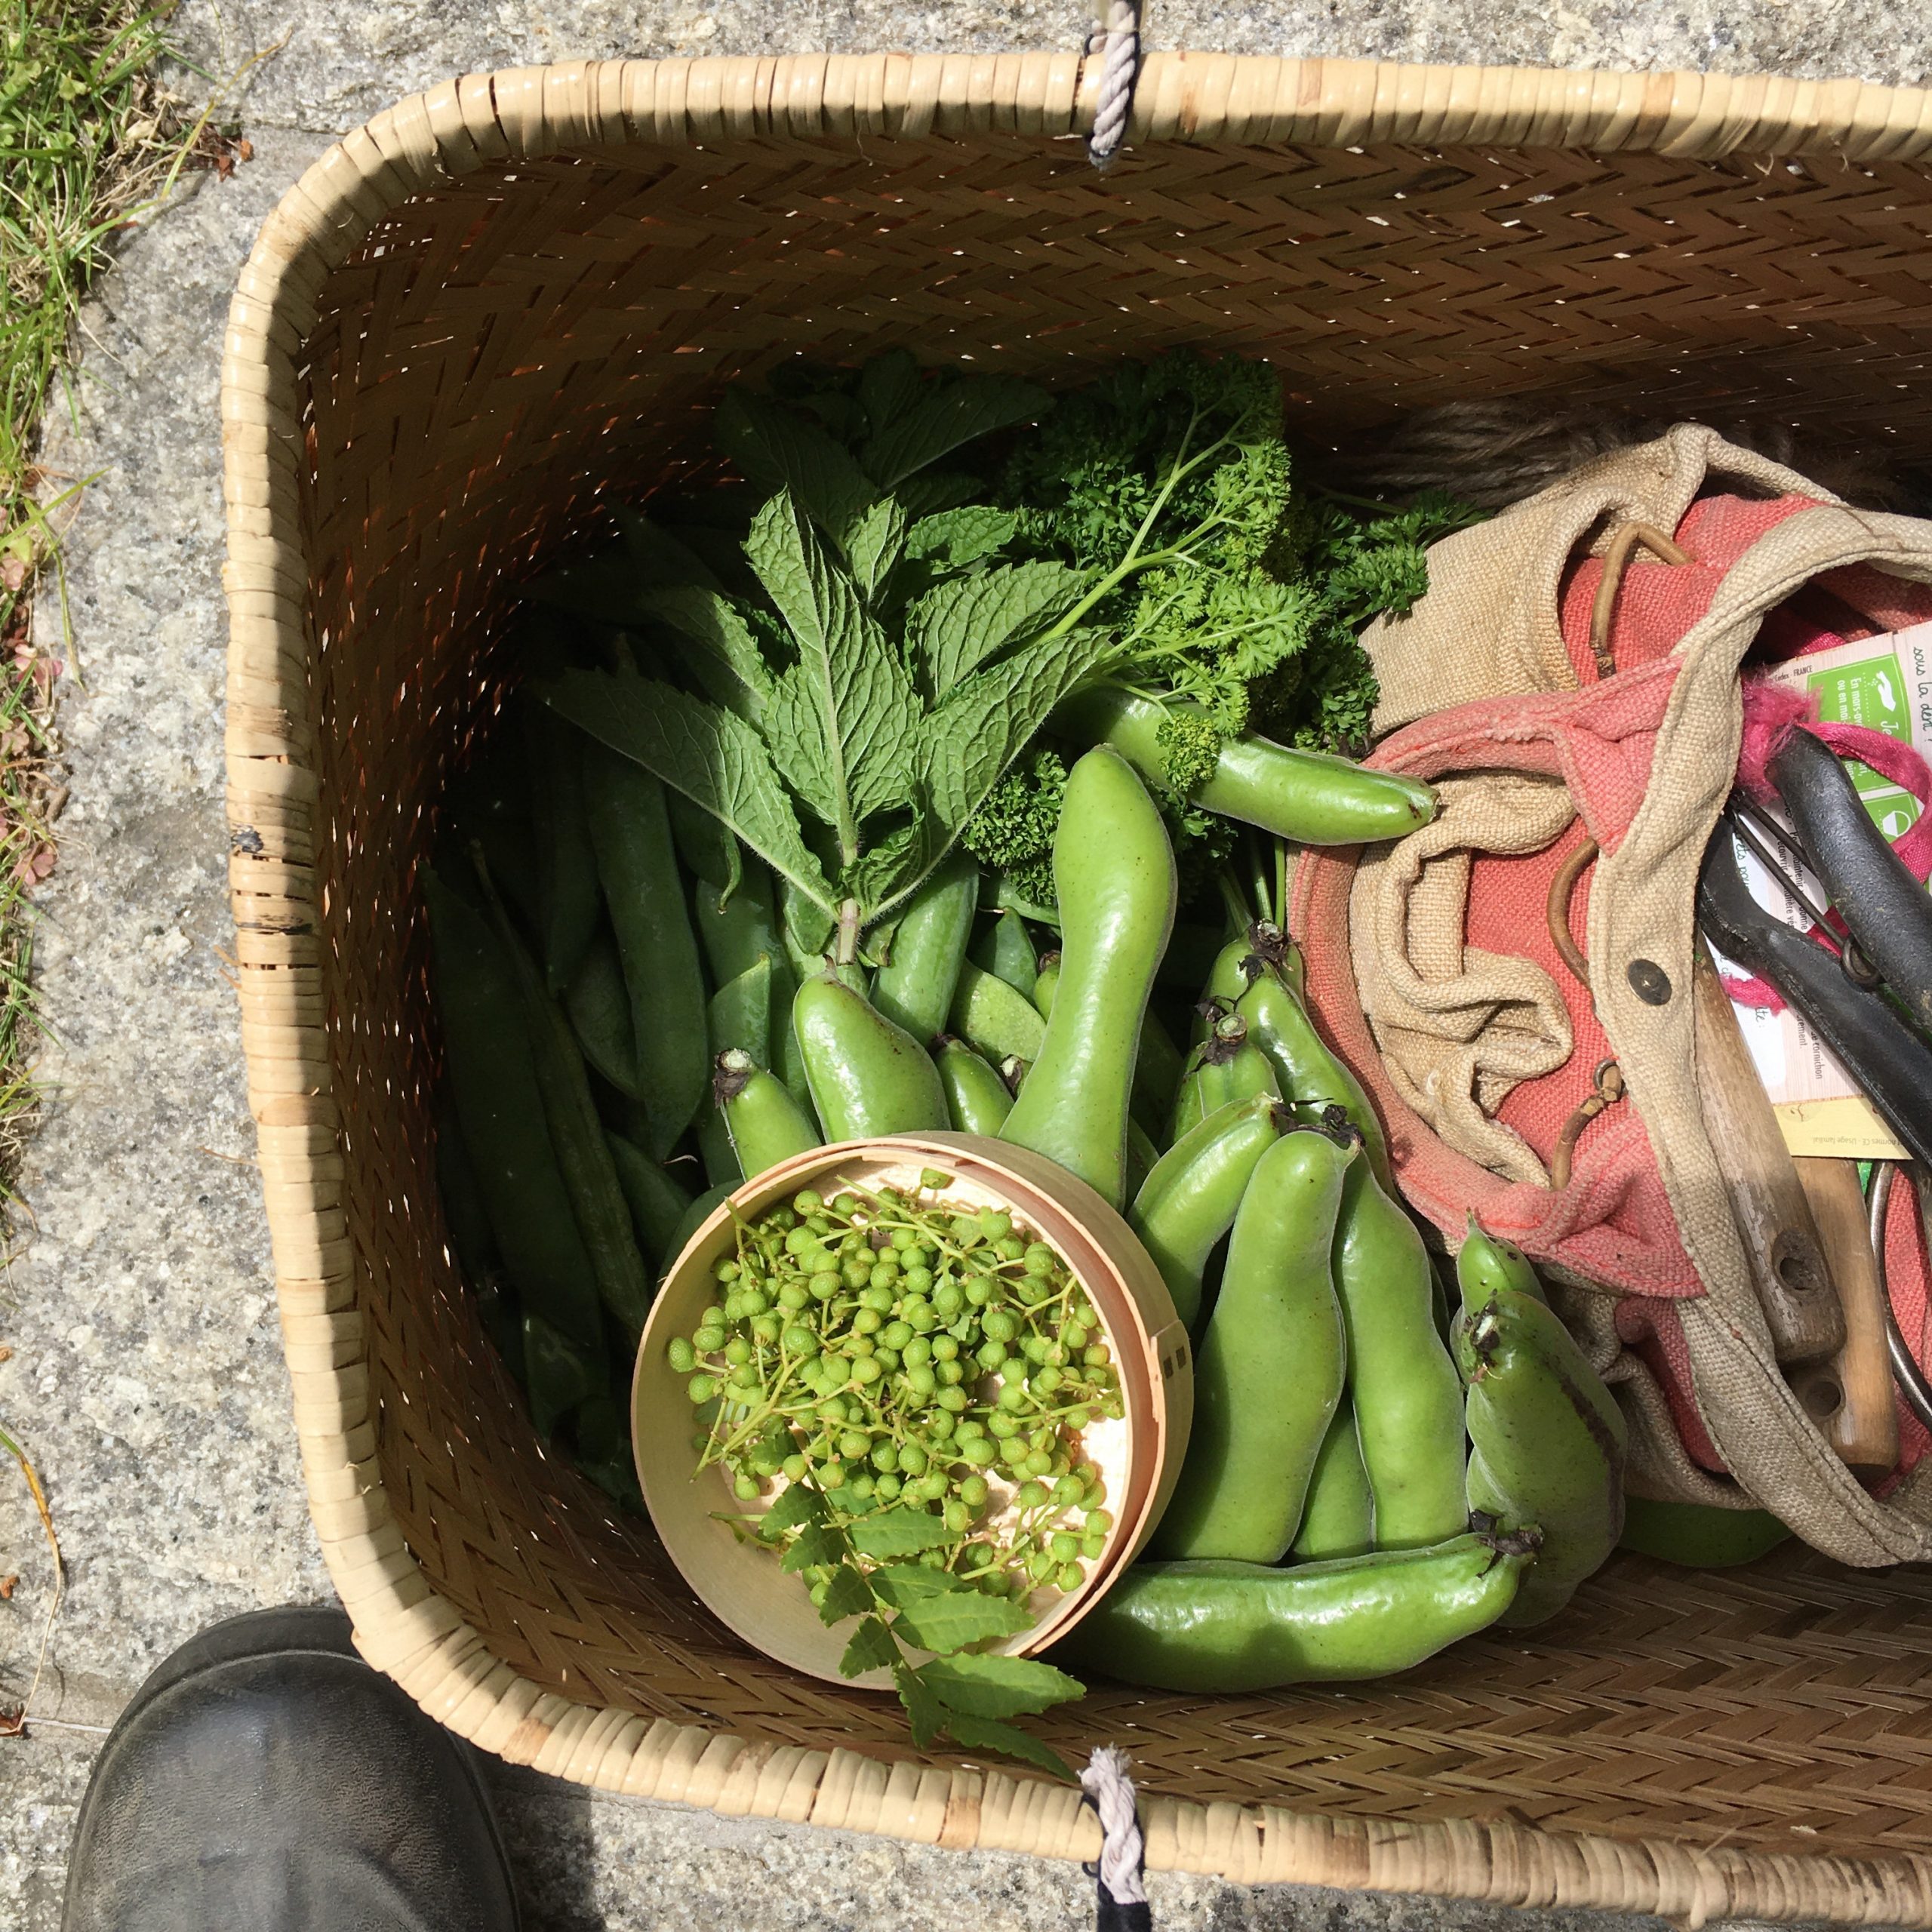
Harvest from the kitchen garden: plenty of green peas, fava beans and herbs.
Late spring brings in so many vegetables! Our modest kitchen garden produced a beautiful crop of green peas. Not over a long period of time like last year, but a few kilos in a very short time. I also harvested a lot of sansho pods, and while looking at the recipe to prepare them in my book of Shojin cuisine, I just found a recipe that so far curiously never attracted me before but was perfect with what I had in the fridge: bamboo shoot and green peas sushi rice. It took just one second to verify I had all the ingredients I needed and my mind was all set. I don’t eat fish and seafood sushi, but I love sushi rice, slightly vinegary and sweet. It is very easy to prepare but somehow never make any…
It was time to change this!
Here is the recipe I prepared, slightly modified from the original.
Bamboo shoot and green peas sushi (4 servings, side dish)
2 go of rice (or 2 cups but that would be more)
A handful of fresh green peas
1 fresh bamboo shoot
A pinch of salt
2tbs of rice vinegar
3tbs of sugar
1tbs of soya sauce
A few sansho leaves
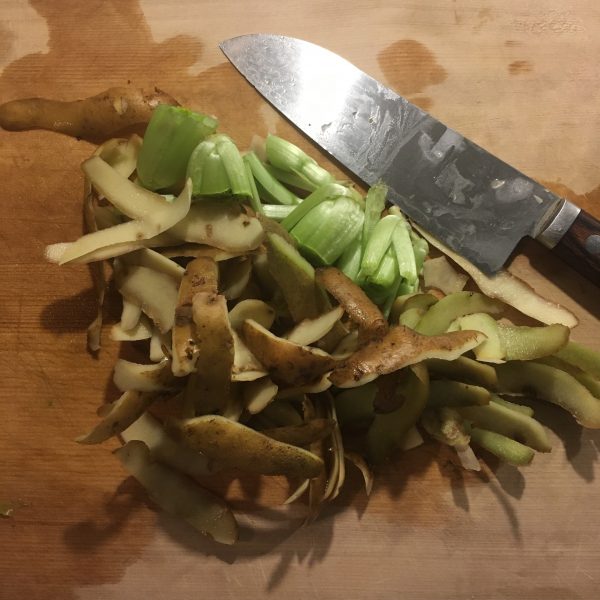
Cook the rice. In the meantime, peel the bamboo, cut it in 3mm thick slices, and the cut the the slices in 2cm strips and boil it for 15min. Drain. In a pan set the bamboo and the green peas, add 2tbs of water, 1tbs of sugar, 1tbs of soya sauce. Cook at medium heat until almost all the liquid is gone. Mix the vinegar and the 2tbs of sugar with the rice. Stir well, add the vegetables and stir gently. Add the sansho leaves and enjoy!
Do not refrigerate, the rice would become hard and flavors would vanish.
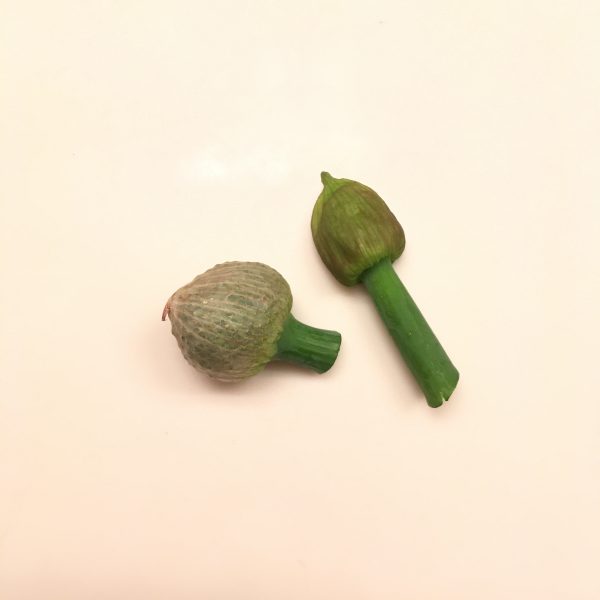
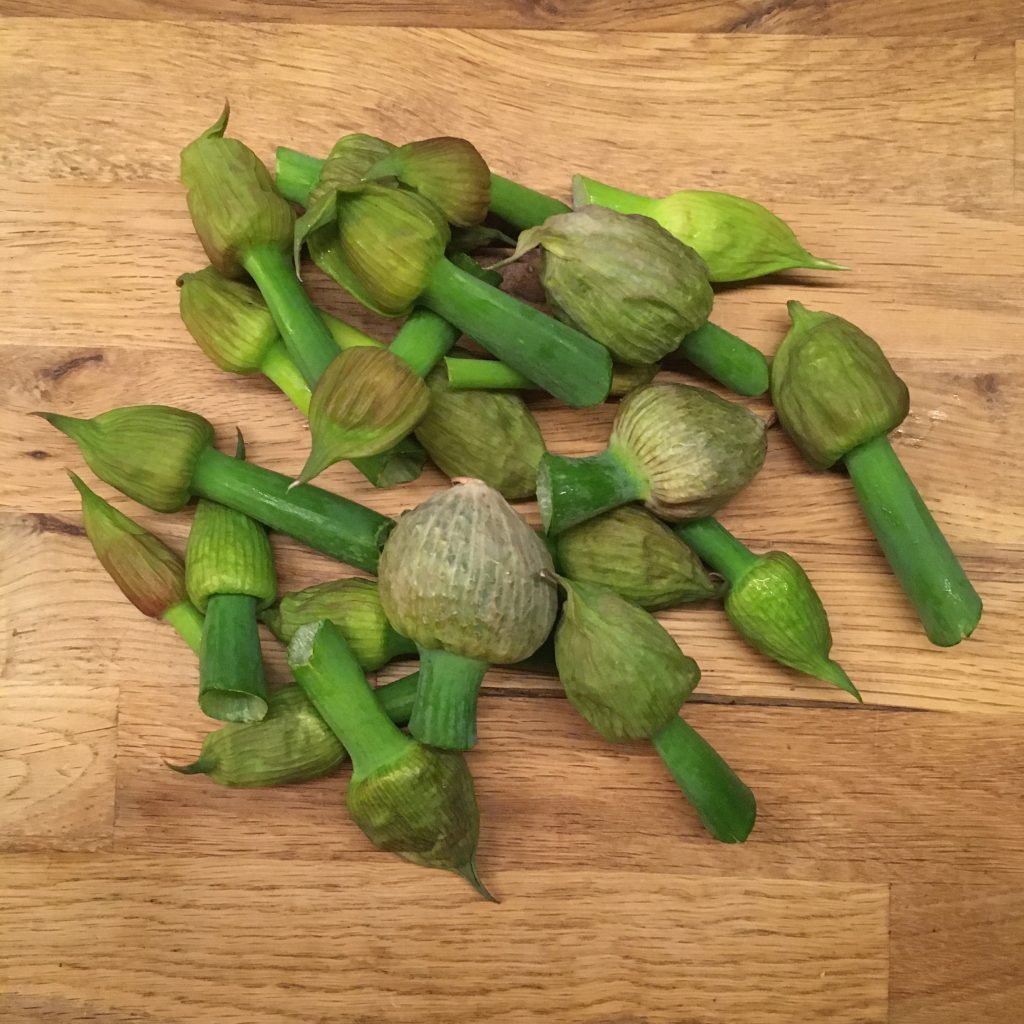
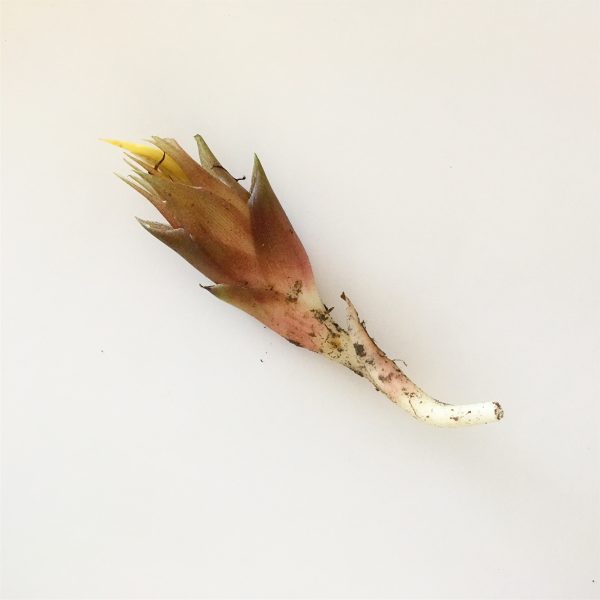
There is no need to go far to discover new things and in particular when it comes to food, there is always something new and curious to discover at the farmers market. You just need to look around and you’ll surely find something you haven’t seen before. This time I found negibosu 葱坊主 leek’s flower buds. You can often spot the beautiful flowers in kitchen gardens in the spring, they are amazing ornaments. But I never guessed that would be edible, and that even you would be able to buy them in the bud version at the farmers market. But it is!
So here I am with my negibosu… I thoughts immediately that tempura would be an appropriate recipe. For some reasons, tempura always work well with any green, even with strong flavors: fukinoto is a good example. But what else… and would actually negibosu be strong in flavors? So I browsed a bit the net. Nothing came out neither in French nor in English but for the fully blossomed leek flowers. It was of no help, so I turned to Japanese and bingo! Negibosu have a significant number of entries in cookpad, more than half of them being…
Tempura of course… hum… not helping much either… digging a bit more I finally found the other classic Japanese recipe to accommodate greens: miso ae. Miso ae, in my opinion, works better with creamy miso, the one I have, that I make, is more granular and won’t work as good… one recipe in the end attracted my attention: a goma ae one. So I decided to go for this one, well, my way though. (and the tempura… just in case!!)
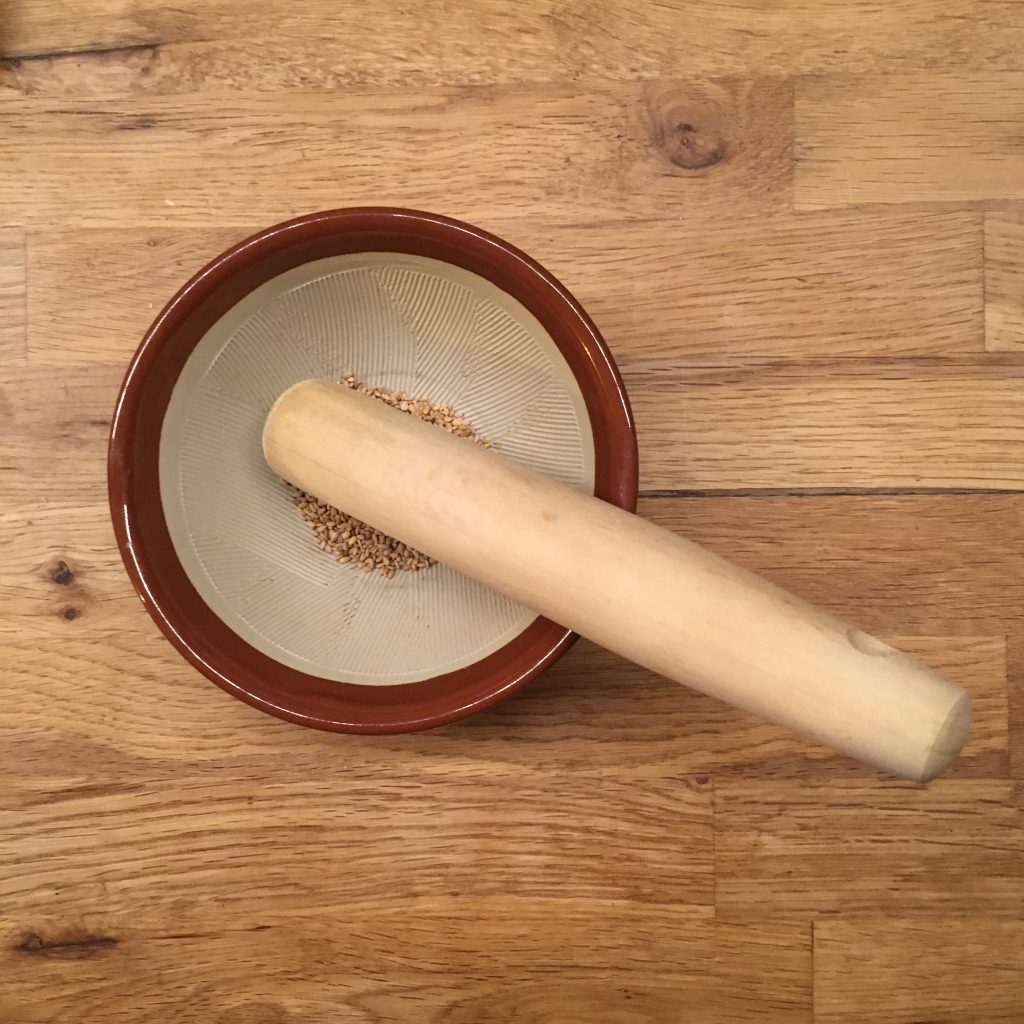
So here’s my recipe of goma ae. Suri goma すり胡麻 is ground sesame powder. It’s very easy to make from the sesame seeds, or to buy already powdered.
Making ground sesame: suri goma
Negibosu goma ae (2 servings)
A dozen of leek flower buds
1tbs of sesame seeds
1tbs of soya sauce
1tsp of brown sugar
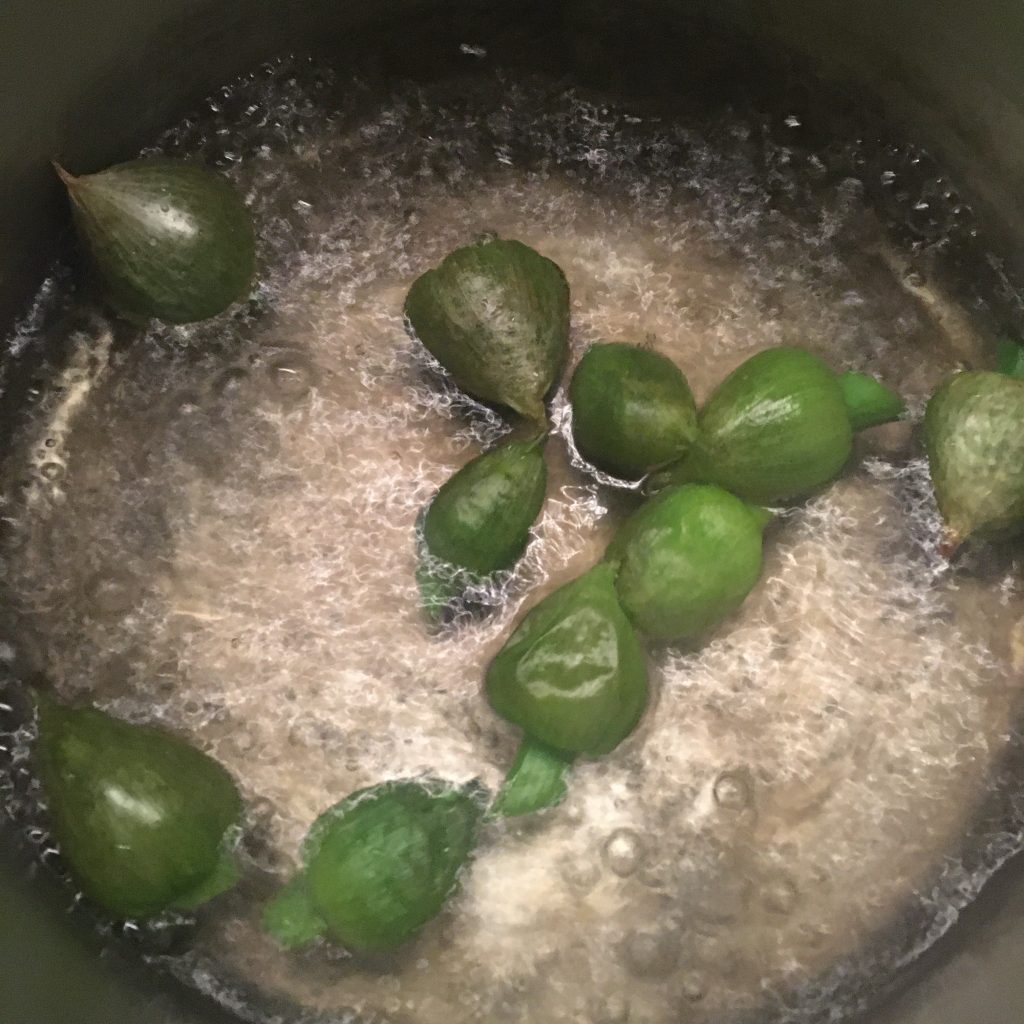
Wash the negibosu, remove the hard part if any, and blanche for a few minutes. Drain and pat dry.
Blanching negibosu
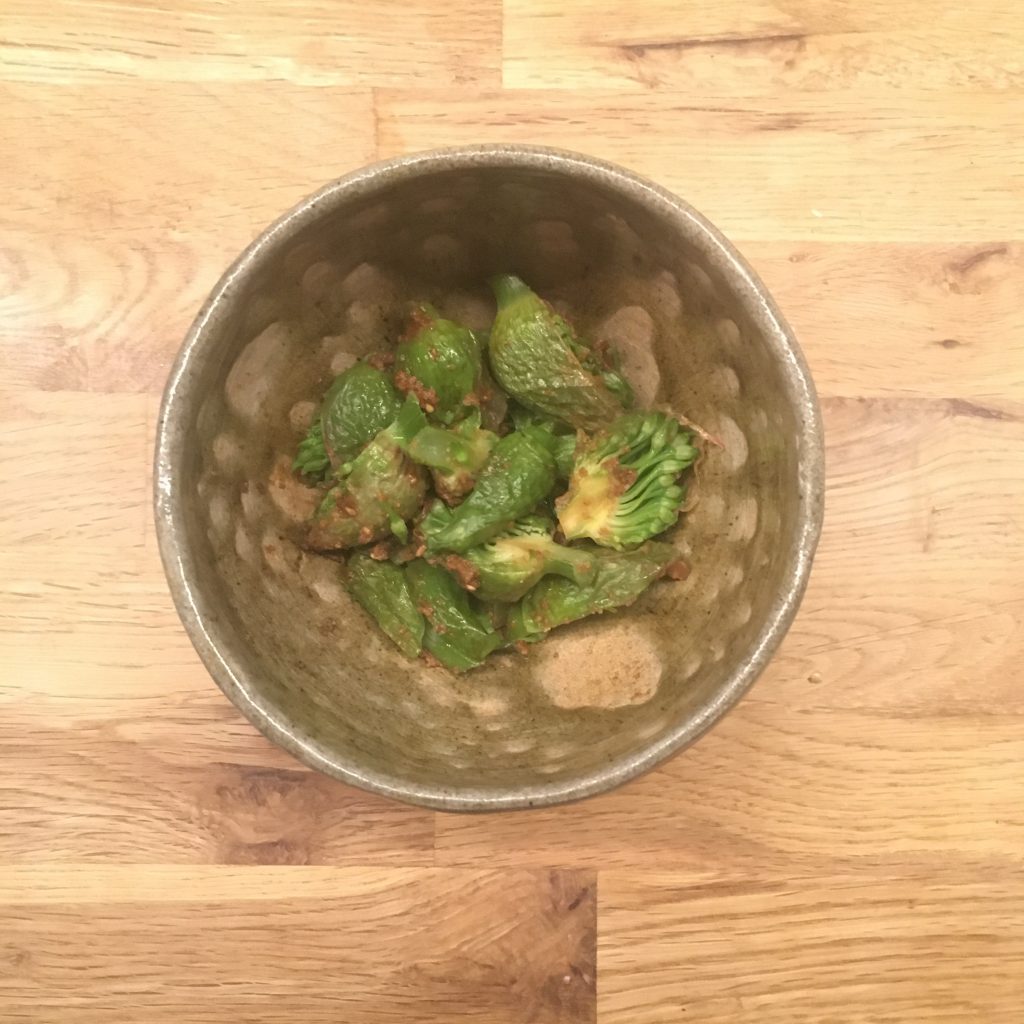
Once cool enough, cut in tiny bite size.
In a mortar, crush the sesame seeds with a pillar to obtain a paste. Add the sugar and soya sauce and stir. Add to the negibosu, stir and that’s ready!! Yes, it’s that simple and you’ll see it’s delicious!!!! Enjoy!
It was 13 years since I left Tokyo University for Tokyo University of Agriculture and Technology, and started my own research lab. The beginnings were hard but the past few years I really reached a stable balance… maybe too much balance… it was time to change… I’m back at the university of Tokyo… and starting from 0 again!!! You may call me crazy but I need some challenges to feel good. So as you can imagine the transition is keeping me busy and I don’t have much time to spend in the kitchen. Even though…
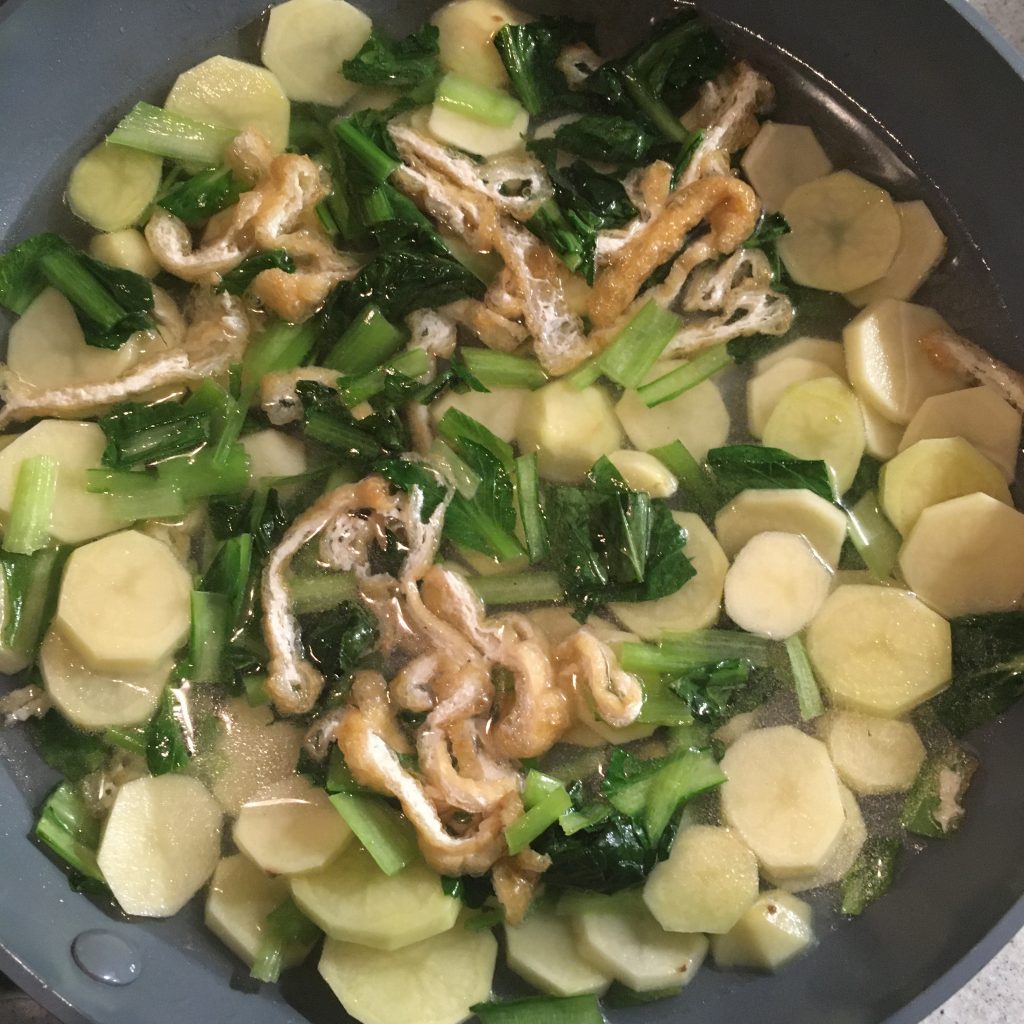
I can’t help spending 10min to prepare something to eat, and improvise a little new recipe with what was in the fridge: tiny potatoes, komatsuna and eggs. The preparation is very simple, it takes just a bit of time to cook it, which is perfect, hands are free to work!!!
Komatsuna jagga 小松菜じゃが (2 servings as full course)
10 small potatoes
3-5 bundles of komatsuna
1 piece of thin aburage
20g of katsuobushi flakes
2tbs of soya sauce
1tsp of oil
2 eggs (optional)
Peel the potatoes and slice them, wash the komatsuna and cut them 2cm long. Slice thinly the aburage. In a greased (with the oil) pan put the potatoes and komatsuna and cook at high heat for 2min. Then add the aburage and cover with water, add the katsuobushi flakes, the soya sauce, and the eggs, stir well and cover. Let cook for 10min or until the potatoes are soft. You can serve as a soup or remove the cover and let the liquid evaporates before serving. Eat hot, because spring may be around the corner, evenings are still cold!!!
If you have read Natsume Soseki’s novel the cat, watched Juzo Itami’s Tampopo or check the Japanese news today, you may not think highly of this Japanese new year specialty that is eaten widely, but kills about 300 people every year!!! No kidding! Despite the caution announcement every year before new year. And if you are more than 65 the risk maybe high that you suffocate eating mochi if you are not careful! But being careful is easy, and mochi is delicious. So let’s get passed the first bad impression, talk about mochi and let me share with you a few delicious ways to eat mochi.
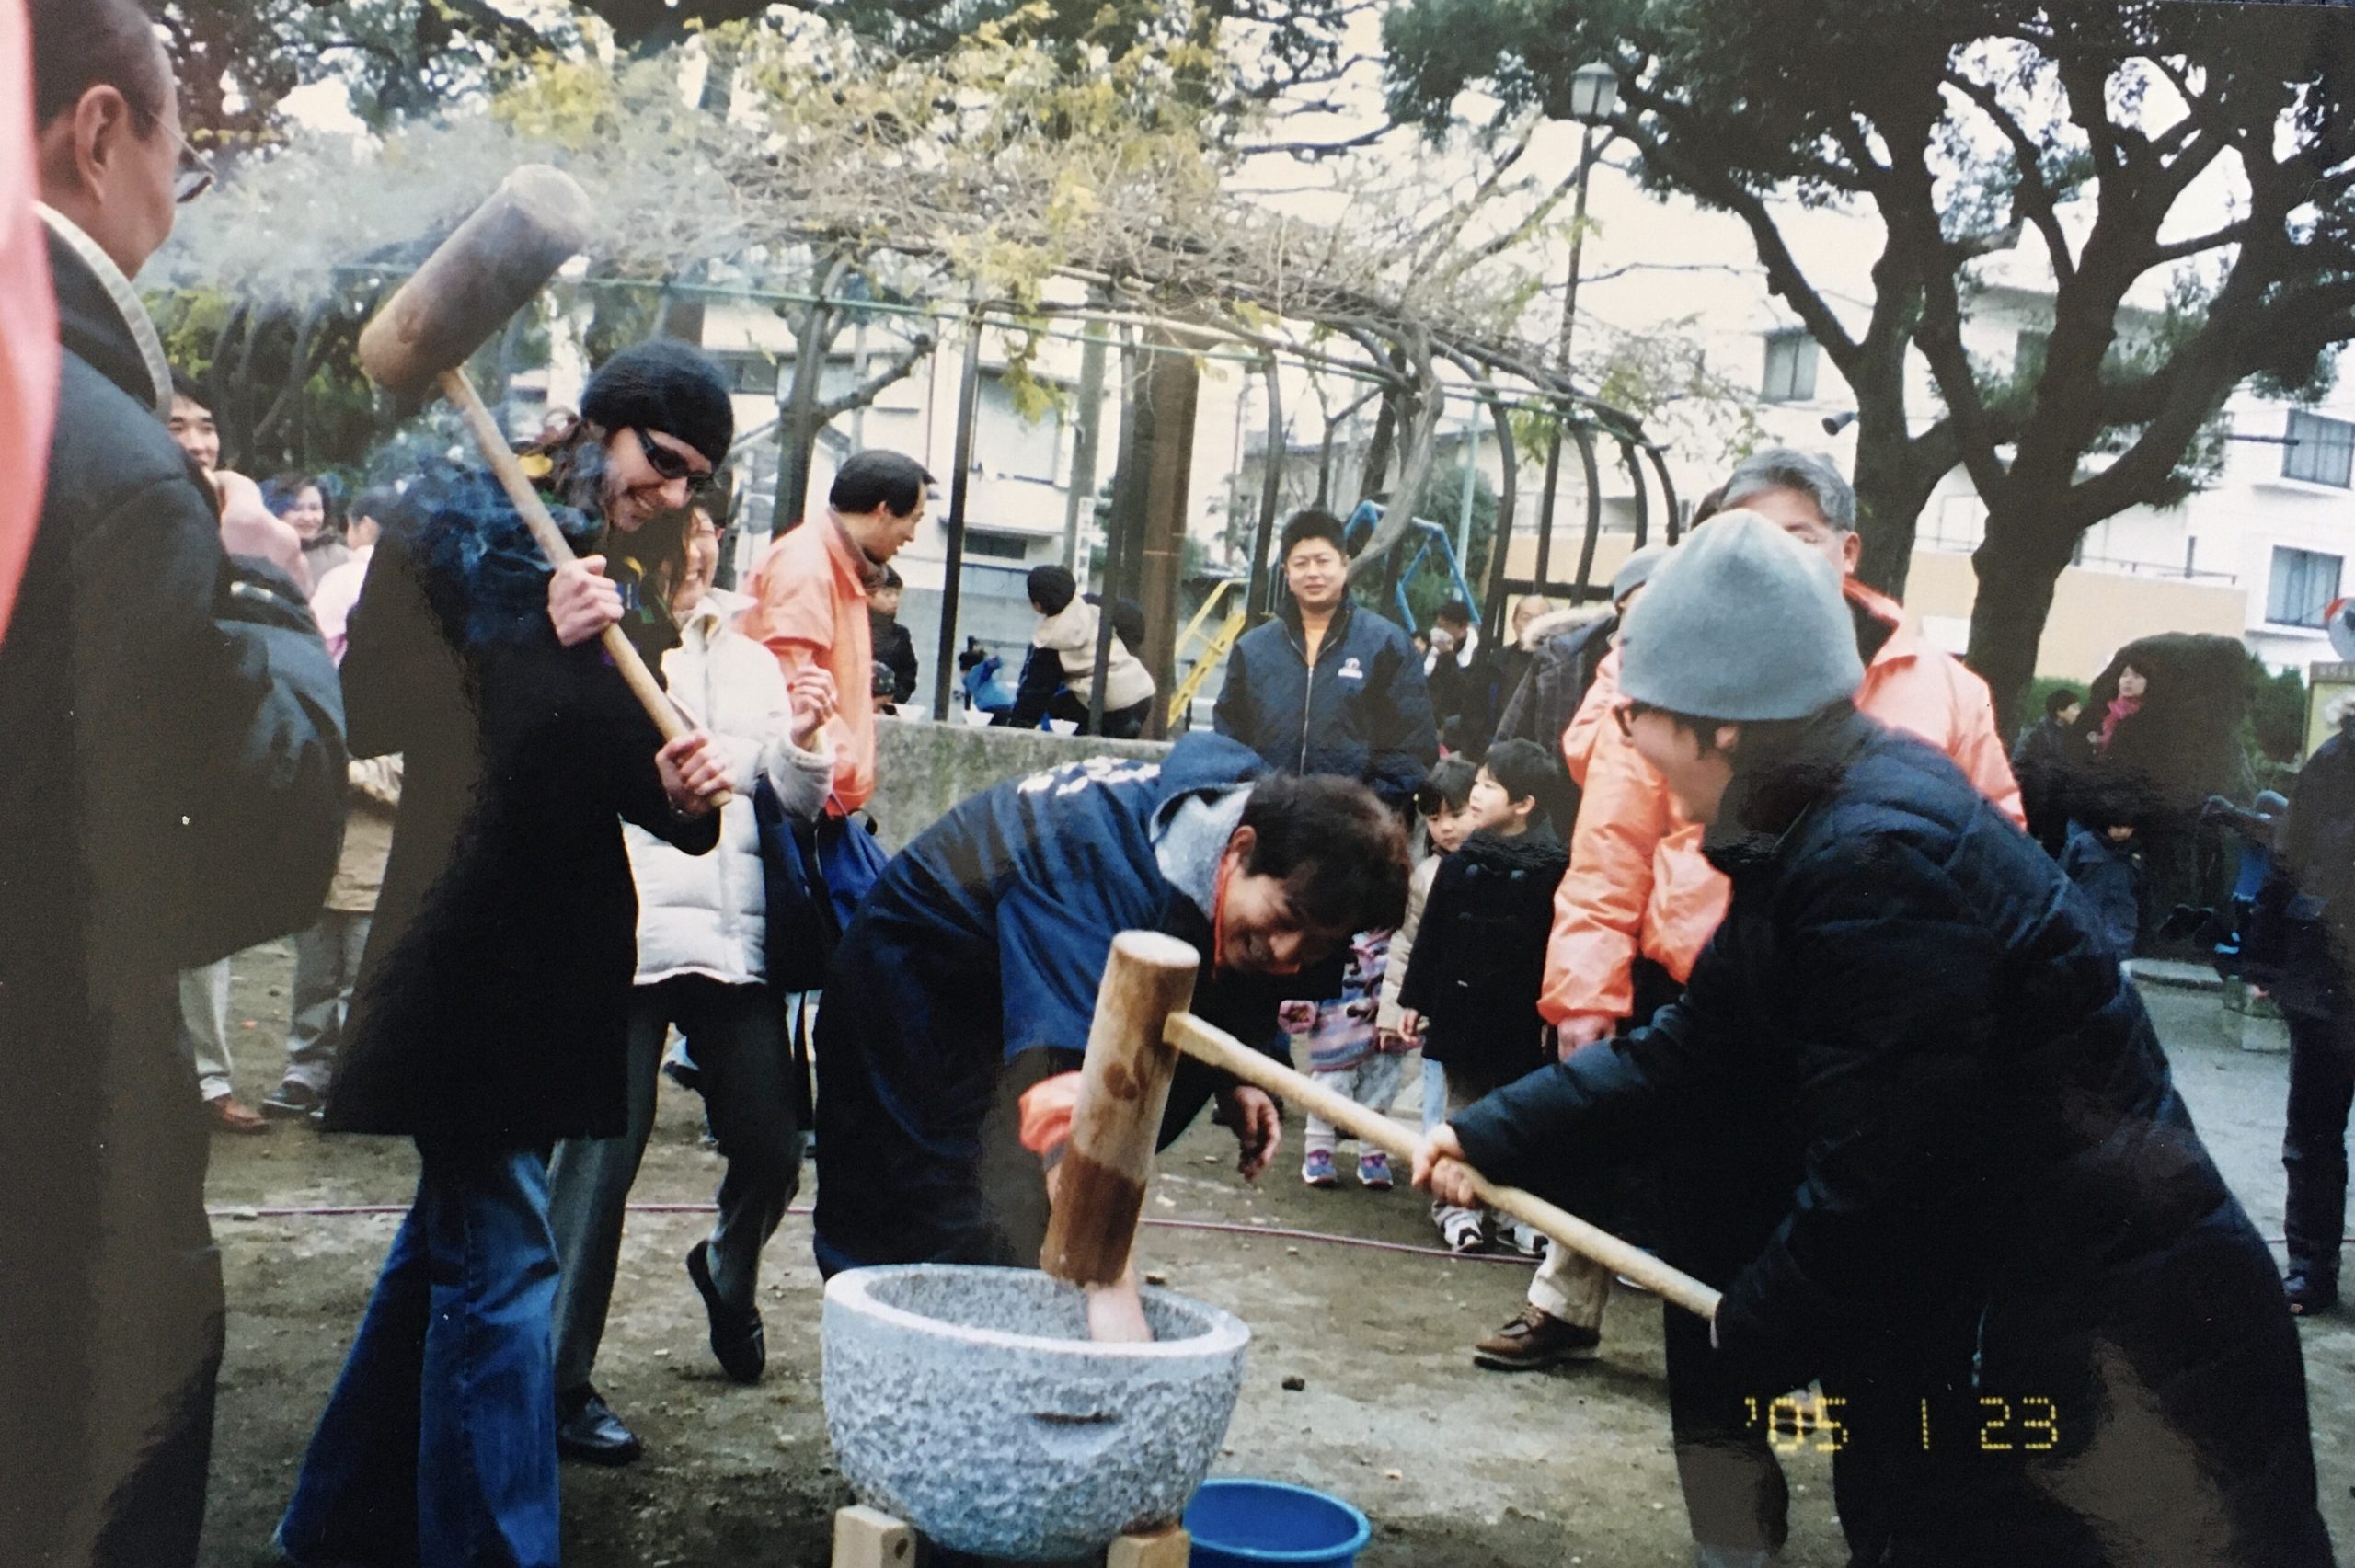
First thing first, you may have heard about mochi but what is it exactly? In most places it is translated as rice cake, but I think it is a bit misleading. Mochi is made of mochigome 餅米 a round rice, slightly more glutinous than the rice you would eat normally, it is cooked them crushed into a paste, the paste is then shaped into a ball of various sizes (smaller are less dangerous to choke on). Making mochi for new year is a tradition and there are plenty of opportunities to go to mochi-dsuki 餅つき events in local communities. We went to our first one in January 2005 with our Japanese teacher. That was fun to pound the rice in a large wooden standing bowl called usu 臼, carved in a trunk, with a huge wooden mallet or pestel called kine 杵.
Me on the left pounding mochi with I. on the day we met for the very first time. (January 2005)
Of course we were scared to try eating it (for the above reasons ;)), but in the end we enjoyed it very much in many many ways: in soup (ozoni), with nori and soya sauce, with kinako, with red beans etc… Not everyone is equipped with a set to make mochi at home and not everyone makes at least 2kg of mochi at once, so there are other ways to get your hand on mochi and to try this very special Japanese specialty. Here are some options I recommend: steamed mochi rice hand crushed and pound in a mortar, fresh mochi in grocery shops (not so easy to find in the city, easier in the countryside) but it doesn’t keep for long, kirimochi 切り餅, it is basically dried mochi that is very easy to use and keeps much longer and is nice for also making grilled mochi (if you want some let me know I can arrange shipment wherever you are, DM me on Instagram or Facebook). Some websites offers to make mochi with a mixer, but it seems that without a powerful one all you may do is burn your motor, so I wouldn’t actually recommend it. Some others propose to make it from mochi rice flour, I have never tried and I guess it is OK but it will lack the slightly granulous texture that you can have with pounded rice.
Once you have your mochi ready it is really easy to prepare in one of the many possible versions savory or sweet. If you use kirimochi you may need to return it to softness by simply putting in a pan cover with water and boil it a few minutes on both sides until tender. Today I introduce two recipes, one savory ozoni, in a version with only clear broth inspired by a picture I saw on Instagram, but reinterpreted, but you can also add white miso to it to make it more Kyoto-style! and one sweet kinako mochi, but there are many others. Actually one I love is mochi with soya sauce, very simple but so delicious and perfect as a side for a piece of grilled fish or with some vegetables.
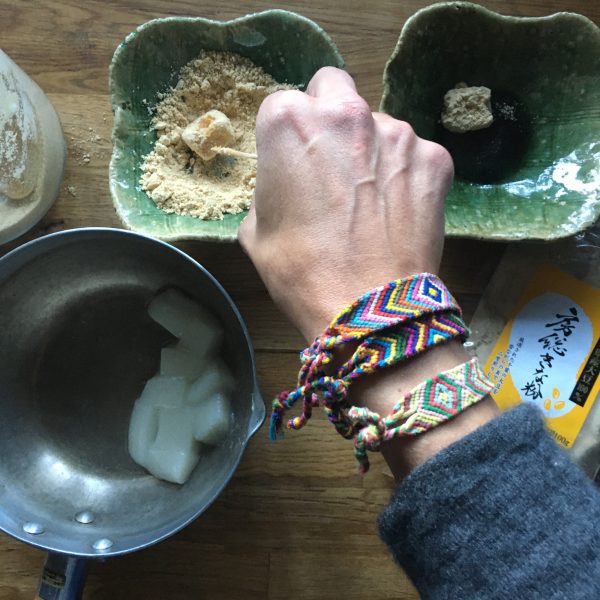
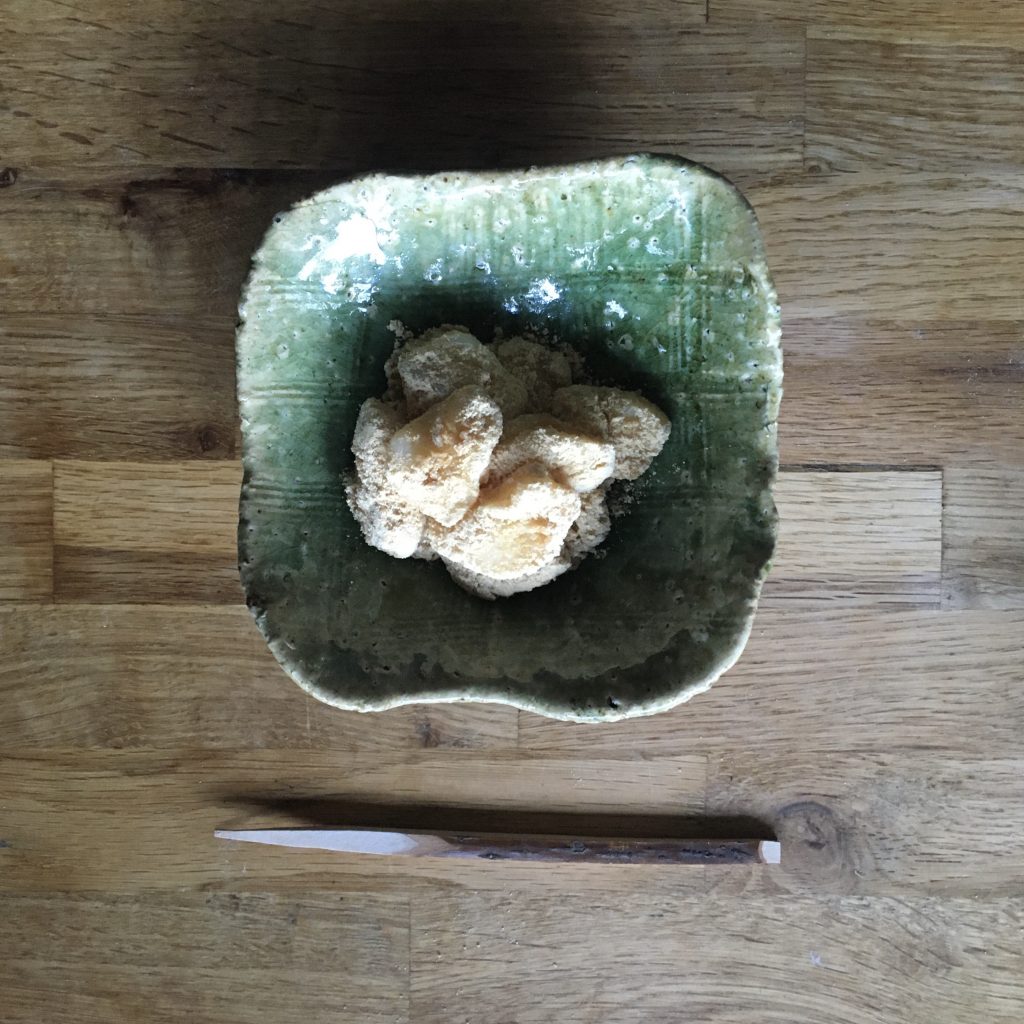
Kinako mochi
soft mochi (if you use kirimochi it needs to be returned to softness)
kinako (torrefied soya bean powder)
brown sugar
I a bowl mix 4/1 kinako/sugar (for example 4tsp of kinako and 1tsp of sugar). Cut the mochi into bite sizes. Dip the mochi in water and roll in the kinako mix, set in a bowl. You can make as much as you want it is very easy to eat and really delicious!!! The picture below is what I made for two for a tea-time snack. There was about 8-10 small bites.
kinako mochi
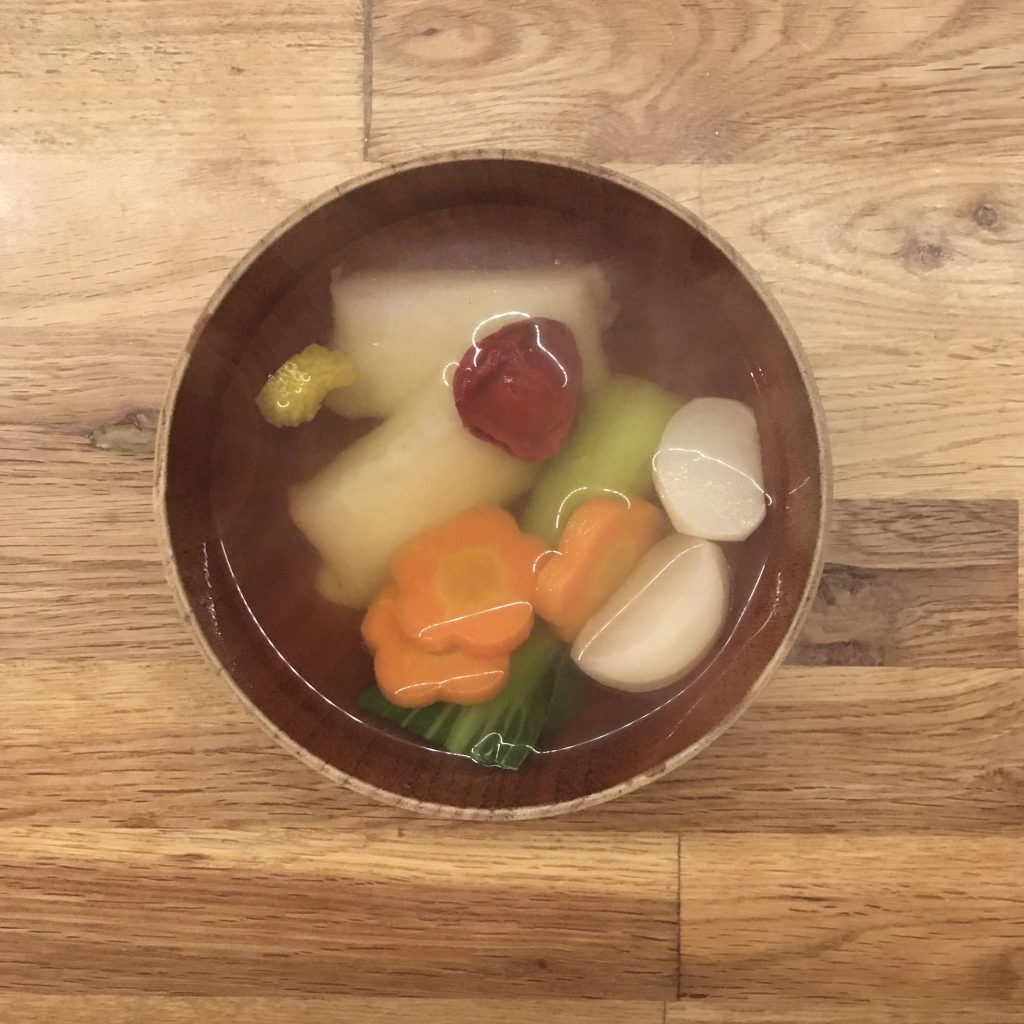
Ozoni (without miso) (2 servings)
500ml of dashi ( I use ichiban dashi (konbu & katsuo) but you can also do with konbu & shiitake dashi for a vegan version)
2 pieces of kirimochi
2 umeboshi
a few seasonal vegetables: 1 carrot, a few spinach leaves or 1 small bok choy…, 2 little turnips…
optional a zest of yuzu
In a pan, prepare the dashi. In another pan, return the kirimochi until soft. Prepare the vegetables (I used a cookie cutter to make the carrot in plum shapes). Cook them in the pan with the dashi, until just tender. In a bowl of your choice set the mochi, dress the vegetables, add the umeboshi, the yuzu peel and cover with the dashi. Enjoy while it’s hot.
Again send me a message on Instagram or Facebook if you want dashi, kinako or kirimochi.
This little wild flower bud is really too delicious and its distinctive flavor quite unique. As you know, from all previous posts, I love it!!!
We are lucky to have some growing wildly in the garden, and it’s quite easy to find some when going for a walk in the woods. Apparently there are two seasons for it, one in spring and one right now in the early fall. Our garden has more of the latter and for me myoga is a fall flavor!
There are many many ways of preparing it and eating it (again, check my previous posts on the topic!). Raw or pickled would be the most common and my favorite. Raw particularly. It is so simple and it goes well with so many things!
Today two super simple recipes with myoga, one is a classic, the second is more one of my classic.
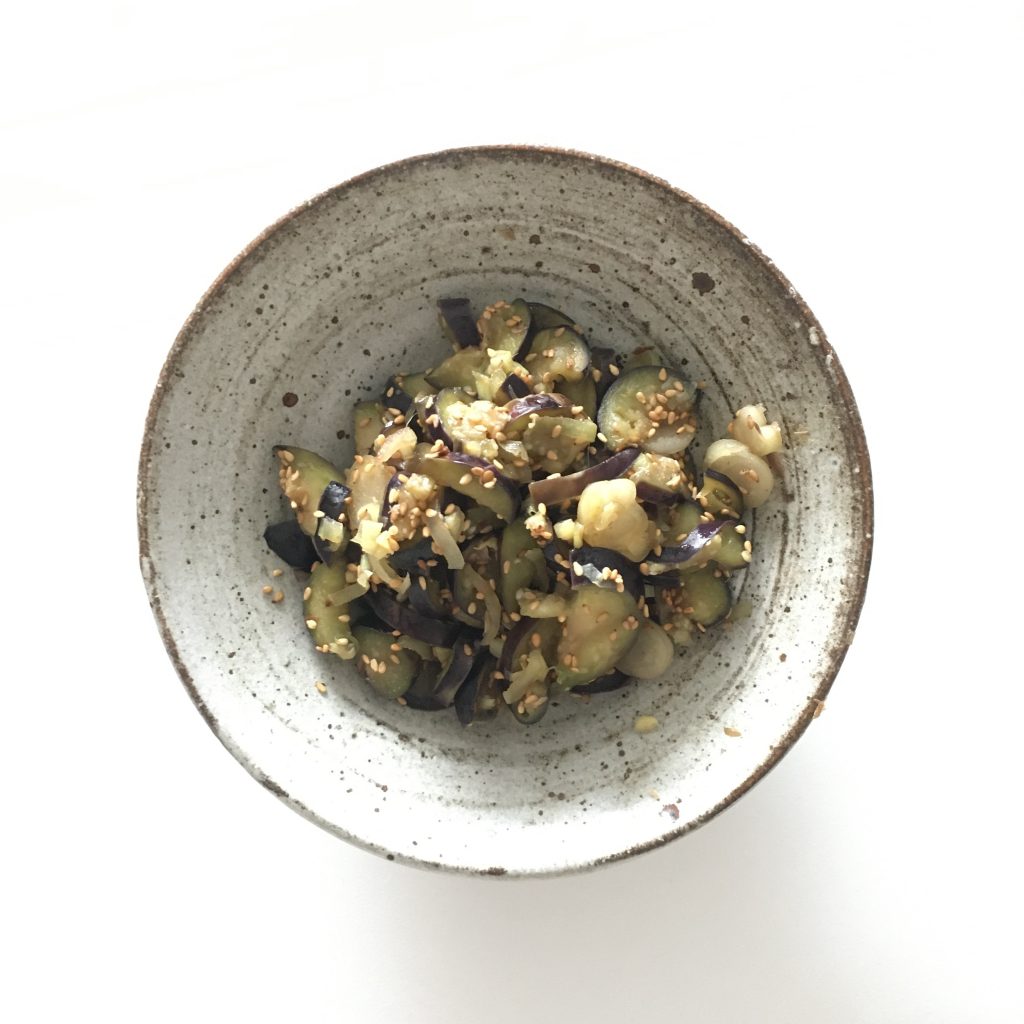
Eggplant with myoga
2 myoga
2 eggplants
1/3 tsp of salt
1tsp of sesame seeds or a handful of katsuobushi
Normally for this you could do it with raw eggplants like I suggested here. But to male it faster, instead of waiting for the salt to slightly pickle the eggplants, I cook them.
Wash and cut the eggplants in their length, then in 4-5mm slices. In a tiny pan start cooking the eggplants, add the salt and stir often. I do not add water nor oil. When the eggplants have softened add the myoga washed and thinly sliced. Stir well. Add the sesame or the katsuobushi. Stir again. Serve and eat now or chilled.
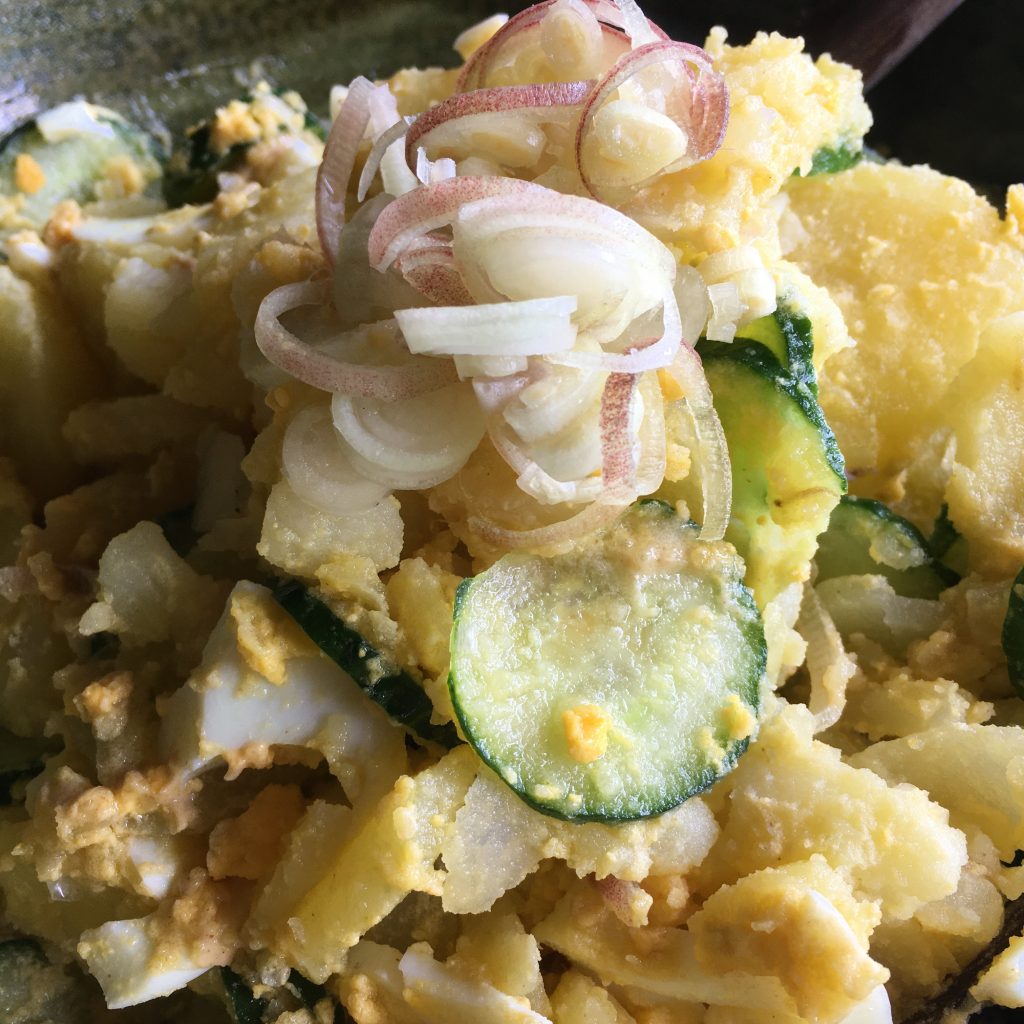
Myoga potato salad
2-3 myoga
1 Japanese cucumber
8 small potatoes
2 eggs
1tsp of mustard
2tbs of olive oil
pepper
Boil the potatoes with the skin and the eggs. When done let them cool down. Wash the myoga and cucumber. Slice them thinly. Peel the potatoes and the eggs.
In a bowl, cut roughly the potatoes and the eggs, add the cucumber and myoga, the mustard and oil. Stir well and serve.
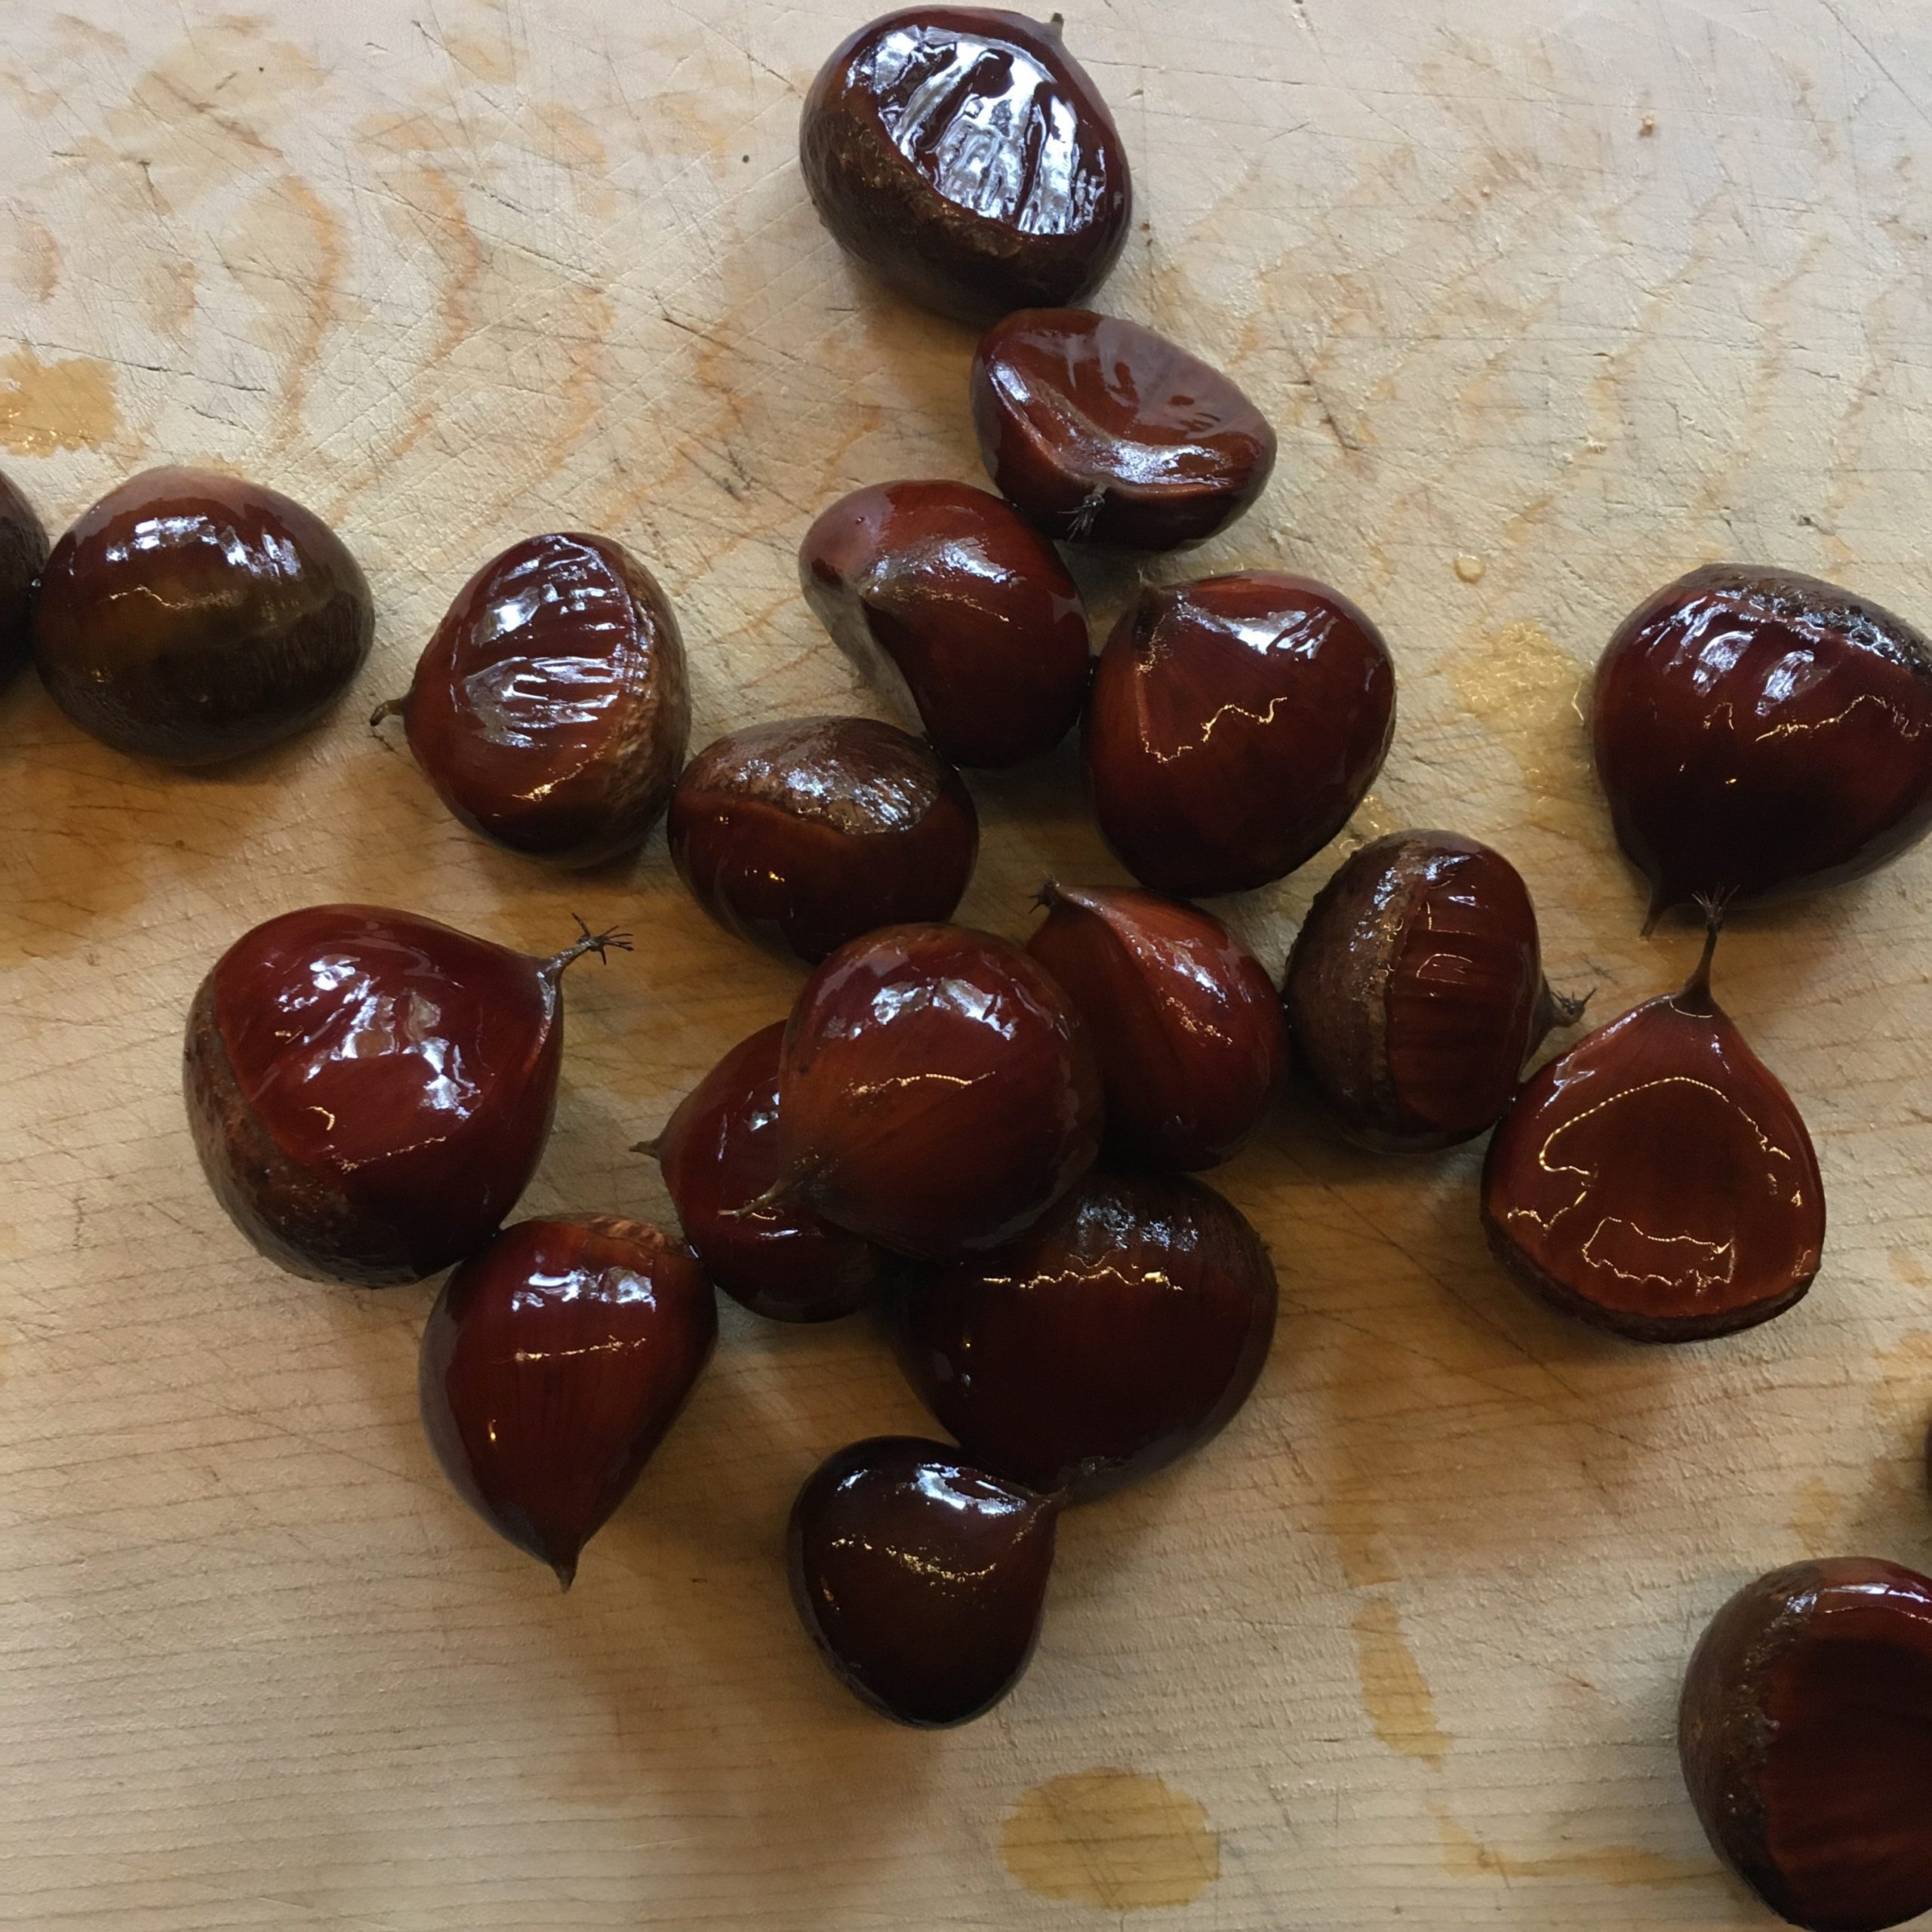
When autumn arrives, sweet chestnuts 甘栗 – amaguri are a must eat. We have a chestnut tree in our garden which usually produces just enough chestnuts for us and the rest of the animals: racoons, kions… A. doesn’t like chestnuts too much so it is usually the right number. Except this year, I wasn’t quick enough in harvesting them, and the other animals didn’t have the slightest pity for us, and left us nothing but empty spiky shells. I had two options: forget about chestnuts this year and be more greedy next year, or wait a bit and buy a bag of local chestnuts whenever I would find one. Bags of chestnut are usually much bigger than what I need, but still eating a few chestnuts, and in particular a bowl of chestnut rice was too tempting. Chestnut rice like many of the traditional Japanese rices, is just too delicious, and the perfect food to enjoy the transition between summer and autumn. This time of the year when days are still hot but shortening quickly, the sky has this special blue color, soft and bright at the same time, and evenings are getting chillier. The cicadas are becoming silent or distant and leave sound space for more delicate voices.
So, it wasn’t long beforeI found local chestnuts and start working with them. Though I had a few ideas of recipes in mind, I opted for the classic chestnut rice 栗ご飯 – kurigohan. It is a bit tedious to make, but not more than anything else with chestnuts, and it is super very delicious, packed with energy. So let me share with you my recipe.
Kurigohan (3-4 servings)
2 cups of rice (I use new rice)
10 raw sweet chestnuts
2tbs of soya sauce
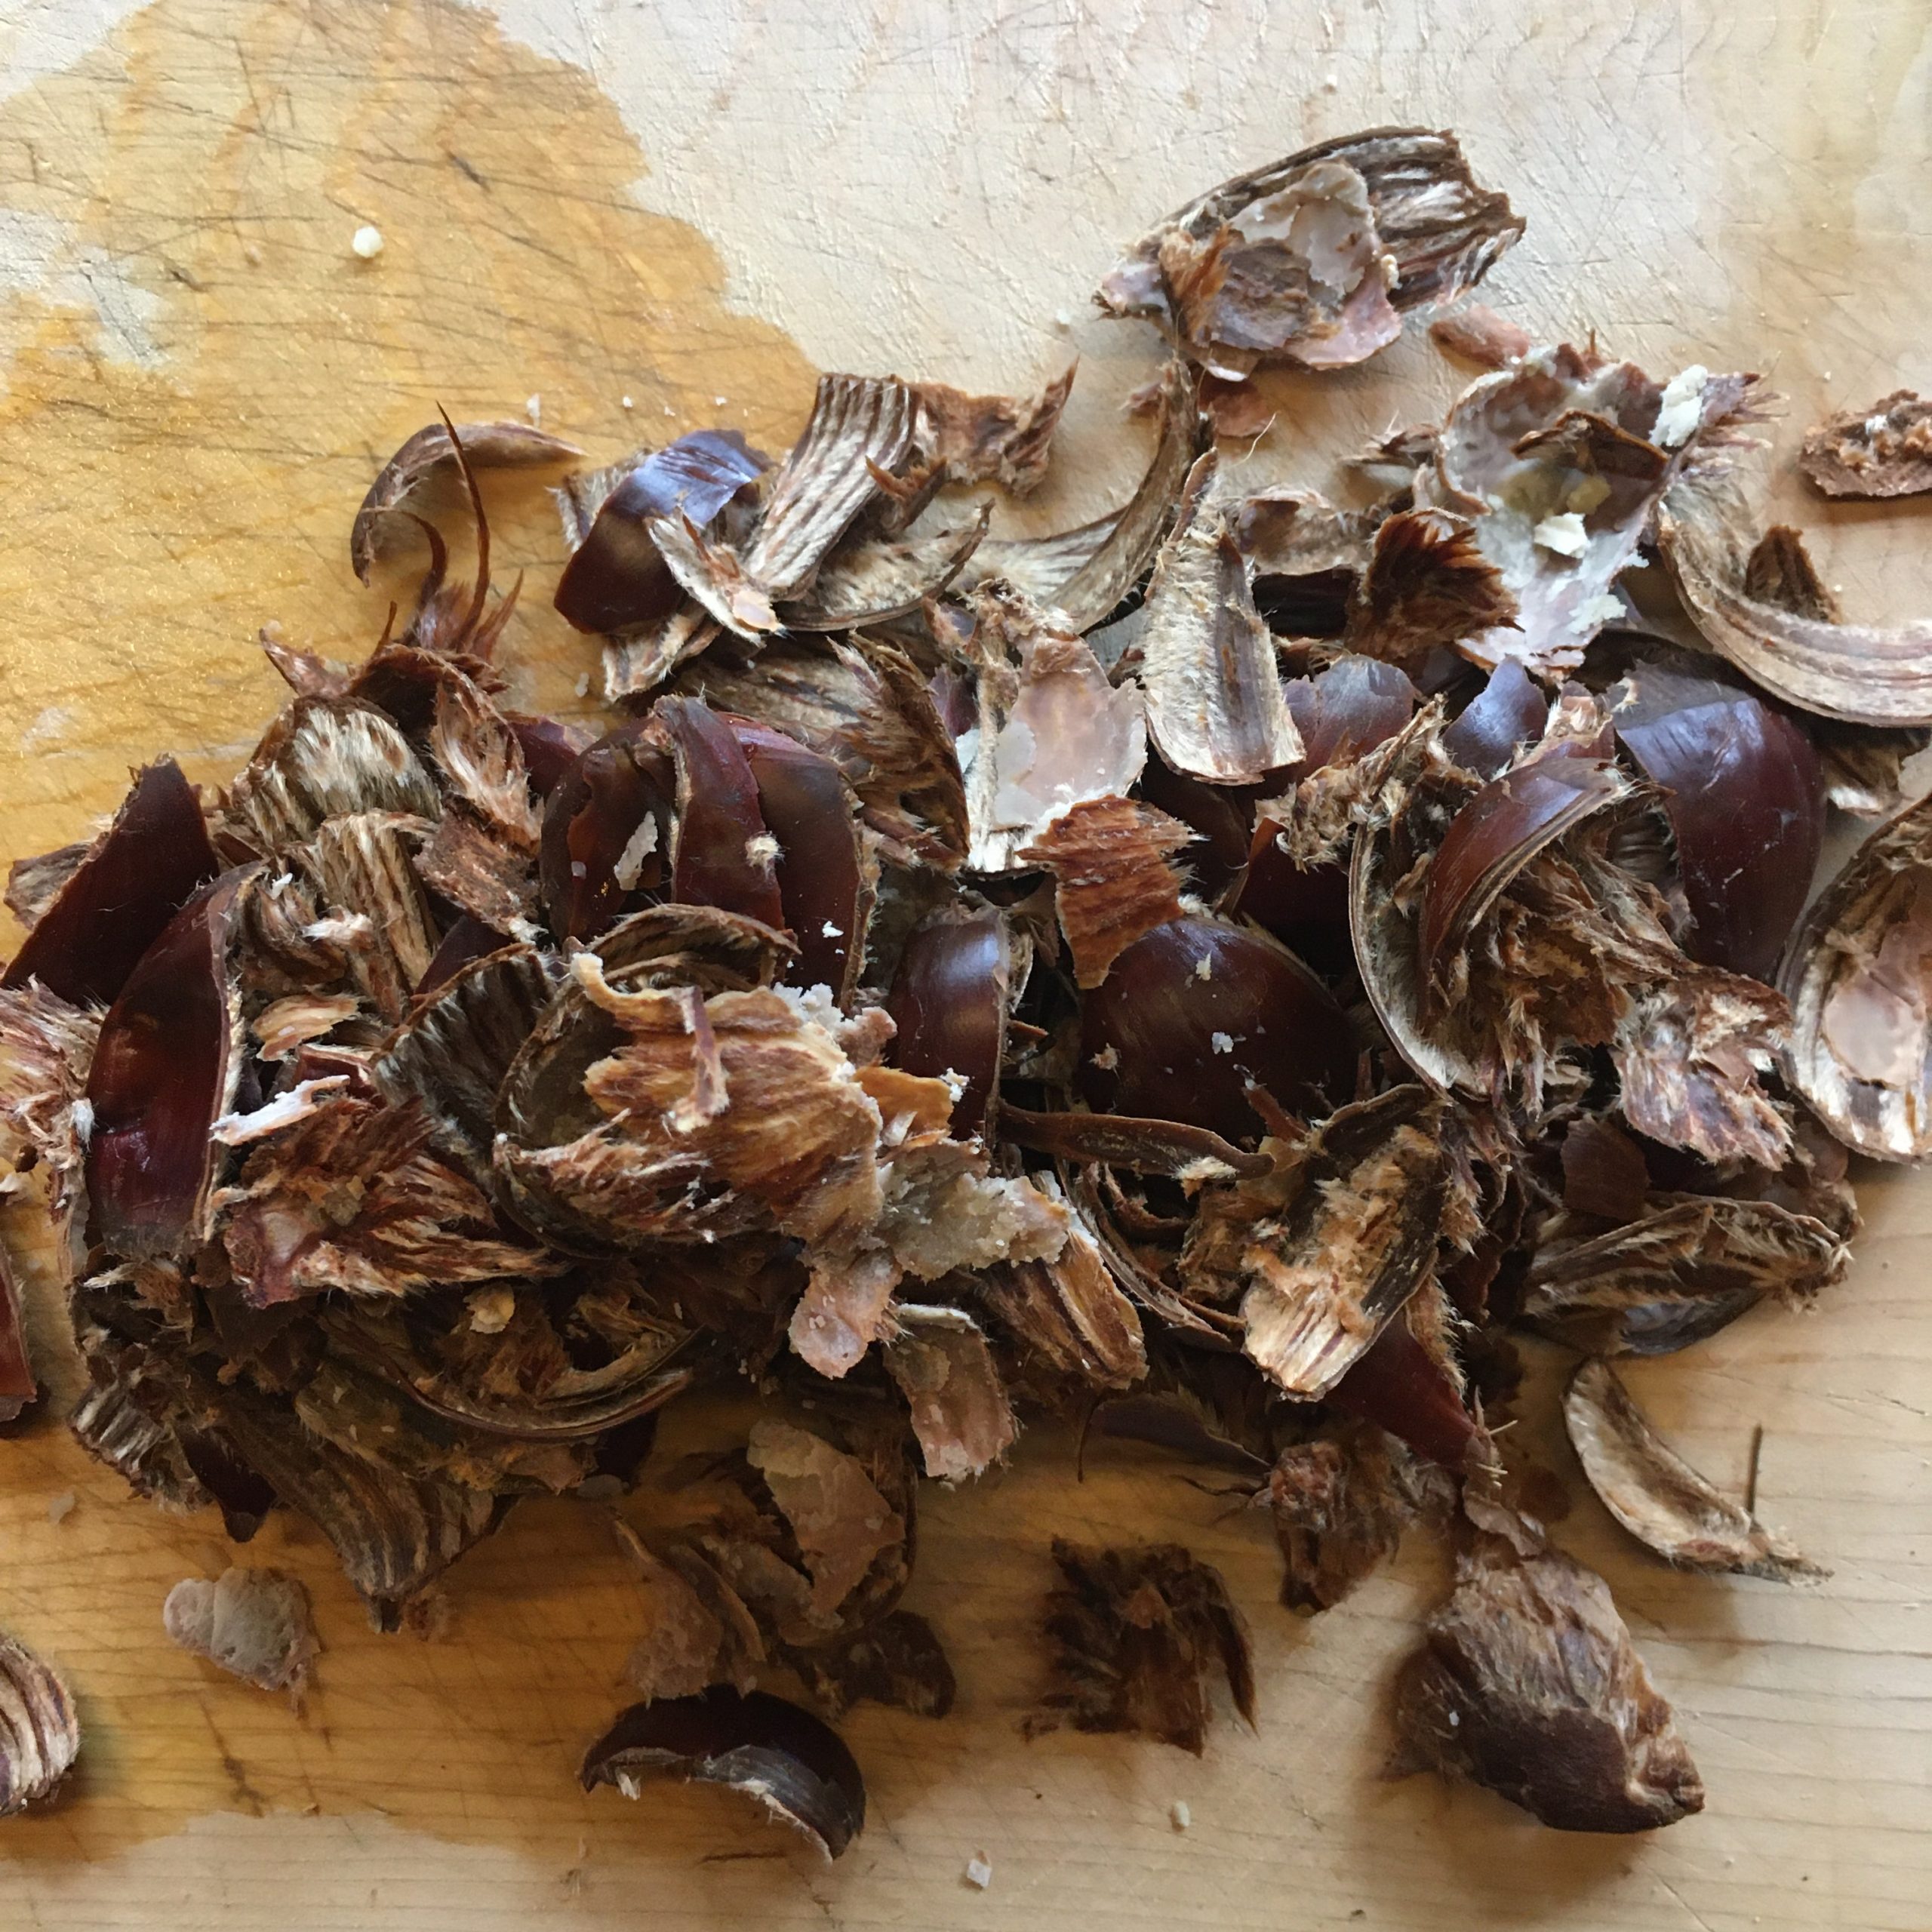
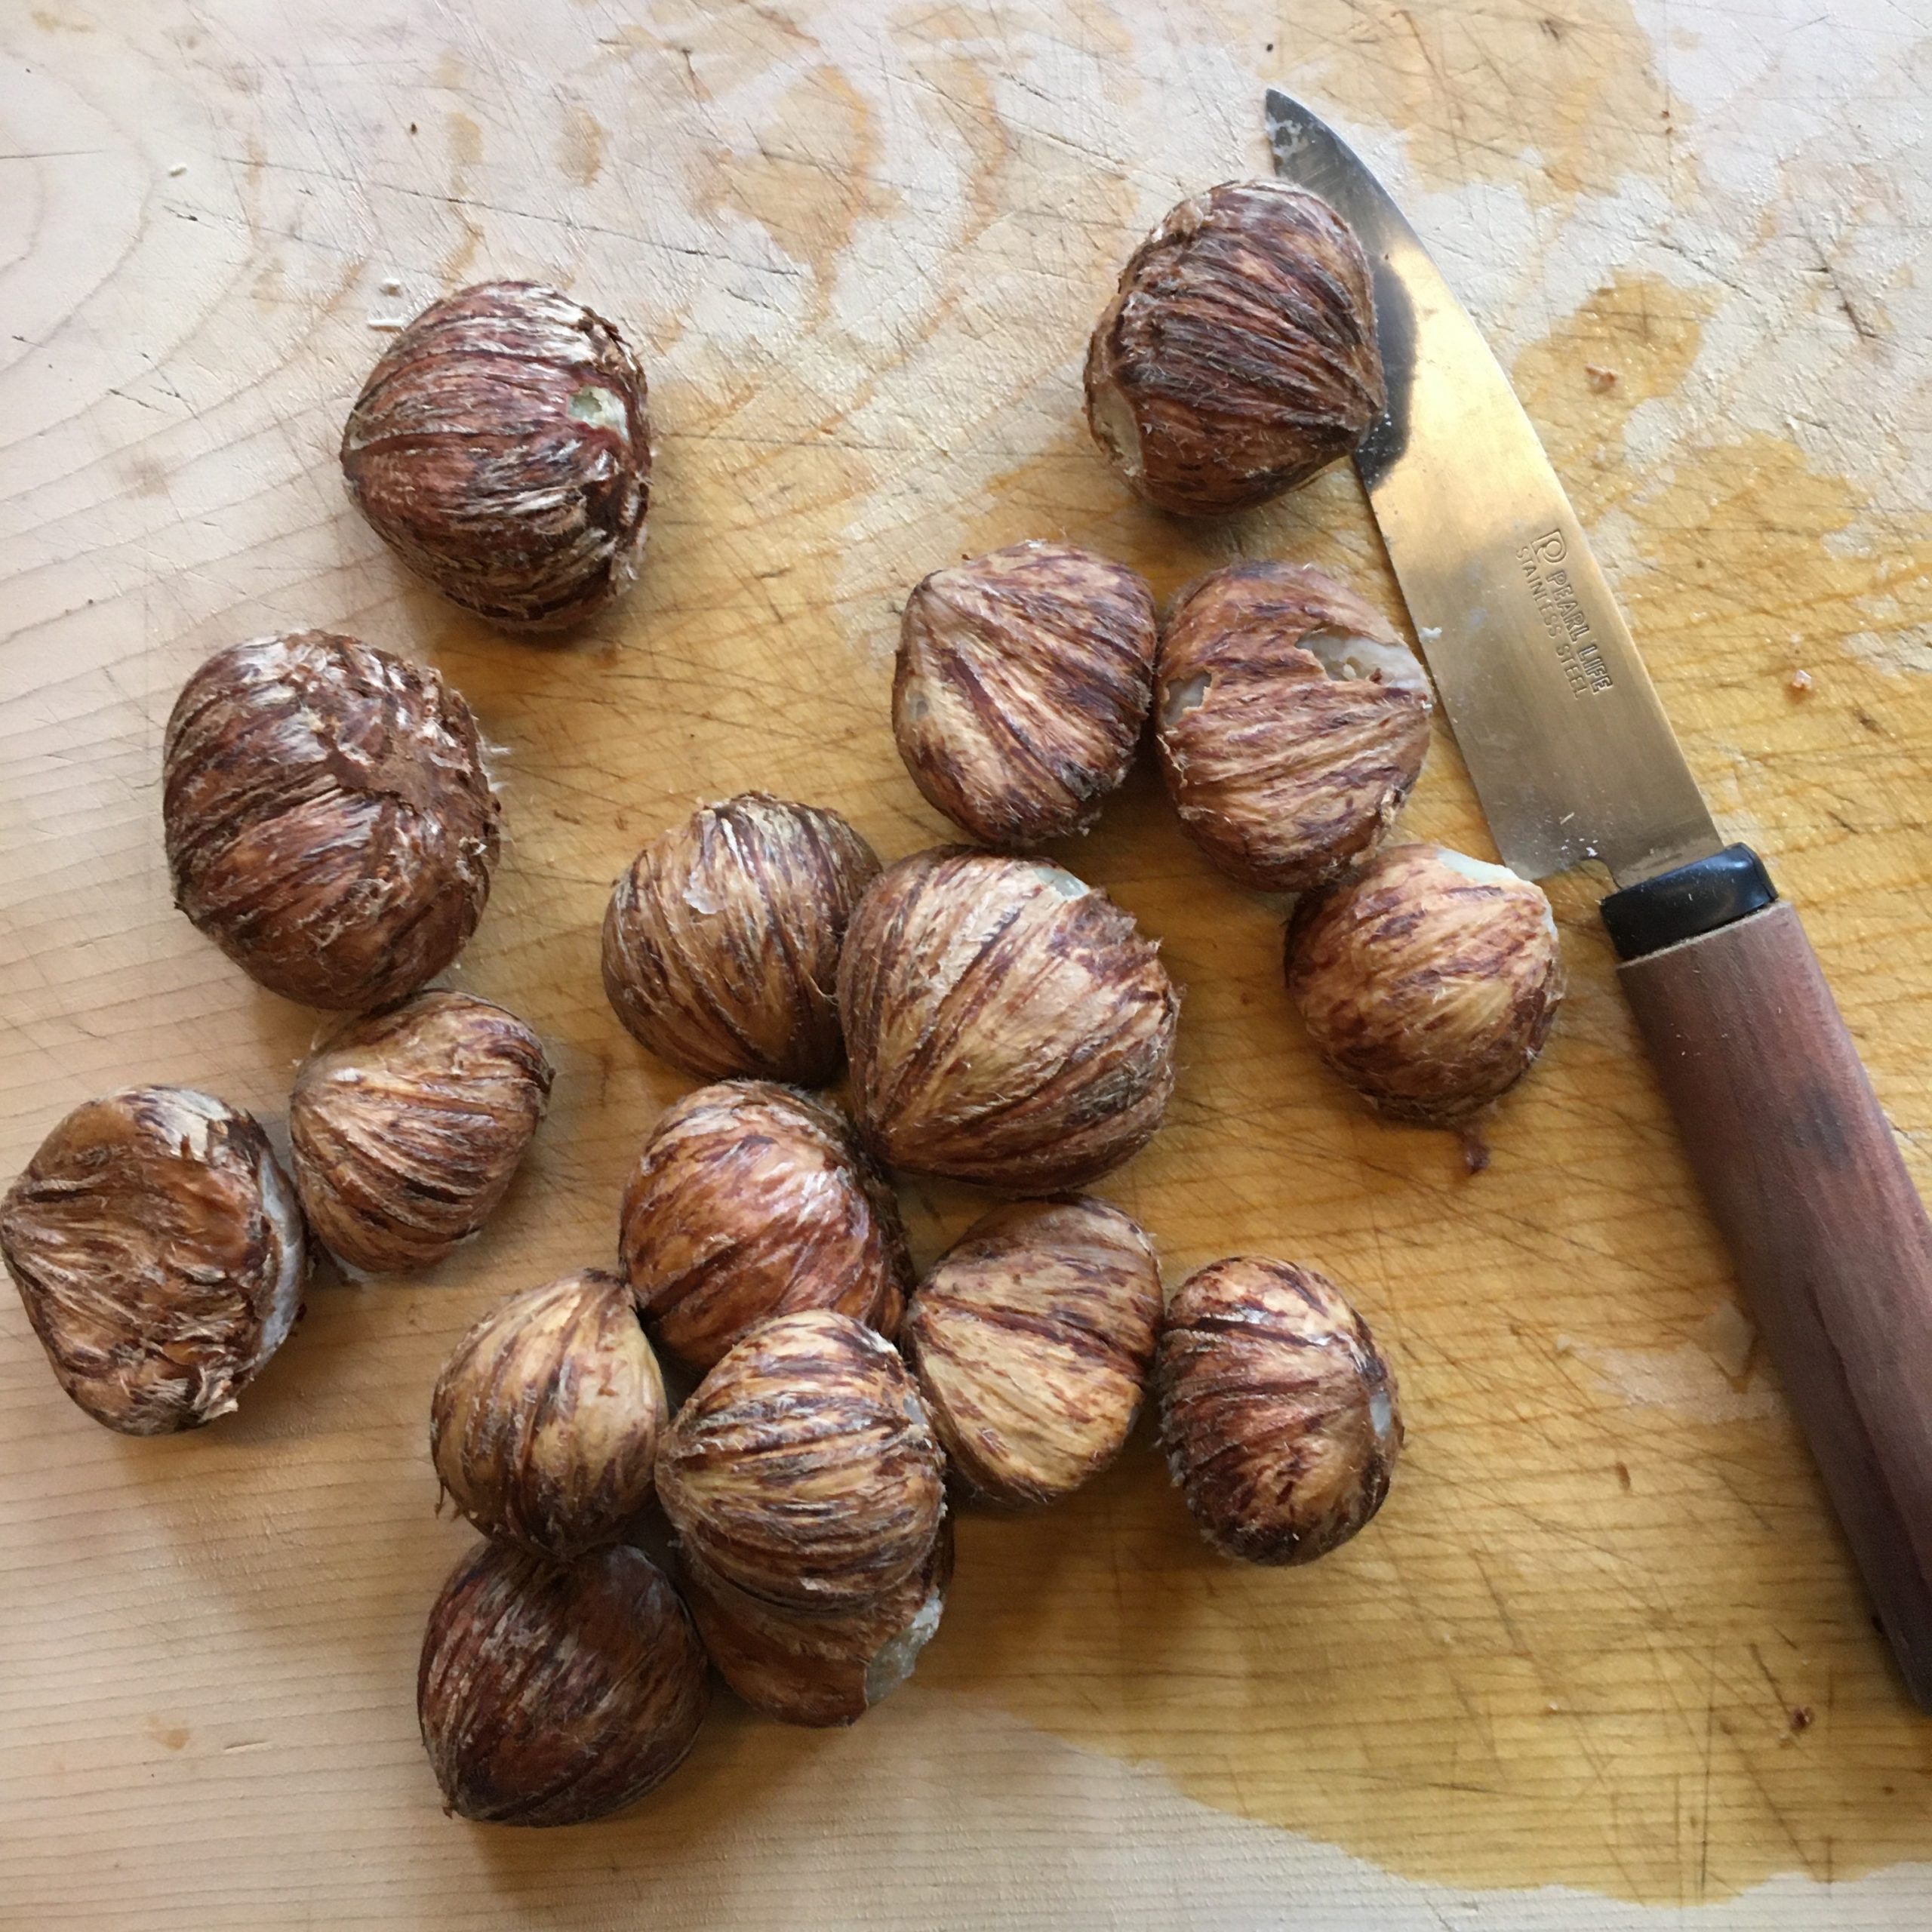
Start by preparing the chestnuts. In a pan put the chestnuts, cover generously with water and bring to a boil. Add a bit of salt if you have some. Bring to a boil and let cook at low heat for 50min. Let cool down. Then peel the chestnuts. You can do this step up to two days before actually.
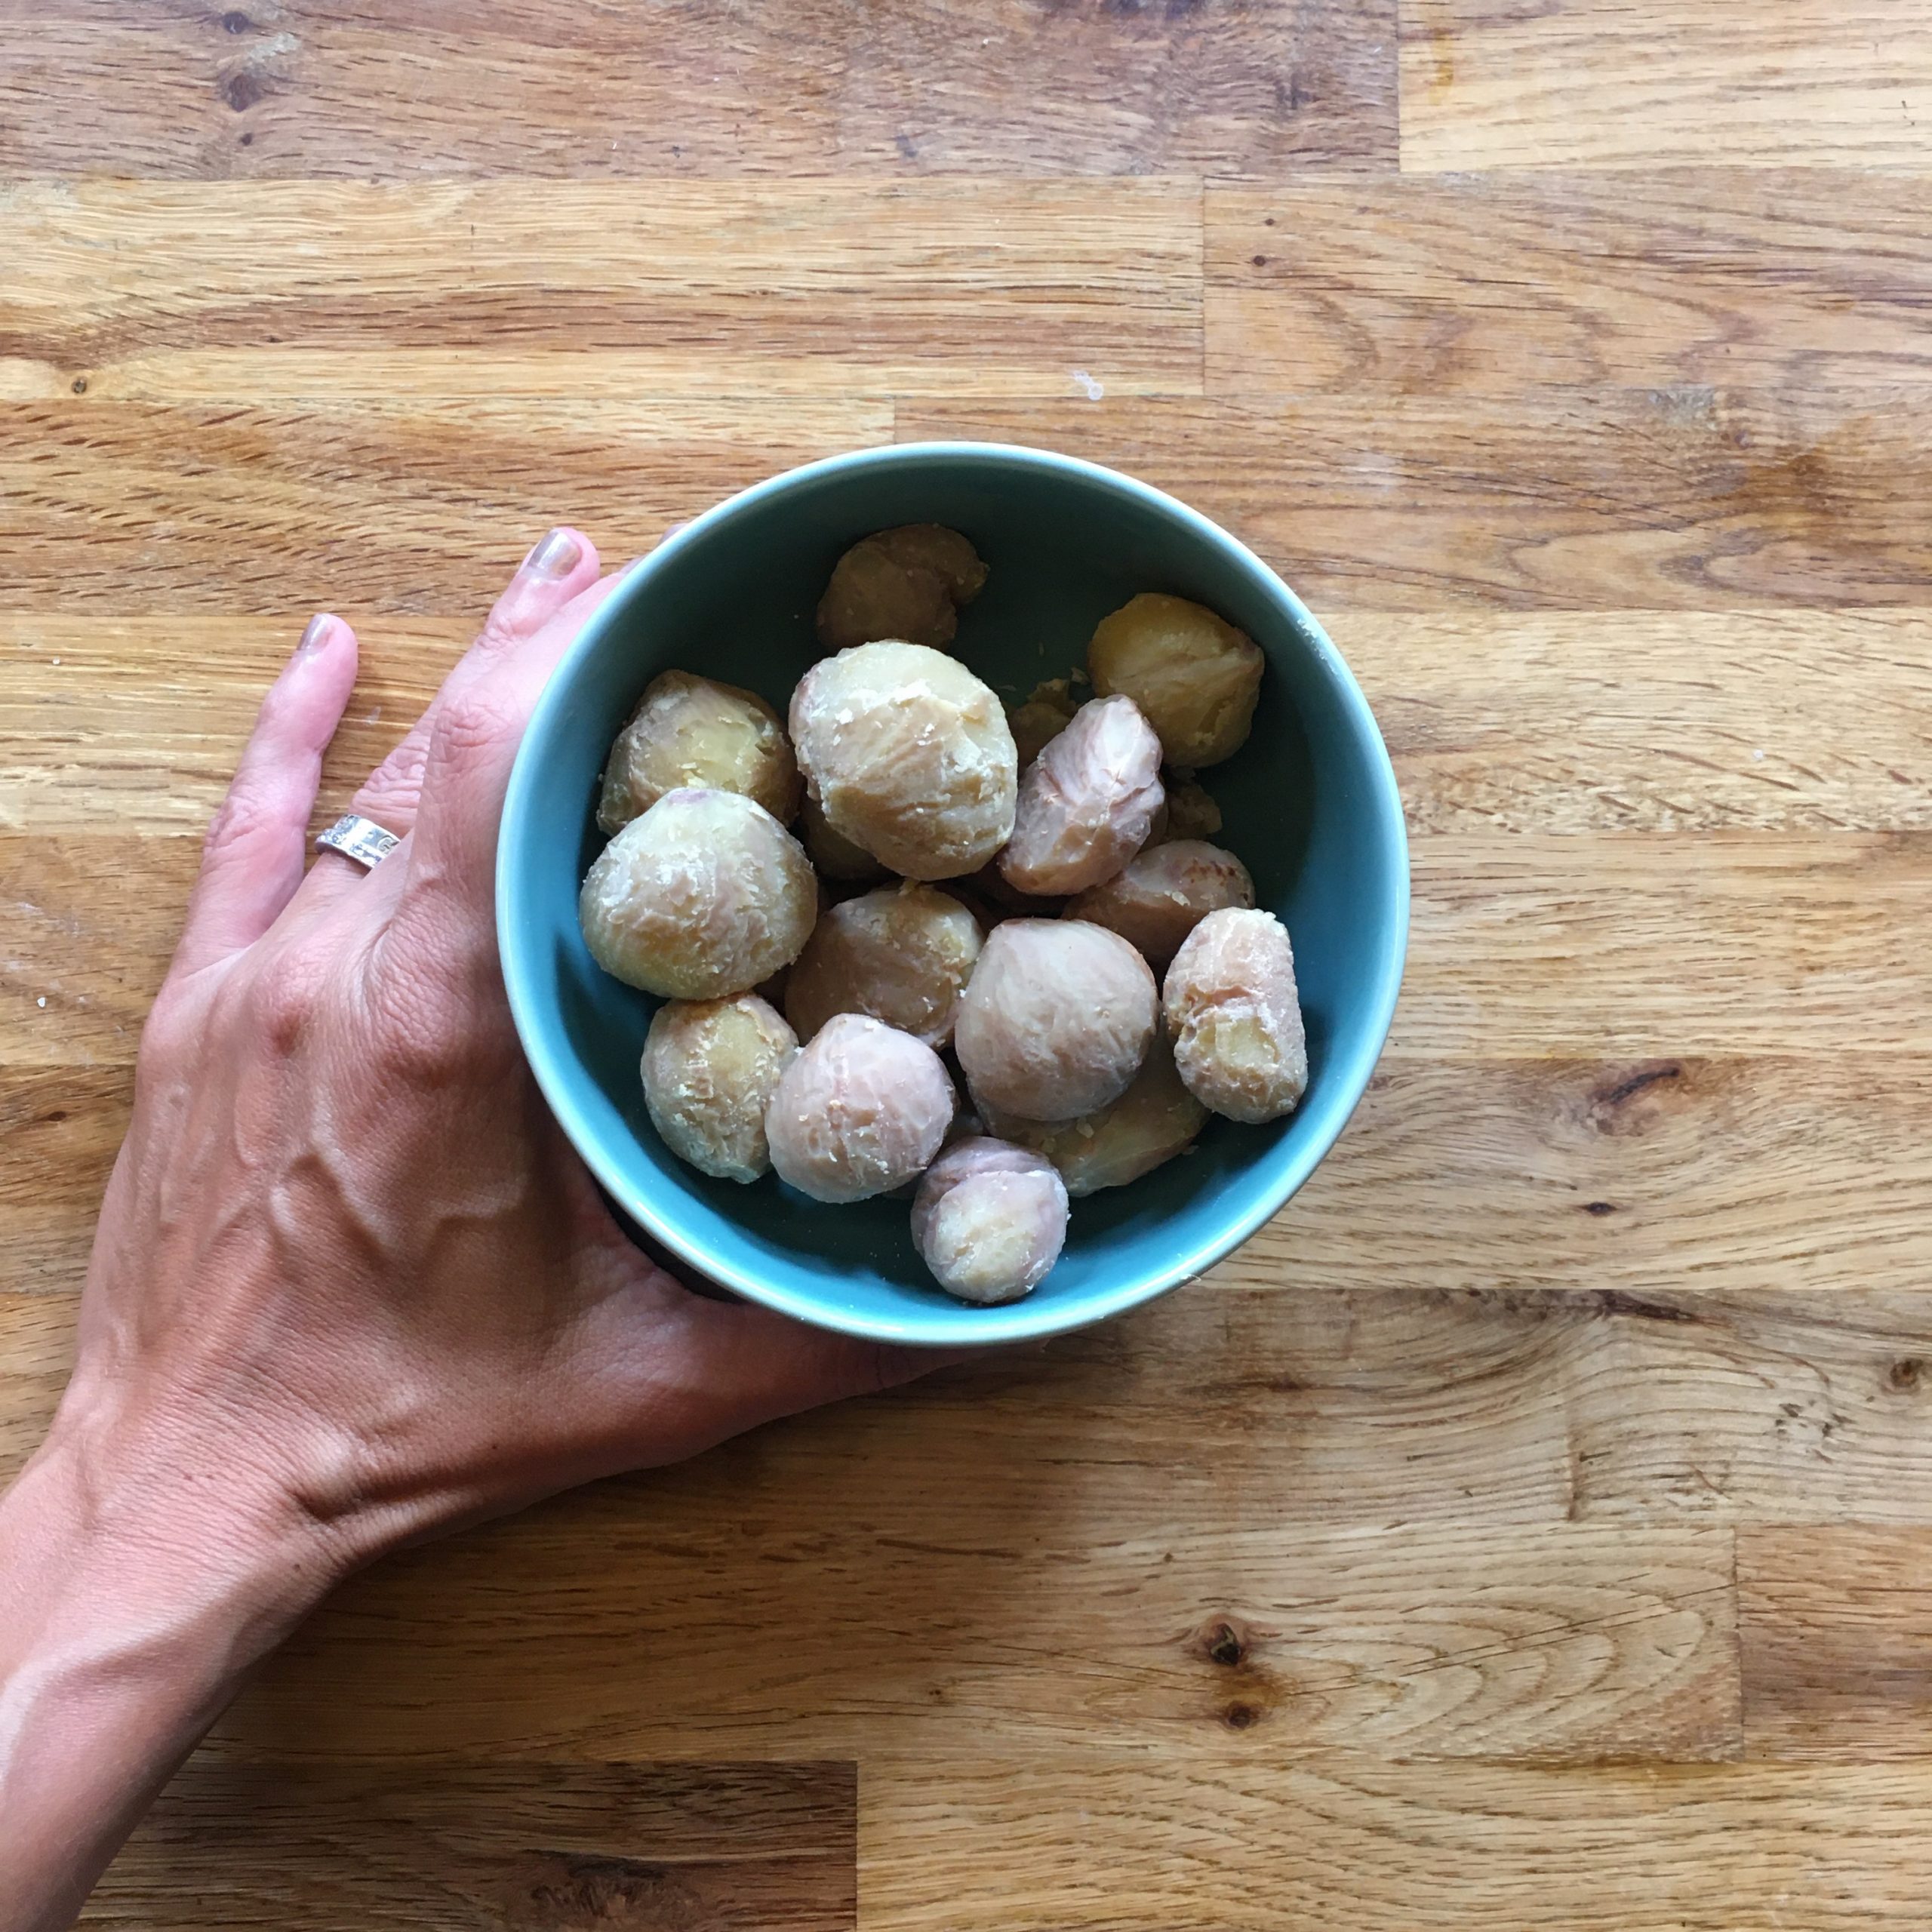
Once you have peeled the chestnuts, it’s time to prepare the rice, and it’s really simple. Use a rice cooker or a regular pan, or a cast iron cocotte… wash the two cups of rice, set the amount of water you would for cooking it normally. Add the chestnuts, it is good to have some whole and some crumbled. Add the soya sauce, and cook just as usual. Enjoy while hot, and it is even better re-heated the next day!
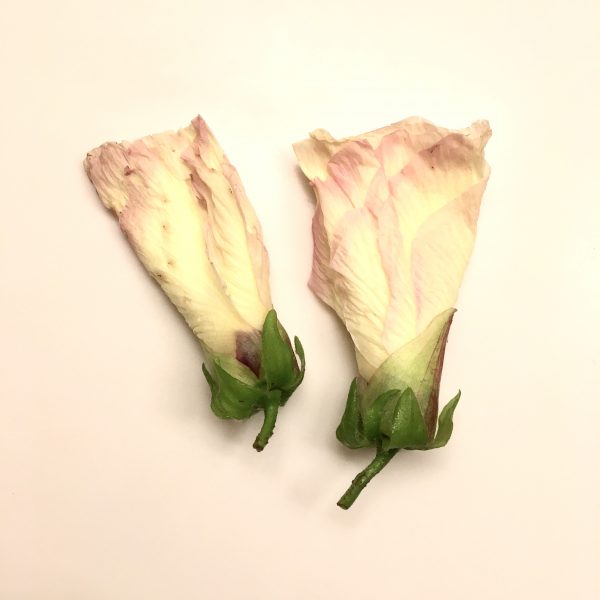
Do you know this flower named aibika or hana okra 花オクラ?
I didn’t until yesterday, when I found it at our local vegetables shop. First time ever I saw it, it’s grown locally, so I bought it. No idea how to prepare it nor how it would taste., but my IG feed was full of zucchini flowers earlier this summer, and more recently of pumpkin flowers, that the idea of having a chance to eat some flowers too was really too tempting!
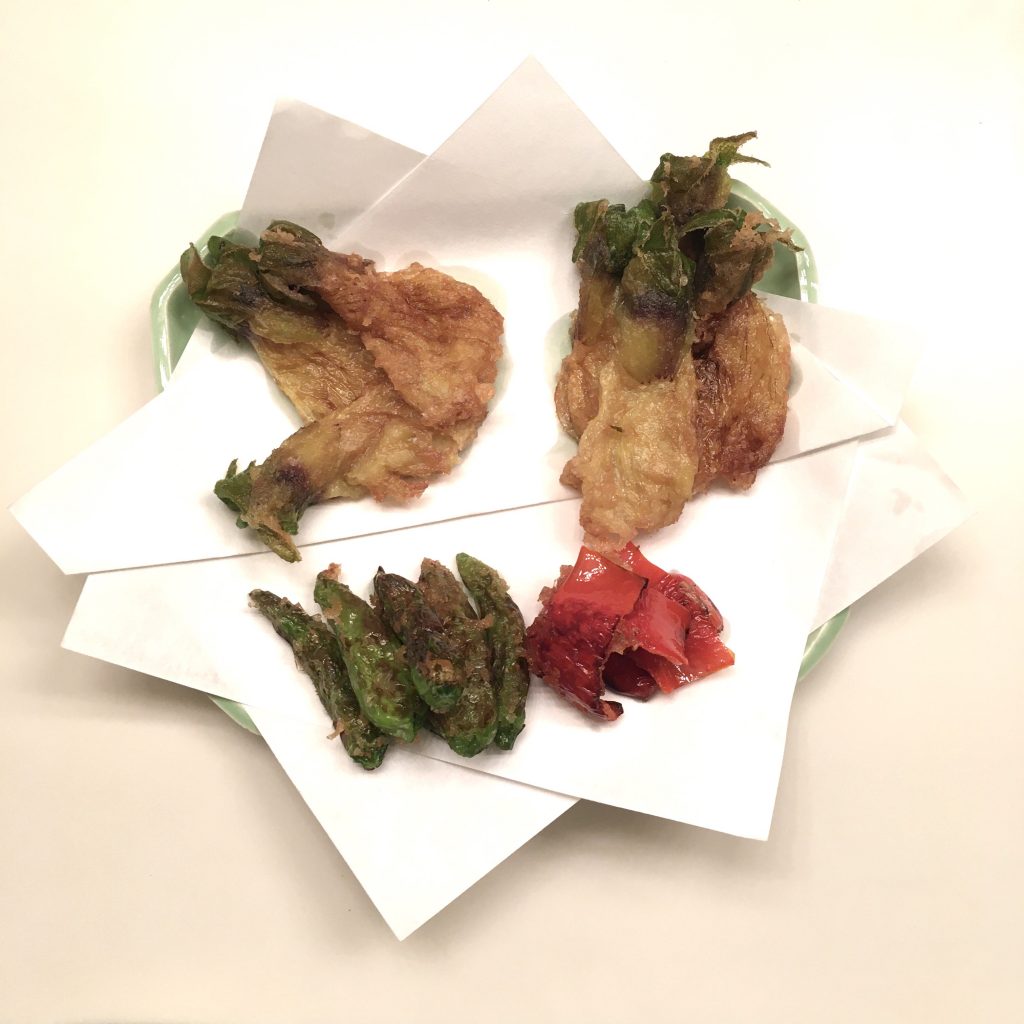
A quick reading of the most popular recipes on the Japanese cookpad website didn’t not tempt me, so I decided to go for something I barely do, but believe would be great, and a substitute for my mother’s zucchini flowers fritters: super light tempura. And it worked really fine. So if you see this pale yellow flowers at a farmer’s market (I doubt you can find them at a supermarket…) just get them.
I guess the name of hana okra or flower okra in direct translation, comes from the fact that they are, like okra, a bit slimy. So if you don’t like slimy food pass on that one.
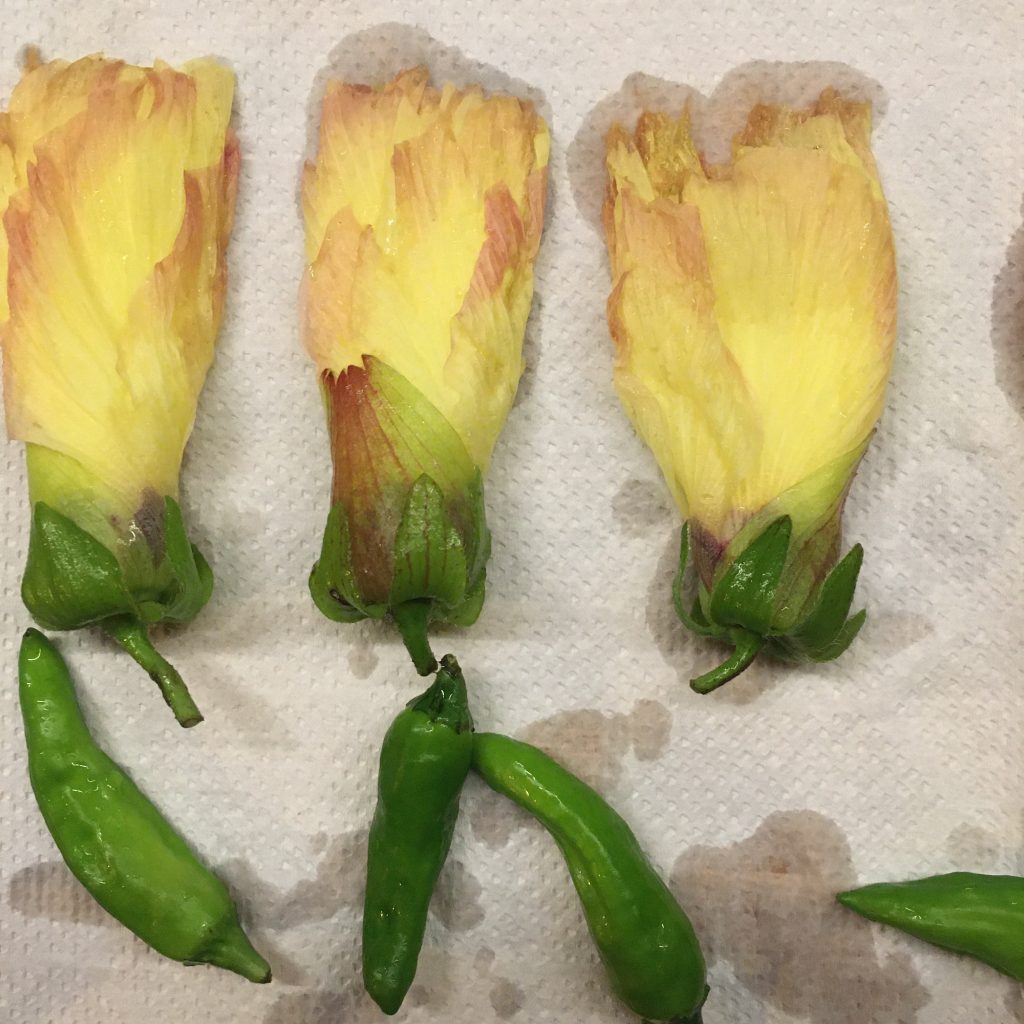
Aibiki tempura
A few flowers of aibiki, and some other vegetables if you want. I did shishito and red bell pepper
3tbs of flour
1cup of water
1/2 tsp of vinegar
A pinch of salt
Cooking oil
Wash and pat dry the vegetables.
In a frypan heat a bit of oil (I don’t deep fry, but if you do heat your oil). In a bowl, mix the flour, the water and the vinegar. Stir well. Dip in the vegetables and put in the pan right away. Cook a few minutes before flipping. Serve with a pinch of salt and eat immediately. That’s it!
The end of the rainy season coincides with the beginning of the true summer days. The cicadas start singing full blast, the dusks and the dawns vibrate with the beautiful and typical sounds of the かなかな蟬kanakanamushi (Tanna Japonensis), probably above all my favorite animal sound… the humidity goes slightly away and the heat climbs up to another level… it’s a short time of the year that lasts just a very few weeks, before the typhoons arrive. The heat brings some kind of slowness to our home, and some restlessness because all I think about is going swimming. But there is much to do too.
What do you think is the very first thing I do when the rainy season ends in Japan?
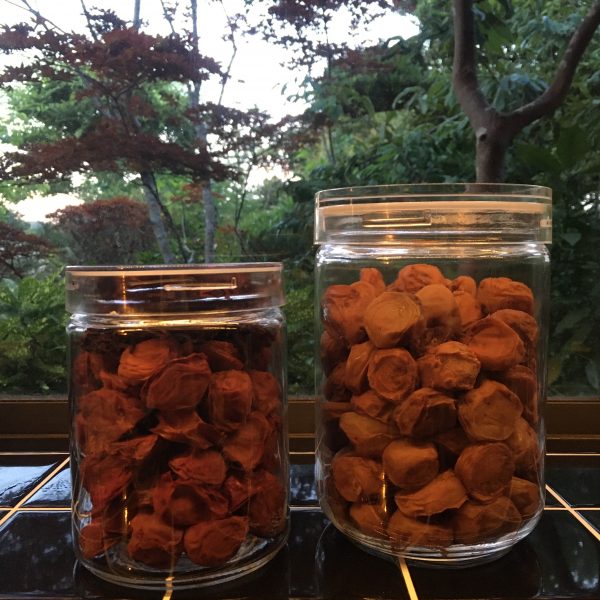
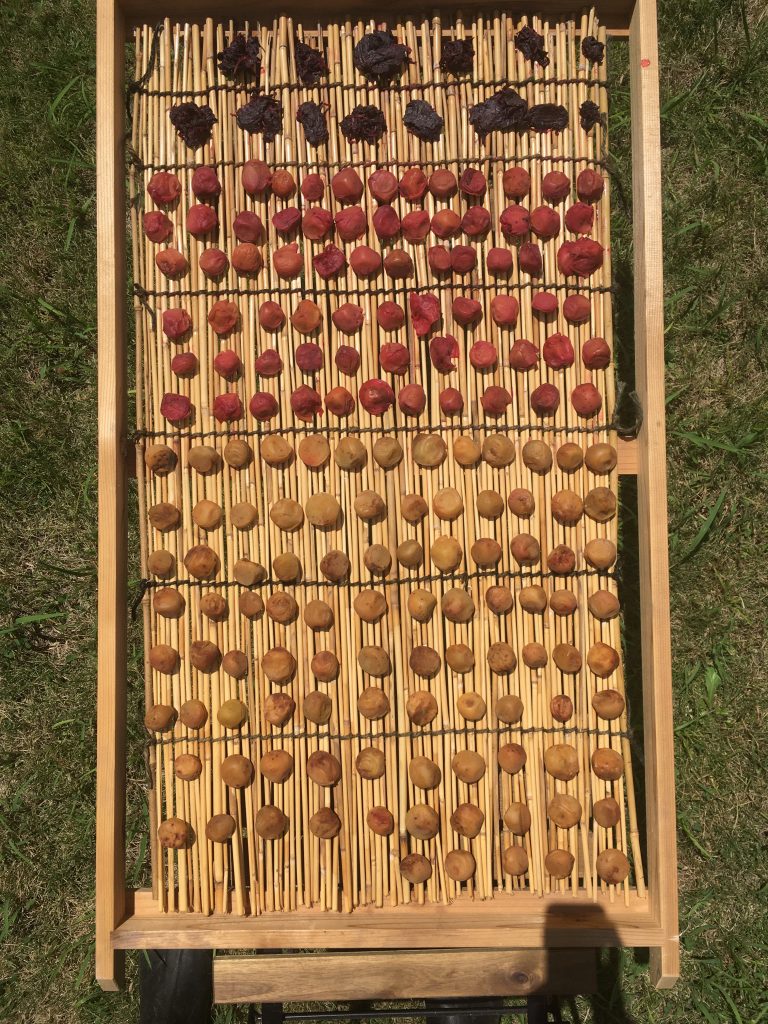
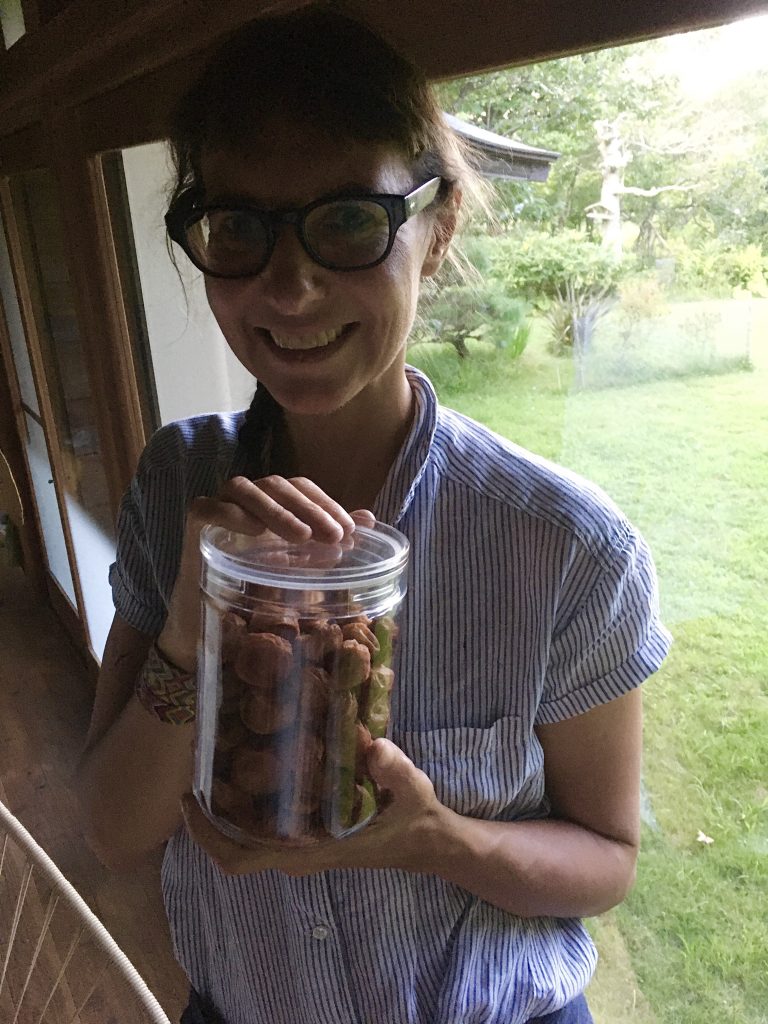
Well… it’s easy, it’s drying my umeboshi. Gently taking them out of the brine on a nice morning one by one and lining them in the sun. Turning them and doing it another day. I must say that I am getting better at picking plums and the worries of the first attempt are now all gone and I am more confident. This year for the first time I also added red shiso to some and I am quite please with the result.
So if you had pickled plums this year, it’s gonna be about time to dry them and enjoy them. Keep the brine for the summer energy drink. Add a bit to a large glass of water to pack on salt and minerals.
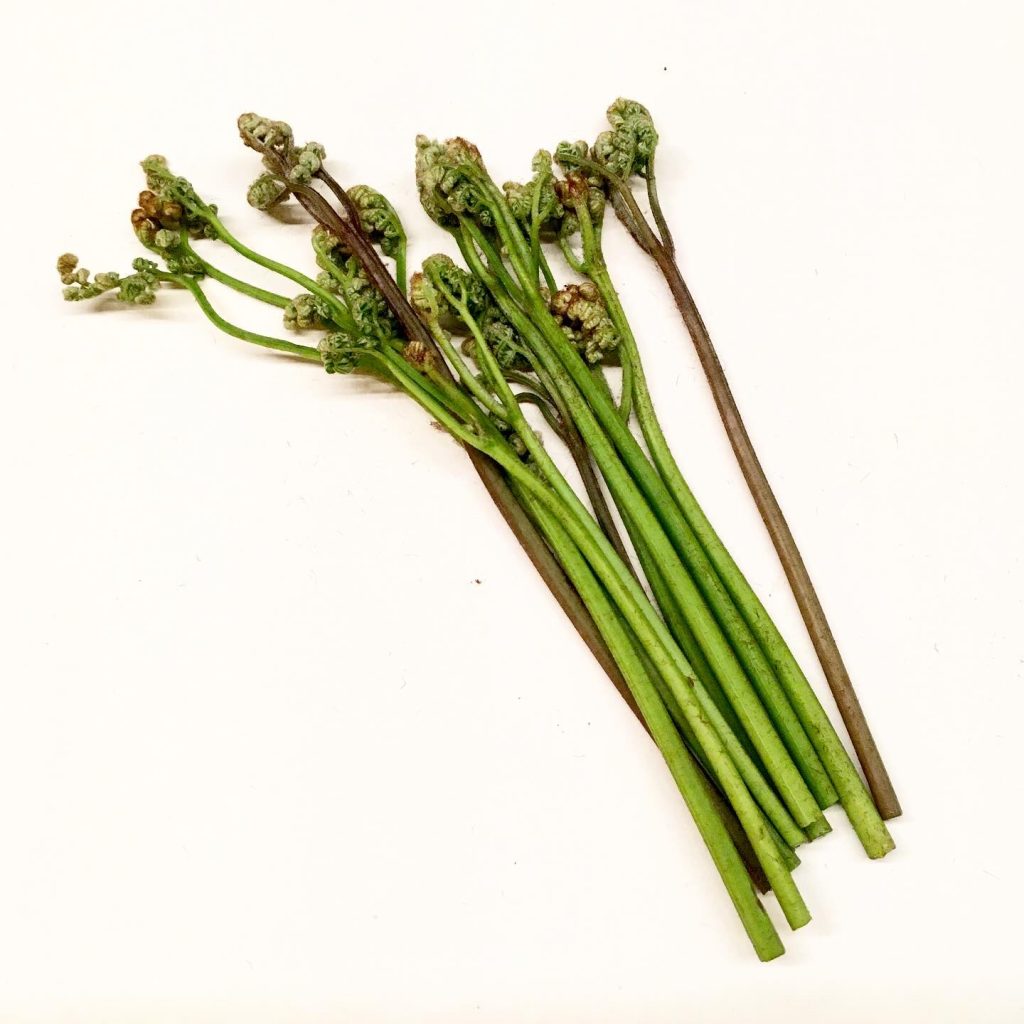
When we go with our friends in Tsunan to forage spring wild vegetables, we would for sure also pick some eagle fern – warabi – わらび 蕨. But because it takes a bit of time to prepare (I’ll come to it later) and we have so many other things to eat, we would usually leave without eating them. So, despite the fact that I knew how to prepare them, I couldn’t recall having eaten any fresh ones… and while we were picking bamboo shoots I was looking at fern and picked a few kogomi – こごみ as these are among my favorite sansai – 山菜… but then I grew uncomfortable with the idea of eating them as I have never picked any in Boso before and there are so many varieties… I was worried one may be poisonous… I realized I need to study (a bit) more. I know that it is impossible almost to find kogomi at the farmers market, so either none are locally good or found in tiny amounts that people keep them for themselves. On the other hand warabi can be found at the farmers market!! So I decided to try cooking some in place of kogomi.
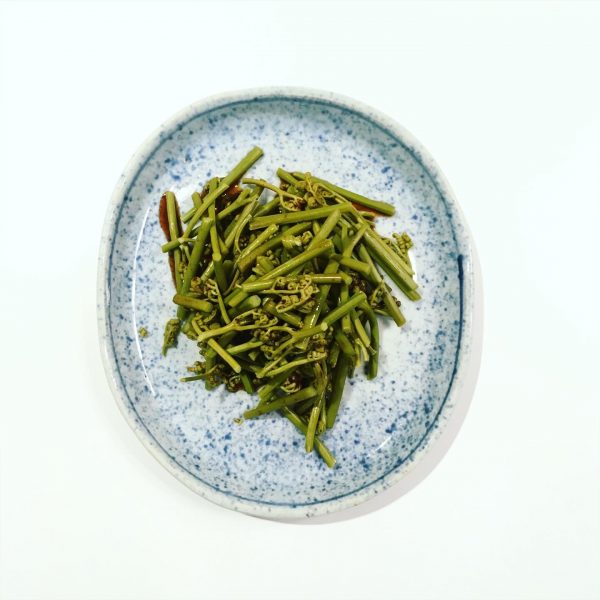
As it was my first cooking them I browsed a few cookbooks, and reminded myself of K. in the kitchen parboiling them while stirring them vigorously with chopsticks and then leaving them to rest overnight by the window. A quick reading on kogomi made me understand why this process was so important. It isn’t to remove the bitterness of warabi, it is to remove a toxin from it that is carcinogenic. So don’t try to eat warabi raw or simply cooked. The parboiling, the stirring and the overnight wait are paramount to removing the toxic component. That said and done, eating warabi is totally safe! As a first try I decided to go by the book. I simply prepared them in soya sauce. So here is my recipe, nothing fancy but deliciously simple as I live a recipe to be.
Warabi
A handful of warabi –
A tsp of baking soda
A tbs of soya sauce
Remove the bottom of the warabi, and wash them. In a pan boil sufficient water. Add the warabi and stir energetically. At this stage you can add a tsp of baking soda. Then keep at room temperature for the night. You can prepare them now.
The simplest is to drain the amount desired, cut in 3-4cm pieces, heat in a pan and add at the very end the soya sauce. It can be eaten as it or at room temperature. Enjoy!!