Eclair ⚡️

With this horrible rainy and cold Saturday there was nothing else to do than cook some sweets and drink hot tea. After browsing a few recipes of things I wanted to cook, the unanimous choice was chocolate eclairs! And here I am in my kitchen, preparing pate a chou and custard. Of course chocolate eclair is not just enough so I also prepared two other variations: macha and chai. Each was just perfectly delicious. So here is my recipe. Eclairs consist in three preparations: the pate a chou, the custard and the coating.

For the pate a chou:

10cl of water; 10cl of milk; 3 eggs; 70g of butter; 110g of flour; a bit of salt and a tea spoon of sugar. 

In a pan heat the milk and the water. Add the butter, the sugar and the salt. When the butter has melted add the flour all at once and stir well. Continue cooking and stirring until the dough is smooth and doesn’t stick. Cool down a bit and add one egg. Stir until the dough is smooth again. Add the second egg and do the same and then the third egg and repeat again.

Pre-heat your oven at 180 deg. Use a pipping bag to shape the eclairs. Remember they will double almost size so tiny is better. Cook for 25 to 30 minutes.  

For the custard: 

30g of flour; 50g of sugar; 2 egg yolks; 25cl of milk.

In a pan heat the milk. In a bowl mix the eggs with the sugat, add the flour all at once and mix well. Add half ofthe  milk and stir well. Add the mix to ghe rest of the milk in the pan and cook at low heat while stirring for 5min, or until it thickens. Add the flavoring of your choice: cacao powder (2 tbs); macha powder (1tsp); chai spices: cardamom, cinnamon, vanilla, nutmeg… up to your liking. I personally like it with a lot of cardamom.

Cut the eclairs from the previous step in halves and fill with the custard. 

For the coating: 

I didn’t use the usual butter cream but rather a simple sugar coating made with ice sugar, water and macha or cacao powder for the coloring.  Add water little by little to obtain a rather thick mix, and apply with a spoon.

Keep refrigerated. 

Spring in the plate!

It’s getting warmer, out the winter coats! And the spring vegetables are everywhere on the market shelves!  I couldn’t resist to preparing the first spring vegetables sautéed of the year. A classic in our house that can accompany fish, meat, tofu, eggs, or just be eaten like that. Choose the spring vegetables of your choice: new potatoes, asparagus, green peas, snap peas, new carrot today for me, but you can add new onion, green beans… a bit of olive oil in a pan and start to cook the potatoes, then the carrots, the green peas, finish the asparagus hardest part and later the heads and the snap peas. Add kosher salt and pepper and serve!

Spinach-chicken ravioli

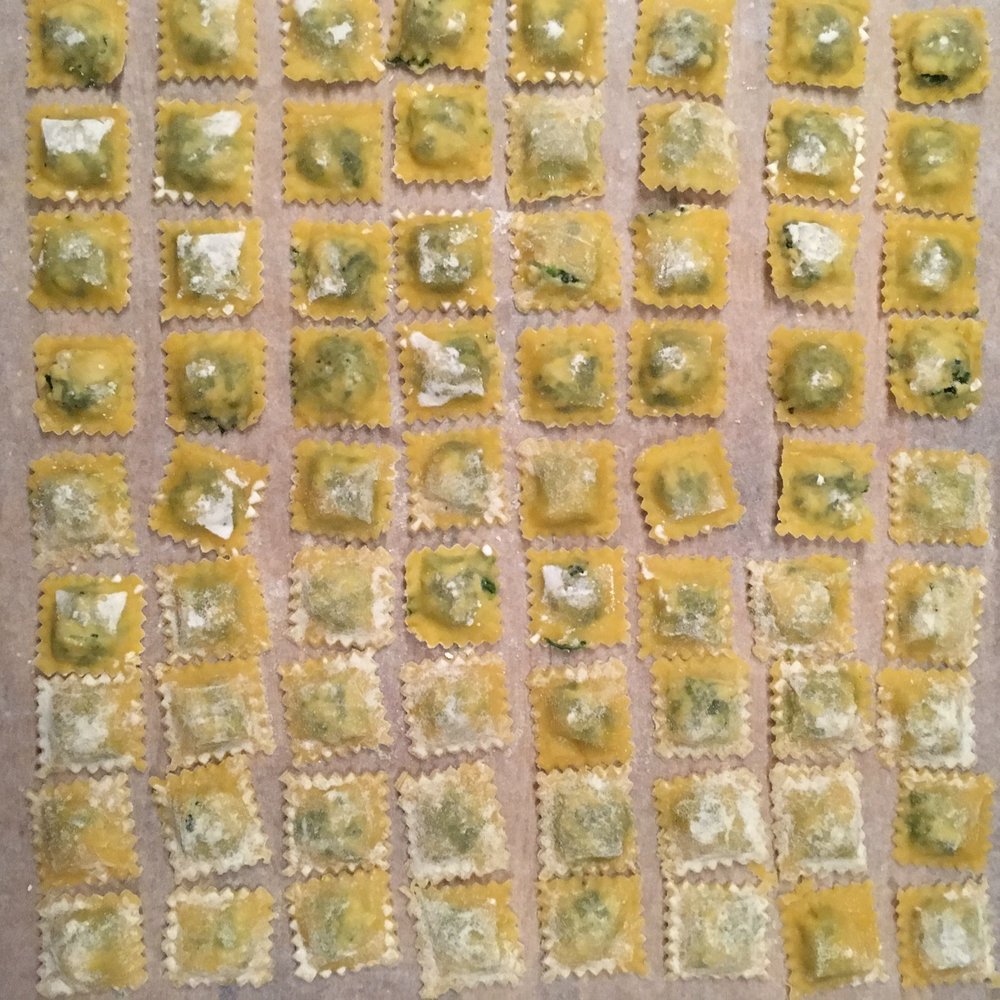
It is spring today and I am down with very strong pollen allergy, my head is spinning, my eyes are itching and I almost couldn’t move this morning. But I am talking at a public event and I hate to cancel my interventions, let people down. So A. has helped me take my things together, prepared breakfast, drove me to where I work today. Without him I’ll still be lying on the sofa. Now I’m getting ready. It’s going to be a tough afternoon but I’m gonna try! Well, while I wasn’t yet dying with pollen allergy I made some little ravioli. Same pasta asusual, with a filling of spinach and chicken. I wanted some cod or salmon but nothing that really attracted me at the supermarket so it ended being chicken. I cooked the chicken, the spinach and a tablespoon of cream cheese. Then filled the ravioli and served with olive oil. Super delicious!

Friday evening pasta

It’s late, we’re tired and the house is cold. A nice plate of colorful pasta or gnocchi is my favorite dish in that situation!! I had some snap peas, some cherry tomatoes and a bit of bacon left, together with olive oil and pepper, it made a great sauce for short pasta. I choose conchiglie, but orrechiete or penne would work good too as they would get soaked in the sauce and become little recipients which would  bring all the flavors and consistency at once in the mouth. Another simply delicious recipe. 

Shiitake and spinach quiche

This is the end of winter, but it is still chilly and though the spring greens are quite attractive, sometimes a good all winter quiche with spinach and shiitake is a perfect dinner. And because I find that a short movie is easier to understand the technique than long sentences I am trying again to make videos of the cooking process. Tell me how you like it. I’m craving to know your opinion to improve from your feedbacks! 

Spinach and shiitake quiche: 

For the quiche crust

– 160g of flour

– 20g of wheat bran

– a pinch of salt

– 1 egg

– 40g of butter

– a bit of water eventually  

In a bowl mix all the ingredients and knead until the dough is soft. Add water or a bit of flour to adjust the hydration level. In a floured top roll the dough to the size of your pie dish. 

For the filling

– 3 eggs

– 20cl of milk

– spinach to your liking 

– shiitake to your liking

– salt, pepper

Wash and blanche the spinach. In a bowl beat the egg, the milk and yhe salt and pepper. Set in the dough. Wash and slice the shiitake. Add the spinach and shiitake.

Bake at 170deg for 30min (the cooking time depends on the depth of the filling) or until golden.

Have a nice week!!!! 

Warm soup for cold day

Since I was in France in November when it snowed in Tokyo, today was the first snow of the winter for me. It only snowed to be cold, wet but not white, but I don’t mind because we ste going to the mountains soon and we will have plenty if snow and white there! But damn, how this rainy-snowy weather plus A. Away make me feel cold and gloomy!!! I needed a warm colorful soup to cheer me up before my late night meeting. So after browsing the fridge I decided to prepare a warm soup with some fresh sunny taste. I used coconut oil, fresh ginger and a zest of lemon for the sunny and warm side, together with a red carrot and two leeks for the winter side. And because I’m busy running here and there, I added some green lentil. That’s it! So simple to cook. In a large heated pan I put 1/2tsp of coconut oil,agg the leek cut in small sticks, then add the carrots cut in small sticks too. Then 2 large zest of lemon, and a piece of ginger peele and cut in small pieces. When the water comes to a boil I add 2 small handfuls of green lentils, a pinch of salt. Cook for 10min (the lentils must not be over cooked and too soft, it’s better if they are slightly undercooked). Serve and eat rigt away!!!

Leek quiche with brown rice piecrust

What to do with a handful of cooked brown rice? Not enough to serve it alone, but too much to throw it away. What to do with a bunch of leeks? Well, it’s very simple, just make a quiche with brown rice in the piecrust, and leek as topping. The brown rice in the piecrust brings in some very crusty texture which goes very well with softness of the leeks. From the nutritive point of view, the brown rice also brings in a lot of fibers and proteins. The perfect tasty-healthy-yummy dinner for another evening without A..

Brown rice piecrust quiche:

– 1/2 cup of cooked brown rice, optimally leftovers  

– 2/3 cup of flour of your choice  

– 2tbs of olive oil

– salt, pepper 

– a bit of water

In a bowl, mix the flour, the olive oil, the salt and pepper and a bit of water . Start kneading and then add brown rice. Continue to knead an add if necessary a bit of water or a bit of flour in order to obtain the right texture for the dough, which is neither too dry neither too wet. Set the dough with your hands in a greased  pie dish. No you’re ready and you can put anything you want in the quiche. In my case, I used simply leeks that I steamed before hand, with 2 beaten eggs, salt and pepper.  And then in a preheated oven at 180° I baked a quiche for 20 minutes or until golden.

Even when A. is away on business trip, I continue to cook just for myself. I can’t help continue cooking new stuff. I actually take it as a good opportunity to try new recipes because the only person I can disappoint myself.

Chinese cabbage pickles

Earlier in Autumn you may have seen some recipes with pickled Chinese cabbage that my nice old neighbor gave me. She also promised at that time to teach me how to make some and last Sunday she came suddenly home with all (the four) ingredients necessary to make this delicious pickled cabbage. And we prepared it together. I like her way of cooking very much because it is very intuitive like mine. No need of a scale or precise measurements, just feeling. So my cabbage is now on it’s second day being pressed and I can’t wait to try it tonight!

Mrs K. pickled Chinese cabbage: 

– one Chinese cabbage

– 1/2 cup of salt

– 1/4 of yuzu zest or yuzu peel cut thinely

– 1/2 red pepper (togarashi – 唐辛子) cut thinely

You also need a large tupperware box or dish where the whole cabbage can fit, and a lid to put pressure on it (ideal a cutting bord that fits in the tupperware and a stone) 

The process takes 3 days so don’t expect to it right away!!! 

Wash and dry the cabbage, then cut it in 6 or 8 depending on its size, along the long side. Wash the tupperware and dry it. In a bowl mix the salt with the yuzu peels and the red pepper. Throw some of the sslt mic in the bottom of the tupperware, then lay your cabbage pieces in one row with the outer leaves towards the bottom. All in one single layer. Add some more salt mix a bit everywhere insisting more at the root if the leaves where it’s white and hard. Then top with your cutting board and apply weight on it. After 24h water would have come out. Then flip the cabbage, outer leaves up, and apply some more pressure for another 24-36h. Be careful that the water may overflow! Remove some if it might. It’s impressive how much water can come out! After the 2nd night and during the 3rd day you can start to eat your cabbage. Rinse under water and dry it in cooking paper before serving. Delicious with rice, rice porridge, or pasta soup.

Curry-quinoa

Here is again a recipe based on quinoa. Because it cooks rather quickly, quinoa is always a good option when running short of time and a good alternative to rice and pasta. Since I discovered this quinoa soup recipe last year in my vegetarian cookbook I have found new ideas to use quinoa rather than simply boiling it. I also find that it goes very very well with lotus roots. This time I prepared it in a spicy version. Simple, warm and tasty.

Vegan curry-quinoa: 

– 100g of quinoa (adjust depending on the size of your portions, mine are usually not big)

– 1 large lotus root or 2 or 3 small ones

– 1 large sato imo or if not available 1 potato

– 1 large carrot

– 2 tomatoes

– 1tbs of curry powder

– a pinch of nutmeg

– a pinch of cardamom

– a pinch of salt and pepper

optional: fresh lemon and fresh ginger

In a large pan set the quinoa, cover with water with about 1cm more water. Start cooking. Peel the carrot, the lotus root, the sato imo, cut in the shape/size you like and add to the quinoa. Add salt. Add the spices and the fresh ginger. Then add the tomatoes. By then the water should have almost disappeared. Check with a tooth pick for the sato imo (or potato) if cooked. Serve immediately with the juice of the lemon. Have a beautiful week!

Proudly powered by WordPress | Theme: Baskerville 2 by Anders Noren.

Up ↑

Verified by MonsterInsights