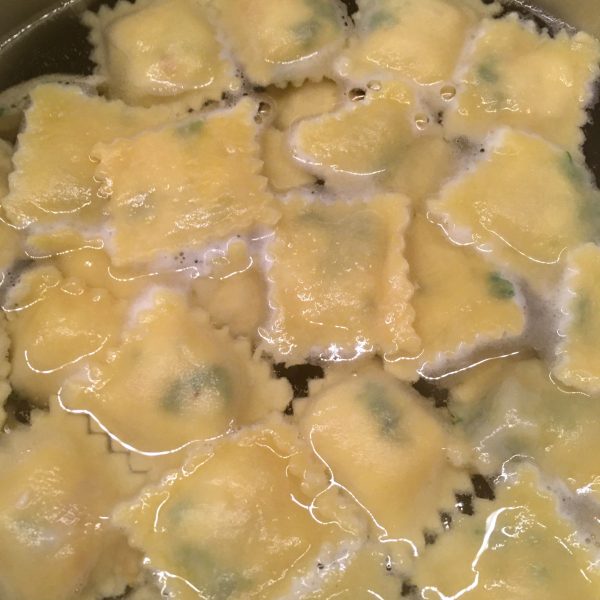
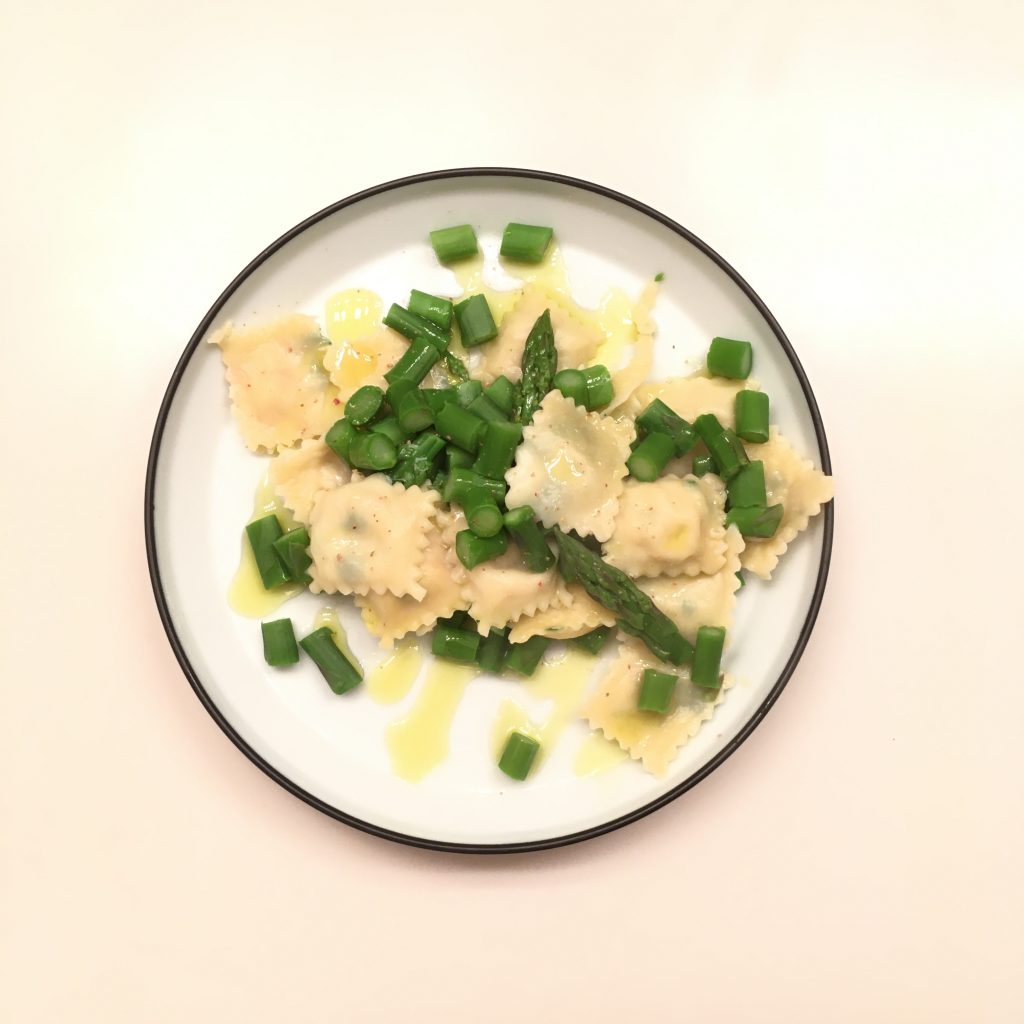
Ravioli… oh! It’s been really a while I didn’t make ravioli… it was high time to fix that… but with all we got from the local shops I wasn’t sure about what use for s filling: korinki and cream cheese, asparagus, eggplant, or flounder… after a certain thinking I had in mind flounder in a sort of bouillon and served with rouille… I was thinking of my own special way of making bouillabaisse… but then something came up at work, upset me and I was working instead of cooking… the dough was ready, the flounder grilled, but neither the bouillon nor rouille were to be done anytime soon… and the clock was ticking and A. was hungry… and past 21:00 I had to go back to the kitchen. Except that now it was too late for a fancy dish… So I ran in the kitchen garden, chopped some fresh parsley, add it to the fish and decided that would be it. Rolled the ravioli dough, filled them in tiny size, and while I was poaching them I felt it was missing something, so I added some asparagus, a fragrant olive oil and that was it.
And you know what: flounder x parsley was a killer filling and I will do again!!! A creamy sauce could have worked fine as well I reckon…
I call summer vegetables the ones I have grown up with: tomatoes, zucchini, eggplants, melons… while here they are for most of them early summer vegetables as they are not endemic. For instance the zucchini season is at its peak now and will end very soon normally. Except that this year the rainy season is rather dry so may be we will have zucchini for longer… that would be good!!! Maybe I won’t have to struggle finding zucchini in the middle of summer to make a good pesto soup!!!
Anyway, at the moment I enjoy cooking them in various ways as long as I can find them. I cook them with my “traditional” or classic recipes but I am also investigating new ways of cooking them. I found that zucchini and green beans go very well together and I came up with a few new nice recipes, super simple and easy to make as I am quite busy these days with several projects on the run… Let me share two recipes here today: a simple savory tart and a vegetable curry-rice. I hope you’ll like them!
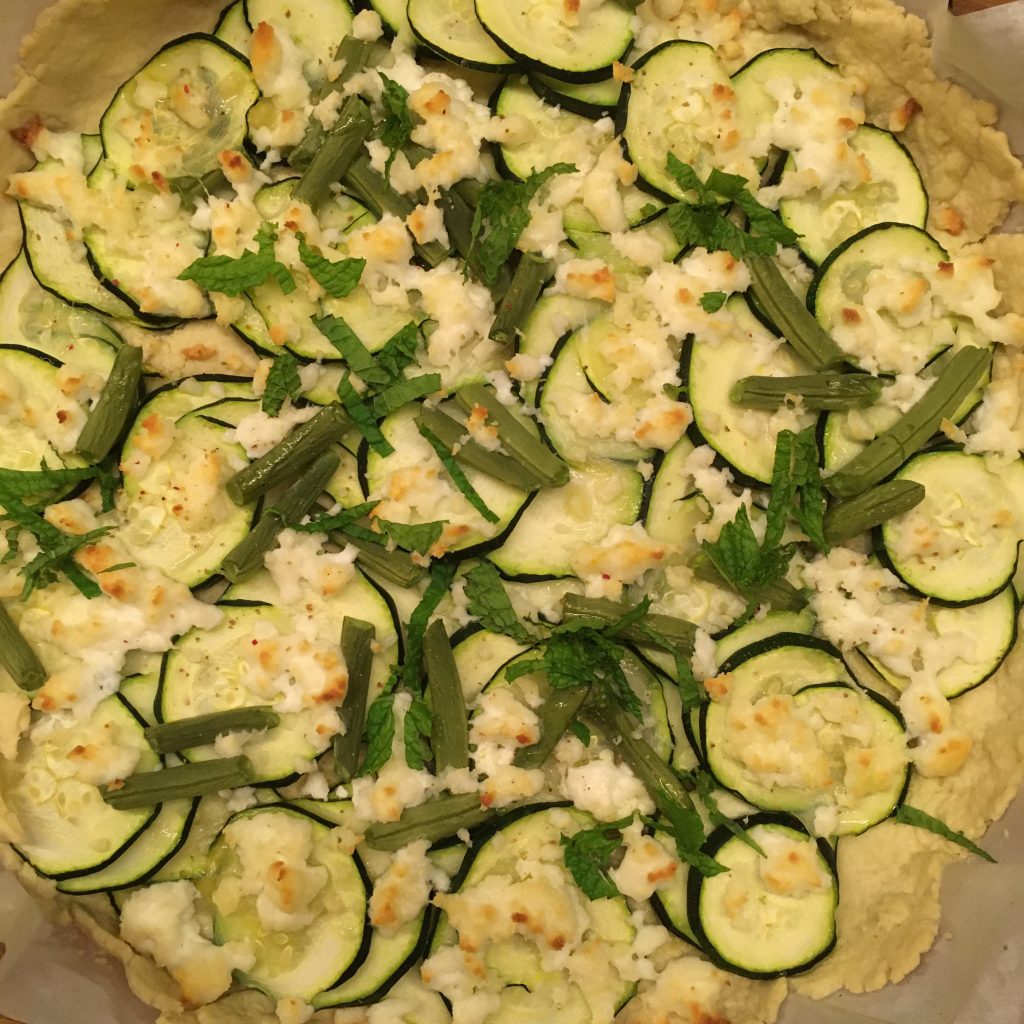
Savory tart
For the pie crust: 150g of flour, a pinch of salt, 3tbs of olive oil, water
2-3 zucchini depending of the size
A handful of green beans
150g of ricotta or cottage cheese
Fresh basil
Prepare the dough as usual, and roll it for your pie dish.
Wash the vegetables. Slice thinly the zucchini (with a mandolin if you have one) and set on the dough. Cut the green beans to 2-3cm long pieces and add on top. Crumble the ricotta or the cottage cheese, chop the basil and sprinkle on top. Bake 40min at 180deg or until golden. Enjoy hot or cold.
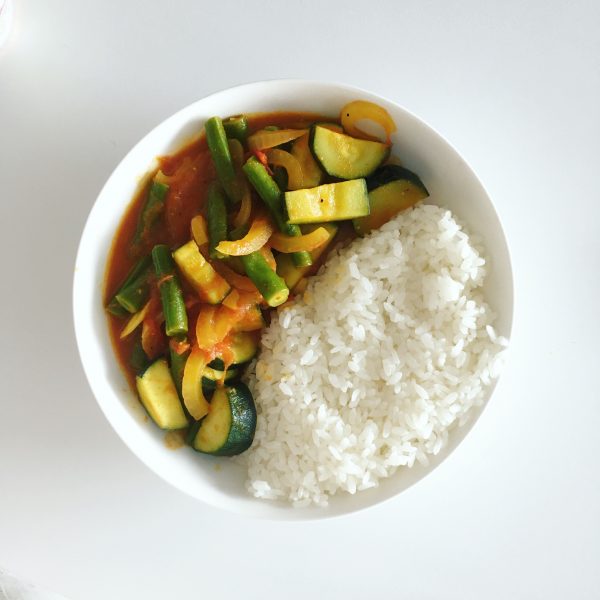
Veggie curry-rice
1 large zucchini or 3 small (better)
1 large ripe tomato
1/2 onion
10 green beans
Japanese white rice cooked
1tsp of curry powder
1/2tsp of cumin powder
A pinch of salt
Wash the vegetables. Cut them in bite size. In a pan greased with a bit of oil add the vegetables. Cook for 5 min at high heat then lower to medium. Add the spices. Cook another 5-10 min until you obtain the level of moisture you want. Personally I like rather soupy so that the rice can suck it in. Serve with the Japanese white rice and enjoy while hot. (Top picture)
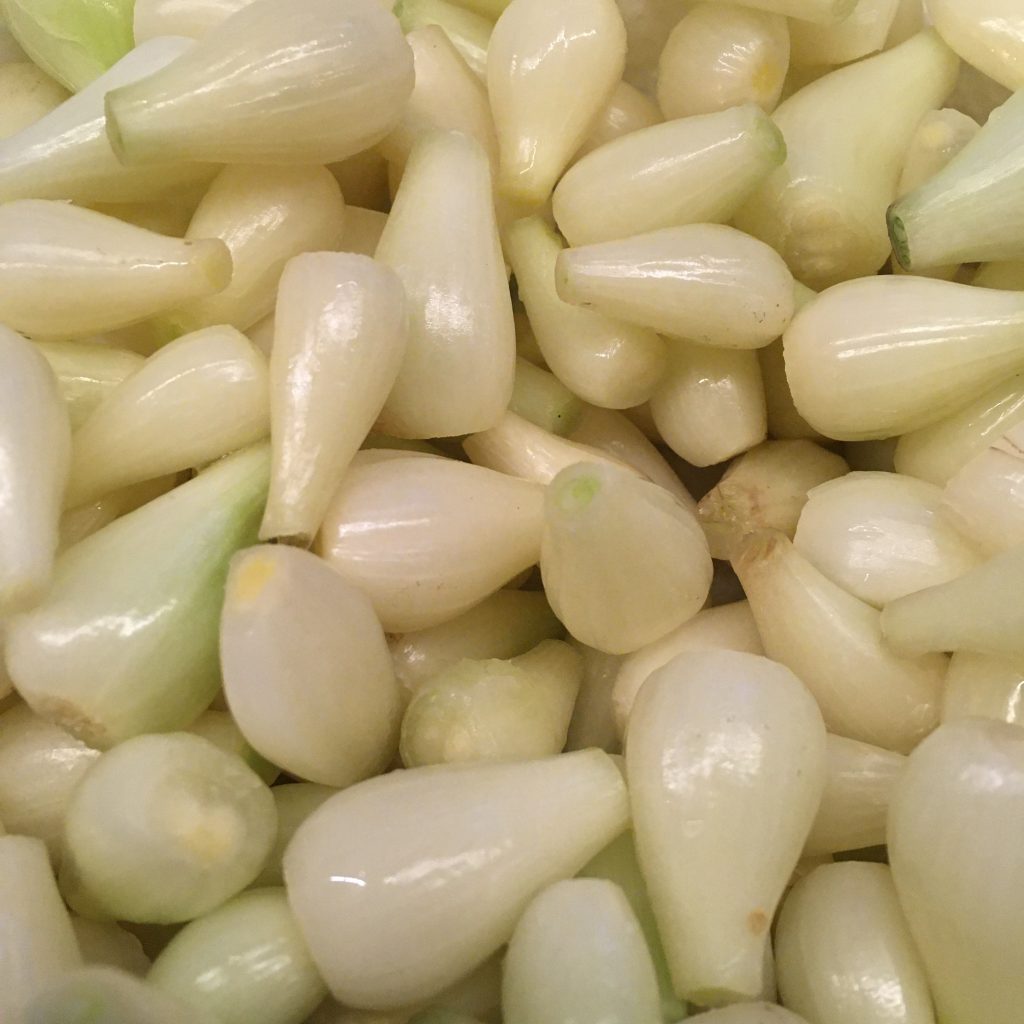
If you have ever eaten curry-rice in a restaurant you surely have eaten the little white pickle served with it and then you have eaten pickled rakkyō 薤. A little vegetable that looks like a shallot a bit and is often called Chinese onion. I love the crisp and fresh taste it has and it’s hard to stop eating! A little like French cornichon, but less sour and salty!!!
The season for fresh rakkyō harvest is right now and it is fairly easy to find in coop and farmers markets. Pickling them is rather simple though washing and pealing is a bit tedious and you have recipe several options.
The easiest one is to use a prepared ready to use “rakkyō su” which is a mix of vinegar, sugar, dashi that is chiefly used for pickling rakkyō but can also be used for other preparations such as curry onion pickles. Though I am not necessarily a fan of ready to use products, they are a good way to start when you are unsure of the result and what you do and want to maximize success.
Other methods are to prepare your own brine for pickling the rakkyō. One recipe I have in an old Japanese cookbook is quite lengthy and probably the most genuine one, yet I couldn’t find a similar one anywhere, so I tempted to share it with you. My rakkyō are still in their first week of picking so I don’t yet the result… we’ll see!!!
So first the recipe for a quick sure outcome, and then the lengthy one. Choose the one you prefer!
Easy-peasy pickled rakkyō
1kg of fresh rakkyō
1 bottle of rakkyō su らっきょ酢
Start by washing the rakkyō and removing the first layer of skin to obtain a smooth and shiny surface. Remove the hard base and top too. Bring a large pan filled with water to a boil and throw the rakkyō in for one minute. Drain and pat dry the rakkyō.
In a sterilized bin put the dry rakkyō and cover with the rakkyō su. Close the bin with a lid. Leave to rest for 14 days. Shake the bin 2 times per day on the first 3 days. After 14 days enjoy!
Classic recipe of pickled rakkyō
Brine for pickling (used 14 days later)
2 cups of rice vinegar or other white mild vinegar
300g of sugar
1 cup of white umezu (brine of the umeboshi unflavored with shiso), can be replaced by 1 cup of vinegar + 1tsp of salt
1/2 cup of mirin or konbu dashi
5 dried red pepper (optional)
Pickling step 1
1kg of fresh rakkyō
30g of salt
4tbs of vinegar
1l of water
Start by washing the rakkyō and removing the first layer of skin to obtain a smooth and shiny surface. Remove the base and top too.
In a pan, set the water, salt and vinegar and the prepared rakkyō. Bring to a boil and stop right away. Drain and pat dry and put in a bin or a pickle-pot. Cover with the brine you made or of commercial brine. If you can set a heavy lid, otherwise everyday shake the bin. Wait for two weeks.
Pickling step 2
After two weeks drain the rakkyō and set them in salted water for 3-4h. Renew 2-3 time the water. Then set to dry in the air for half a day. Ideally in the sun, but any well ventilated place will do.
Finally prepare the brine by mixing all the brine ingredients together (but the red pepper) and bring to a boil. In a sterilized bin put the rakkyō and cover with the brine. Add the red pepper if you plan to use some.
Now it’s ready. Rakkyō in brine should keep a year or so., so enjoy!
The end of May in Ohara is a beautiful season. The greens on the hills change from fresh greens to rich ones and the paddies from the typical yellow green if very young rice plants to a beautiful shamrock green. It is also the beginning of the rainy season, of hydrangeas blooming and warmer days. At bight it is possible for a few weeks to see fireflies.
Japanese have something for fireflies 蛍 hotaru. I didn’t recall seeing fireflies often as a child, a rare few times in Lozere, but not much. And since we moved to Japan and went to see fireflies at Chizanso in Tokyo with our friend I. who always had the best info about things to do, I kind of understand the sweet magic and the kind of nostalgia they bring. Seeing fireflies at Chizanso was great, but it is an orchestrated event when they release fireflies in the garden. While the magic is there, the artificiality of it is hard to neglect. It’s like seeing lions in a zoo…
In Ohara we are blessed with rather clean streams of water and great nature (I can’t say it is everywhere when I see the palettes of glyphosate at the garden center…) and we can see fireflies in their ecosystem. We first saw some in our garden one Sunday night, and since then every year we go for a walk when the season comes. And for sure with a bit of patience and the habituation to darkness you can spot a little green light blinking. If we want to be lazy, we walk to the nearest stream in the paddies, and there we can see plenty.
A firefly in our garden
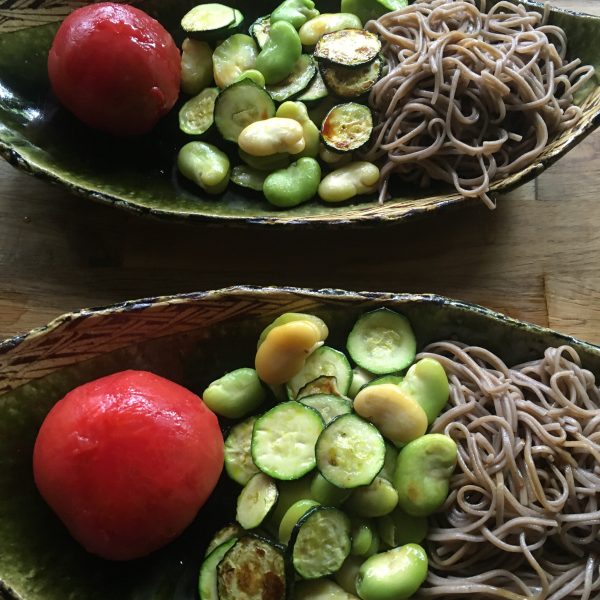
The fireflies season is the perfect transition between the end of spring and the beginning of the summer. It brings many greens in the plate broad beans and zucchini. Tomatoes from the green house that are ripe, sweet and juicy. It inspired me for the recipe of the simple plate on the top picture: soba, fava beans and zucchini in soya sauce and a peeled tomato, also with soya sauce. I love when the juice of the tomato mix in the soya sauce, eaten together with the cold soba it is divine.
Just as I was talking very proudly of my sourdough in my last post, it has decided to scare me like crazy by almost dying…
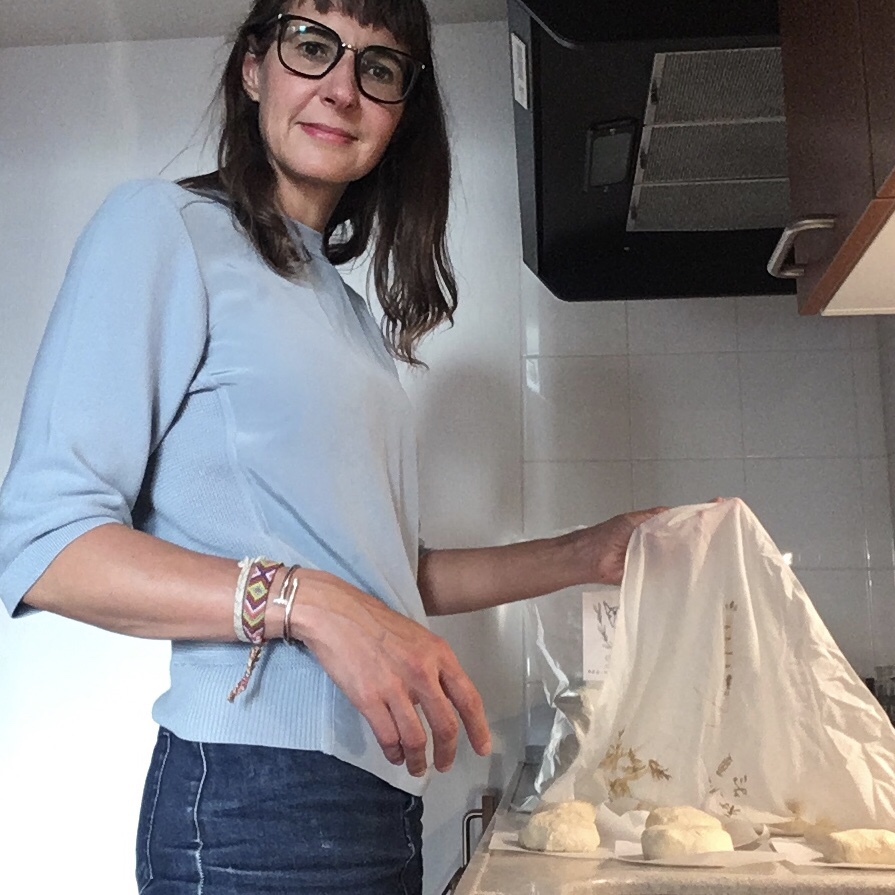
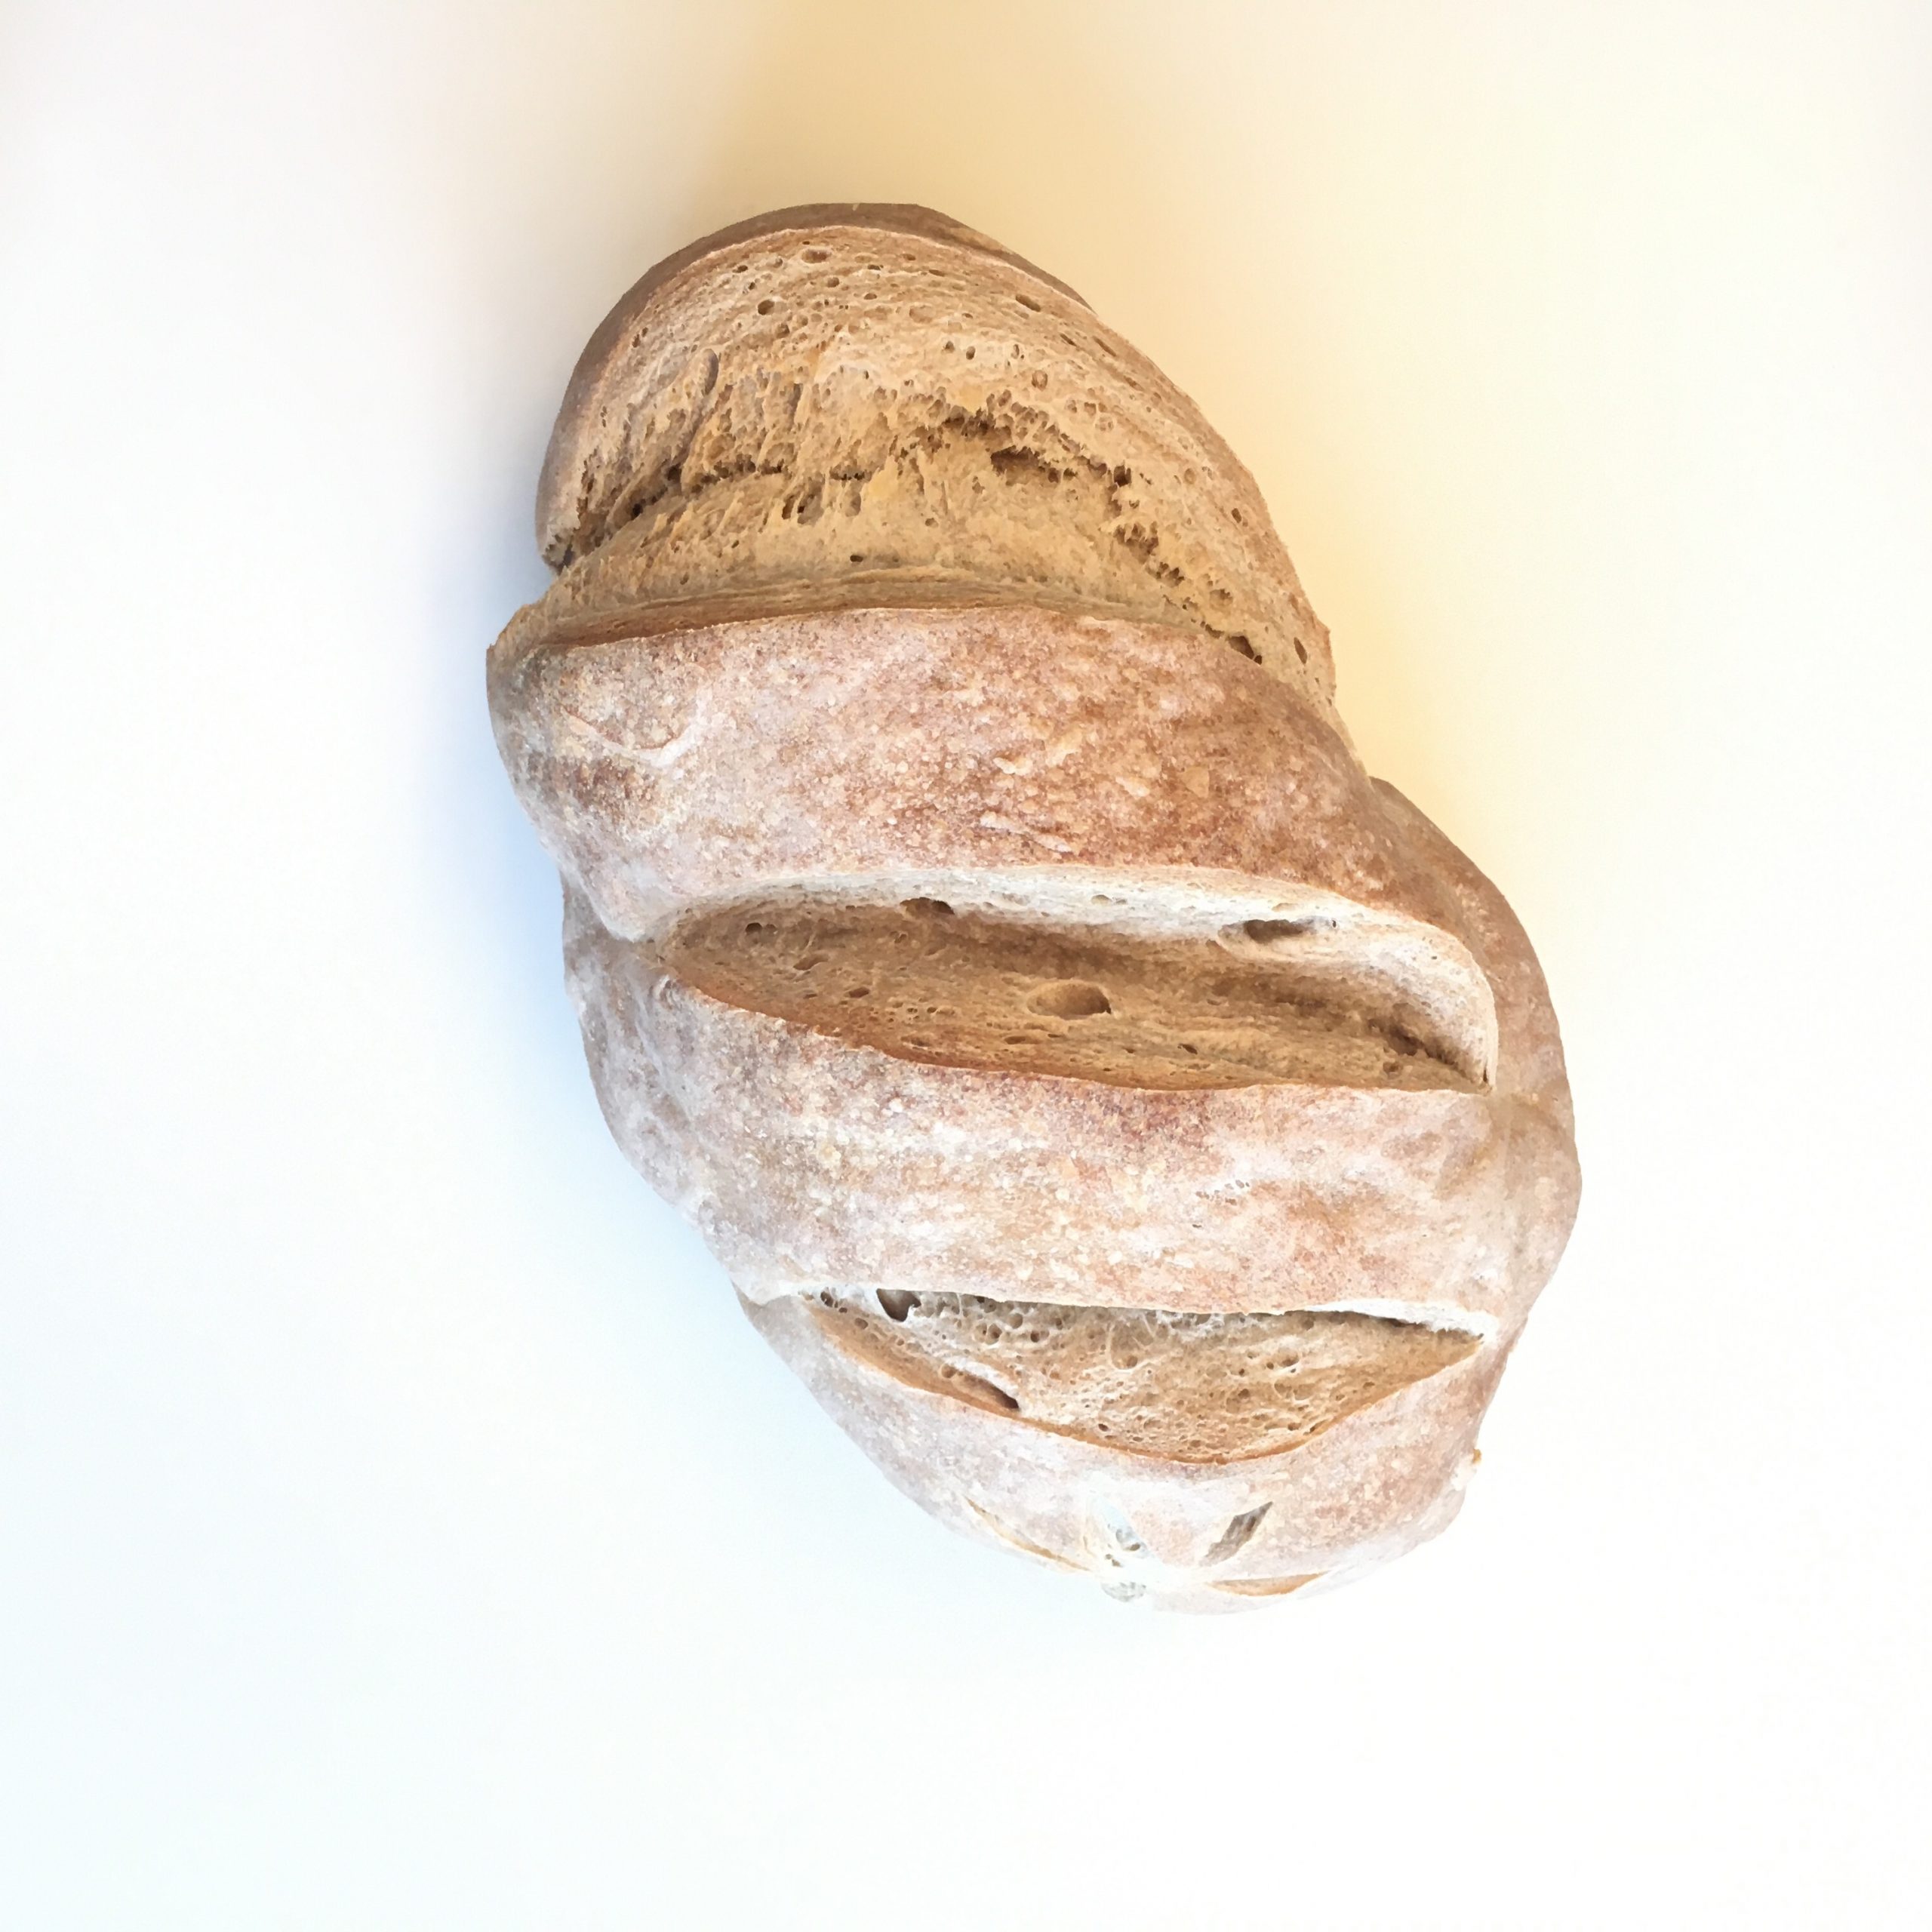
Indeed, I used it over the weekend to make some delicious giant campagne bread, and I found it Monday morning inert and unresponsive. Probably the lack of food and warmer temperatures it’s not been used to but the diagnosis is still unclear. It was smelling perfectly fine and I feed it as I should except that bubbles didn’t come out and texture was rather unusual. So I started to worry and panic. I devised a rescue plan of the rather large amount of sourdough starter I had. First, I split it in two, one in a dough the rest in intensive care: food every 1.5 hours for 12 hours, lots of love and mixing.
It was breaking my heart to imagine I’ve let it die, but after 9h of intensive care, the starter showed a few bubbles… it was going to be ok!
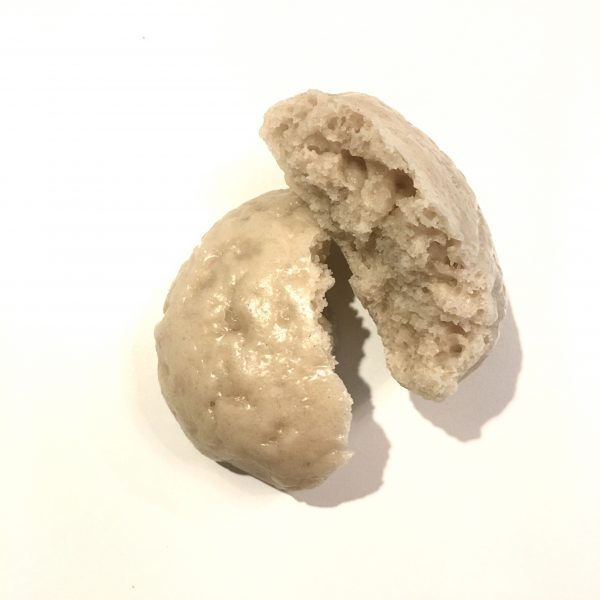
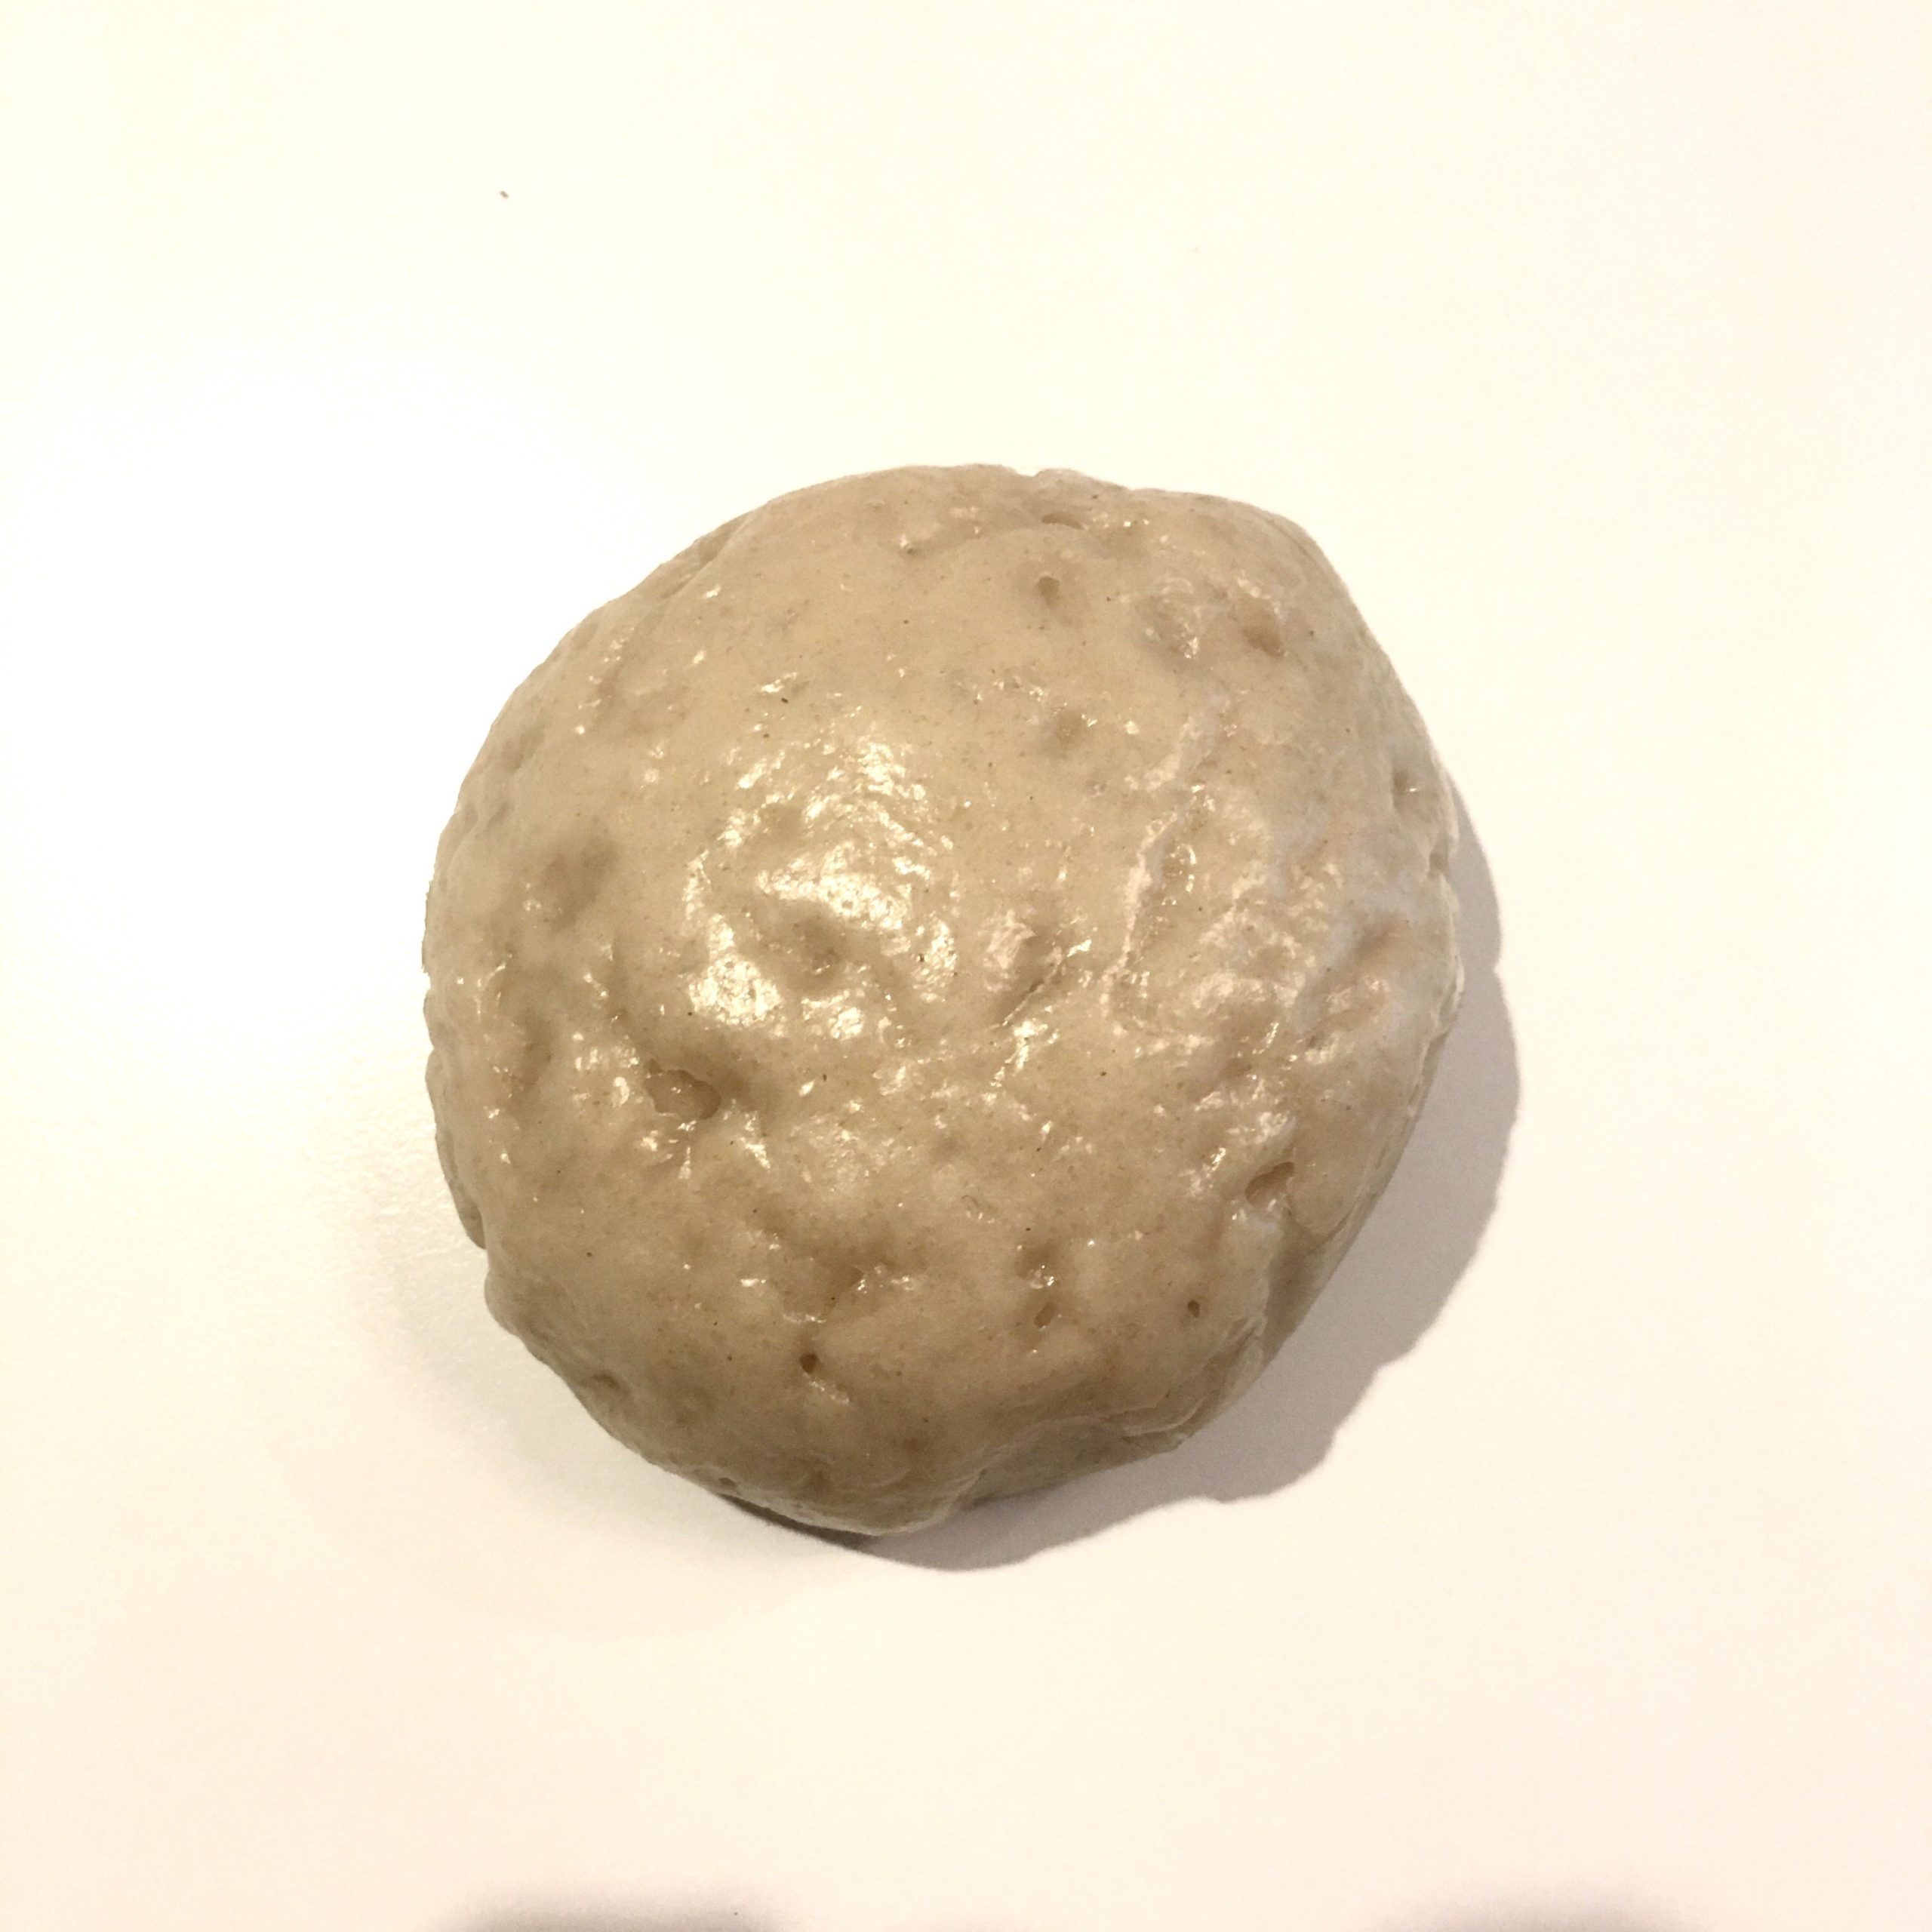
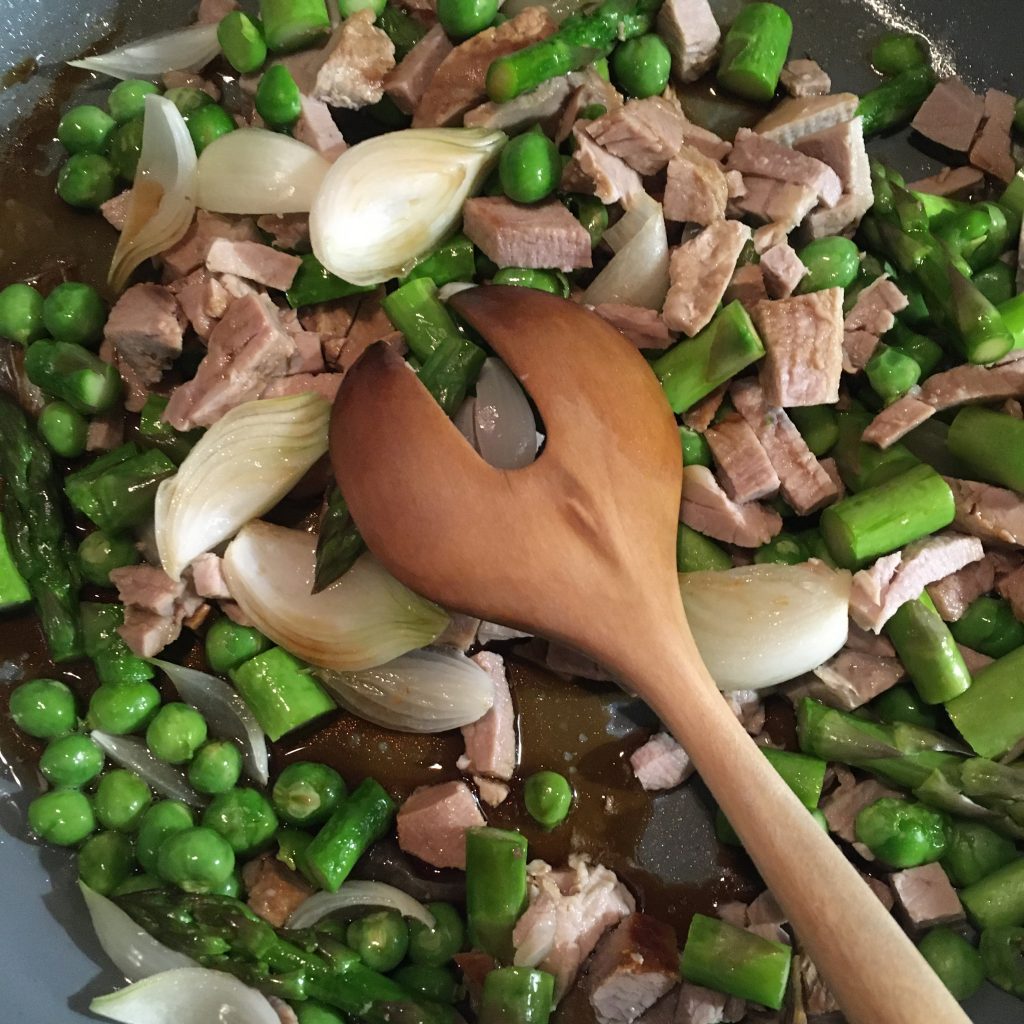
The dough… well it stayed doing nothing for 12h and then after 24h it finally was doing something. Except that in the meantime we left the country and were back to Tokyo, where I still don’t have an oven. So there were a few options: flat breads in a pan, bread in a skillet, or steamed bread. I opted for the latter and was planning to make stuffed steamed breads, except that work was too busy and I didn’t have time to prepare the filling. So I simply prepared 8 balls of dough, and after work I steamed them to obtain round little breads that we enjoyed with a mix of peas, asparagus, chopped pork filet and onions from the garden and soya sauce, that would have been the perfect seasonal filling, but it ended up outside as a side. When cooking while working one needs to be flexible…
The filling that ended up a side…
So not only did I rescued my sourdough, but we had delicious little buns to eat!!!
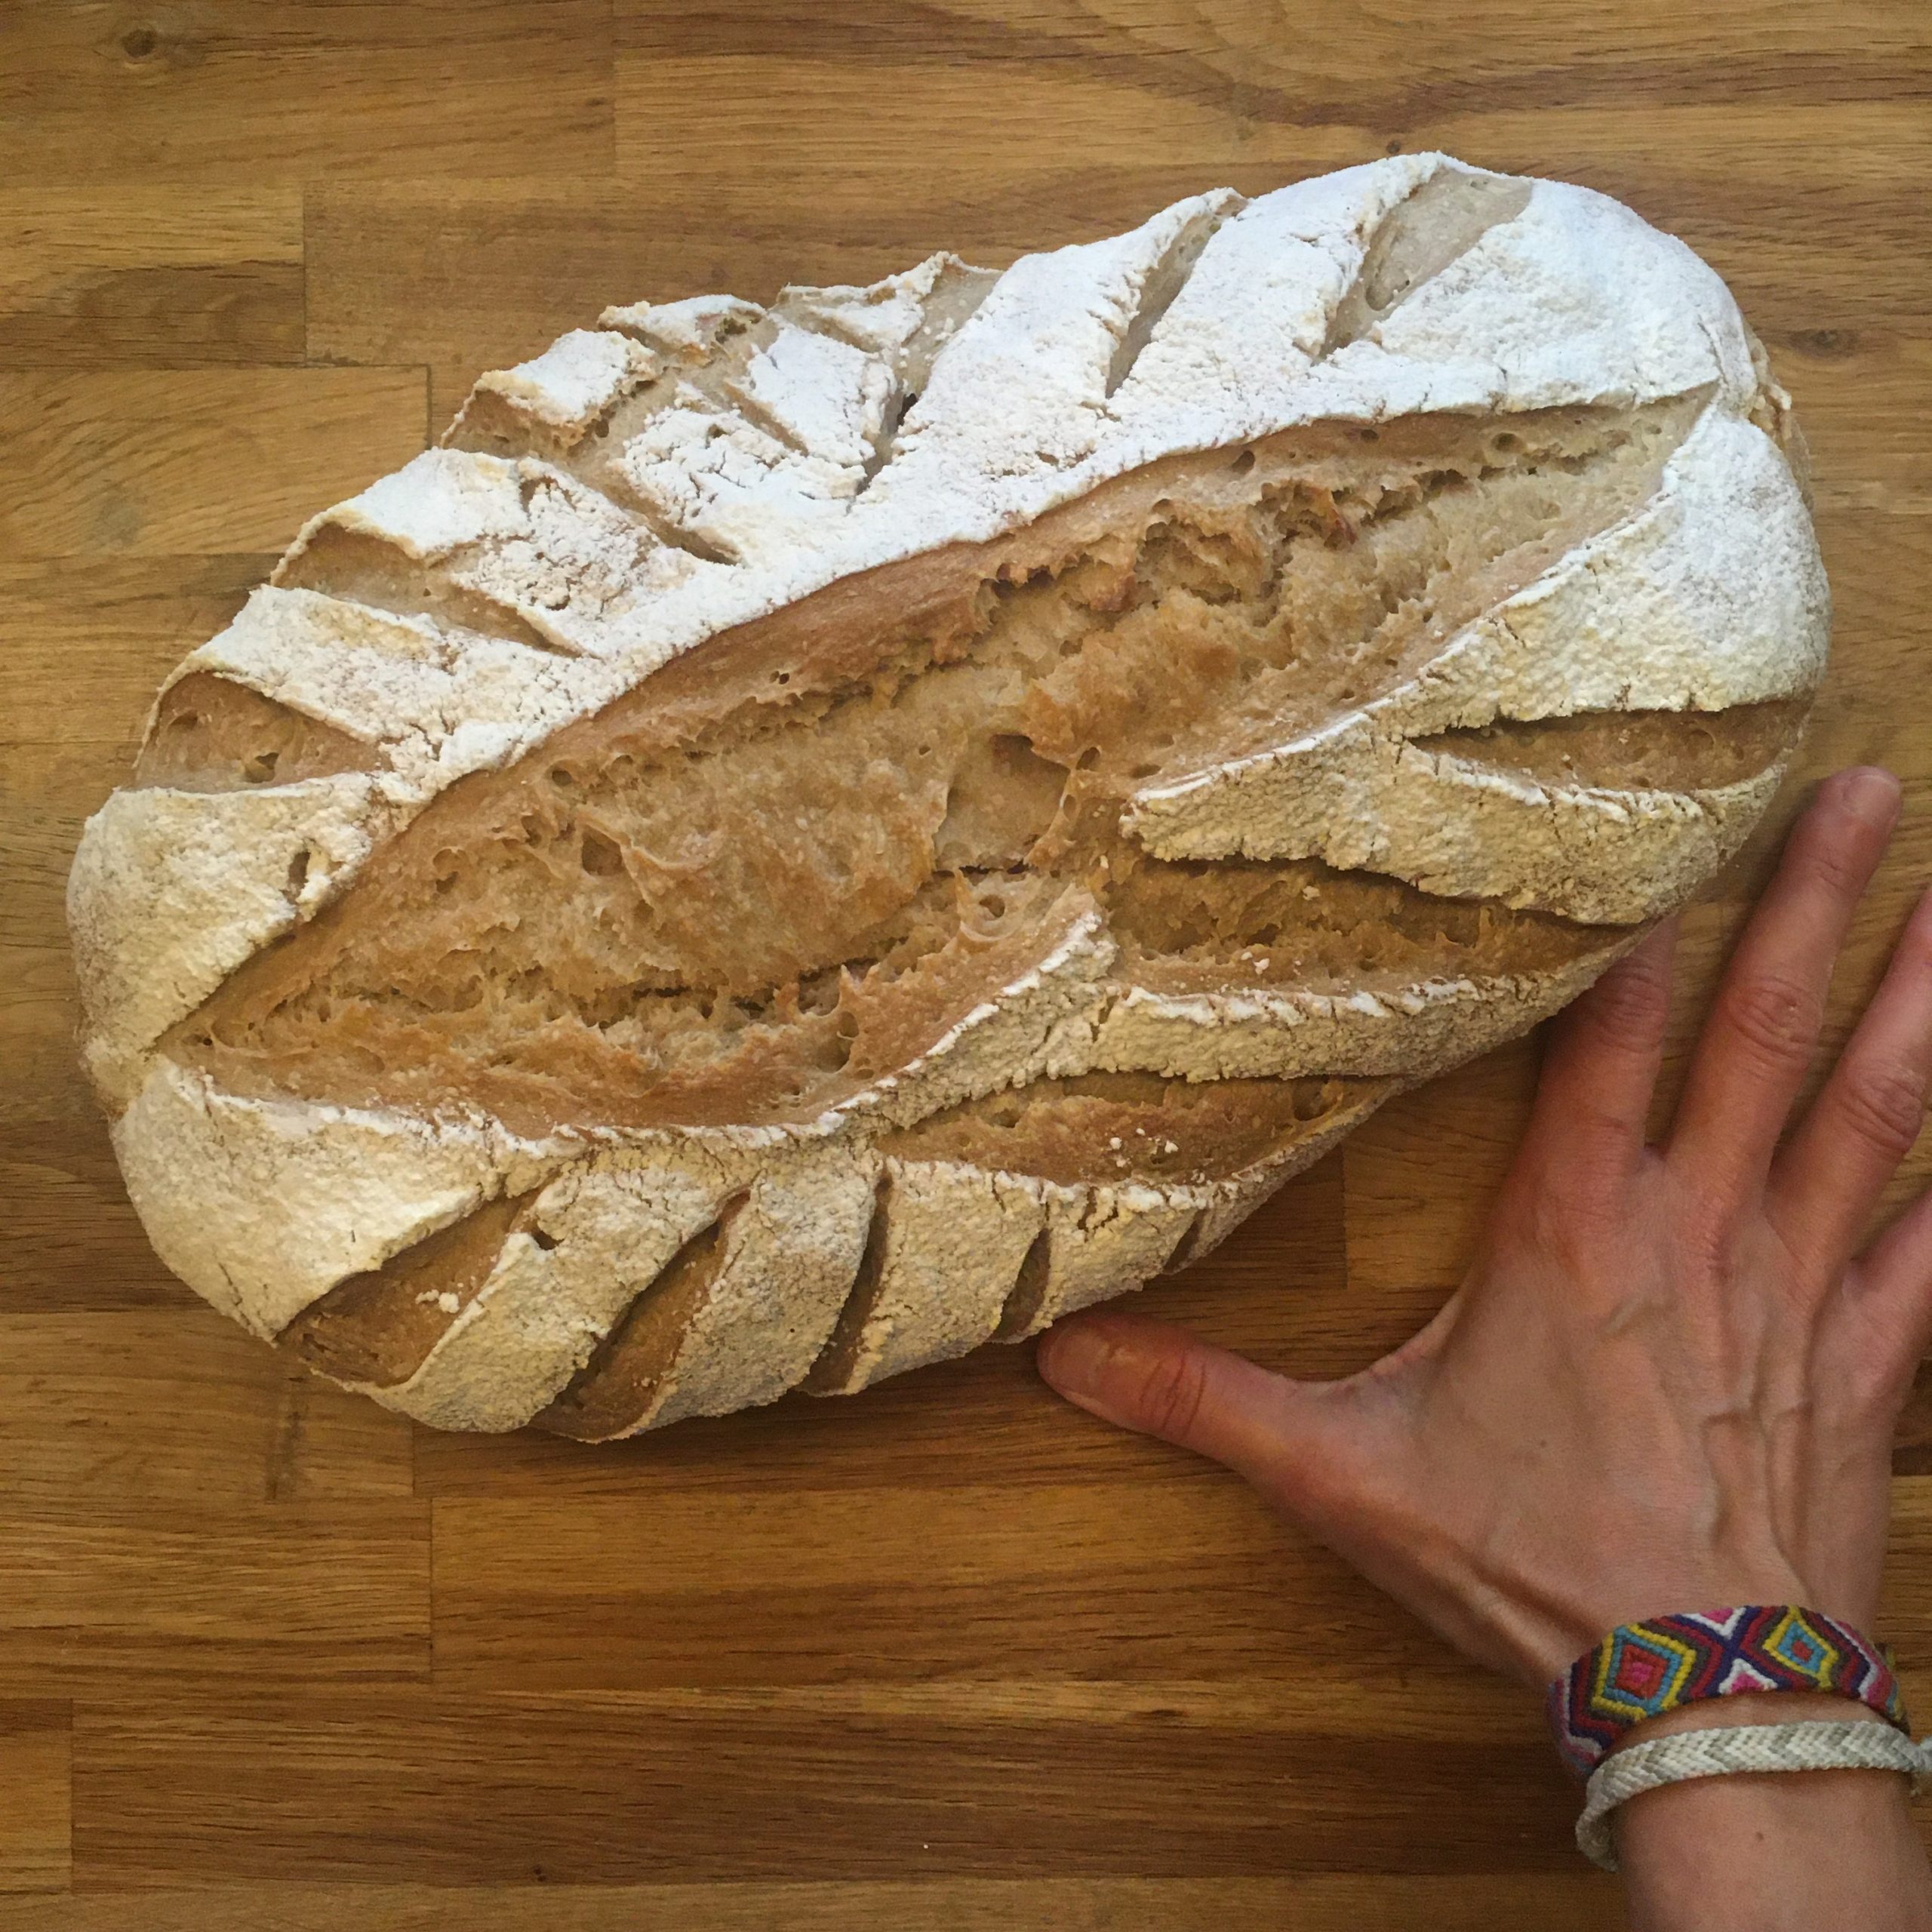
When I started making bread I was so unsure of the results that I was making bread for a single breakfast, basically with 160-180g of flour. After I became more confident I increased slightly and went to double, but baking with yeast, the bread had a hard time keeping fresh in the Japanese weather: too dry in winter and too humid almost all the rest of the time. So my basic flour amount stayed around 300g for a loaf most of the time, unless we had guests and the bread would go in no time. But I felt it was such a waste of time and energy. Kneading 300g or 500g of flour is not much different, and heating the oven once is so much more energy efficient.
Since I’ve baked with my sourdough Lois, as I was experimenting I went down to smaller loafs again for a bit, and increasing their size little by little, I also got rid of the scale. I do everything using my feeling, learning to understand how the dough is rather than trusting the scale always. Indeed, I feed my sourdough also without a scale, more than often I keep rather hard but when I want to wash its home I then liquify it to move it before making it hard again when moving in again. And with the weather changing really quickly, the scale was no good to tell me how much hydrated should be the dough, but my hands are rather good. It also helps when working with different kind of flours, like I do.
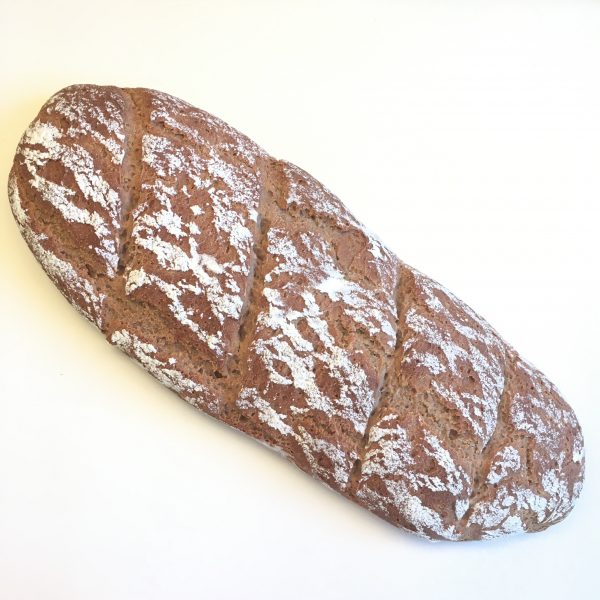
What I am targeting is a large loaf that can make 3 breakfasts and eventually a few extra slices for tea-time, for this I use the equivalent of 500g or slightly more of flour, which happens to be perfect to use a large part of my sourdough before it becomes too voluminous!!!
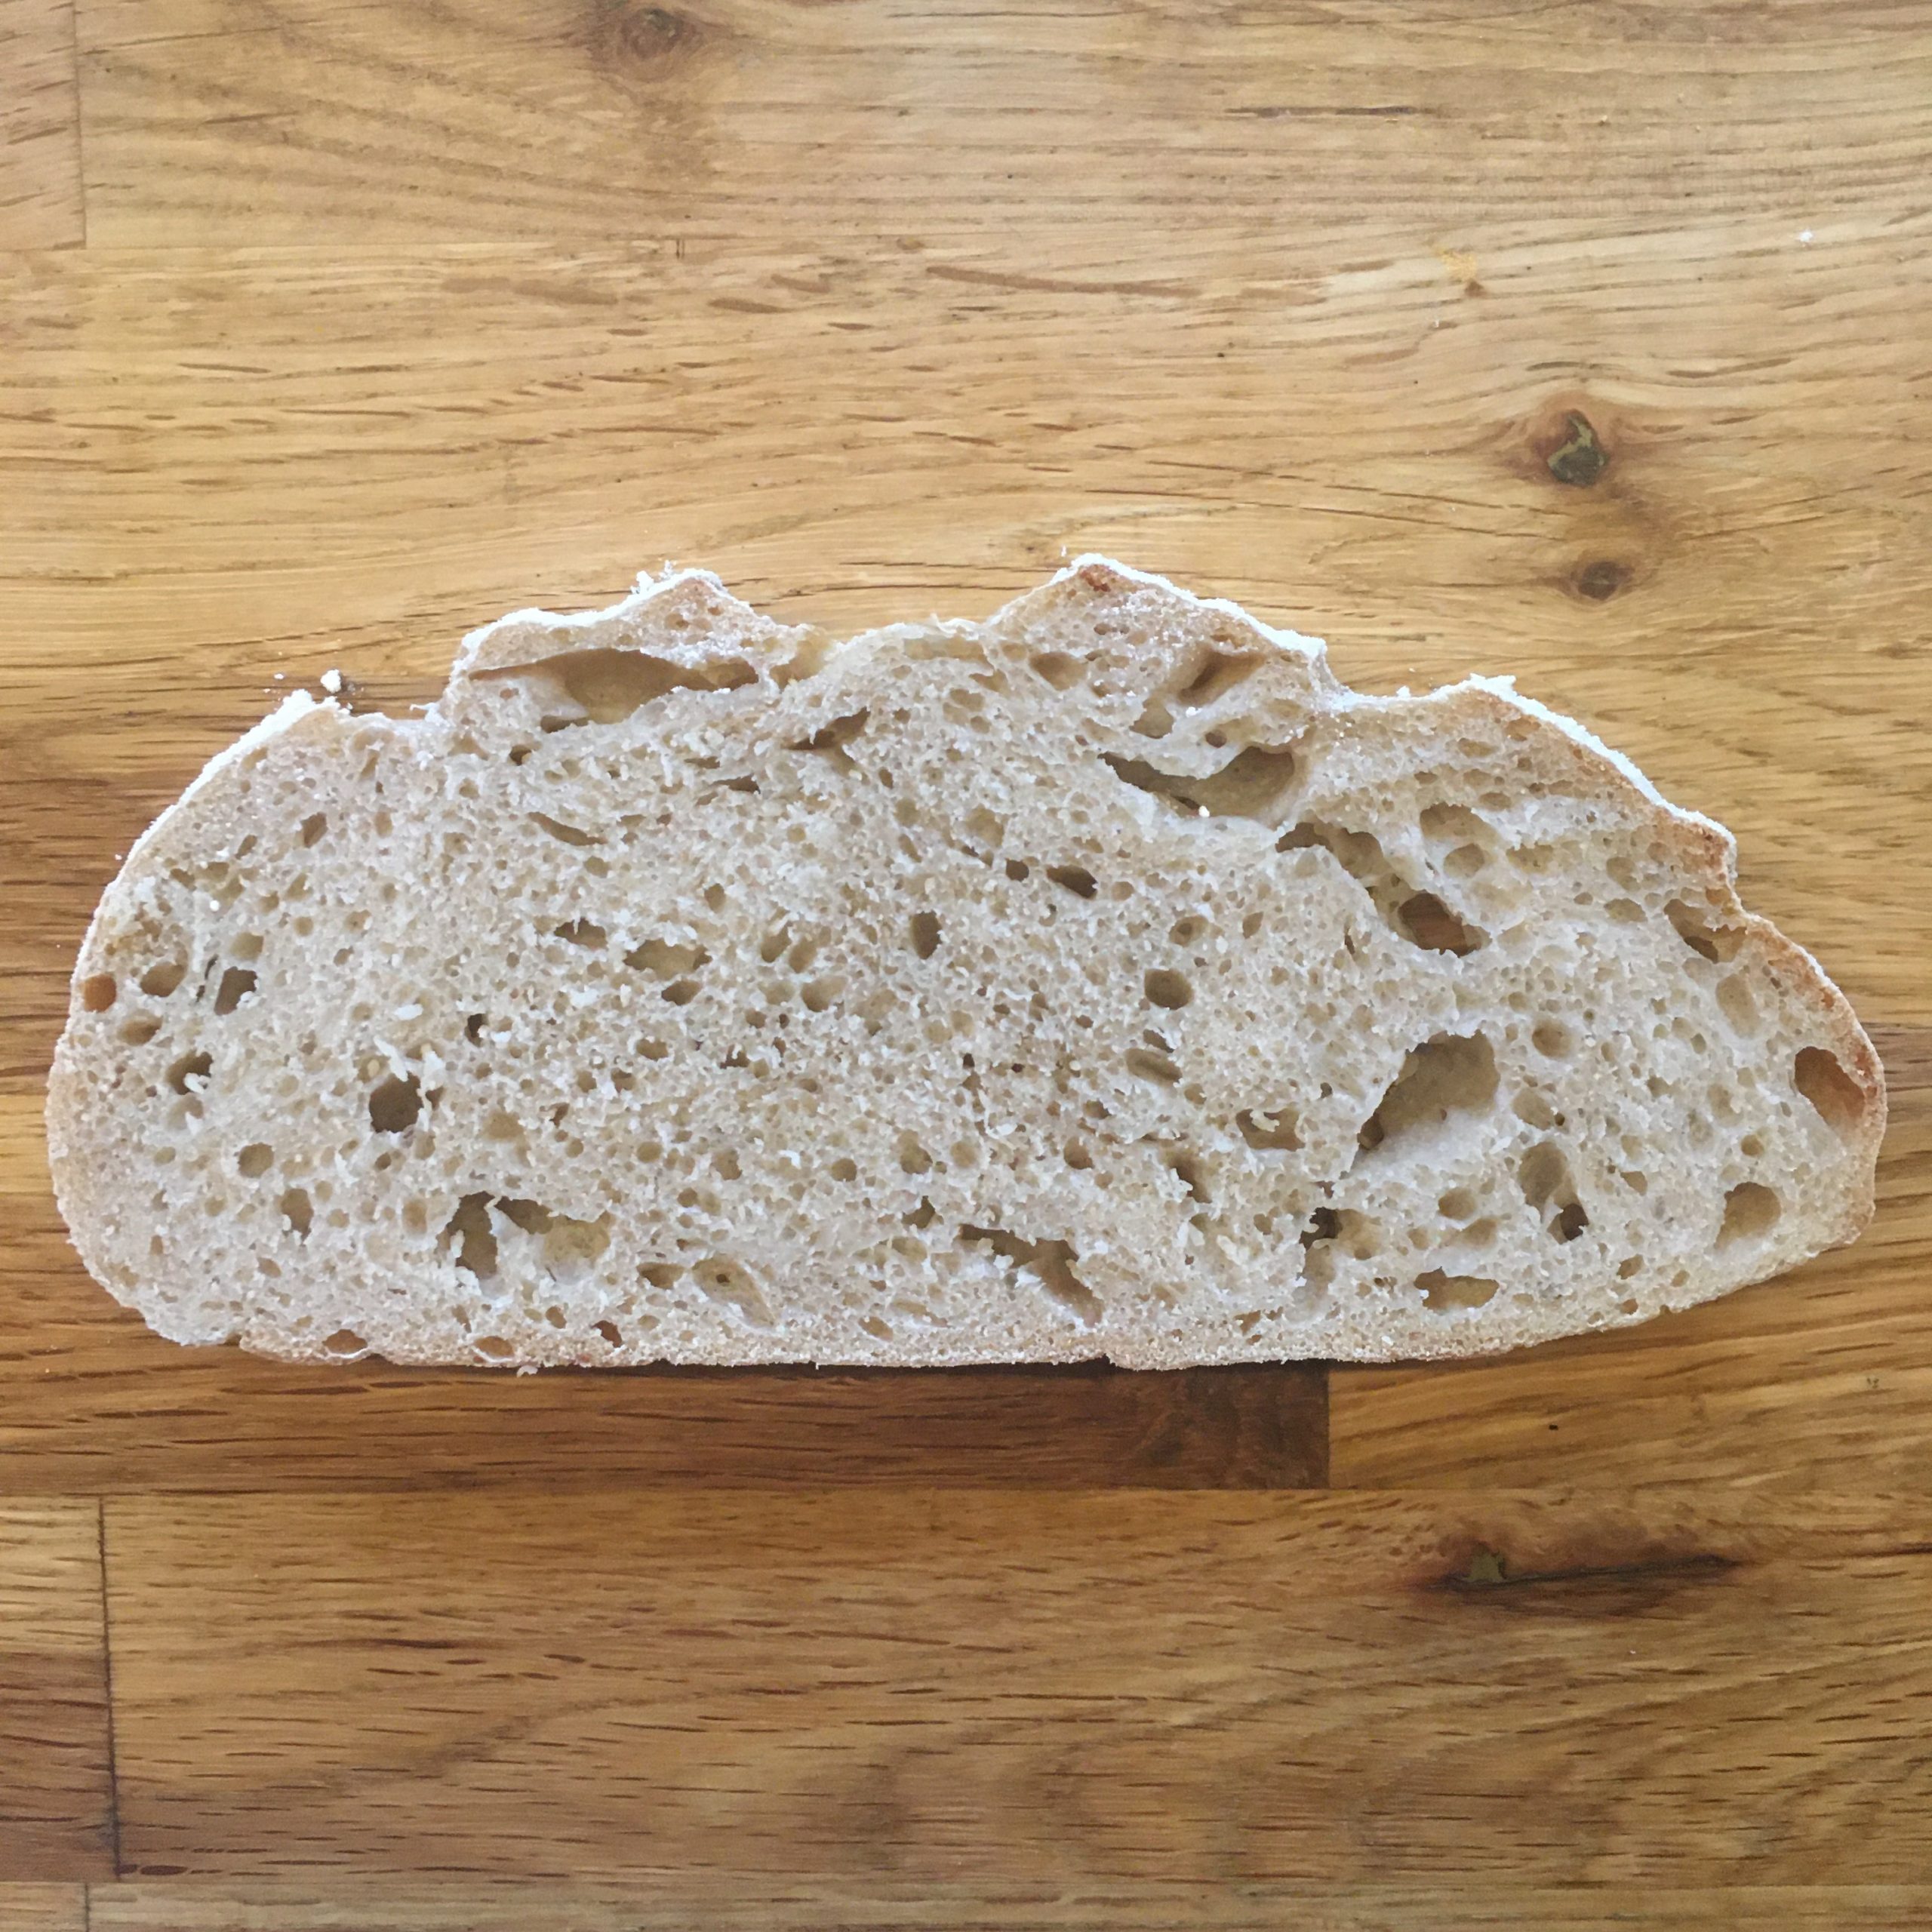
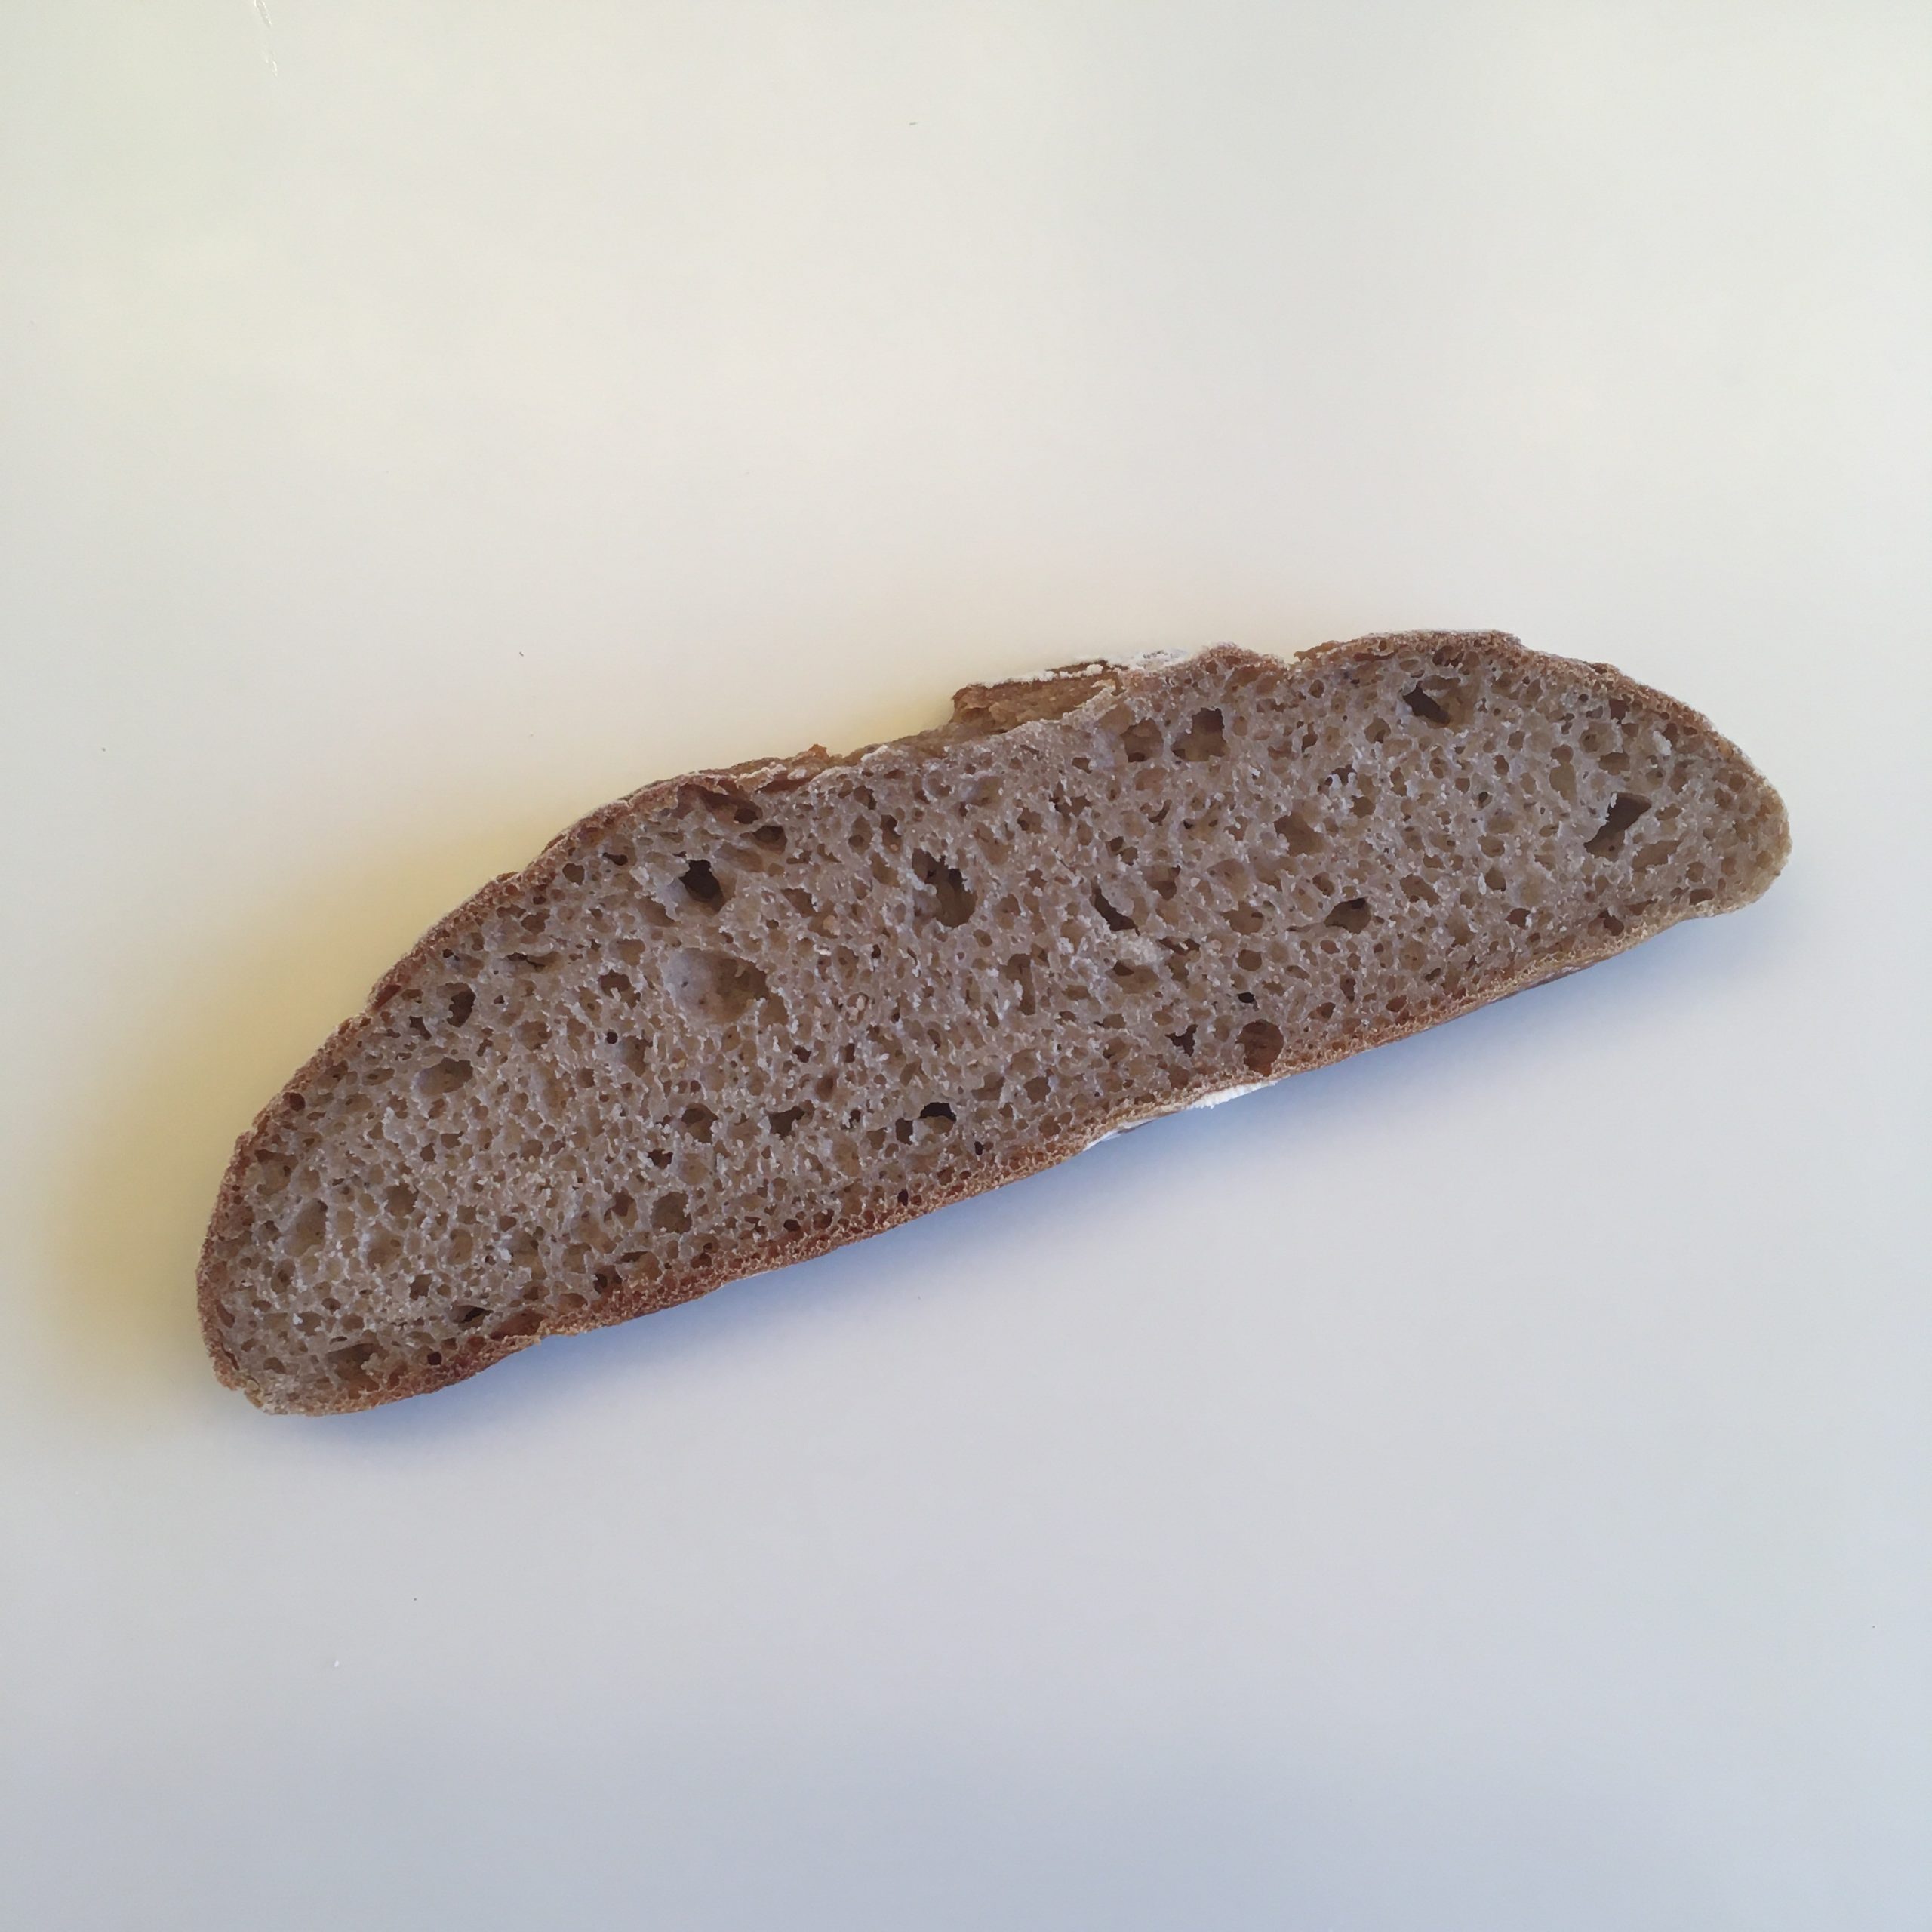
My all-time favorite is definitely campagne bread using about 20% of whole wheat flour or of buckwheat flour. The others that I love baking are the boxed whole wheat bread with nuts, seeds and dry fruits, I love the shape of its slices and the patterns the fruits etc… create in it. or the naturally very sweet whole wheat and chestnut flour bread. While chestnut flour contains no gluten you obtain a denser crumb but all the same delicious.
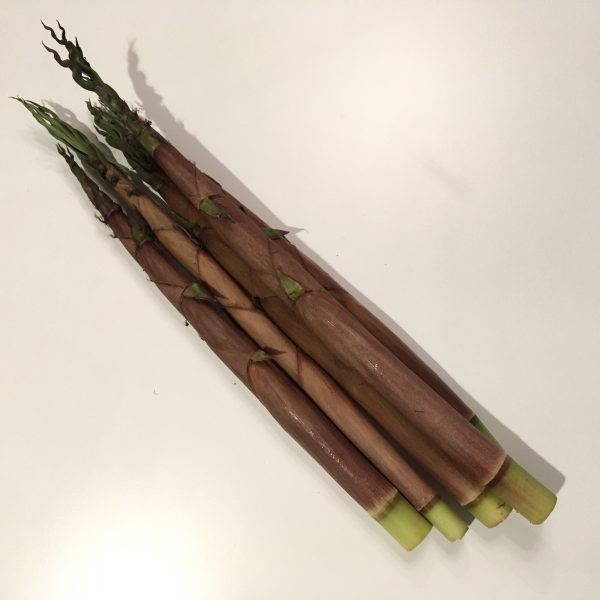
Probably the very last of the wild spring vegetables, undeniably not the easiest to find in a shop, and a very fun one to go and pick in the forest. We discovered henon 淡竹 (hachiku) when our friends in Tsunan invited us to go and pick them in late May 2010, and I remember it at as a lot of fun foraging them. Unfortunately after that, rare were the times we had a chance to eat some. And I longed for eating some, but didn’t venture in unknown forest to try to search for some. So you can easily imagine how happy I was when I found some at one of the local farmers cooperatives we shop in Chiba. Henon is a sort of bamboo shoot. But contrarily to takenoko the are thin and even more tender. And they don’t have such tartness. They are much more refined.
With more than 10 years since I last helped K. preparing them, I was a bit unsure about how to proceed and how to dress them, but I decided to do it my way: simple and rapid.
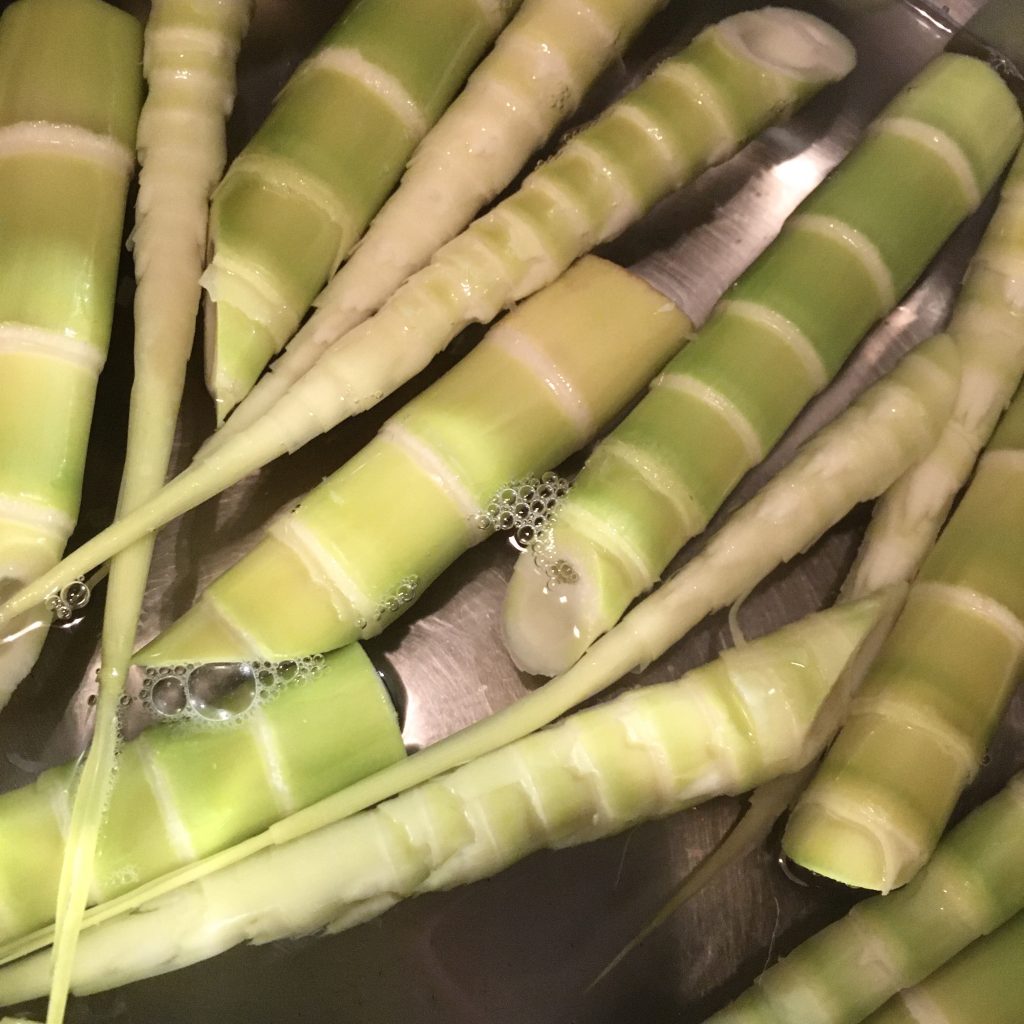
So, as for other bamboo shoots, I peeled them carefully, blanched them until tender, which takes only about 10min.
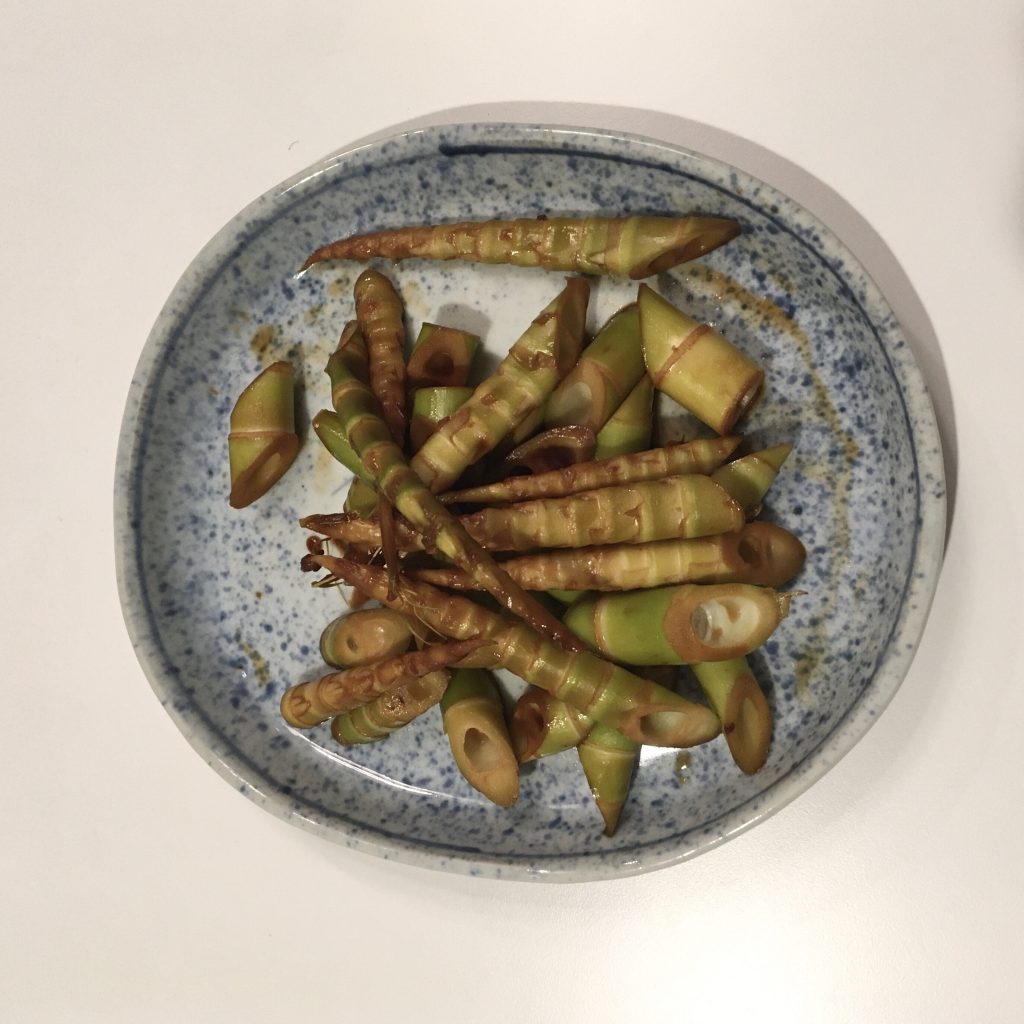
Then cut and dressed them. As I was roasting a piece of pork filet I decided to use the jus and deglazed the henon in the jus, where I added 2tbs of soya sauce. The result was exactly what I wanted. I know I could have made a more Japanese-cuisine like preparation, but the pork juice and the soya sauce are a sublime mix for pretty much any vegetable, and the magic worked again this time.
Unfortunately there might not be too often henon recipes here, unless we find a spot to harvest some, but if you happen to find some I more than recommend you try cooking them!!
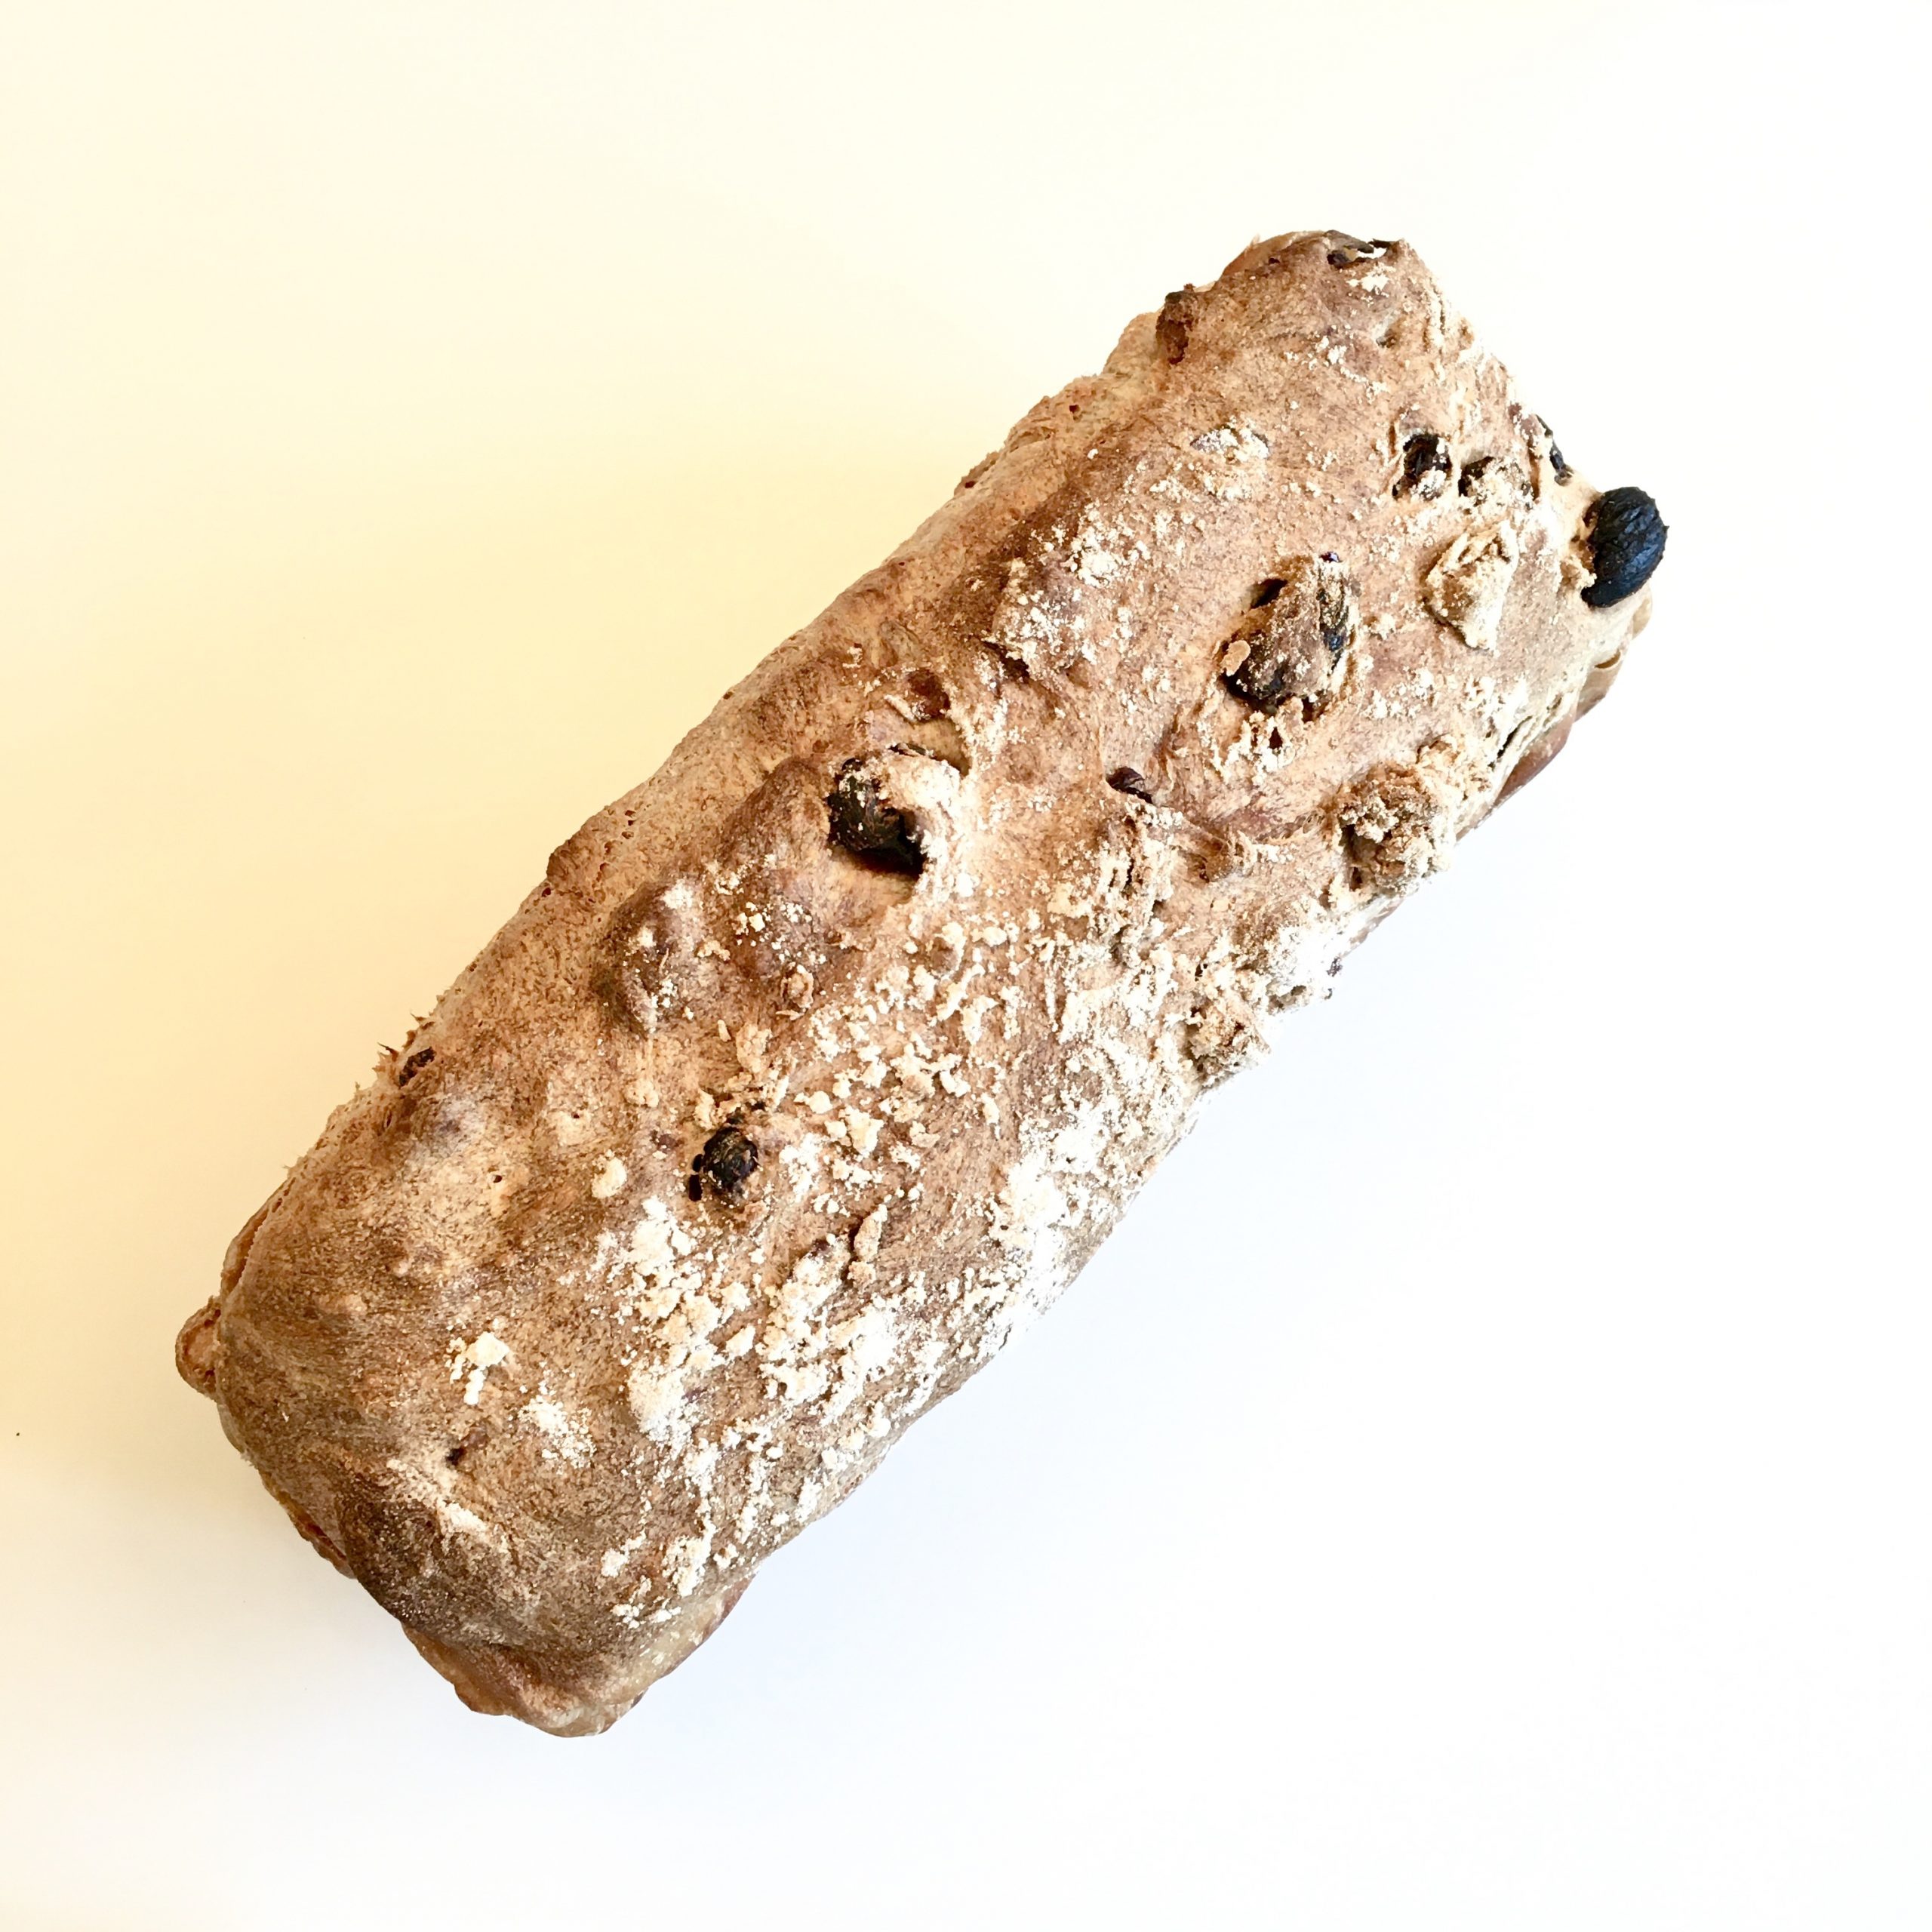
Having a nice loaf of bread waiting for you for breakfast is one of the many reasons I started making bread. Controlling what is inside and where ingredients come from is also as much important. I have had a hard time finding nice flour, I started with using flour I would bring back from France and shifted to Japanese flour, but honestly finding organic or chemical free local flour has been quite a challenge. And when I finally found it (アオヤギ製粉), discussing with the owner to see if they provide me with whole wheat flour, he told me there will be no harvest for the next 3 years because they need to replace some of their equipment… huge deception… so I order pretty much all their stock to support them (hoping it would enable them to fix their equipment faster) and be sure I would have enough for a year (that’s how long I think I can keep it in the Japanese weather). But I am pretty sure I won’t, now that I realized I use about 5kg of flour per month!!!! So I have turned back to the more commercial organic flour I’ve been finding at the supermarket, made in Japan but sold in tiny 500g bags (and this is the big size, the normal being 300g!!!). But at least there is some whole wheat flour which makes me happy. Indeed one of my favorite bread is pumpernickel and the other is a rich whole wheat bread with nuts, seeds, raisins etc… very dense, energetic and delicious! It reminds me some of the breads we often had at home, toasted with butter. So let me share my recipe.
Some of my flour stock… 20kg of flour is basically 4 months of bread making and pasta, quiche, scones, crepes…
Energy packed bread
500g of whole wheat flour
10g of salt
150g of sourdough
30g of brown sugar
70g of sultanas
70g of whole hazelnut
30g of pumpkin seeds
You can add more but I like it that way….
Water
In a large bowl mix together the flour, the sourdough, the salt and sugar. Add water as needed when kneading to obtain a soft slightly wet dough. Then add the nuts, seeds, sultanas. Knead to obtain an homogeneous mixture. Leave to rest for 6 to 24h depending on temperatures. After it has grown, shape it and leave again for another 2-3h. Bake 30 min at 230deg.
Times like this one happen more then often… when we are so busy with “other things” that cooking comes last… it also synchronizes with lack in novel ingredients and a total blank in terms of inspiration. So I am back in autopilot mode. Cooking simple, ultra simple things that we love and that don’t take much time. I think also the technical issues I am facing with WordPress recurrently are not helping, as most of the pleasure of sharing a recipe or an experience here is destroyed by the “error uploading” message that pops again and again.
My morning and afternoon tools…
So, food has been nourishing so that a morning in the ocean can be followed by an afternoon in the garden. Spring brings a lot of work in the garden. Everything suddenly grows so quickly. And this year plums may be 2 to 3 weeks earlier than usual, so better be ready…
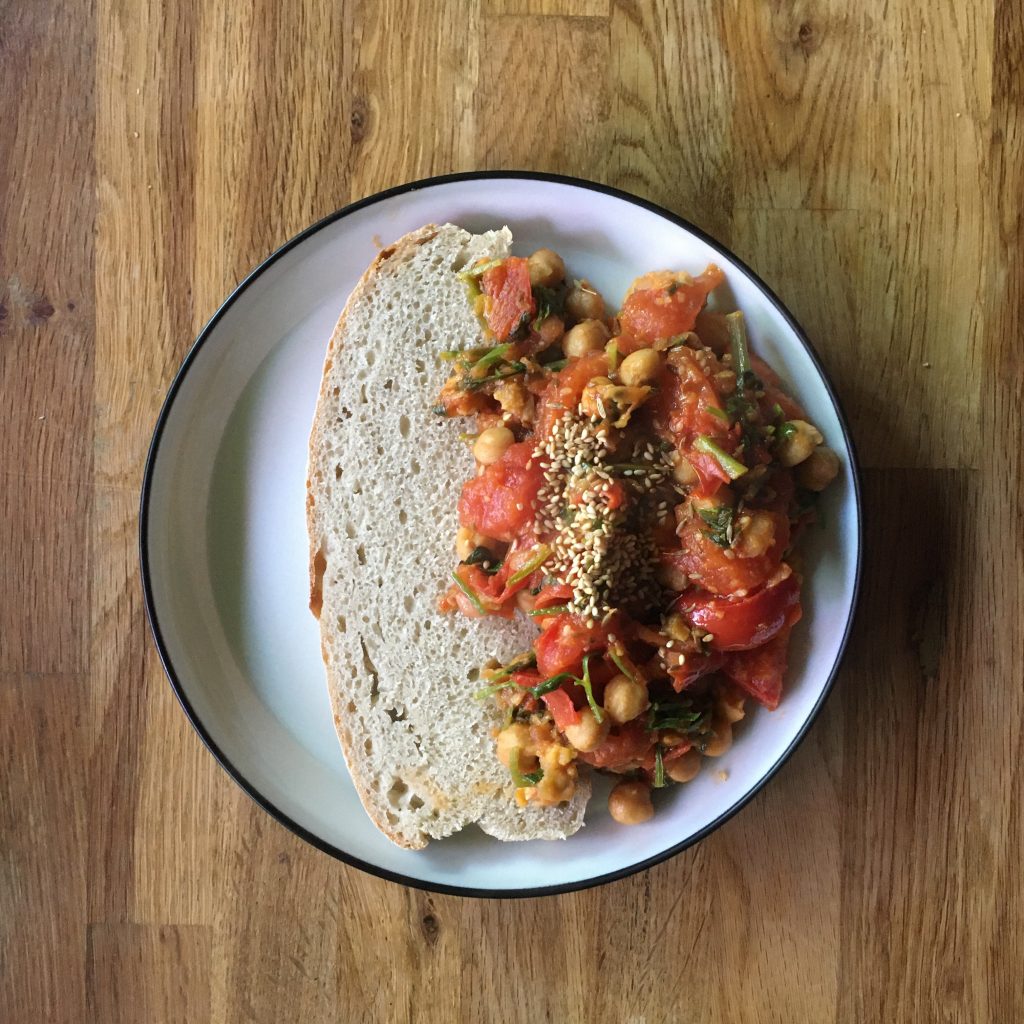
A simple chick peas and tomatoes spicy raggu with a generous slice of sourdough bread
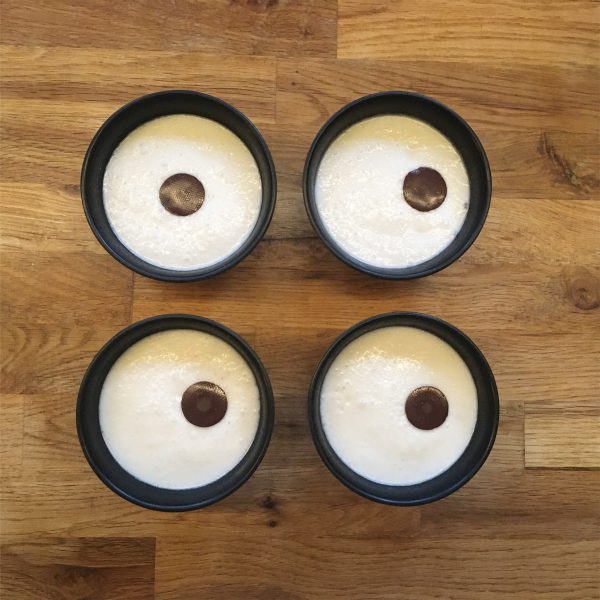
But probably my most “creative” recipe of the past 10 days is a revised version of the cocoa cream for a vegan coconut all white dessert. This recipe of the cocoa cream really got me into making desserts, and it is so easy to make variations of it (I have a few others in mind). So while I’m trying to find new ideas, or rediscover old ones (which the original reason for which I started this blog), let me share this super easy one.
Coconut cream (4 servings)
200ml of coconut cream
20g of corn starch
30g of sugar
50ml of water
In a pan, warm the coconut cream, add the all the ingredients and stir until it starts thickening. Serve ib bowl, let cool down before eating.