Eclair ⚡️

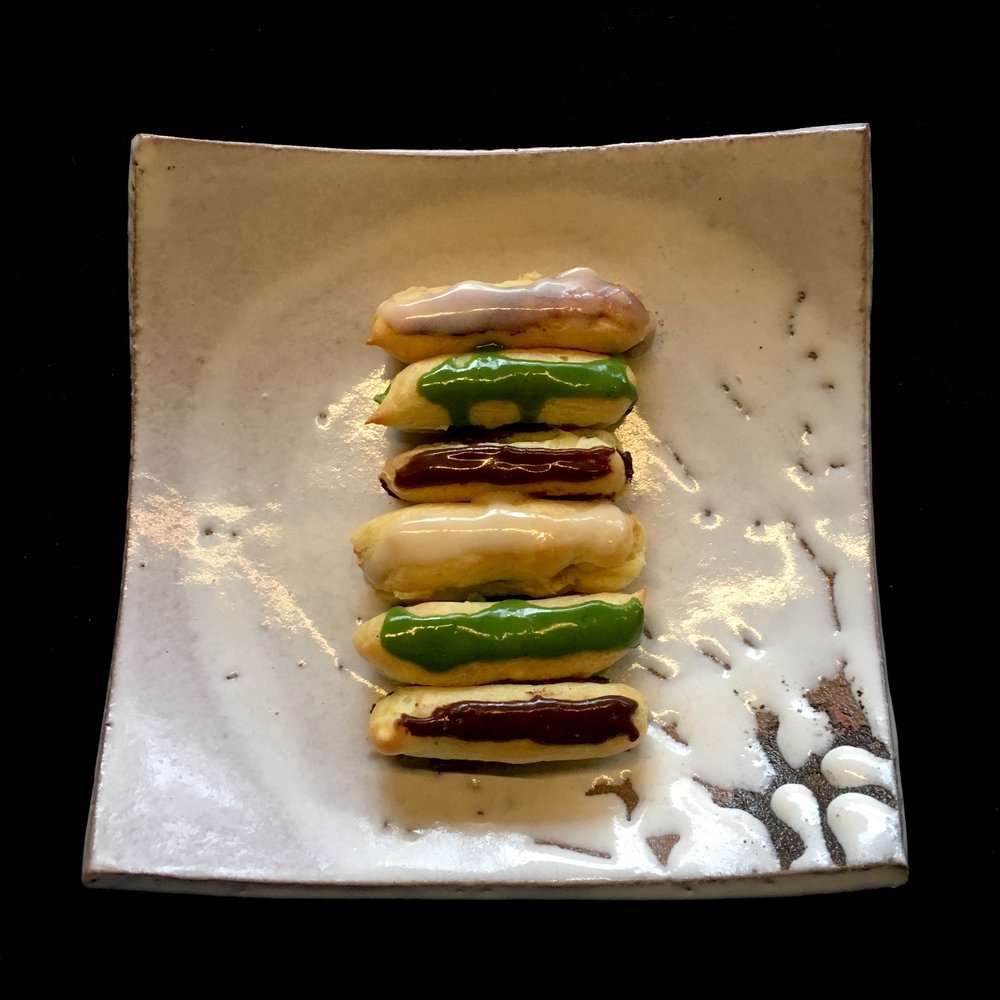
With this horrible rainy and cold Saturday there was nothing else to do than cook some sweets and drink hot tea. After browsing a few recipes of things I wanted to cook, the unanimous choice was chocolate eclairs! And here I am in my kitchen, preparing pate a chou and custard. Of course chocolate eclair is not just enough so I also prepared two other variations: macha and chai. Each was just perfectly delicious. So here is my recipe. Eclairs consist in three preparations: the pate a chou, the custard and the coating.

For the pate a chou:

10cl of water; 10cl of milk; 3 eggs; 70g of butter; 110g of flour; a bit of salt and a tea spoon of sugar. 

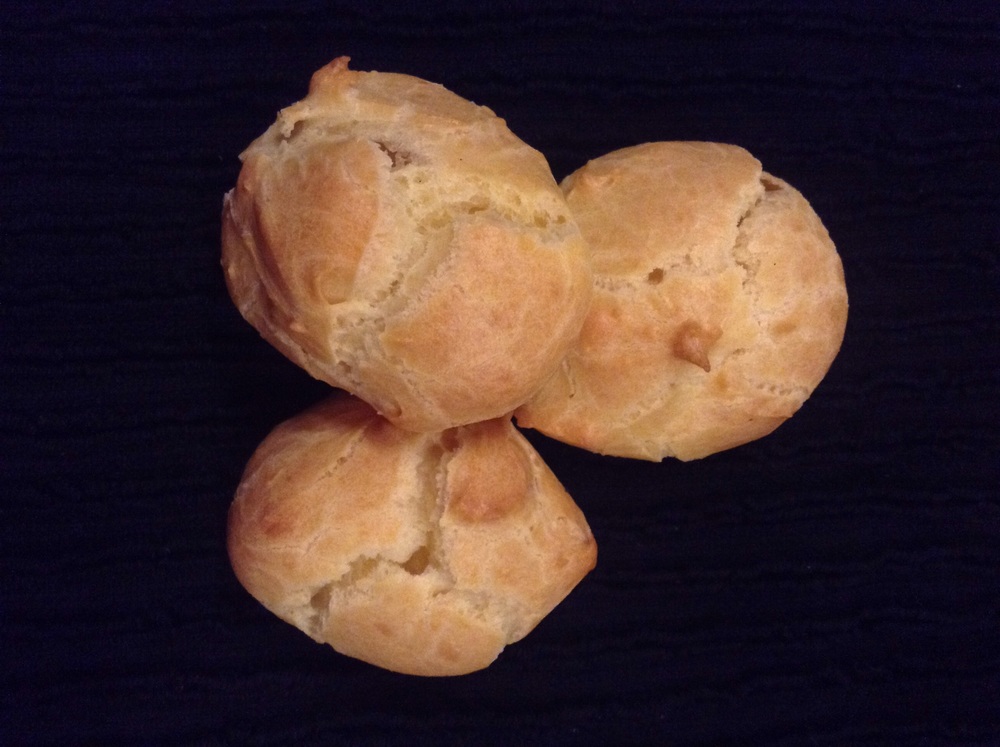
In a pan heat the milk and the water. Add the butter, the sugar and the salt. When the butter has melted add the flour all at once and stir well. Continue cooking and stirring until the dough is smooth and doesn’t stick. Cool down a bit and add one egg. Stir until the dough is smooth again. Add the second egg and do the same and then the third egg and repeat again.

Pre-heat your oven at 180 deg. Use a pipping bag to shape the eclairs. Remember they will double almost size so tiny is better. Cook for 25 to 30 minutes.  

For the custard: 

30g of flour; 50g of sugar; 2 egg yolks; 25cl of milk.

In a pan heat the milk. In a bowl mix the eggs with the sugat, add the flour all at once and mix well. Add half ofthe  milk and stir well. Add the mix to ghe rest of the milk in the pan and cook at low heat while stirring for 5min, or until it thickens. Add the flavoring of your choice: cacao powder (2 tbs); macha powder (1tsp); chai spices: cardamom, cinnamon, vanilla, nutmeg… up to your liking. I personally like it with a lot of cardamom.

Cut the eclairs from the previous step in halves and fill with the custard. 

For the coating: 

I didn’t use the usual butter cream but rather a simple sugar coating made with ice sugar, water and macha or cacao powder for the coloring.  Add water little by little to obtain a rather thick mix, and apply with a spoon.

Keep refrigerated. 

Canola with miso

It is nice to change shopping place once in a while because different markets have different products and it opens up to new opportunity for trying new recipes or new combinations. So this weekend instead of shopping in Ohara I shopped in Kuniyoshi, a small village 10km away. I love their coop shop because they have many different products in particular for fish and meat. So I got a beautiful sashimi of sabre fish and prepared it very simply with white rice, canola boiled in dashi and served with miso (one classic use of canola in Japanese cuisine), and I pan fried some tiny lotus roots and the fish. That’s it!

Canola with miso – 味噌和え菜の花 

– 1 bundle of canola

–  1 small handful of katsuobushi

– 1 tbsp of miso of your choice

Wash quickly the canola under running water, remove the hardest parts if any. In a pan boil 1/3L of water, add the katsuobushi in a dashi bag. Bring to a boil. Add the canola and cook for 5min. Drain and rince with cold water. Squeeze them gently to remove all the water. Cut in 3 or 4 the whole bundle. Serve woth miso on top. (You can also mix the miso with it but it might break the leaves and flowers, so I prefer not to) 

Okonomiyaki

“Grill what you like” could be a direct translation for okonomiyaki, this very popular Japanese dish from Kansai as I explained in a previous post. And it is one of the first Japanese dish I’ve ever prepared after we first travel to Japan. Indeed, okonomiyaki is easily found as stall food for festival and is always high impact with the bonito flakes that seems to dance feverishly on top, the white and black stripes of the mayonnaise and the bulldog sauce, and the base so easy to eat! And it is very easy to make at home and always impresses foreign visitors! For one okonomiyaki for 4 people here is my recipe again: you need half a cabbage or chinese cabbage shredded, some pork meat, ground and seasoned with a bit of salt and pepper, 4 eggs, 1/2 to 1 cup of flour depending how thick you want the base, mayonnaise, bulldog sauce, and two handful of bonito flakes. In a hot and greased pan cook the cabbage until soft; add the meat, stir well. In a bowl mix the eggs snd the flour. Add the mixture in the pan and even the surface. Cook at low heat under cover, flip when the surface is almost done. Cook a few more minutes, serve in a dish, add crisscross mayonnaise and bulldog sauce, finish with bonito flakes topping. Enjoy the motion of the flakes while it’s still hot.

Back to the basics

There is one thing I like but almost never cook because it takes to long to prepare for most of my evenings, and I don’t have the special gear required to make it look really good: it’s Japanese dashi-rolled omelette だし卵焼き(dashitamagoyaki). The preparation is really easy it’s just that to roll it correctly you need to cook one thin layer of eggs after the other and roll in between. So in the end this omelette takes 30min to cook and needs regular attention. But last night I was having a little more time than usual, A. being in a late meeting. You can find dashitamagoyaki in supermarket and most izakaya, and in bento but it’s too often sweet and the taste of the dashi that bring a delicate flavor is too often imperceptible because of the sweetness. My dashitamagoyaki only uses katsuobushi dashi and a little of soya sauce, I find that the dashi brings enough umami not to sweetnen additionally. So first thing is to prepare dashi with katsuobushi. Then in a bowl mix 1cup of dashi with 5 eggs, add a tbs ofsoya sauce, stir well. In a greased heated pan pour a thin layer of the egg mix, just like if you were making a crepe. Wait until the bottom is well cooked and almost golden. Then roll it tightly. Take it of the pan, grease a little and make an other “crepe”, add the one you just did before and roll the new one around the first one tightly. Repeat until all the egg mix has been used, or make 2 smaller ones. You can clearly guess that with a round pan the rolling is a pain, that’s why Japaneses have rectangular oan for that. Except that I don’t really have cooking goodies that have only one purpose so I keep using the round pan!!!

Choux

Instead of the traditional strawberry tart for A.’s birthday, I decided to make choux. It’s not something I’m very found of because ot often goes with cream or filling Idon’t like too much, but A. likes them very much. It’s actually very simple to make and with just an ice-sugar frosting it’s really delicious. It was my first time making some so they were a bit too big to my taste but taste-wise it was perfect! Recipe soon to come!

Tribute to our grand mother’s mironton

Our grand mother was doing magic with left overs of meat, in particular porc filet. It would be used in the filling for stuffed vegetables, in cannelloni, or hachis parmentier for exemple. But she would also use them for “mironton”. Her mironton was just simple: onion, potatoes and chuncks of pork meat fried in oil and butter. It was definitely something I loved very much!!! Now her version may have been a little too rich for us now, so I kept the idea but slightly changed the recipe, but the main attributes remain. I replaced the onion by some Japanese mushrooms, and used only a little of olive oil. I cut in rough pieces the left over of the filet mignon and the potatoes (with the skin), and then simply cook them in a heated and olive oil greased pan until golden. The key is to cook until it’s almost burned, and then stir and repeat. It should for kind of blocks, golden and crispy, but soft inside. Add a bit of salt and pepper when serving.

Summer time = fruits time

It’s official it’s summer! 

 Melon-peach-blueberry smoothie
Melon-peach-blueberry smoothie

Thought it is not yet super hot, summer fruits start to appear everywhere in the garden and at the market. Shiny pinkish plums, soft and pink peaches, melons, blue-berries, addictive cherries. Soon to come also the delicious nashi, watermelon etc… So I’m happy because it means fresh and juicy fruits every day that are going to replace the usual kiwi and pineapple! It means new recipes of smoothies and of clafoutis. 

Clafoutis are so simple to prepare, and so delicious for breakfast, dessert or snack that I prepare many during the summer. It’s a very simple mixture of any kind of flour, a bit of sugar, eggs and milk or equivalent. Proportion vary depending on the aspect you want the clafouti to have. More milk and egg for a flat custard like type, less if you want it to look like a Brittany’s famous “far”. In a buttered pie-dish set the mixture, and then add the fruits. Finally baked in the oven around 180deg for 20 to 30min depending on the size (if no oven, you can bake in a greased pan under cover at low eat). You can add any type of fruit in that support heat: berries, cherries, plums, peaches, apricots… You can eat warm or cold.

 Plum and peaches clafouti for breakfast
Plum and peaches clafouti for breakfast

Proudly powered by WordPress | Theme: Baskerville 2 by Anders Noren.

Up ↑

Verified by MonsterInsights